Heavy FPV Quadrocopter - Continued: APM 2.5 and Active Camera Gimbal

Part one - in which I came up with and built my quadrocopter.
I continue the story of my quadrocopter. Since the publication of the first article, I have flown a lot of hours, and have done many modifications on the copter. Talking about all the small details will be long, and of little interest. Therefore, I will limit myself to the main changes, namely:
- The new flight controller - a simple Crius MultiWii SE shawl gave way to the new ArduPilot Mega 2.5, dramatically improving flight performance and adding some advanced features to the copter.
- Active gimbal for the camera - GoPro is now not rigidly fixed, but mounted on a stabilizing gimbal that keeps it horizontal at any position of the copter.
- New motors - due to the increased weight of the copter (as well as the sudden death of one of the old engines), new, more powerful and significantly better engines were installed.
- Separate FPV camera - GoPro is now used only for recording, a separate hard-mounted camera is used for flying through video glasses.
But first things first…
ArduPilot Mega 2.5
So, the first update is the new APM 2.5 flight controller. How does it differ from the previously used Crius MultiWii SE?
ArduPilot Mega 2.5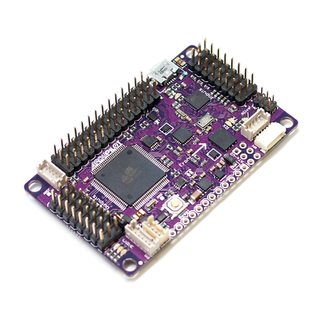 | Crius MultiWii SE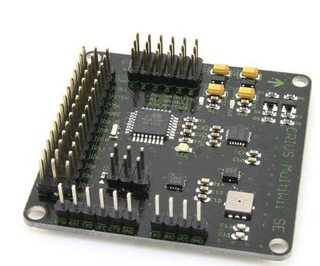 | |
|---|---|---|
| CPU: | Atmel ATmega2560 | Atmel ATmega328p |
| Gyroscope, accelerometer: | Invensense MPU-6000 | Invensense ITG-3205 Bosch BMA180 |
| Barometer: | Measurement Specialties MS5611-01BA03 | Bosch BMP-085 |
| Magnetometer: | Honeywell HMC5883L-TR | |
| GPS: | Direct sensor connection via serial port | Sensor connection via an additional controller and I 2 C bus |
| PC connection: | USB Telemetry via radio modem (433 MHz) | USB via separate FTDI adapter Telemetry via Bluetooth |
| Built-in memory: | 4 MB for recording GPS logs and other telemetry | - |
- Hold position and height with an accuracy of half a meter (GPS data is used along with inertial navigation)
- Automatic return to the point of departure and landing (on a signal from D / C or when the signal is lost or the batteries are low)
- Limit the maximum flight altitude and the territory over which it is allowed to fly
- Automatic navigation at set points - a flight plan is compiled using the PO Mission Planner, and the copter is sent to autonomous navigation. Remote control from PC via 433 MHz radio telemetry is possible.
Due to more accurate sensors and more advanced stabilization algorithms, the copter feels like flying is much more stable than under MultiWii. And the autonomous return to base function gives peace of mind when flying through FPV - video loss is now not fatal, just turn on RTH (Return To Home) and wait until either the copter arrives “home” and lands, or returns to the zone of stable video communication. When the D / R signal is lost, RTH is turned on automatically.
Active gimbal and FPV camera
For good video recording, a fixed camera is not suitable - stabilization is needed to keep the camera in a horizontal position regardless of the position of the copter. There are two types of suspensions for such stabilization:
- Servo suspensions: a common solution from yesteryear. Uses ordinary servos from the model area, they are controlled by a flight controller, since he has roll and pitch data.
Advantages: simple and inexpensive.
Disadvantages: poor stabilization. The resolution and reaction speed of the servos is insufficient to compensate for the movements of the copter without apparent delay. - Suspension on brushless motors: gained distribution around the last year. Brushless motors are used, rewound to create a high holding torque, controlled by a separate controller with a camera position sensor.
Advantages: almost perfect stabilization, with sufficiently powerful motors and a perfectly tuned controller, the camera does not have visible movement at all.
Disadvantages: expensive, quite difficult to configure, heavy.
For me, the advantage of brushless suspensions outweighed all the shortcomings, and I decided to make my own: in the end, I already assembled the copter from scratch, not to stop there. At the same time, I decided to integrate the mount for the additional camera into the suspension: flying through FPV is all the more pleasant through a rigidly fixed camera (otherwise the copter’s position is not visible), plus specialized FPV cameras have a number of advantages over GoPro: they give a signal without delay and can cope much better complex lighting (when flying against the sun, for example). The following components were purchased:
- Controller: Martinez v3.1 (€ 50)
- Motors: RCTimer HP2212 70T (2x $ 17.99)
- FPV camera: Sony Super HAD 600TVL (€ 40)
The Martinez controller runs on open source software ( BruGi ) and is being developed by several people in my local FPV forum . An alternative is the well-known controller Alexey Moskalenko ( Alexmos SimpleBGC ). It costs, however, more than twice as much, and in terms of stabilization quality, the latest BruGi versions are already at an absolutely comparable level.
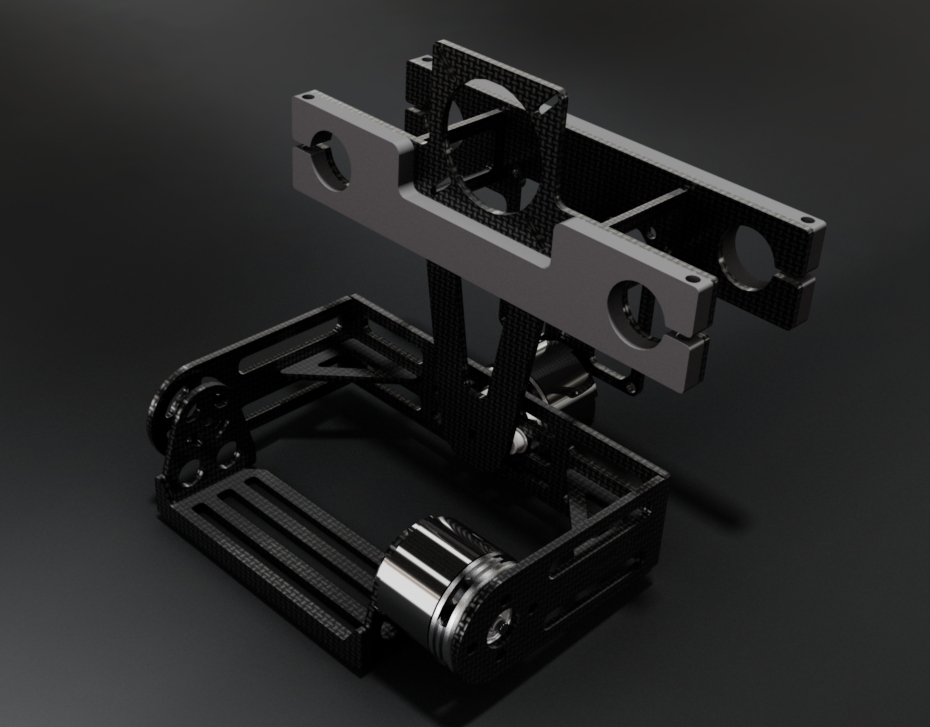
I developed the suspension mechanics myself, and as with the frame for the copter itself, I asked a good friend to cut it for me on a fiberglass milling machine. While a friend was preparing my details, another colleague from the forum volunteered to make a 3D model and render:
The assembly process, as well as the first flight after many hours of setting the controller PID parameters:
All the rest
Due to the increased weight of the copter after installing the suspension (before: 1950, after: 2140g), as well as in connection with the sudden death of one of the old engines (in flight ... fortunately, the flight was at a low height above the field with meter grass - the copter not hurt), new engines were bought and installed.
Before: Turnigy NTM 28-30 750kv . Rod with Graupner E-Prop 11x5 and 4S battery: 1kg
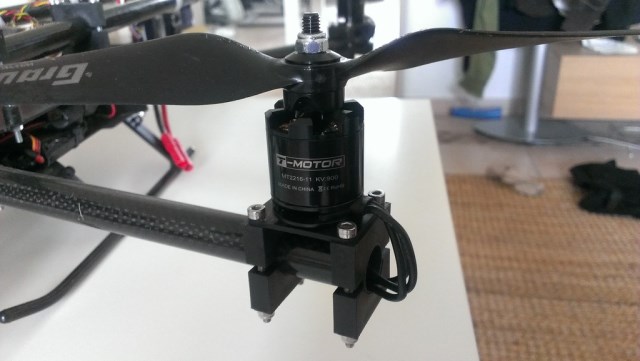
After: Tiger Motor MT2216-11 900kv . Rod with Graupner E-Prop 11x5 and 4S battery: 1.2kg
Tiger Motor motors are significantly more expensive than Hobbyking's NTM (€ 36.50 versus € 18), but significantly more quality. The Japanese bearings used in them live much longer than the cheap Chinese in NTM motors. All four engines I bought were perfectly balanced and worked without vibrations in the full speed range - of the four NTMs, three were well balanced, but the fourth was clearly crooked and gave quite strong vibrations.
Also, since the heavy gimbal of the camera shifted the drone's center of gravity forward, I had to move the battery even further back. This had a negative effect on flight performance: the copter became significantly more inert along the pitch axis than along the roll axis. Typically, the PID parameters of the flight controller are selected equally for both axes, since most copters are symmetrical; I had to manually select new parameters separately for both axes in order to achieve a fairly stable flight without vibrations and other undesirable effects.
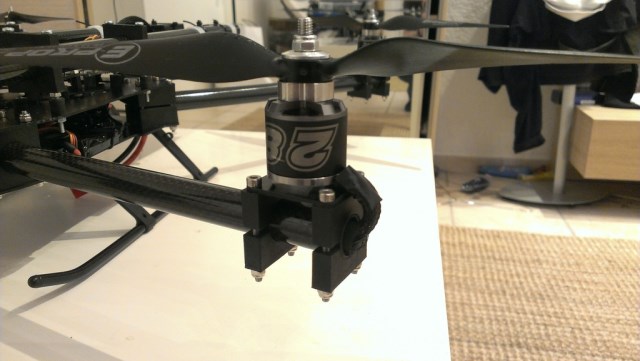
General view of the copter with all the new things:
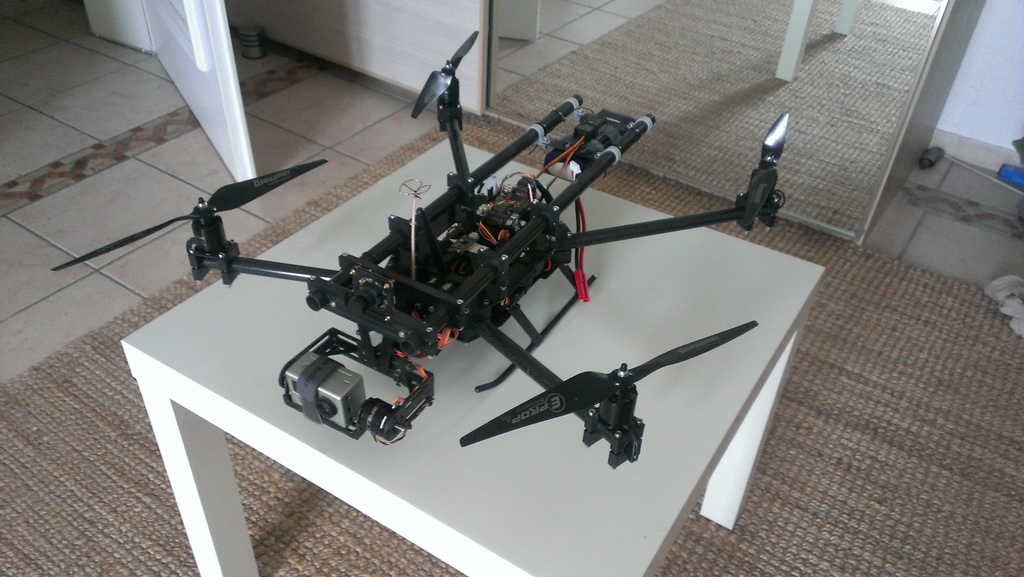
To be continued ...