Baby Monitor - Good Beetle
It just so coincided that the appearance of the child in the family coincided with financial difficulties. But the lack of time and money can not drown out the care of the baby and the thirst for learning new things.
The article does not pretend to be new, and all the technologies used in it are pretty well spread over the Internet. But I hope all of the following will help you decide to help your loved ones and make your child’s sleep calm. Remember, I have never studied radio craft anywhere, but I was able to assemble a device that has been working properly for two years now. All you need is a soldering iron, a multimeter and patience.
Background. In the summer, the wife and child spend quite a lot of time in the Soviet-style summer cottage: a plot along the edges of which a number of buildings are scattered. The conditions for an overnight stay are in the house, but vacationers spend almost all the daylight near the summer kitchen located at the opposite end of the plot at a distance of about 50 meters. A tolerable asphalt road leads to the holiday village, so during the day vehicles of “businessmen” take scrap metal, selling village products and technologies, allowing summer residents to realize their cherished dream - to achieve a crop similar to that transported by these businessmen. But the mentality of our people is such that all these machines use their horn with an interval of several minutes to increase the profitability of the business.
The sum of these factors inspired me to think about the need for a baby monitor: for a child to sleep, it was necessary to close all windows and doors, but in the daytime his wife was spinning around the summer kitchen and was simply unable to hear when the baby woke up. Yes, and awakenings are sometimes short-term, it’s worth pumping up on time and a healthy sleep will last another hour. So I had to sit quietly in the house for several afternoon hours, or make the child hysterical and not enough sleep.
A little google, I was upset that the minimum price of a baby monitor that I found then was $ 50, and reviews about models with a similar price were mostly negative, good ones cost about $ 100. But then I remembered about my unfulfilled childhood dream: to solder the “bugs” and this pushed me to action. They have a lot in common: compact size, low consumption (long battery life), short range (more on this below).
The main idea of homemade bugs is the use of an accessible elemental base and ready-made devices to reduce the cost of construction. So broadcasting is carried out at frequencies that household radios are capable of receiving, and now the price of the device has already decreased by more than two times. But due to the fact that, although with good intentions, broadcasting at these frequencies without special licenses is not possible, low output power and the choice of the frequency as far as possible from the radio stations are used. I chose the range of 88-108 megahertz with frequency modulation in the common people FM.
Next was the reading of many specialized forums for choosing a scheme. Frequency stability was added to my parameters. As it turned out for such small devices, often with minimal shielding and the most important placement in various places - the frequency deviation from the intended one can be quite significant. We placed the device closer to the child’s body or hitched it to an iron bed and again a dreary setting. Also, initially I used to power the nanny of the battery, the discharge of which also diverted the frequency.
In the end, I chose a compromise between the complexity and stability of the device and settled on the scheme from the link. The essence of the device there is disclosed in sufficient detail, but I will focus on the changes and nuances that I made to the design that are obvious to forum participants, but difficult for mortals like me.
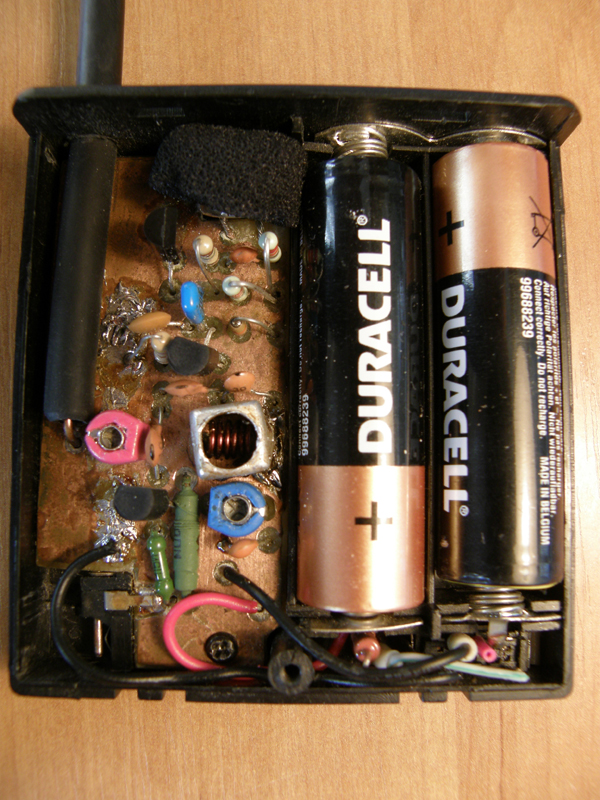
1. The fee. I used TNT mounting (one of the oldest and most widely described) on a two-sided board (for better shielding).
When assembling, not all components can be obtained exactly according to the scheme due to the scatter of parameters and the lack of standards for some parts (in this scheme, this is just a microphone - I took it from broken computer headphones). But it was not in vain that I proposed this particular scheme, since it will work, albeit not in the optimal mode, without additional configuration.
In my case, the differences are:
- the microphone resistor turned out to be 22k (on the 39k circuit) - but you can use a variable resistor to control the microphone sensitivity
Optional:
- the 330 Ohm resistor is replaced by an inductance of 5-10 μH (you don’t need to wind this coil as a regular part) to improve the efficiency
- added one variable capacitor in front of the antenna for minimal matching.
- an LED is added and (+ a resistor is selected) as an indicator of operability
- a screen is soldered to the board above the coil (you will find in any Soviet radio device) to improve shielding
- Added a switch to three positions allowing you to switch between an external power source, batteries and turn off the device. (You can use it in two positions, but then you need to fence gardens with a protective diode so as not to supply voltage from an external power supply when batteries are inserted, and the diode will drain voltage when working from batteries, which will reduce the operating time and radius)
All parts can be bought with a specialized store, and on the radio market - there are no rare ones among them, the total cost is about $ 6.
2. Case. The device will be used by women. And giving them even the perfect circuit board is tantamount to simply throwing it away.
For examples of many articles, I used a box for 4 batteries, using the two compartments for the intended purpose, and the board itself fit in the two remaining ones.
3. Antenna. The laws of physics are inexorable and the size of the antenna is primarily dictated by the frequency. Namely, it should be a multiple of the wavelength, which is why the antenna in the form of a length of 170 cm wire is offered in reference. Using it, frankly, is inconvenient. You can also take a quarter-wave telescopic (from any modern radio), but it is also quite fragile. And after some time of use, I assembled an antenna similar to that used in modern portable radios based on the ideas and calculations from this article .
4. Customization. A radio transmitter needs at least a minimal setup. In our case, these are games with a coil and a variable capacitor parallel to it to remove the frequency into the free range (in my case, 90 MHz).
Important! Twist the capacitors (and stretch the coil) is not a metal object. Otherwise, when you remove your hand, the frequency will go away again. I carved a semblance of a screwdriver out of sushi sticks.
After changing the type of antenna, my transmission range decreased significantly (up to 20m), for matching with the antenna I added a terminal variable capacitor. But to tune it by ear in modern digital receivers is not possible. Therefore, if you and I don’t have a friend as a radio amateur with a radiometer, collect a Polyakov resonance wave meter. I tried several wavemeter circuits, but only this one worked normally.

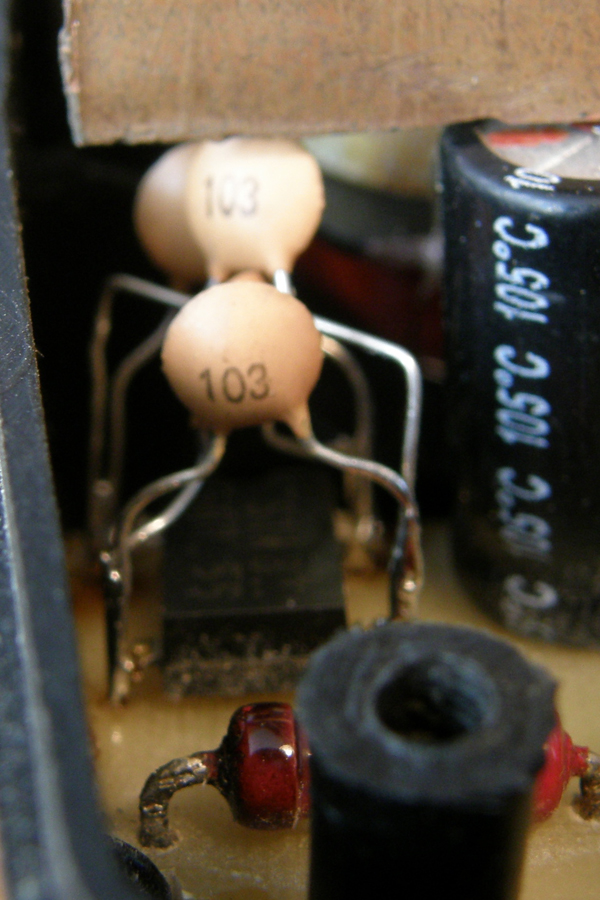
The only thing that can cause you difficulties is the search for a germanium diode. Modern industry has almost abandoned them, but they are still in abundance on radio markets.

We connect the conclusions of the wavemeter to the multimeter and begin to rotate the capacity regulator of the output stage until the maximum indicator of the multimeter is reached (with the same wooden screwdriver). The multimeter is preferably pointer, but it turned out for me and on the digital it’s just necessary to configure smoother and, as a result, longer.
5. The power source. Initially, everything worked on batteries, since the current in the power circuit was about 5.24 mA, which is estimated to be about 1000 hours. But the reality is that manufacturers lie with the account of the actual capacity of the batteries and the voltage gradually decreases during operation - as a result, the device will stop working long before the batteries are completely discharged. A converter circuits here are not suitable because of the "noise" of the latter. A voltage drop also diverts the frequency, and in the country the radio was without auto-tuning (now a rarity). As a result, I decided to power the circuit with the help of a power supply unit (any one suitable for 3-5 V) from some dead device.
But here is another difficulty, the search for a solution to which took more than a week (well, I don’t have a radio amateur friend). The baby monitor began to disgustingly loudly, while switching to batteries corrected everything. I tried three options for power filters, but to no avail. I wanted to quit already, but stumbled upon the mention that each diode of the PSU bridge is enough to shunt the capacitor to 10n. And lo and behold, the noise disappeared 99%.

As a result: excellent clean sound at a distance of about 150 meters, the microphone sensitivity is such that it even had to be reduced, it is received on any household radios - the baby sleeps calmly.
A couple more tips:
Remember that waves travel in all directions and you have another source of information leakage. On the old Soviet walkie-talkie there was always a sign in a prominent place "Caution! The enemy is eavesdropping ”:)
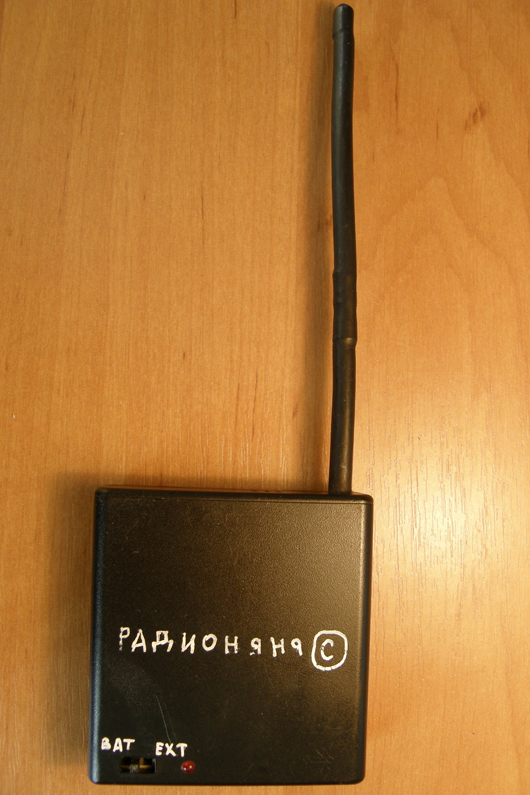
In order to avoid misunderstandings, it is better to sign the device. Legally, using it you all too early remain wrong, however, like thousands of users of car FM transmitters. But on the forums, part of the population living in Russia mentioned unpleasant incidents with law enforcement agencies. And the nerves of loved ones must be protected.
Well, now what happened to me.
For the quality of soldering from the installation side, do not judge strictly I have a 30W soldering iron, it simply is not able to warm anything more than the legs of the radio component. I can’t lay out the soldering side. For this, I need to dismantle the antenna, and during the assembly process (a year ago) I did not guess to make a photo session. Yes, and on the above site there are several wiring options in many modern formats.
Board

General view

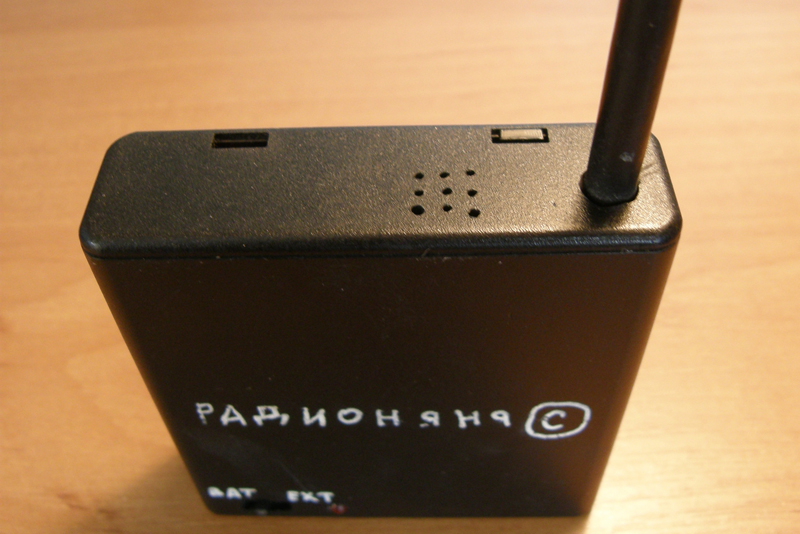
Microphone holes

External power socket

Several original ideas and especially regarding the “Chinese” alarm clock were gleaned from this article.
PS The topic was written under the “DIY or Do it yourself” hub, so if innovative technologies are not applied in the article, do not judge strictly.
The article does not pretend to be new, and all the technologies used in it are pretty well spread over the Internet. But I hope all of the following will help you decide to help your loved ones and make your child’s sleep calm. Remember, I have never studied radio craft anywhere, but I was able to assemble a device that has been working properly for two years now. All you need is a soldering iron, a multimeter and patience.
Background. In the summer, the wife and child spend quite a lot of time in the Soviet-style summer cottage: a plot along the edges of which a number of buildings are scattered. The conditions for an overnight stay are in the house, but vacationers spend almost all the daylight near the summer kitchen located at the opposite end of the plot at a distance of about 50 meters. A tolerable asphalt road leads to the holiday village, so during the day vehicles of “businessmen” take scrap metal, selling village products and technologies, allowing summer residents to realize their cherished dream - to achieve a crop similar to that transported by these businessmen. But the mentality of our people is such that all these machines use their horn with an interval of several minutes to increase the profitability of the business.
The sum of these factors inspired me to think about the need for a baby monitor: for a child to sleep, it was necessary to close all windows and doors, but in the daytime his wife was spinning around the summer kitchen and was simply unable to hear when the baby woke up. Yes, and awakenings are sometimes short-term, it’s worth pumping up on time and a healthy sleep will last another hour. So I had to sit quietly in the house for several afternoon hours, or make the child hysterical and not enough sleep.
A little google, I was upset that the minimum price of a baby monitor that I found then was $ 50, and reviews about models with a similar price were mostly negative, good ones cost about $ 100. But then I remembered about my unfulfilled childhood dream: to solder the “bugs” and this pushed me to action. They have a lot in common: compact size, low consumption (long battery life), short range (more on this below).
The main idea of homemade bugs is the use of an accessible elemental base and ready-made devices to reduce the cost of construction. So broadcasting is carried out at frequencies that household radios are capable of receiving, and now the price of the device has already decreased by more than two times. But due to the fact that, although with good intentions, broadcasting at these frequencies without special licenses is not possible, low output power and the choice of the frequency as far as possible from the radio stations are used. I chose the range of 88-108 megahertz with frequency modulation in the common people FM.
Next was the reading of many specialized forums for choosing a scheme. Frequency stability was added to my parameters. As it turned out for such small devices, often with minimal shielding and the most important placement in various places - the frequency deviation from the intended one can be quite significant. We placed the device closer to the child’s body or hitched it to an iron bed and again a dreary setting. Also, initially I used to power the nanny of the battery, the discharge of which also diverted the frequency.
In the end, I chose a compromise between the complexity and stability of the device and settled on the scheme from the link. The essence of the device there is disclosed in sufficient detail, but I will focus on the changes and nuances that I made to the design that are obvious to forum participants, but difficult for mortals like me.
1. The fee. I used TNT mounting (one of the oldest and most widely described) on a two-sided board (for better shielding).
When assembling, not all components can be obtained exactly according to the scheme due to the scatter of parameters and the lack of standards for some parts (in this scheme, this is just a microphone - I took it from broken computer headphones). But it was not in vain that I proposed this particular scheme, since it will work, albeit not in the optimal mode, without additional configuration.
In my case, the differences are:
- the microphone resistor turned out to be 22k (on the 39k circuit) - but you can use a variable resistor to control the microphone sensitivity
Optional:
- the 330 Ohm resistor is replaced by an inductance of 5-10 μH (you don’t need to wind this coil as a regular part) to improve the efficiency
- added one variable capacitor in front of the antenna for minimal matching.
- an LED is added and (+ a resistor is selected) as an indicator of operability
- a screen is soldered to the board above the coil (you will find in any Soviet radio device) to improve shielding
- Added a switch to three positions allowing you to switch between an external power source, batteries and turn off the device. (You can use it in two positions, but then you need to fence gardens with a protective diode so as not to supply voltage from an external power supply when batteries are inserted, and the diode will drain voltage when working from batteries, which will reduce the operating time and radius)
All parts can be bought with a specialized store, and on the radio market - there are no rare ones among them, the total cost is about $ 6.
2. Case. The device will be used by women. And giving them even the perfect circuit board is tantamount to simply throwing it away.
For examples of many articles, I used a box for 4 batteries, using the two compartments for the intended purpose, and the board itself fit in the two remaining ones.
3. Antenna. The laws of physics are inexorable and the size of the antenna is primarily dictated by the frequency. Namely, it should be a multiple of the wavelength, which is why the antenna in the form of a length of 170 cm wire is offered in reference. Using it, frankly, is inconvenient. You can also take a quarter-wave telescopic (from any modern radio), but it is also quite fragile. And after some time of use, I assembled an antenna similar to that used in modern portable radios based on the ideas and calculations from this article .
4. Customization. A radio transmitter needs at least a minimal setup. In our case, these are games with a coil and a variable capacitor parallel to it to remove the frequency into the free range (in my case, 90 MHz).
Important! Twist the capacitors (and stretch the coil) is not a metal object. Otherwise, when you remove your hand, the frequency will go away again. I carved a semblance of a screwdriver out of sushi sticks.
After changing the type of antenna, my transmission range decreased significantly (up to 20m), for matching with the antenna I added a terminal variable capacitor. But to tune it by ear in modern digital receivers is not possible. Therefore, if you and I don’t have a friend as a radio amateur with a radiometer, collect a Polyakov resonance wave meter. I tried several wavemeter circuits, but only this one worked normally.

The only thing that can cause you difficulties is the search for a germanium diode. Modern industry has almost abandoned them, but they are still in abundance on radio markets.

We connect the conclusions of the wavemeter to the multimeter and begin to rotate the capacity regulator of the output stage until the maximum indicator of the multimeter is reached (with the same wooden screwdriver). The multimeter is preferably pointer, but it turned out for me and on the digital it’s just necessary to configure smoother and, as a result, longer.
5. The power source. Initially, everything worked on batteries, since the current in the power circuit was about 5.24 mA, which is estimated to be about 1000 hours. But the reality is that manufacturers lie with the account of the actual capacity of the batteries and the voltage gradually decreases during operation - as a result, the device will stop working long before the batteries are completely discharged. A converter circuits here are not suitable because of the "noise" of the latter. A voltage drop also diverts the frequency, and in the country the radio was without auto-tuning (now a rarity). As a result, I decided to power the circuit with the help of a power supply unit (any one suitable for 3-5 V) from some dead device.
But here is another difficulty, the search for a solution to which took more than a week (well, I don’t have a radio amateur friend). The baby monitor began to disgustingly loudly, while switching to batteries corrected everything. I tried three options for power filters, but to no avail. I wanted to quit already, but stumbled upon the mention that each diode of the PSU bridge is enough to shunt the capacitor to 10n. And lo and behold, the noise disappeared 99%.

As a result: excellent clean sound at a distance of about 150 meters, the microphone sensitivity is such that it even had to be reduced, it is received on any household radios - the baby sleeps calmly.
A couple more tips:
Remember that waves travel in all directions and you have another source of information leakage. On the old Soviet walkie-talkie there was always a sign in a prominent place "Caution! The enemy is eavesdropping ”:)
In order to avoid misunderstandings, it is better to sign the device. Legally, using it you all too early remain wrong, however, like thousands of users of car FM transmitters. But on the forums, part of the population living in Russia mentioned unpleasant incidents with law enforcement agencies. And the nerves of loved ones must be protected.
Well, now what happened to me.
For the quality of soldering from the installation side, do not judge strictly I have a 30W soldering iron, it simply is not able to warm anything more than the legs of the radio component. I can’t lay out the soldering side. For this, I need to dismantle the antenna, and during the assembly process (a year ago) I did not guess to make a photo session. Yes, and on the above site there are several wiring options in many modern formats.
Board

General view

Microphone holes

External power socket

Several original ideas and especially regarding the “Chinese” alarm clock were gleaned from this article.
PS The topic was written under the “DIY or Do it yourself” hub, so if innovative technologies are not applied in the article, do not judge strictly.
