May 21, 2013 at 09:17
SmartDeblur 2.1 - restore blurry and defocused images
Many of you have already read a series of my posts about restoring defocused and blurry images, and also tried free versions of the SmartDeblur program, one of which is available on the GitHub source.
The program and articles aroused great interest both in RuNet and in other countries, so we are glad Introduce the commercial version of SmartDeblur.
Major changes:
- Support for large images (up to 36MP on 64-bit OS and up to 15MP on 32-bit)
- Ability to edit the resulting kernel (trajectory smaz)
- Increased speed due to optimizations and the use of Intel IPP as FFT
- Improved interface
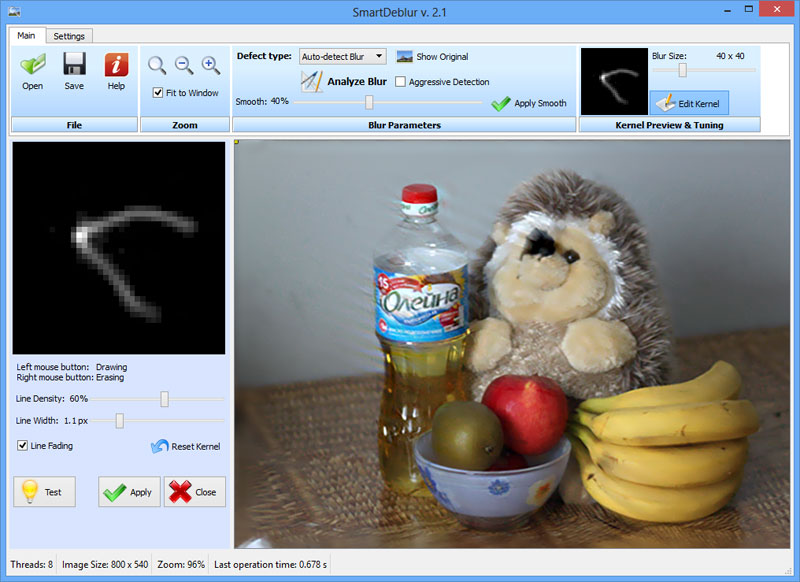
Project address : smartdeblur.net
There are a lot of pictures under the cut !
Part 1. Theory - Restoring defocused and blurry images
Part 2. Practice - Restoring defocused and blurry images
Part 3. Improving quality - Restoring defocused and blurry images
Part 4. Blind Deconvolution - automatic blurry image recovery
English translations available on yuzhikov.com
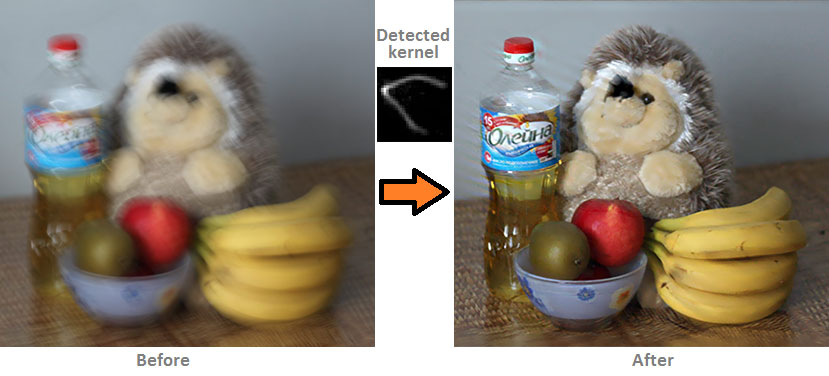
This is an example of a real image taken with a Canon 500D camera with an EF 85mm / 1.8 lens.
The trajectory of the lubricant was determined completely automatically. The result seems unbelievable, but it is really a real image :)
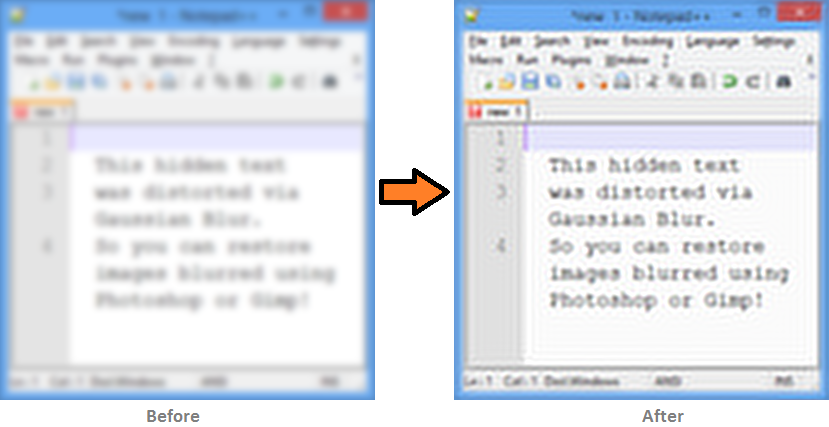
SmartDeblur can also enhance images that have been blurred by photo editors such as Photoshop or Gimp.
Despite the fact that the synthetic lubricant - 100% recovery is not obtained due to the features of the Gaussian during deconvolution, nevertheless, you can significantly improve the readability of the text:
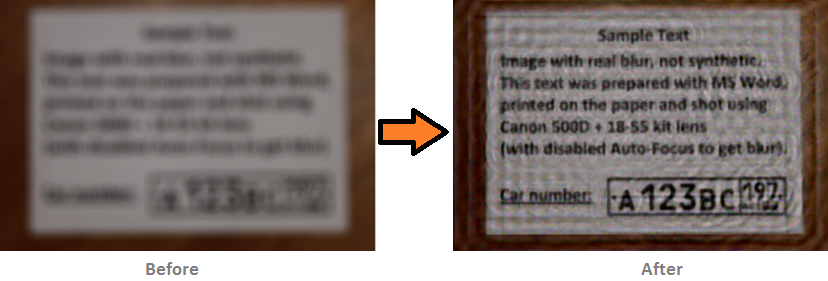
Well, the last example shows the work of restoring images with the wrong focus.
The main difference from the free version is the high preview speed even for 36MP images.
Other processing examples can be found on the Examples page.
Detailed instructions are on the Tutorial page.
It looks like this:
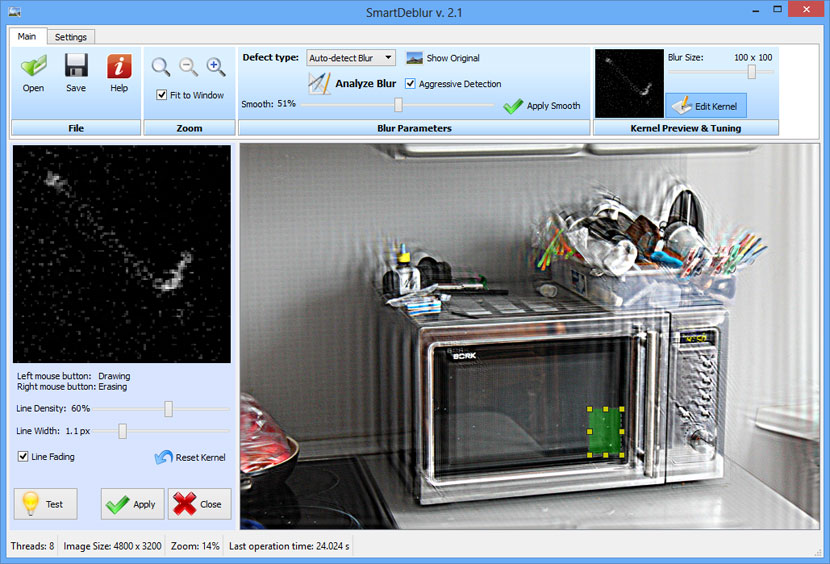
In addition, on the settings page, you can change the final processing method to a better one. The default is Medium-Quality (Wiener) for faster performance and less memory consumption.
By tradition, I distribute keys for a constructive feedback.
The program and articles aroused great interest both in RuNet and in other countries, so we are glad Introduce the commercial version of SmartDeblur.
Major changes:
- Support for large images (up to 36MP on 64-bit OS and up to 15MP on 32-bit)
- Ability to edit the resulting kernel (trajectory smaz)
- Increased speed due to optimizations and the use of Intel IPP as FFT
- Improved interface
Project address : smartdeblur.net
There are a lot of pictures under the cut !
Theory
Those who are interested in the theory of image restoration and deconvolution can read a series of articles:Part 1. Theory - Restoring defocused and blurry images
Part 2. Practice - Restoring defocused and blurry images
Part 3. Improving quality - Restoring defocused and blurry images
Part 4. Blind Deconvolution - automatic blurry image recovery
English translations available on yuzhikov.com
Work examples
Grease elimination
This is an example of a real image taken with a Canon 500D camera with an EF 85mm / 1.8 lens.
The trajectory of the lubricant was determined completely automatically. The result seems unbelievable, but it is really a real image :)
Eliminate Synthetic Blur - Gaussian Blur
SmartDeblur can also enhance images that have been blurred by photo editors such as Photoshop or Gimp.
Despite the fact that the synthetic lubricant - 100% recovery is not obtained due to the features of the Gaussian during deconvolution, nevertheless, you can significantly improve the readability of the text:
Defocus correction
Well, the last example shows the work of restoring images with the wrong focus.
The main difference from the free version is the high preview speed even for 36MP images.
Other processing examples can be found on the Examples page.
Detailed instructions are on the Tutorial page.
Fine tuning
If the result of the automatic detection of distortion did not give an acceptable result, then you can open the Kernel Editor and manually edit the resulting grease path.It looks like this:
In addition, on the settings page, you can change the final processing method to a better one. The default is Medium-Quality (Wiener) for faster performance and less memory consumption.
By tradition, I distribute keys for a constructive feedback.
-Vladimir Yuzhikov (Vladimir Yuzhikov)