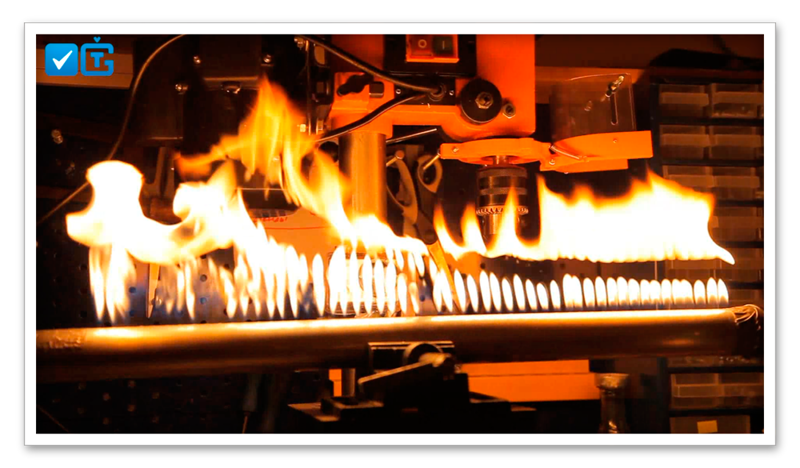
How we did the Rubens Pipe

A few years ago, in the Mythbusters, Adam and Jemmy built the Rubens Pipe. It was so spectacular and fun that I really envied them. And now, when the opportunity came up to build something like this, it was impossible to resist the temptation.
Attempt at writing
We all thought where to start building this structure, and decided to try on a miniature model. Under my arm came a plastic pipe with a diameter of about a centimeter. Of course, we assumed that it would begin to melt, but it should have been enough for a trial run. To prevent the pipe from melting right away, small pieces of a thin copper tube were inserted into the drilled holes.
A hose going to a gas cylinder was connected to one end of the pipe.

The second end of the pipe was leaned against the hole for the polyphonic speaker of the iPhone and sealed with plasticine.

After supplying gas to the pipe with the sound turned off, we got a gas burner.

Immediately after the melody was turned on, fire began to break out of the tubes to the rhythm of the music, and in places from the flames came out something wavy.


But after about 10 minutes, our pipe began to melt.

Full-scale sample
Taking an aluminum pipe with a diameter of 5 cm, we drilled millimeter holes in it through each centimeter.


To connect a hose from a gas cylinder, we made an adapter from a plastic funnel.


They put the adapter on the pipe using thermo-sealant.


We decided to use a speaker with a 25-watt speaker, comparable to the size of the pipe.

The mating funnel was also useful here as an adapter. Using a thermal gun, a funnel was tightly attached to the speaker. This glue is a very convenient tool when you need to connect two plastic parts in order to then disconnect them without damage.


After that, they took up the gas cylinder. In the first version of the Rubens Pipe, the gas supply was controlled in a curved manner, which did not allow for fine tuning. A nozzle with a piezoelectric element was attached to our cylinder, but it was not possible to connect a hose to it. I had to put the nozzle into the flow and remake it for our needs.


We leaned the pipe against the speaker and connected the other end to a gas bottle.


A laptop was used as a sound wave generator.

After the gas was set on fire.


Adjustment
The most important thing in this whole process is the amount of gas supplied, volume control and audio frequency selection.

After several minutes of testing, we began


to see such distinctive pictures: To find out the wavelength, it is enough to measure the distance between the peaks with an ordinary ruler.


Fiery light music
And when they turned on the music, it became very beautiful.


While rejoicing at this sight, a pile of paper lying nearby lit up on us :) This made us move to a more spacious room to continue to enjoy the musical “fireplace”.


Video report
The video shows more clearly the behavior of fire relative to sound.
You can subscribe to new HI-TESTING experiments on Vkontakte . And you can follow the new experiments on the channel website.
