 March 20, 2013 at 18:12
Combining multiple videos in iOS using AVMutableVideoComposition
 Hello, Habr!
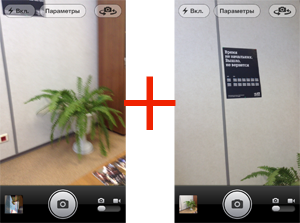
 In one of the projects I needed to solve the problem of combining video, in particular, the user could pause the video, and then continue recording (the number of iterations was unknown). Therefore, it was necessary to find a way to solve this problem by available means. Of course, two options came to my mind, either to write everything at once into one file, or to write to different ones, and to glue them after the session. I decided to stay on the second, and what came of it, read under the cut.
To record video, I used AVCamCaptureManager , based on the AVCam application, kindly located on all of our favorite site . Well, after pressing the stop button, the fun began.
Stage 1. Preparation.
At this stage, do the following:
- Object AVMutableComposition . It will have our paths.AVMutableComposition
AVMutableComposition *mixComposition = [[AVMutableComposition alloc] init];
- An array of instructions for tracks and an AVMutableVideoCompositionInstruction object for them.AVMutableVideoCompositionInstruction
NSMutableArray *arrayInstruction = [[NSMutableArray alloc] init];
AVMutableVideoCompositionInstruction *MainInstruction = [AVMutableVideoCompositionInstruction videoCompositionInstruction];
- Common audio track. The variable isSound indicates whether it is needed here (according to the task, the user could record video with or without sound).Common audio track
   AVMutableCompositionTrack *audioTrack;
   if(self.isSoundOn==YES)
		audioTrack = [mixComposition addMutableTrackWithMediaType:AVMediaTypeAudio
											preferredTrackID:kCMPersistentTrackID_Invalid];
- A variable for storing duration (and also it is needed to determine the boundaries of gluing).
CMTime duration = kCMTimeZero;
Stage 2. Search for files, creating assets, generating instructions and transforming the video track if necessary.
- We go over all the files and create assets for each of them. All this can and should be done in a loop, the variable i-here is the file index.Asset CreationI recorded all the videos in a tempo directory, while increasing the value of i. Accordingly, assets are created from these files.
AVAsset *currentAsset = [AVAsset assetWithURL:[NSURL fileURLWithPath:[NSString stringWithFormat:@"%@%@%d%@", NSTemporaryDirectory(), @"Movie",i,@".mov"]]];
- In the loop, AVMutableCompositionTrack is created , in each of which a CMTimeRange time interval from the created asset is inserted.Track creationParticular attention should be paid to where exactly you want to insert the segment, if you want to avoid black bars during playback, or even worse, overlapping one video on another during playback. And do not even ask why I focus on this.
//VIDEO TRACK
AVMutableCompositionTrack *currentTrack = [mixComposition addMutableTrackWithMediaType:AVMediaTypeVideo preferredTrackID:kCMPersistentTrackID_Invalid];
[currentTrack insertTimeRange:CMTimeRangeMake(kCMTimeZero, currentAsset.duration) ofTrack:[[currentAsset tracksWithMediaType:AVMediaTypeVideo] objectAtIndex:0] atTime:duration error:nil];
- AVMutableVideoCompositionLayerInstruction is used to create instructions for a specific layer of the track. It is in him that a possible transformation is recorded.AVMutableVideoCompositionLayerInstructionWith the correct definition of the position of the video (portrait or landscapescaped) at the output, you can get a gorgeous picture in which the horizontal or vertical video will be centered depending on the track in which mode you go first.
AVMutableVideoCompositionLayerInstruction *currentAssetLayerInstruction = [AVMutableVideoCompositionLayerInstruction videoCompositionLayerInstructionWithAssetTrack:currentTrack];
- An AVAssetTrack object is needed to create a track based on an existing asset of type AVMediaTypeVideo .AVAssetTrack
AVAssetTrack *currentAssetTrack = [[currentAsset tracksWithMediaType:AVMediaTypeVideo] objectAtIndex:0];
- Increase the duration value .duration UPCMTime even requires a separate post, of course.
duration=CMTimeAdd(duration, currentAsset.duration);
Stage 3. Setting MainInstruction parameters and forming AVMutableVideoComposition
- timeRangeThe total duration of the video track.
MainInstruction.timeRange = CMTimeRangeMake(kCMTimeZero, duration);
- layerInstructionsHere we need an array of instructions generated in the second stage.
MainInstruction.layerInstructions = arrayInstruction;
- MainCompositionInstWe create an instance of MainCompositionInst with the necessary parameters
		AVMutableVideoComposition *MainCompositionInst = [AVMutableVideoComposition videoComposition];
		MainCompositionInst.instructions = [NSArray arrayWithObject:MainInstruction];
		MainCompositionInst.frameDuration = CMTimeMake(1, 30);
		MainCompositionInst.renderSize = CGSizeMake(320.0, 480.0);
- Where to save something?
NSArray *paths = NSSearchPathForDirectoriesInDomains(NSDocumentDirectory, NSUserDomainMask, YES);
		NSString *documentsDirectory = [paths objectAtIndex:0];
		NSString *myPathDocs =  [documentsDirectory stringByAppendingPathComponent:[NSString stringWithFormat:@"mergeVideo-%d.mov",arc4random() % 1000]];
		NSURL *url = [NSURL fileURLWithPath:myPathDocs];
Step 4. Saving the received video through AVAssetExportSession
The difference between the Highest and Medium presets is very significant. Therefore, if you plan to distribute video on social networks, I strongly recommend that you use Medium.
- We set quality and create a session
		NSString *quality = AVAssetExportPresetHighestQuality;
		if(self.isHighQuality==NO)
		quality = AVAssetExportPresetMediumQuality;
		AVAssetExportSession *exporter = [[AVAssetExportSession alloc] initWithAsset:mixComposition presetName:quality];
- Save!
exporter.outputURL=url;
		exporter.outputFileType = AVFileTypeQuickTimeMovie;
		exporter.videoComposition = MainCompositionInst;
		exporter.shouldOptimizeForNetworkUse = YES;
		[exporter exportAsynchronouslyWithCompletionHandler:^
		 { //здесь можно удалить темповые файлы.
}];
Possible export statuses:
What do we have here?
		 switch (exporter.status)
			 {
				 case AVAssetExportSessionStatusCompleted:
				 NSLog(@"Completed exporting!");
				 break;
				 case AVAssetExportSessionStatusFailed:
				 NSLog(@"Failed:%@", exporter.error.description);
				 break;
				 case AVAssetExportSessionStatusCancelled:
				 NSLog(@"Canceled:%@", exporter.error);
				 break;
				 case AVAssetExportSessionStatusExporting:
				 NSLog(@"Exporting!");
				 break;
				 case AVAssetExportSessionStatusWaiting:
				 NSLog(@"Waiting");
				 break;
				 default:
				 break;
			 }
Conclusion
In the article, I tried to focus specifically on combining video, and I think that this post will help many Habrovsk people involved in iOS development who are faced with such a task in the future. In the future I plan to talk more about CMTime , and why it is not just “time”. By the way, a lot of useful information on the topic is on the site . You can find the method itself in the repository.









