“Clarifying for bangs” on Android P. What to do with Android Cutout?
- Tutorial
First we need to figure out whether the application needs optimization at all.
If you have a fullscreen application or are present in the subject
windowActionBarOverlay = true, then it is most likely needed. Almost all applications are far from a single screen, and you can not notice how one of them will go layout. Especially if in application the volumetric legacy code. Therefore, it is still worth going through all the main screens and double-check. Let's see what you need to do.
1. Prepare a test device / emulator
In order to test your app with a bang, you need (thanks, cap!) Android P. Currently, Android P Preview 5 is available for the following devices (thanks to Project Treble):
Essential Phone;
Google Pixel 2;
Google Pixel 2 XL;
Google Pixel;
Google Pixel XL;
Nokia 7 plus;
Oneplus 6;
Oppo R15 Pro;
Sony Xperia XZ2;
Vivo X21UD;
Vivo X21;
Xiaomi Mi Mix 2S.
To install Android P on your device, just go here and tap “Get Beta” for your device. Get it through the air or roll yourself - the choice is yours. Instructions on the site is attached.
But if you can not or do not want to install Android P on the device, then no one has canceled the emulator. Instructions for setting up here .
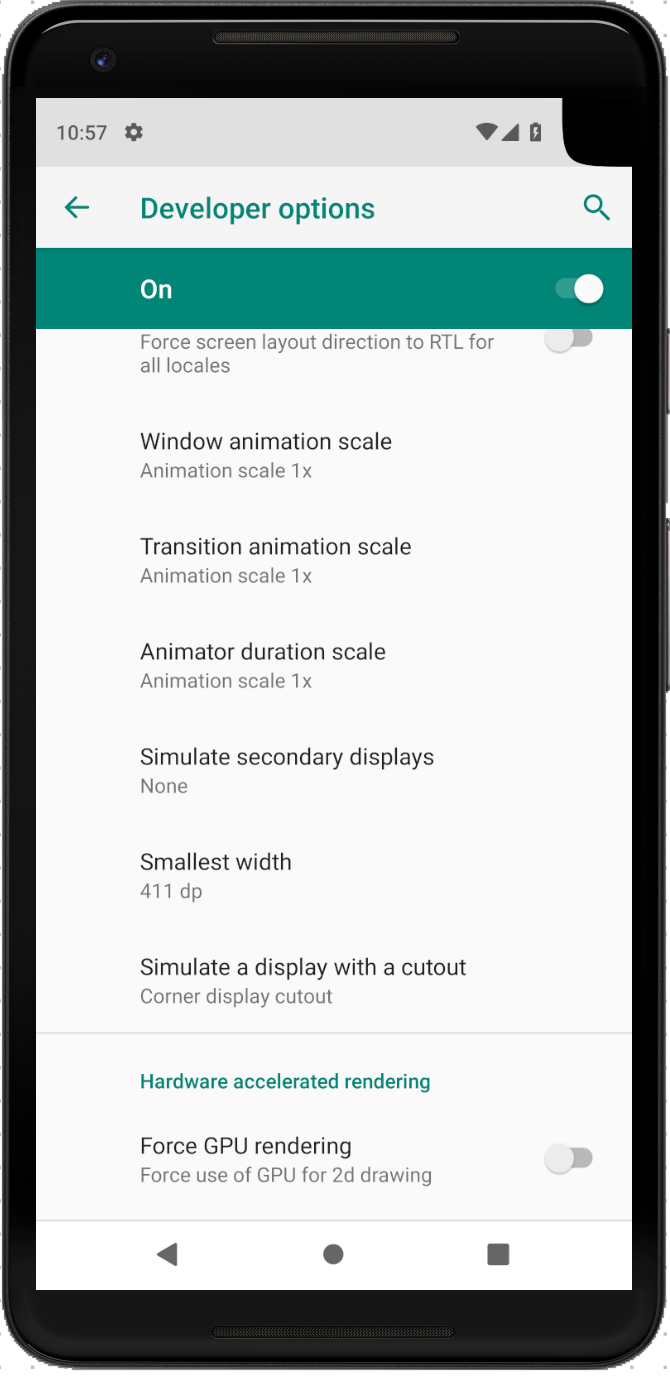
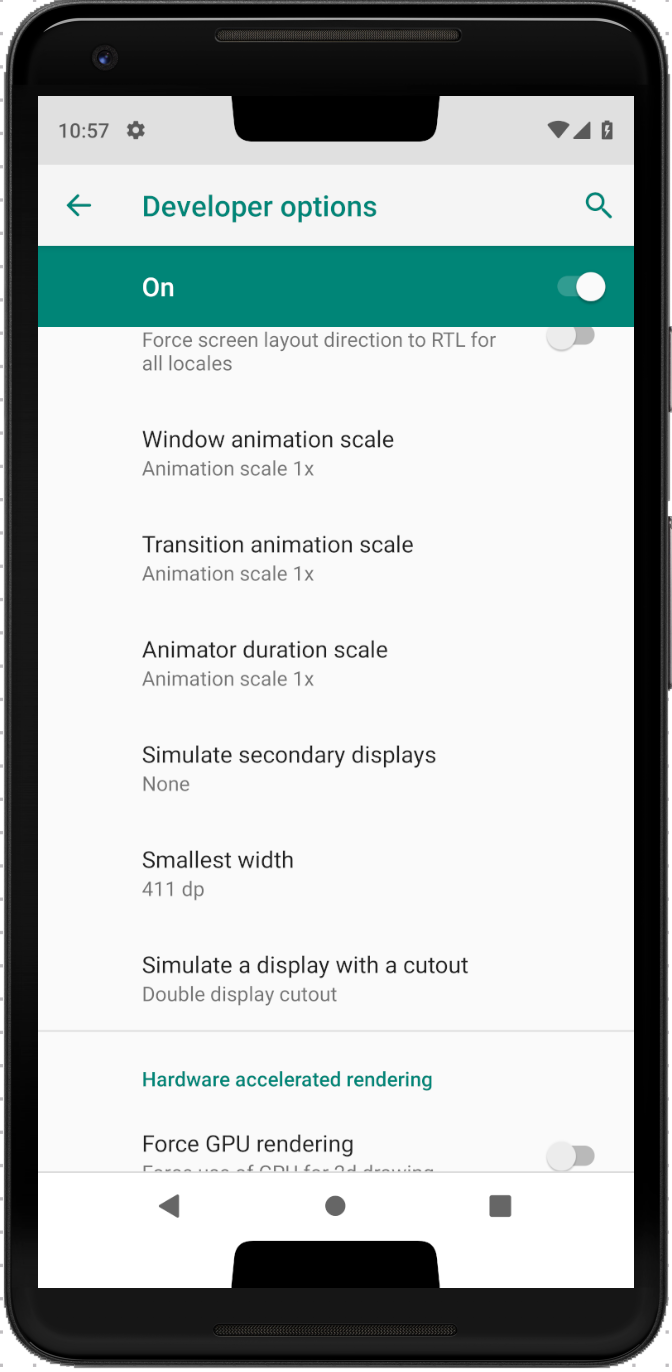
2. Include the very bang software (if there is no hardware)
Everything is simple: go to System -> Developer options -> Simulate a display with a cutout.
There are 3 options to choose from:
- Corner
- Double
- Tall
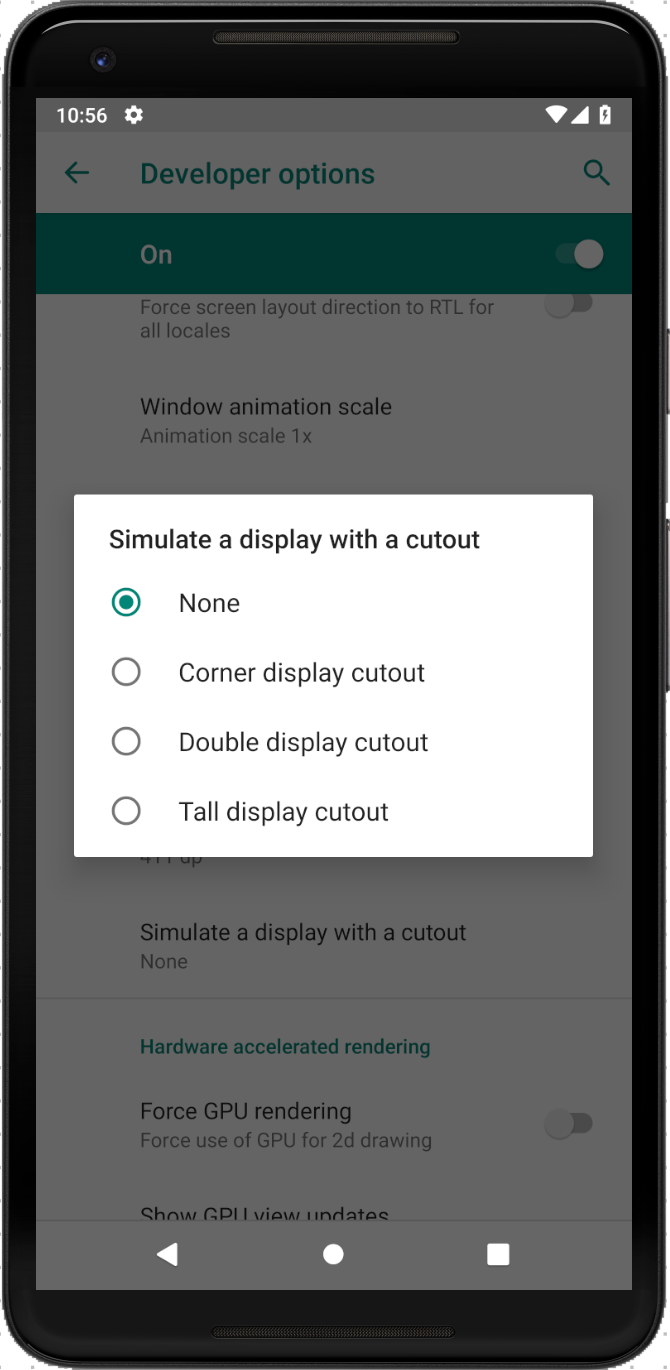
They look like this:
| Corner | Double | Tall |
|---|---|---|
 |  |  |
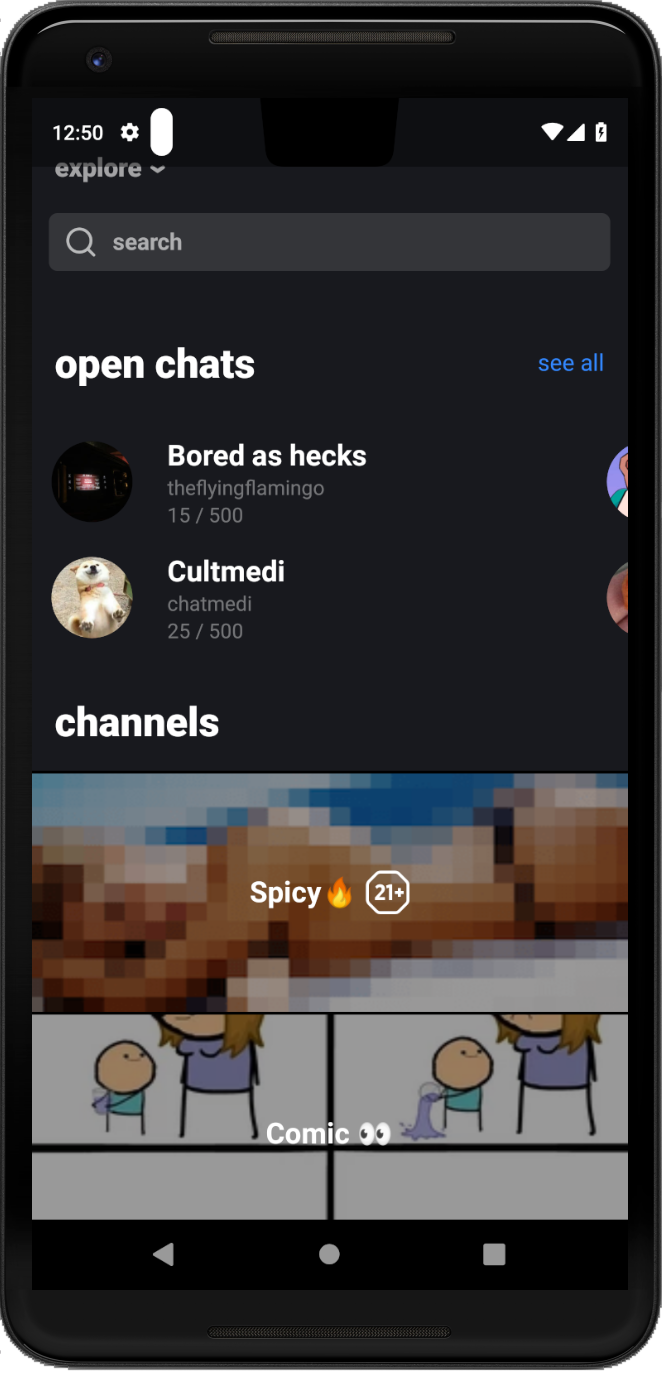
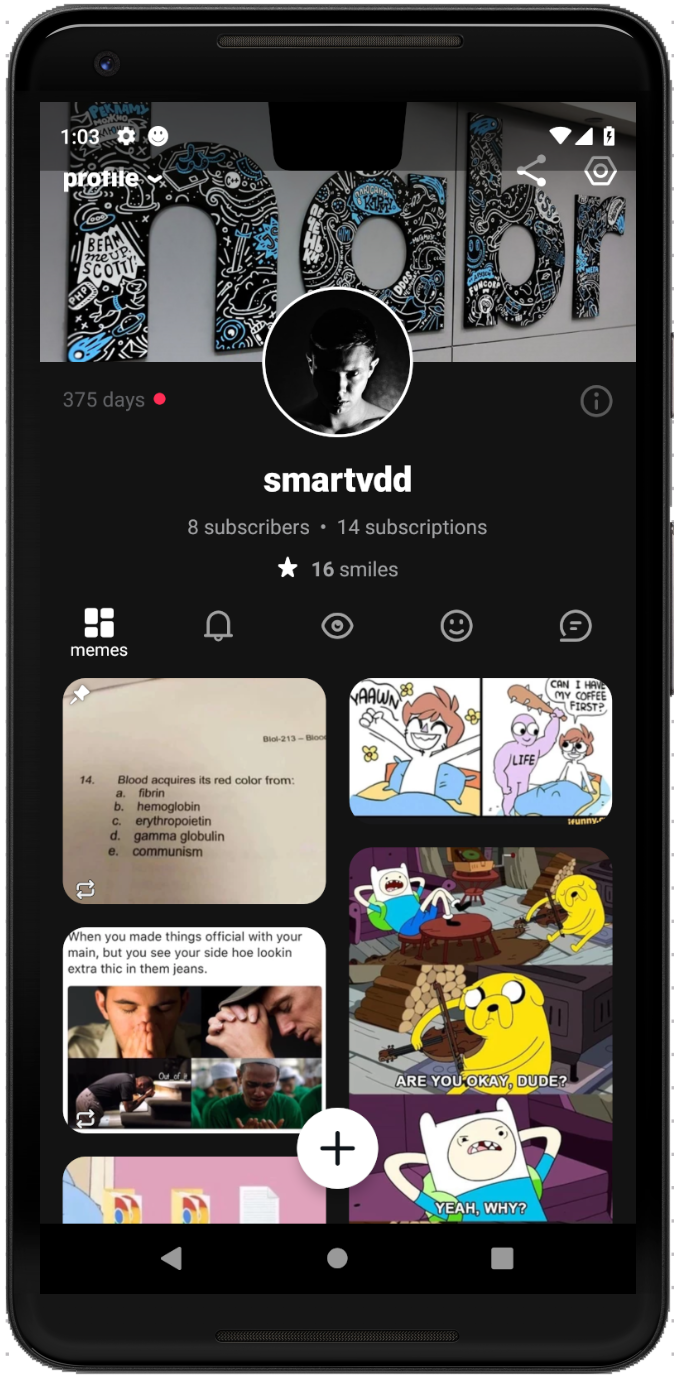
3. Go through the main screens
Of course, this case will all be different. Someone simple logic, someone not very. I will give a couple of examples of screens with a go-through layout, which I found in our application.
| Explore | Profile |
|---|---|
 |  |
Now let's see what there are ways to eliminate the shortcomings of the layout.
Not raising compileSdkVersion
Starting with the 20th API, the WindowInsets class appeared , which is Rect objects that describe accessible and inaccessible parts of the screen. Together with them in the View appeared such methods, with the help of which we can process the coordinates of inaccessible parts of the screen:WindowInsets dispatchApplyWindowInsets(WindowInsets);
WindowInsets onApplyWindowInsets(WindowInsets);
voidrequestApplyInsets();
voidsetOnApplyWindowInsetsListener(OnApplyWindowInsetsListener);Details on how to use them, here .
You can use these methods in two ways:
a) put a tag
android:fitsSystemWindows="true"in the layout on your layout or view; b) do it from the code:
layout.setFitsSystemWindows(true);
layout.requestApplyInsets();| It was | It became |
|---|---|
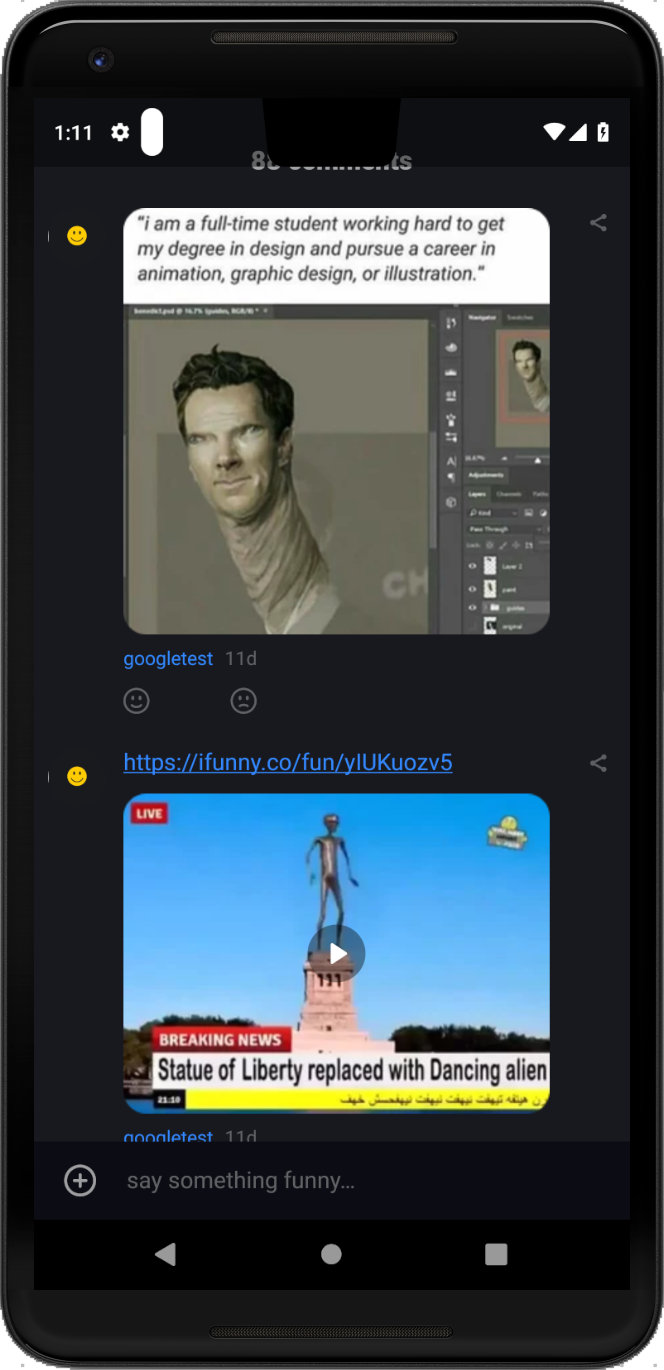 | 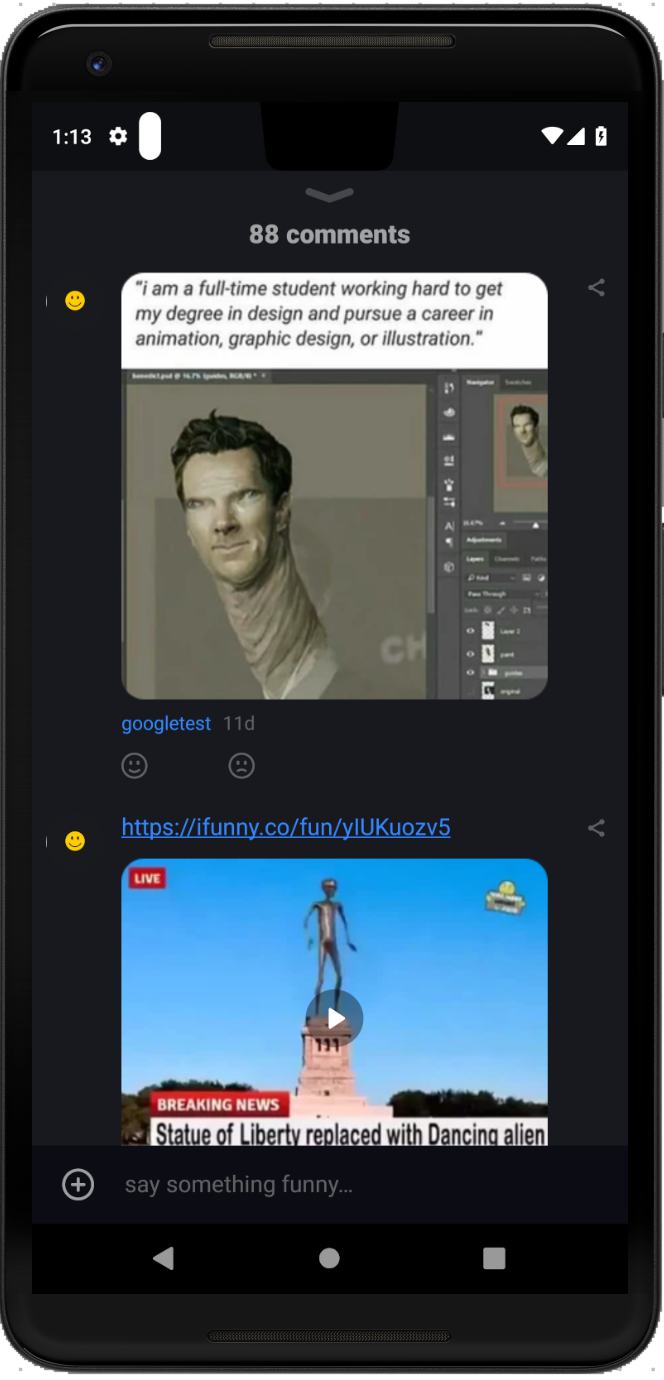 |
Increase compileSdkVersion to version 28
In the near future we will have to switch to this version, so why not prepare for it now? But be careful, if you have unit tests in the project (and I hope you have them), the JUnit package has moved. How to connect it, described here .So, what options does the Android P now provide us with?
A. WindowManager.LayoutParams has 3 new flags:
- LAYOUT_IN_DISPLAY_CUTOUT_MODE_DEFAULT - with this flag the bang will be on top of the application screen only in portrait mode, in landscape there will be just a black bar;

- LAYOUT_IN_DISPLAY_CUTOUT_MODE_NEVER - there will be no fashionable bang with this flag at all, it will merge with the black stripe;


- LAYOUT_IN_DISPLAY_CUTOUT_MODE_SHORT_EDGES - with this flag the bang is always and in any orientation.


How to apply?
window.attributes.layoutInDisplayCutoutMode =
    WindowManager.LayoutParams.LAYOUT_IN_DISPLAY_CUTOUT_MODE_SHORT_EDGES
B. If option A does not suit you and you need to take into account the location of the ill-fated cut-out (for example, you have something displayed directly in the status bar, as messages on the connection in the Telegram), then in this case the new DisplayCutout class will help .
Consider his methods:
- getBoundingRects () returns a List of Rect objects, each of which represents an inaccessible screen area;
- getSafeInsetLeft () , getSafeInsetRight () , getSafeInsetTop () , getSafeInsetBottom () return the left, right, upper and lower indent without cut in pixels, respectively.
With them you can already do everything that is enough imagination. Want - move
marginthe code on them. Want - process in OnApplyWindowInsetsListenerand do consumeDisplayCutout(). Perhaps you need more complex manipulations. I will give a simple example of how to denote a fringe.classSampleFragment() : Fragment() {
privatelateinitvar root: ViewGroup
overridefunonCreateView(inflater: LayoutInflater, container: ViewGroup?, savedInstanceState: Bundle?): View? {
return inflater.inflate(R.layout.sample_fragment, container, false)
}
overridefunonViewCreated(view: View, savedInstanceState: Bundle?) {
super.onViewCreated(view, savedInstanceState)
root = view.findViewById(R.id.root)
addArrowsToCutout()
}
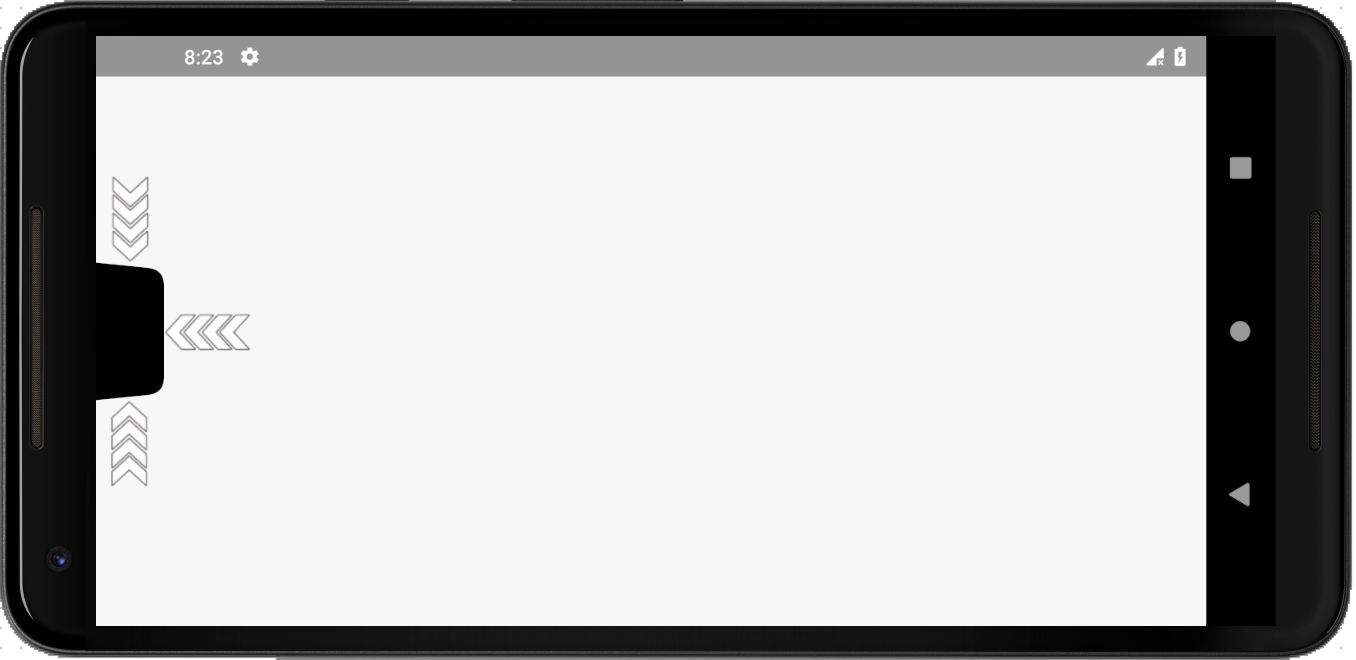
privatefunaddArrowsToCutout() {
//Нужно учитывать, что фрагмент должен успеть сделать attach к window, иначе тут будут null'ыval cutoutList = root.rootWindowInsets?.displayCutout?.boundingRects
cutoutList?.forEach {
addArrow(context!!.getDrawable(R.drawable.left), it.left.toFloat(), it.top + (it.bottom - it.top).toFloat() / 2,
::calculateLeftArrow)
addArrow(context!!.getDrawable(R.drawable.right), it.right.toFloat(), it.top + (it.bottom - it.top).toFloat() / 2,
::calculateRightArrow)
addArrow(context!!.getDrawable(R.drawable.top), it.left + (it.right - it.left).toFloat() / 2, it.top.toFloat(),
::calculateTopArrow)
addArrow(context!!.getDrawable(R.drawable.bottom), it.left + (it.right - it.left).toFloat() / 2, it.bottom.toFloat(),
::calculateBottomArrow)
}
}
privatefunaddArrow(arrowIcon: Drawable, x: Float, y: Float, calculation: (View, Float, Float) -> Unit) {
val arrowView = ImageView(context)
arrowView.setImageDrawable(arrowIcon)
arrowView.layoutParams = ViewGroup.LayoutParams(ViewGroup.LayoutParams.WRAP_CONTENT, ViewGroup.LayoutParams.WRAP_CONTENT)
root.addView(arrowView)
arrowView.post {
calculation(arrowView, x, y)
}
}
privatefuncalculateLeftArrow(arrowView: View, x: Float, y: Float) {
arrowView.x = x - arrowView.width
arrowView.y = y - arrowView.height / 2
}
privatefuncalculateRightArrow(arrowView: View, x: Float, y: Float) {
arrowView.x = x
arrowView.y = y - arrowView.height / 2
}
privatefuncalculateTopArrow(arrowView: View, x: Float, y: Float) {
arrowView.x = x - arrowView.width / 2
arrowView.y = y - arrowView.height
}
privatefuncalculateBottomArrow(arrowView: View, x: Float, y: Float) {
arrowView.x = x - arrowView.width / 2
arrowView.y = y
}
}Portrait
| Corner | Double | Tall |
|---|---|---|
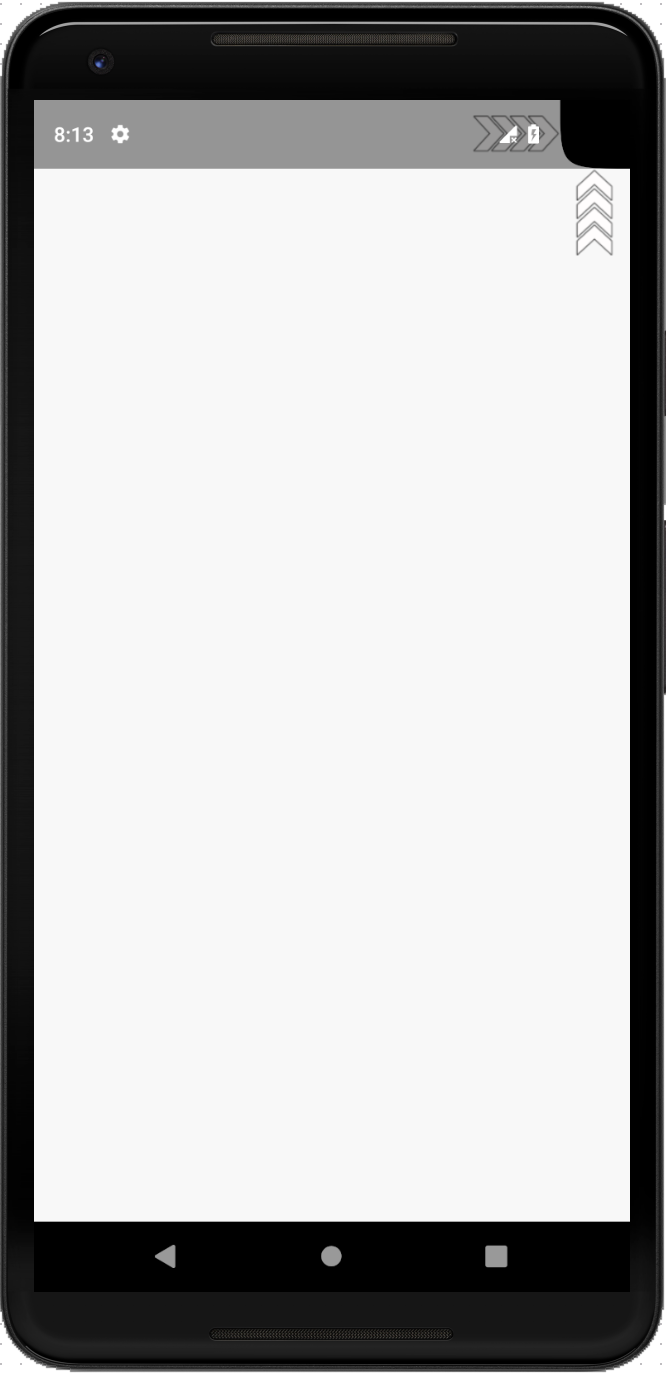 | 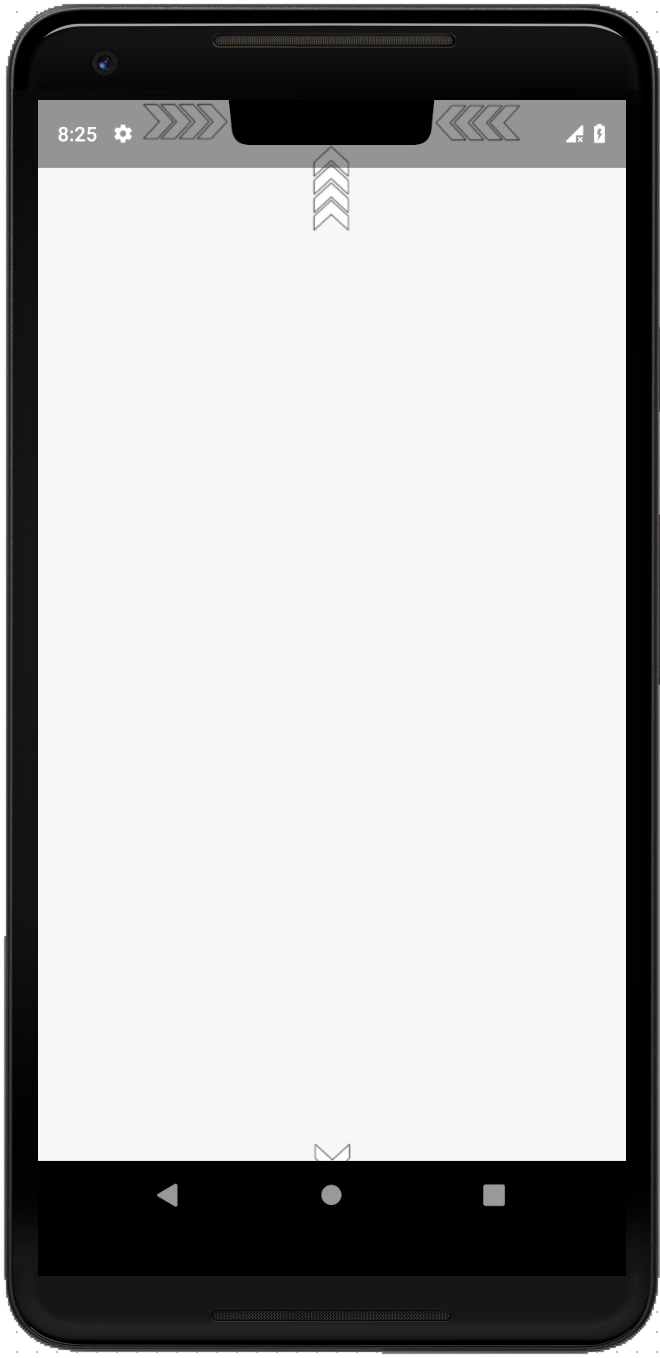 |  |
Landscape
| Corner |
|---|
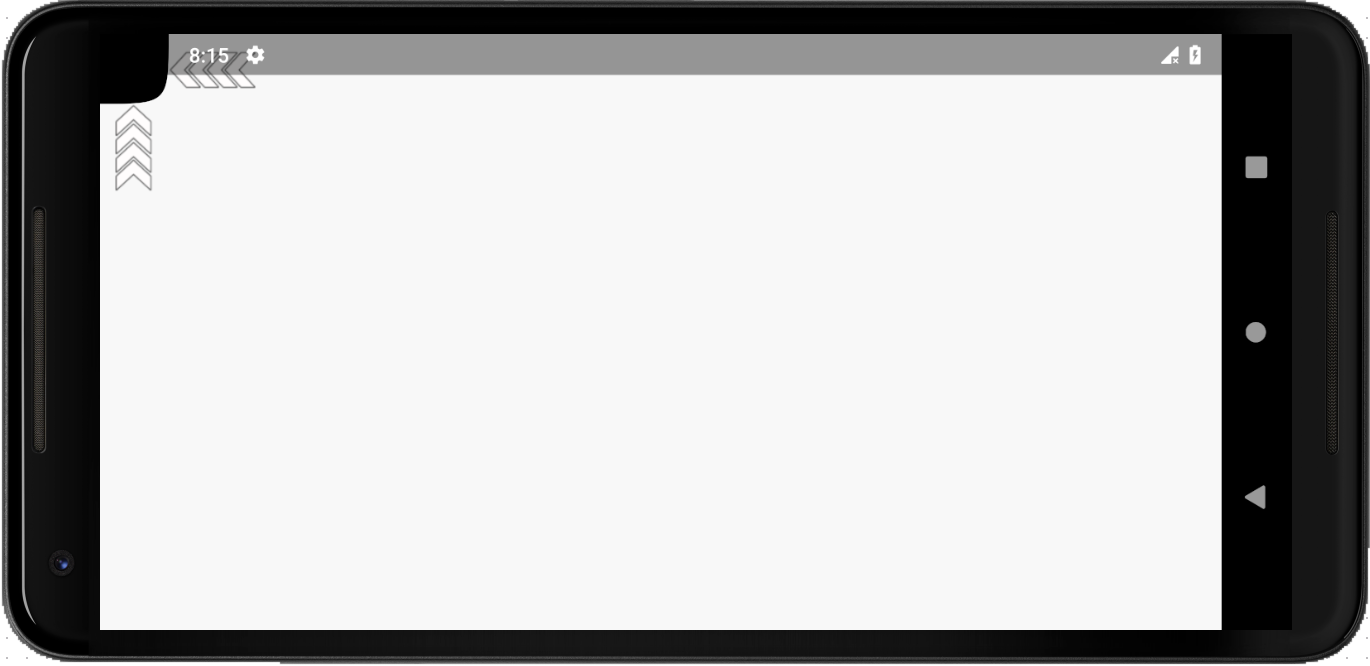 |
| Double |
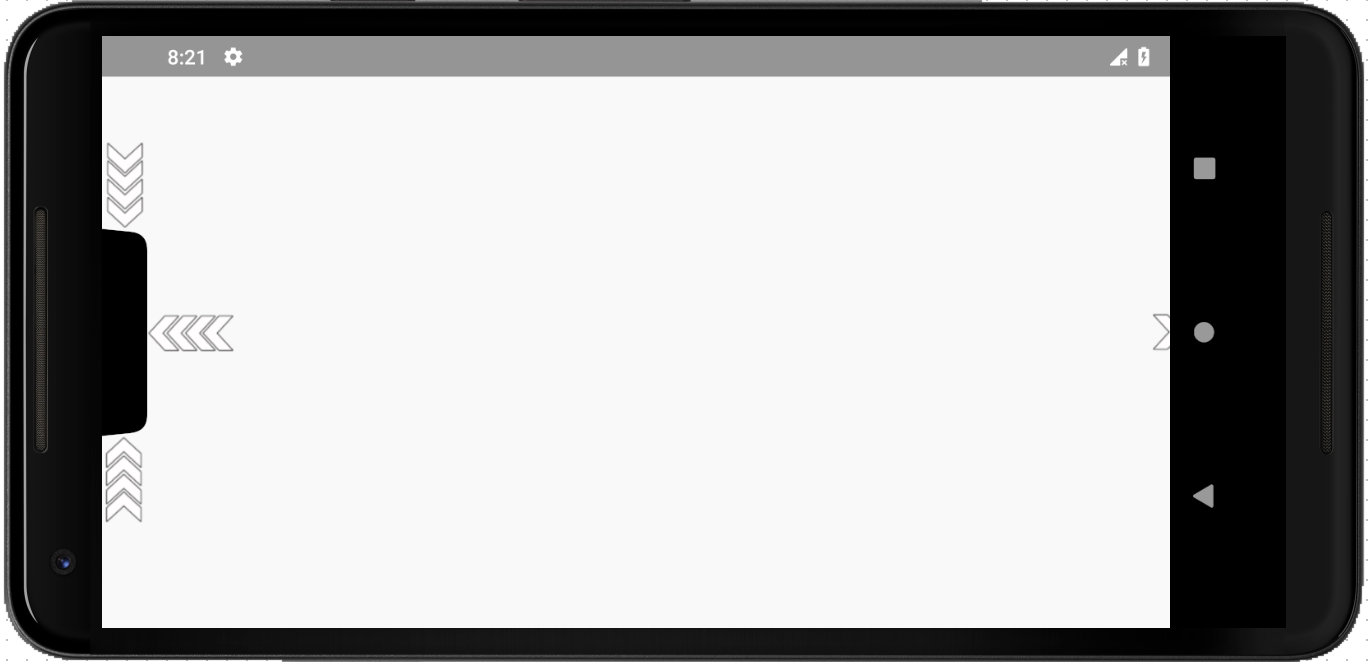 |
| Tall |
 |
So, as we see, the bang will bring us some inconvenience and will force us to make extra gestures / additional manipulations. In principle, everything is solved. The main thing is to start eliminating the shortcomings of the layout as early as possible in order to have enough time to prepare. Good luck with the edits. Do not break your Google Play!