Google ARM Chromebook: HOWTO Install Ubuntu / Fedora / openSUSE
- Tutorial
 Hi% username%!
 No sooner had Google released its new Chromebook for $ 249 with a dual-core 1.7 GHz ARM processor, and then articles began to appear on the network about tests of its impressive performance under Ubuntu, about installing Fedora and openSUSE on it . Well, I, in turn, having got it in my hands, could not resist and also launched GNU / Linux on it.
How to configure dual-boot without losing ChromeOS we read under habrakat.
The work is based on a post by Andrew Wafaa.
Before starting work
Make sure you have:
- Google ARM Chromebook
- a flash drive or memory card with a capacity of at least 8 GB (depending on the selected system);
- Linux computer
- and a little curiosity :)
Developer Mode
First of all, in order to be able to load another OS on a Chromebook, you must activate Developer Mode . Please note, during the activation of Developer Mode, all your data will be destroyed! To do this, hold down the Esc + Refresh buttons at the same time when the Chromebook is off and turn it on by pressing Power. Next, we call Recovery, in it press Ctrl + D, confirm and wait until the system is finished preparing. Upon completion of the preparation, the system will reboot with the developer mode already activated.
Creating an image for recovery (optional)
To create it, you will need another flash drive. To get started, open a special page in the Chromebook: “chrome: // imageburner” and confirm the creation of the image.
Download system
Next, you should decide on your preferences and download one of the options:
- Ubuntu: Linaro Nano (minimum version, console only), LXDE option or Stock Ubuntu Desktop ;
- Fedora: Console (minimum version, console only) or XFCE ;
- openSUSE: JeOS (minimum version, console only) or XFCE
⇒ Personally, I chose Ubuntu Desktop and put it on an SD card. Although all the following steps, in most cases, are suitable one to one (regardless of the medium: flash drive or SD card) for other distributions, or they need minor changes.
Preparing a bootable SD card
Next, create two partitions using parted and gdisk:
sudo parted /dev/sdXcreate a GPT table
mktable gptconfirm (all data from the flash drive will be lost)
yesgo out
quitWe start gdisk
sudo gdisk /dev/sdXand set the sector alignment 4M
x
l
8192
m
Now create two partitions on our SD card (one for the kernel and the other for the root partition):
n
1

+16M
7f00
n
2

w
y
We create the FS and mount it:
sudo mkfs.ext4 /dev/sdX2
sudo mount /dev/sdX2 /mnt
Unpack the previously selected distribution kit:
cd /mnt
sudo tar xvpf ~/Downloads/target_rootfs.tar.bz2
⇒ Warning! Make sure that after unpacking in / mnt / there is a root directory of your distirbutiv.
Providing Chromebook Support
We insert the card into the running chromebook, make sure that ChromeOS sees two sections, and press Ctrl + Alt + T. In the window that opens, execute the shell command and get into the chromebook console. Next, run the following commands:
cd /media/removable/External\ Drive\ 1
sudo cp -r /lib/firmware/* lib/firmware
sudo cp -r /lib/modules/* lib/modules
sudo vi usr/share/X11/xorg.conf.d/50-touchpad.conf
>> Section "InputClass"
>> 	Identifier "touchpad"
>> 	MatchIsTouchpad "on"
>> 	Option "FingerHigh" "5"
>> 	Option "FingerLow" "5"
>> EndSection
sudo cp -r /tmp/chromeos-rootfs/usr/share/alsa/ucm/* usr/share/alsa/ucm
Kernel and bootloader
cd /tmp
echo "console=tty1 debug verbose root=/dev/mmcblk1p2 rootwait rw" > /tmp/config
vbutil_kernel --pack /tmp/newkern --keyblock\
/usr/share/vboot/devkeys/kernel.keyblock --version 1 --signprivate\
/usr/share/vboot/devkeys/kernel_data_key.vbprivk\
--config=/tmp/config --vmlinuz /boot/vmlinuz-3.4.0 --arch arm
dd if=/tmp/newkern of=/dev/mmcblk1p1
Activate the ability to boot from removable media
To do this, run the following two commands:
crossystem dev_boot_usb=1
cgpt add -i 1 -S 1 -T 5 -P 10 -l KERN-A /dev/mmcblk1
Loading
Now, having completed all the above steps, you can boot into the newly prepared system. During the boot of the Chromebook, when there is a warning on the screen that the Developer Mode is on, you can press Ctrl + U to boot from a USB flash drive (memory card) or Ctrl + D (or just wait 30 seconds) to load regular ChromeOS.
Work impressions
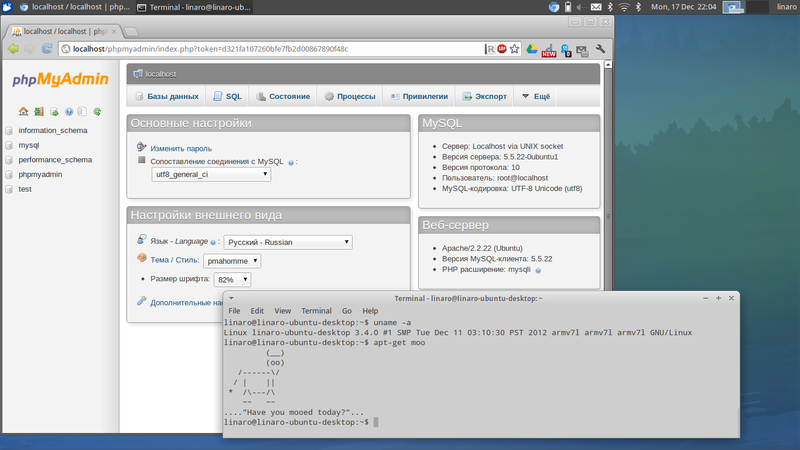
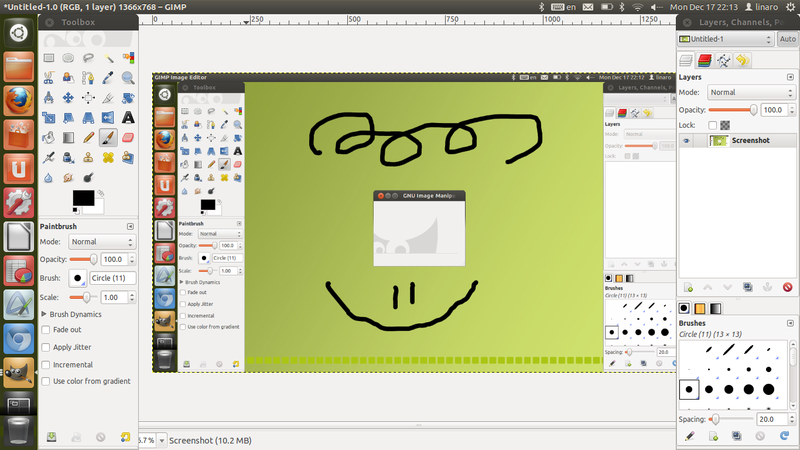
First of all, it is worth noting that so far not everything works correctly. For example, hardware acceleration of graphics is not implemented at the moment and there are some difficulties with sound. In general, according to my feelings, the installation of applications and their cold start are rather slow. But after starting the application, they work pretty well. So Firefox, Chromium, Libre Office were tested. In addition, without a hitch, the LAMP application stack was installed and earned. Besides Unity, LXDE and XFCE have been successfully downloaded and verified. The latter, as for me, is much more comfortable for working on a chromebook.
LAMP, Chromium, Terminal: Unity, GIMP, Libre Office Writer recursion :


Additions
According to reviews on the Internet, to turn on the sound in a loaded distibutiv advise
alsaucm -c DAISY-I2SThe following resources may also be useful to you:
