October 9, 2012 at 13:24
Building Android x86
 There are many tasks that require rebuilding the kernel and the Android operating system as a whole. For example, creating and debugging your own modules, enabling support for system profiling, and simply testing your applications on the new version of Android.
 The ability to run Android x86 inside the VirtualBox virtual machine allows enthusiasts and creators of firmware to delve into the settings of the system, configure and rebuild the kernel, and at the same time not "brick" the real device. VirtualBox provides the ability to use OS debugging tools familiar to Linux developers. For ordinary Android application developers, an emulator that uses Intel Hardware Accelerated Execution Manager technology is great. (more details can be found here )
This article provides some practical tips on building an Android x86 image to run under the VirtualBox virtual machine and building an emulator. The Android source code is taken from the official repository of the AOSP (Android Open Source Project) project, and an adapted version of the Linux 2.6 kernel from Intel is used as the kernel.
Setting the build environment
To build Android, you need a 64 bit version of Linux. Another important point: pay attention to the version of GCC that is installed on the system. Google supports GCC version 4.4 and higher. Also on the system must be installed Java implementation from Oracle.
Installing additional dependencies for Ubuntu 12.04:
sudo -i
apt-get update
sudo apt-get install git-core gnupg flex bison gperf build-essential \
  zip curl libc6-dev libncurses5-dev:i386 x11proto-core-dev \
  libx11-dev:i386 libreadline6-dev:i386 libgl1-mesa-glx:i386 \
  libgl1-mesa-dev g++-multilib mingw32 openjdk-6-jdk tofrodos \
  python-markdown libxml2-utils xsltproc zlib1g-dev:i386
Set a symlink to resolve the name conflict:
sudo ln -s /usr/lib/i386-linux-gnu/mesa/libGL.so.1 /usr/lib/i386-linux-gnu/libGL.so
Download the source tree
Install Repo
Repo is a repository management utility that simplifies working with Git for Android. More information can be found here (http://source.android.com/source/version-control.html)
To install, initialize and configure Repo, follow these steps:
• Make sure you have the bin directory in your home directory and it is written in PATH:
mkdir ~/bin
PATH=~/bin:$PATH
• Download the Repo script and set execution rights:
curl https://dl-ssl.google.com/dl/googlesource/git-repo/repo > ~/bin/repo
chmod a+x ~/bin/repo
Initializing a Repo Client
After installing Repo, configure access to the Android source repositories:
• Create an empty directory for the source files and go to it. For example, it might look like this:
mkdir aosp
cd aosp
• Run the repo init script to update the version of Repo itself.
repo init -u https://android.googlesource.com/platform/manifest
This command will connect the master branch from the Android source tree. You can specify any other using the -b switch:
repo init -u https://android.googlesource.com/platform/manifest -b android-4.1.1_r6
To view all available branches, enter the command:
git --git-dir .repo/manifests/.git/ branch -a
We are interested in the latest versions of Android from Google:
- Jelly Bean: remotes / origin / android-4.1.1_r6
- Ice Cream Sandwich: remotes / origin / android-4.0.4_r2.1
You can choose any one to your taste, further steps will not differ. To demonstrate the build process for VirtualBox, take the version of Jelly Bean (JB).
If initialization is successful, you will see a message stating that Repo is initialized in your directory and the .repo folder will appear in it
Upload files
To download the source files from the repository to your working directory, run the command:
repo sync -j 16
Initial synchronization may take more than an hour.
Kernel assembly
Android is primarily designed for gesture-controlled devices and it does not support a mouse by default. Therefore, as an example, we will rebuild the kernel from source with mouse support enabled.
Create a directory to store the kernel sources:
mkdir ~/android_kernel
cd ~/android_kernel
We use a pre-prepared version of the kernel from Intel:
wget http://software.intel.com/sites/landingpage/android/Intel_x86_sysimg_2.3.7_Source_Files.zip
unzip Intel_x86_sysimg_2.3.7_Source_Files.zip
tar -xvf kernel_sdk_x86.tar.gz
Let's go to the kernel directory:
cd kernel
Now we have the kernel sources. It is necessary to modify the configuration file and rebuild. To reduce the time to fully configure the kernel, we will use the configuration file that we prepared for the developers. An important point - do not forget to specify the architecture for which the kernel is being built, in our case it is x86.
cp arch/x86/configs/vbox_defconfig .config
make ARCH=x86 menuconfig
After a few seconds, the graphical kernel configuration menu will load. Use the up, down arrows to move through the menu items, Enter to enter the submenu. Everything is exactly the same as with the regular Linux kernel.
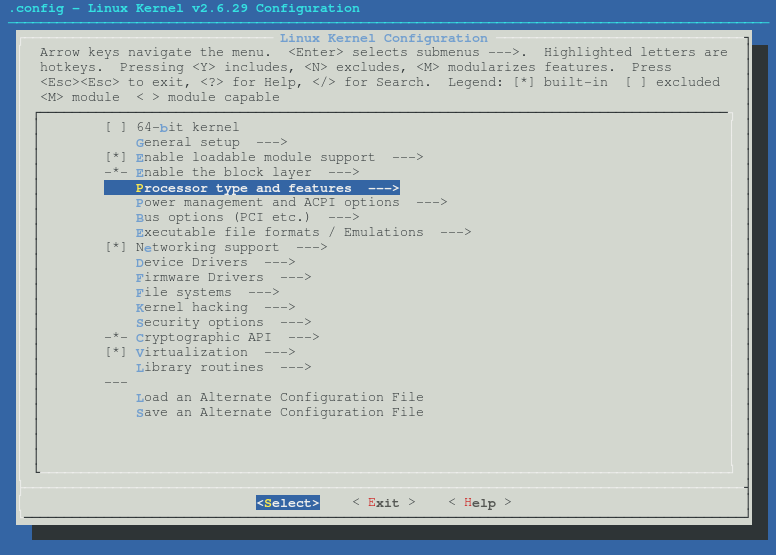
To enable mouse support:
• Go to “Device Drivers”
• Select “Input device Support”
• Check “Mice”
You can go to the “Mice” submenu and see additional driver settings.
Then exit the kernel configuration menu. This can be done with a few clicks on “Esc”. Remember to save the settings when the configuration menu prompts you to do this.
Having made the necessary kernel settings, we will assemble it. This will not take much time, especially if you are using a multi-core machine - you can specify the make command option: -j N, where N is the number of cores (for example, make -j 32 was used to write the article).
make ARCH=x86 –j 32
Upon successful compilation, you will see a message:
Kernel: arch/x86/boot/bzImage is ready
The path to the new kernel is indicated on the last line.
Kernel spoofing
The path to the kernel that will be used in the assembly for VirtualBox can be determined as follows:
grep "LOCAL_KERNEL :=" ~/aosp/build/target/board/vbox_x86/device.mk
The following should be displayed:
LOCAL_KERNEL := prebuilt/android-x86/kernel/kernel-vbox
Copy bzImage using the found path:
cp ~/kernel/arch/x86/boot/bzImage ~/aosp/prebuilt/android-x86/kernel/kernel-vbox
Android build
Set the build environment:
cd ~/aosp
. ./build/envsetup.sh
Now everything is ready to begin compiling the Android source. The first step is to specify the purpose for the assembly:
lunch vbox_x86-eng
After running the command, you will see information about the upcoming build:
============================================
PLATFORM_VERSION_CODENAME=REL
PLATFORM_VERSION=4.1.1
TARGET_PRODUCT=vbox_x86
TARGET_BUILD_VARIANT=eng
TARGET_BUILD_TYPE=release
TARGET_BUILD_APPS=
TARGET_ARCH=x86
TARGET_ARCH_VARIANT=x86
HOST_ARCH=x86
HOST_OS=linux
HOST_OS_EXTRA=Linux-2.6.32-131.0.15.el6.x86_64-x86_64-with-redhat-6.1-Santiago
HOST_BUILD_TYPE=release
BUILD_ID=JRO03R
OUT_DIR=out
============================================
Then you need to start the source assembly with the make command. It’s good practice to keep the build log, this can be done using the tee utility.
make –j 16 | tee vbox_build.log
The assembly process can take considerable time, specific numbers depend on the power of the central processor and the amount of RAM in the machine. On the system that was used to prepare the article, this took about an hour. The recommended number of threads for assembly can be determined from the calculation of 2GB of RAM per thread.
Upon successful compilation, the last line of output will contain the path and size of the image:
Install system fs image: out/target/product/vbox_x86/system.img
out/target/product/vbox_x86/system.img+ total size is 268435456
Next, you need to build a boot image for VirtualBox:
make installer_vdi
If the assembly was successful, the entry should appear in the console:
Done with VirtualBox bootable installer image -[ out/target/product/vbox_x86/installer.vdi ]-
Configure VirtualBox
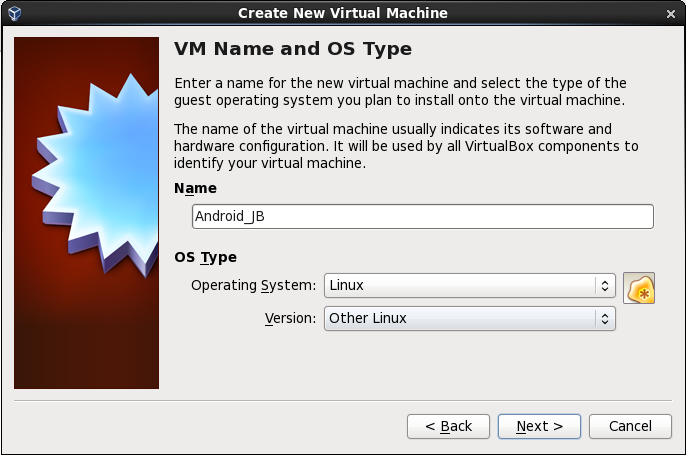
Now let's set up VirtualBox. You need to create a new virtual machine, let's call it “Android_ICS”, select Linux as the operating system, and set the version to Other as the most suitable for Android.
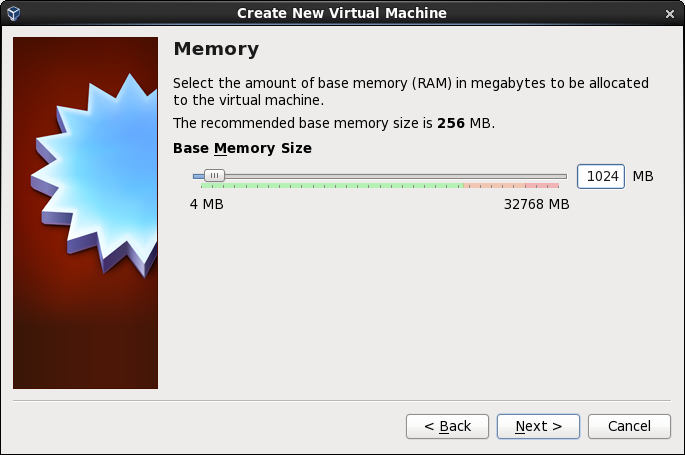
The next step is the allocation of RAM. 512 megabytes or more is recommended. In our case, it will be a gigabyte.
Next, configure the size of the hard disk. The main thing is that after the setup is complete, all VirtualBox hard drives are connected to the IDE controller.
Install the bootable Android image as the second partition of our virtual machine.
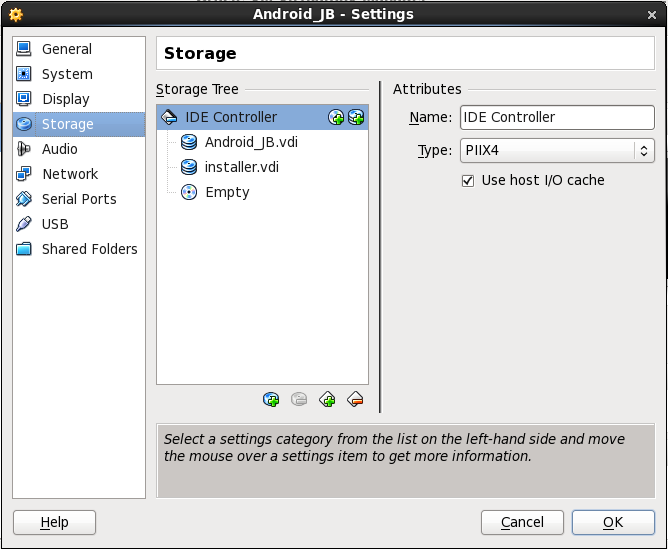
At the first start of the virtual machine, we need to start the installation of Android. During startup, press F12 to enter the BIOS settings menu. Select 2 “Primary Slave”, that is where the installation image of Android is contained.
In case of successful installation, you will see "Done processing installer config". Sometimes during the first installation errors may occur, just run it again. Then reboot the virtual machine into your newly installed Android!
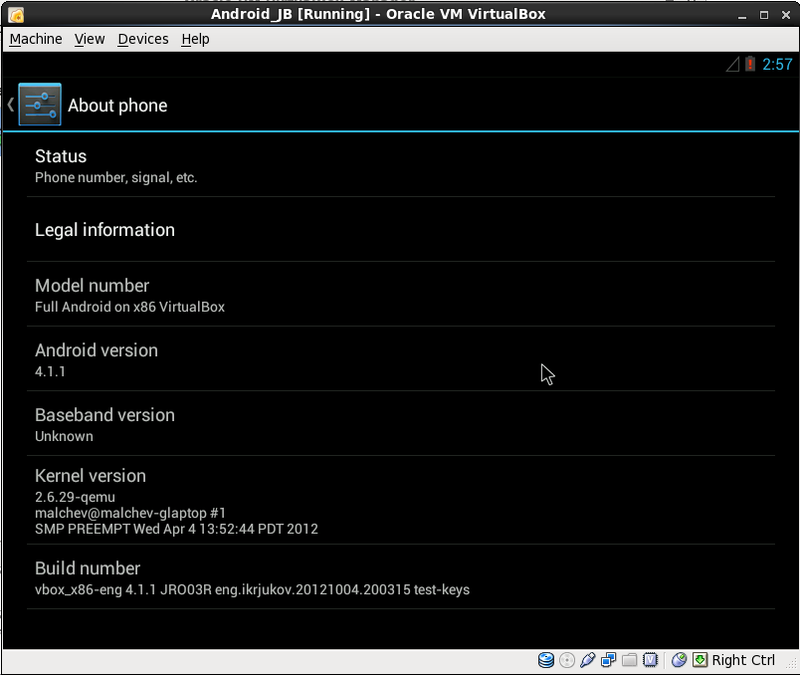
Emulator Jelly Bean
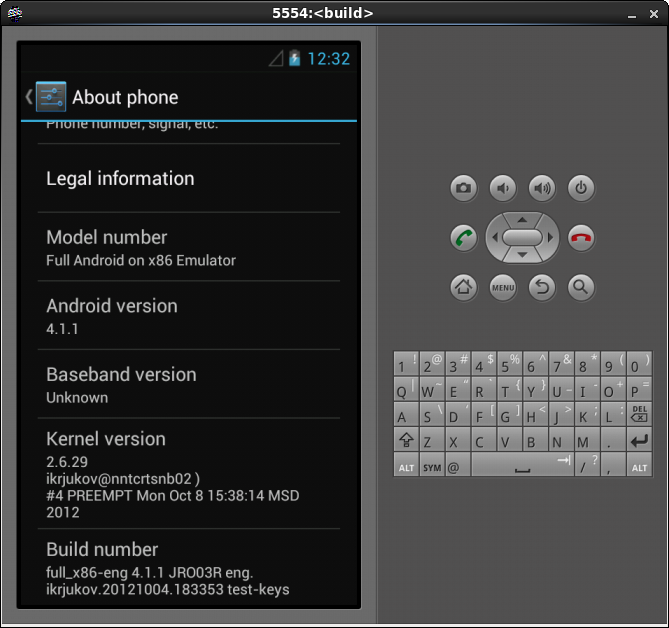
The build of the emulator is not much different from the build of the version for VirtualBox. If you already have the source codes, then proceed with the assembly from the initialization step of the environment. For the purity of the experiment, the process of building an emulator will be outlined from the very beginning. Therefore, we will create a separate directory for Jelly Bean Emulator and repeat the familiar steps.
mkdir ~/jb
cd ~/jb
Repository Initialization
repo init -u https://android.googlesource.com/platform/manifest -b android-4.1.1_r6
Download Source
repo sync -j 16
Environment initialization
. ./build/envsetup.sh
Emulator Build Selection
lunch full_x86-eng
If successful, you will see:
============================================
PLATFORM_VERSION_CODENAME=REL
PLATFORM_VERSION=4.1.1
TARGET_PRODUCT=full_x86
TARGET_BUILD_VARIANT=eng
TARGET_BUILD_TYPE=release
TARGET_BUILD_APPS=
TARGET_ARCH=x86
TARGET_ARCH_VARIANT=x86-atom
HOST_ARCH=x86
HOST_OS=linux
HOST_OS_EXTRA=Linux-2.6.32-131.0.15.el6.x86_64-x86_64-with-redhat-6.1-Santiago
HOST_BUILD_TYPE=release
BUILD_ID=JRO03L
OUT_DIR=out
============================================
We start assembly:
make –j 16 | tee emulator_build.log
While the compilation process is in progress, copy the configuration file and build the kernel for the emulator.
cd kernel
cp arch/x86/configs/goldfish_defconfig .config
make ARCH=x86 -j16
Now emulator assembly is complete.
The easiest way to run it:
emulator
For example, you can run it with a newly-built kernel, with a resolution of 480x800, 512 MB of RAM and hardware graphics acceleration enabled.
emulator -kernel ~/kernel/arch/x86/boot/bzImage -skin WVGA800 -memory 512 -gpu on
You can read more about the capabilities and settings of the emulator here
Conclusion
This article describes how to install the Android x86 version of Jelly Bean for VirtualBox, building a custom kernel and emulator. There are many different tricks and approaches to building and configuring various versions of Android that are left out of this article. Here was laid out the basic material in order to begin its journey into the world of OS Android.