SharePoint 2013 Farm on Windows Azure SQL Server 2012
- Tutorial

This is the continuation of our article series on creating a SharePoint 2013 farm in Windows Azure. You can find the first chapters at the following links:
- SharePoint 2013 Farm on Windows Azure AD DC
- SharePoint 2013 Farm on Windows Azure SQL Server 2012 (this article)
- SharePoint 2013 Farm on Windows Azure SharePoint 2013
This article discusses how to add SQL Server 2012 to the domain and the next steps to configure it.
Create a virtual machine with SQL Server 2012
In the previous article, we looked at creating a virtual machine through a portal; in this, we restrict ourselves to creating through PowerShell.
# Подписки к Azure
Get-AzureSubscription | Select SubscriptionName
$subscriptionName = "ВАША-ПОДПИСКА"
$storageAccount = "ВАША-АККАУНТ-ХРАНИЛИЩА"
Select-AzureSubscription $subscriptionName
Set-AzureSubscription $subscriptionName -CurrentStorageAccount $storageAccount
# Параметры облачного сервиса
$serviceName = "SP2013-Service"
$serviceLabel = "SP2013-Service"
$serviceDesc = "Cloud Service for SharePoint 2013 Farm"
# Список всех образов виртуальных машин
Get-AzureVMImage | Select ImageName
$sqlimage = 'MSFT__Sql-Server-11EVAL-11.0.2215.0-08022012-en-us-30GB.vhd'
$vnetname = 'SP2013-VNET'
$subnetName = 'SP2013Farm-Subnet'
$ag = 'SP2013-AG'
# IP адрес контроллера домена
$primaryDNS = '192.168.1.4'
# Группы доступности
$avsetsql = 'avsetsql'
# Настройки домена
$domain = 'contoso'
$joindom = 'contoso.com'
$domuser = 'administrator'
$dompwd = 'pass@word1'
$advmou = 'OU=AzureVMs,DC=contoso,DC=com'
# Создаем SQL Server1
$size = "ExtraSmall"
$spsql1 = New-AzureVMConfig -Name 'SP-SQL1' -AvailabilitySetName $avsetsql -ImageName $sqlimage -InstanceSize $size |
        Add-AzureProvisioningConfig -WindowsDomain -Password $dompwd -Domain $domain -DomainUserName $domuser -DomainPassword $dompwd -MachineObjectOU $advmou -JoinDomain $joindom |
        Add-AzureDataDisk -CreateNew -DiskSizeInGB 200 -DiskLabel 'data' -LUN 0 |
        Set-AzureSubnet $subnetName
$dns1 = New-AzureDns -Name 'dns1' -IPAddress $primaryDNS
New-AzureVM -ServiceName $serviceName -ServiceLabel $serviceLabel `
            -ServiceDescription $serviceDesc `
            -AffinityGroup $ag -VNetName $vnetname -DnsSettings $dns1 `
            -VMs $spsql1
Once the preparation is complete, connect to the virtual machine using the Remote Desktop Services and make sure that it was automatically joined to your domain.
If it doesn’t work, connect manually.
Customize drives
The script above adds a 200 GB data disk.
Connect this disk to the operating system as described in the previous article.
Next, let's set up the default location for the database. To do this, start SQL Server Management Studio, right-click the server name, select Properties , and database options ( the Database the Settings ) .
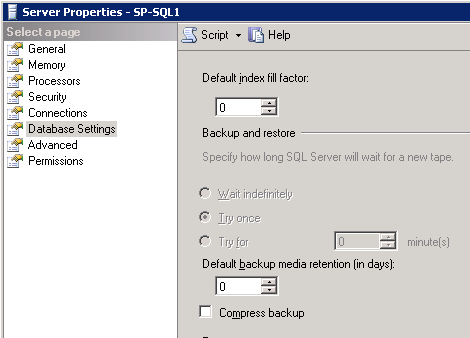
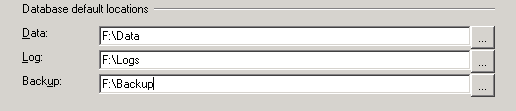
Select new drives for folders with data, logs and backups.
And the press about the K .
Updating network settings in SQL Server
We will configure protocols for SQL Server and ports in the Windows firewall.
We configure protocols
Launch SQL Server Configuration Manager .
Expand the SQL Server Network Configuration node and select the Protocols for MSSQLServer protocol .
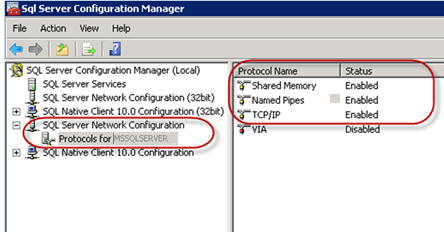
Ensure that shared memory, named pipes, and TCP / IP are enabled.
Configure port
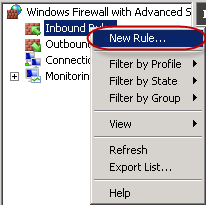
Launch the firewall in high security mode.
Create a new rule for incoming connections.
At the first step, select the type Port
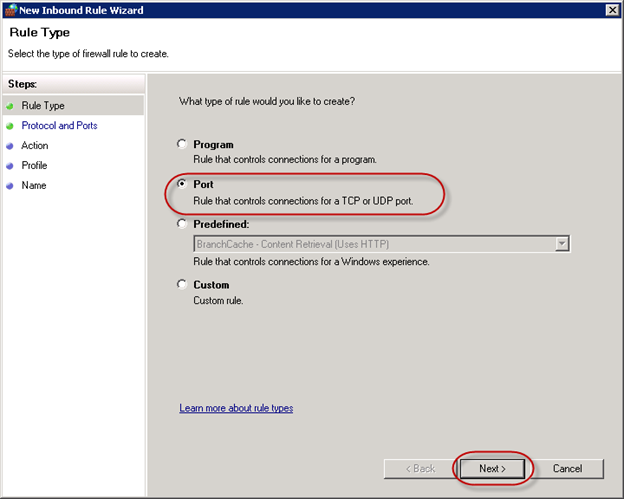
And specify the port 1433.

Select Allow all connections.
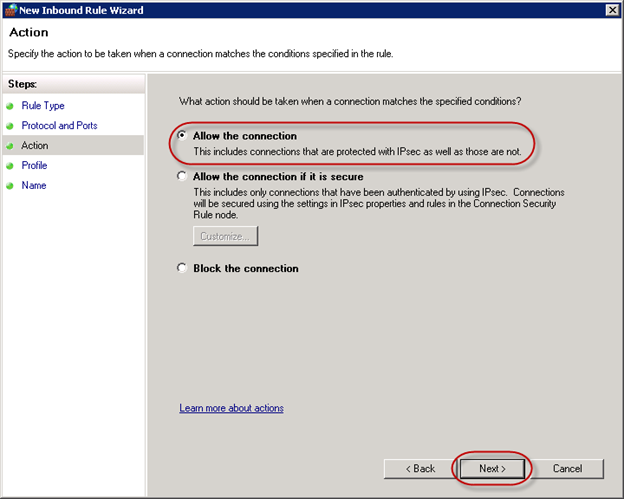
On the next page, leave the default values, and then specify the name of the rule, for example, SQLServerRule .
So we prepared SQL Server 2012 for the SharePoint 2013 farm.