Fast working environment for web developers (Vagrant and PHPStorm)
How to quickly create a working environment for web developers or set up a development environment for working or learning HTML, CSS, PHP in Windows.
(article published on Linkedin )

This is my translation of an article from the author of books on assembly and reversing programs. Now it is mainly published in the USA. I think useful for beginners and not only.
Novice programmers always wonder where to start learning how to create websites? Searching the Internet provides a lot of diverse information, but unfortunately it only confuses novice developers. Having more than 5 years of teaching experience, I saw many times how students, taking breaks in computer games and deciding to become web developers, tried to set up development environments. They started sorting out programs for layout. They grabbed for Sublime Text, Notepad ++, Visual Studio Code, NetBeans, or PHPStorm. We tried to install WAMP (stands for Windows, Apache, MySQL and PHP) platforms such as Denver, Xampp, Open Server and many others on the local computer. But since in the head of a novice developer, there is no systematic knowledge, no tuning experience,
This article was born because of explaining for many years to each student how to do everything correctly and conveniently.
Once again I want to say that we will configure the working environment in the Windows system to study the creation of websites in HTML, CSS, and their links with PHP. We will call such a computer a worker so that beginning web developers get used to the idea that their computer is their source of income.
Getting started
I think that once you decide to become a web developer, the very first thing you need to do is install Git on your computer. Git is a distributed version control system. Take my word for it that this system will save you more than once, especially during the moments when you realize that something went wrong. Thanks to git, you can clearly control when it happened and git will give you the opportunity to roll back to the previous version of the file being edited. Conveniently, right?
To install, download and install Git for Windows ( https://gitforwindows.org/ ), leaving all the paths and default settings. After installation, restart the computer.
Now you can use Git using the command line or PowerShell.
I adhere to the rule that you only need to install git and IDE on your work computer, which stands for “integrated development environment”. Everything else should work in the server version. Set yourself a variety of WAMP can not. I emphasize that I am talking about WAMP assemblies. I will explain my point of view. WAMP assemblies are convenient and good, but only when you clearly understand what you are doing on the server and on the site. Beginners simply because of their experience so far can not. Yes, in many forums where web developers, including Full Stack Developers, give advice to beginners, I often read that WAMP assemblies are very convenient. But according to such advice, you can immediately distinguish a professional from someone who just took his first steps towards web development.
And the thing is this. The environment in the WAMP assembly is quite different from the real environment that the web-hosters have, on which your finished website will be located. The web-hosters environment is usually a system based on UNIX-like systems (Linux, CentOS, etc.), rather rarely it is an IIS web server, and using WAMP builds we get a windows environment that has nothing to do with real environment does not have. In my practice, I witnessed when WAMP-assemblies interfered with people. For example, a novice web developer who develops websites on a home computer with a WAMP assembly came to our team. He had a simple task to design a page from a ready-made layout and make a working feedback form on it. A few days later he brings a ready-made solution. We upload it to the test server, which is an exact copy of the production server and see that the form does not work, and some of the pictures are not shown. Yes, experienced developers immediately understand what's the matter, but the beginner doesn’t understand it and has a panic. He immediately says: "I do not understand, everything works in my house." I ask him to check where the page loads the images, as well as check the php script for absolute paths. When he fixes it, everything works. But this is a simple feedback form, and if this is an online store site, 400 pages? Or another example. I had to somehow deal with the deployment of the site, which the company ordered from freelance - the developer. The developer made a business card site for one company. When this developer showed a ready order to a client on his working laptop, everything worked well, but when this site was transferred to a hosting provider, the site did not work and some of the pages simply did not show up. Experienced developers also understand what's the matter, but this is not yet given to beginners, due to the lack of necessary experience. It turned out that there was no support for .htaccess in windows, prescribing the necessary directives for CMS to work, everything worked. But it was just a business card site, and if it were an online store with admin panel, closed sections, etc.? In order to avoid all this, I recommend to all my students to use if not the full 100% production environment, then at least very close to it, but they cannot provide this WAMP assembly. It turned out that there was no support for .htaccess in windows, prescribing the necessary directives for CMS to work, everything worked. But it was just a business card site, and if it were an online store with admin panel, closed sections, etc.? In order to avoid all this, I recommend to all my students to use if not the full 100% production environment, then at least very close to it, but they cannot provide this WAMP assembly. It turned out that there was no support for .htaccess in windows, prescribing the necessary directives for CMS to work, everything worked. But it was just a business card site, and if it were an online store with admin panel, closed sections, etc.? In order to avoid all this, I recommend to all my students to use if not the full 100% production environment, then at least very close to it, but they cannot provide this WAMP assembly.
I have two favorite environments in which I work, this is NetBeans and PHPStorm. Who is more like, you decide. I recommend to put both and try to work in them. NetBeans is free, PHPStorm costs $ 89 for an individual developer, but there is a 30-day trial so you can look at it at work.
I will tell you about the configuration using the example of IDE PHPStorm. Install on our work computer IDE PHPStorm by downloading it from the official site . There is nothing complicated, it's just a windows-program, leaving all the paths by default. Installed.
As I said, everything should be developed in an environment that is identical or very close to the hoster. To do this, we need to install VirtualBox on our computer by downloading it from the official site . Here, too, there is nothing difficult, we set up and reboot the computer.
Then there are two ways of development.
The first way is to create a virtual machine manually inside VirtualBox, install a Linux Server into it, raise Apache, MySQL and PHP on the server. Further, for debugging, we will also need to install Xdebug for PHP debugging in the same place, having dealt with dependencies inside a virtual machine and also take into account dependencies with our working folder on the host machine. When you gain experience, it's not as difficult to do as it seems, but for those who are just taking their first steps towards WEB development, these are all unnecessary difficulties.
Therefore, there is a second way of development. We install Vagrant on our computer by downloading it from the official site . Vagrant is an application that helps you manage virtual machines. Installed? If you get an error about the incompatibility of PowerShell, update the Management Framework . Installed? Fine.
Next, download the archive with the vagrant configuration, which I prepared on the basis of "Ubuntu Server 16.04" and which I propose to use to my students. We create a working folder in which we will create our site. For example, this will be the “webdev” folder on the “C” drive. How to do it? For those who have already installed Git, open the "C" drive in the explorer and right-click and select "Git Bash Here" .
Go 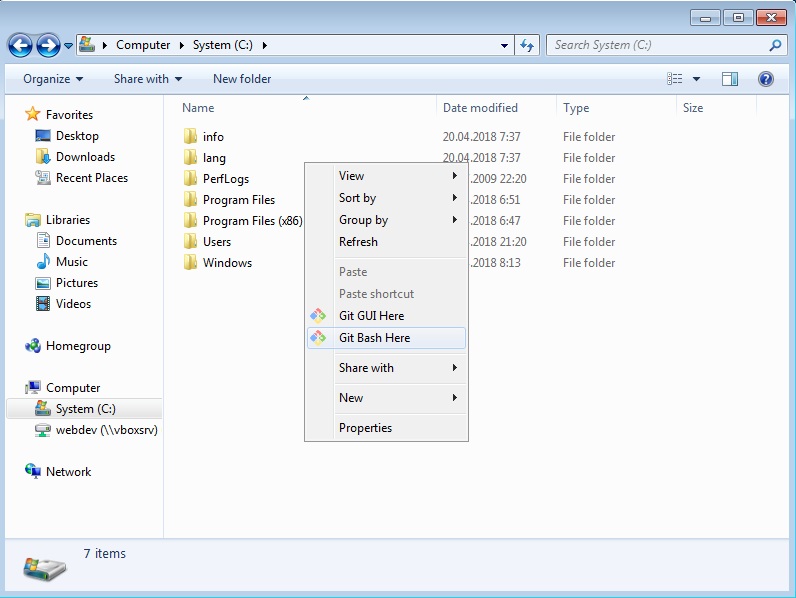
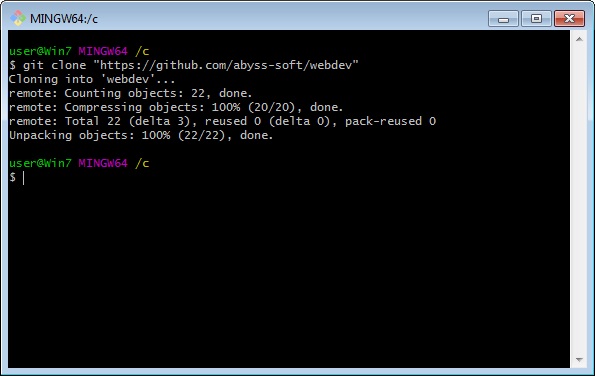
A console will open, in which we enter the command: git clone https://github.com/abyss-soft/webdev and press "enter".
After that, you have our ready-made working folder on the disk with this file tree:
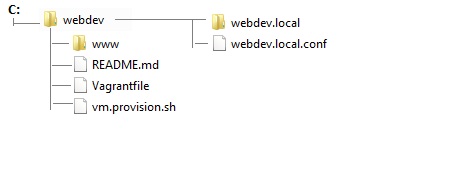
Please note that the folder with our website that we will develop is located along this path: C: \ webdev \ www \ webdev.local
In the future, you will be able to replace all the files in this folder with the files of your site and thus obtain a ready development environment for your site.
I also recommend that you register at https://github.com and make the “Fork” of my “ https://github.com/abyss-soft/webdev ” repository , thus you save it yourself and it will always remain with you.
For those who don't want to install git for themselves, here are the direct links:
- Direct link: https://github.com/abyss-soft/webdev/archive/master.zip
- Link to github: https://github.com/abyss-soft/webdev
- Link to Vagrant Box: https://app.vagrantup.com/alex-panov/boxes/webdev
Next, run the command line interpreter, to do this, press Win + R (press so - hold down the button with the Windows logo to the left and right of the space after the viola) and without releasing it, press R) and enter the cmd command (without quotes). In the window that opens, we go to our created folder by entering the cd c: \ webdev command .
Go to the folder, enter the command vagrant up . The console does not close. When we work and we need to shut down the virtual server, we will enter the vagrant halt command .
The first launch can take a lot of time - the image will be downloaded, on subsequent launches this step will not, the image will cling from the cache. Next, start the virtual machine.
In the virtual machine itself, we have the PHP.ini file located at the address /etc/php/7.0/apache2/php.ini and having the following setting:
---------- Working: -------
[xdebug]
zend_extension = "/ usr / lib / php / 20151012 / xdebug.so"
xdebug.remote_autostart = on
xdebug.remote_enable = on
xdebug. remote_connect_back = on
xdebug.remote_port = 9000
xdebug.remote_host = 192.168.33.31
xdebug.idekey = PHP_IDE_CONFIG
Where xdebug.remote_host = 192.168.33.31 is the address of the host computer where we run PHPStorm.
Waiting for it to load, we will write the following line in the hosts file (it is C: \ Windows \ System32 \ drivers \ etc): 192.168.33.33 webdev.local
Next, launch your favorite browser and follow the link webdev.local
If everything went as expected, we will see a page with the text “PHP calculating:” , showing that our test site is loaded into our virtual machine on the server and is ready to work.
Next we need to connect a remote PHP interpreter to PHPStorm.
To do this, run PHPStorm and create a new project:
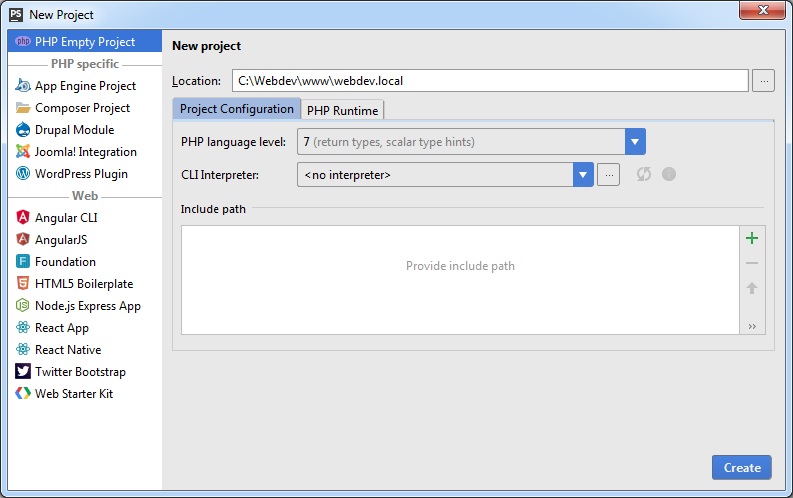
The program will tell us that files already exist in this folder and ask if we want to create a project in this folder:

Click "Yes"
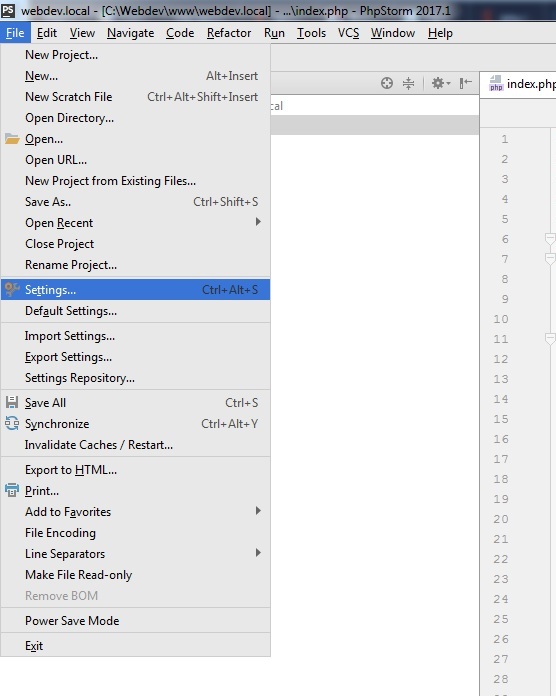
Next, click in the menu "File" -> "Settings ..":
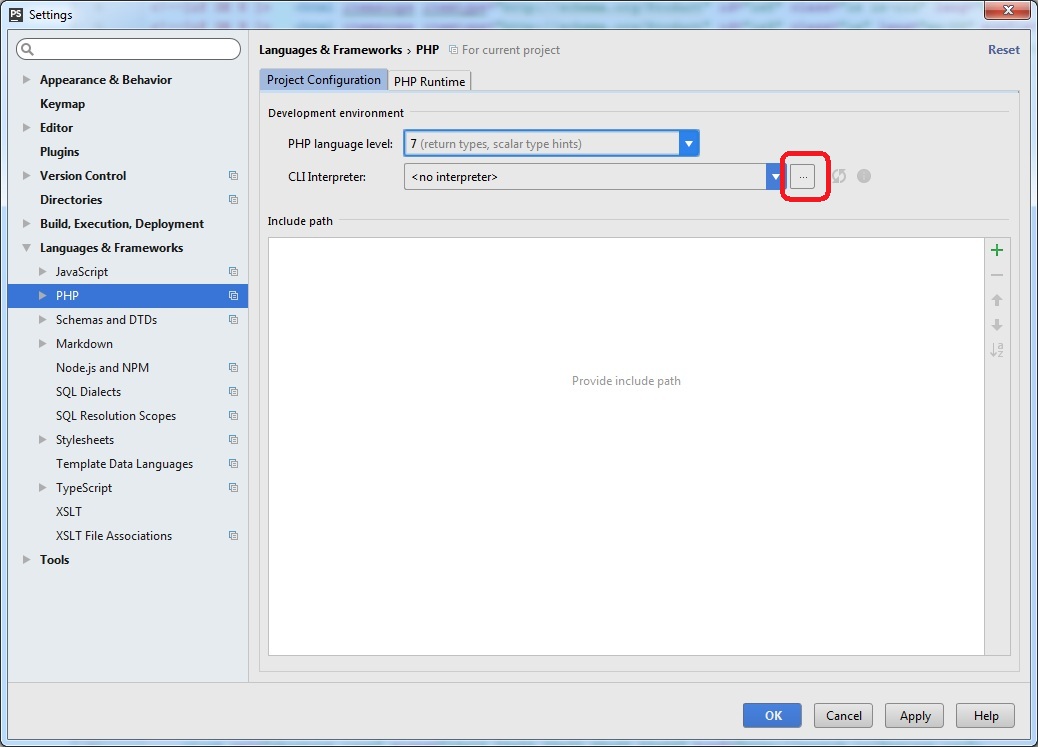
and go to the Languages & Frameworks section and in this section select the PHP option. In this section, you must assign an interpreter for the IDE in the CLI Interpreter section by pressing the [...] button
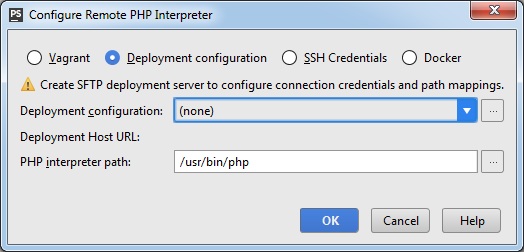
In the window that opens, click on the green "+" specify any name, such as «Remote PHP 7" and select the item the Remote ... .
In the window that appears, select Vagrant and specify the path to the file "C: \ webdev"
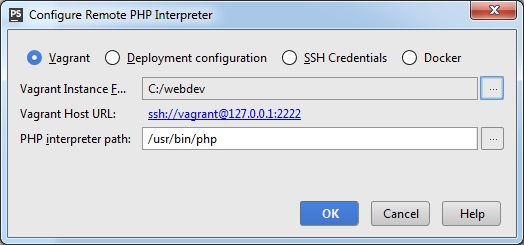
And click "OK".
This window appears in which you can see the PHP version and the debugger version:

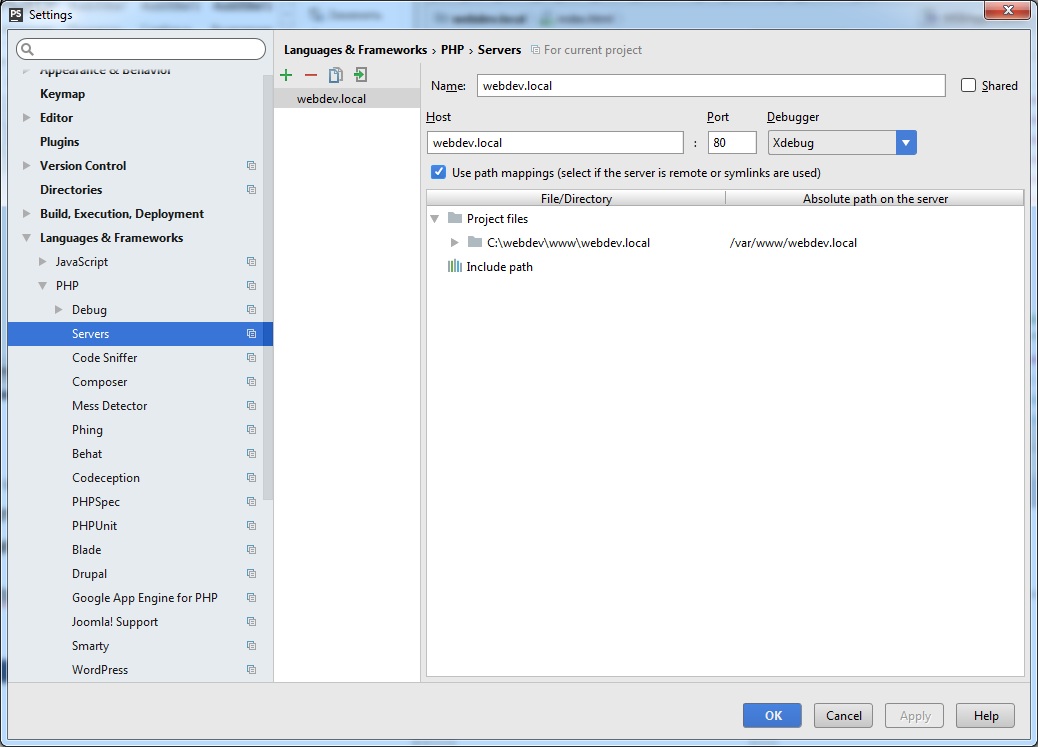
Next, in the PHP section, select the Servers item (PHP -> Servers) . Click on the green “+” and enter any name, for example “webdev.local” and the host name: “webdev.local”. The port number is “80” and the debugger is “XDebug”. Be sure to include a tick Use path mappings ... specify the matching paths:
| File / Directory | Absolute patch on the server |
|---|---|
| C: \ webdev \ www \ webdev.local | /var/www/webdev.local |
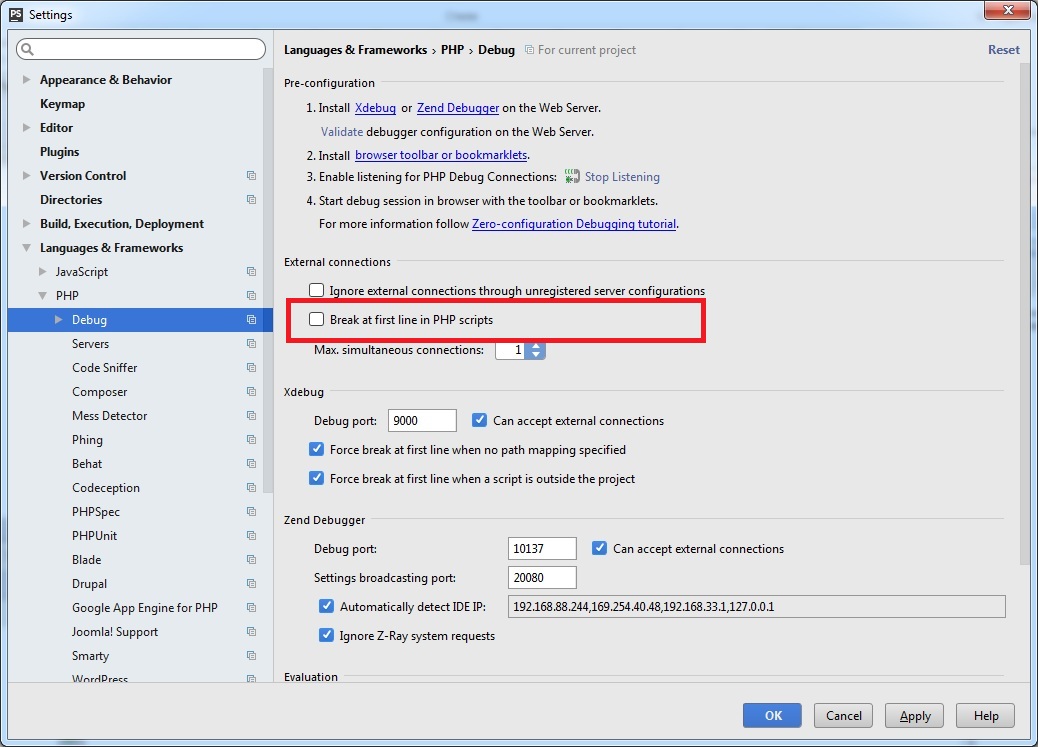
For a more comfortable debugging, or rather, in order that the debugger does not pop up on the first line of any PHP file, you need to disable this feature here:
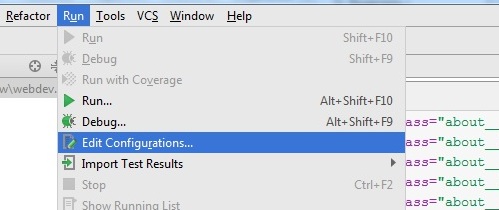
Go to PHPStorm, in the "Run" menu, select the item Edit Configurations ...
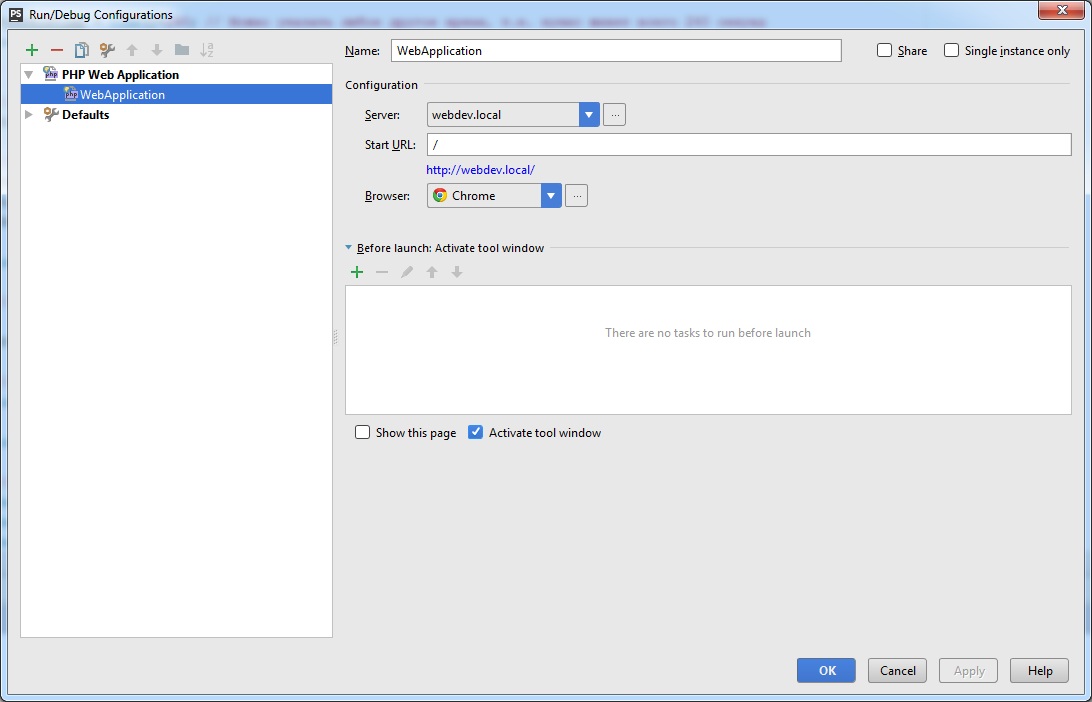
In the form that opens, click the green "+" and select the type of application PHP Web Application . Enter a name, for example, “WebApplication”, in the server field, select the name of the server we just created, the start URL, and you can also choose a browser in which the xdebug session will open.
Important!
Debugging only works when PHPStorm is listening on. To do this, click in the right corner of the Start Listening for PHP Debug Connections :

We also need to install an additional extension in the browser. To do this, visit the official JetBrains page with Browser Debugging Extensions and download the necessary extension for your browser.
After we install our extension in the browser, let's open its settings and specify the idekey , which we have already specified in the settings: PHP_IDE_CONFIG

In PHPStorm, activate the listener (in the right corner of the Start Listening for PHP Debug Connections ) and click on Run WebApplication . Debugging at PHPStorm is running.
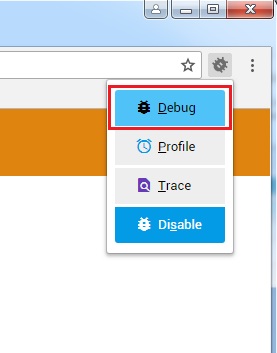
Next we activate the Debug Extension. To do this, go to the address of our website http: //webdev.local and after logged in, click on the bug icon (already in the browser) and select the Debug item in “Google Chrome”
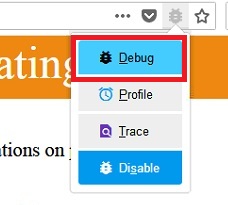
Or in "Mozilla Firefox"
After which the icon will turn green.
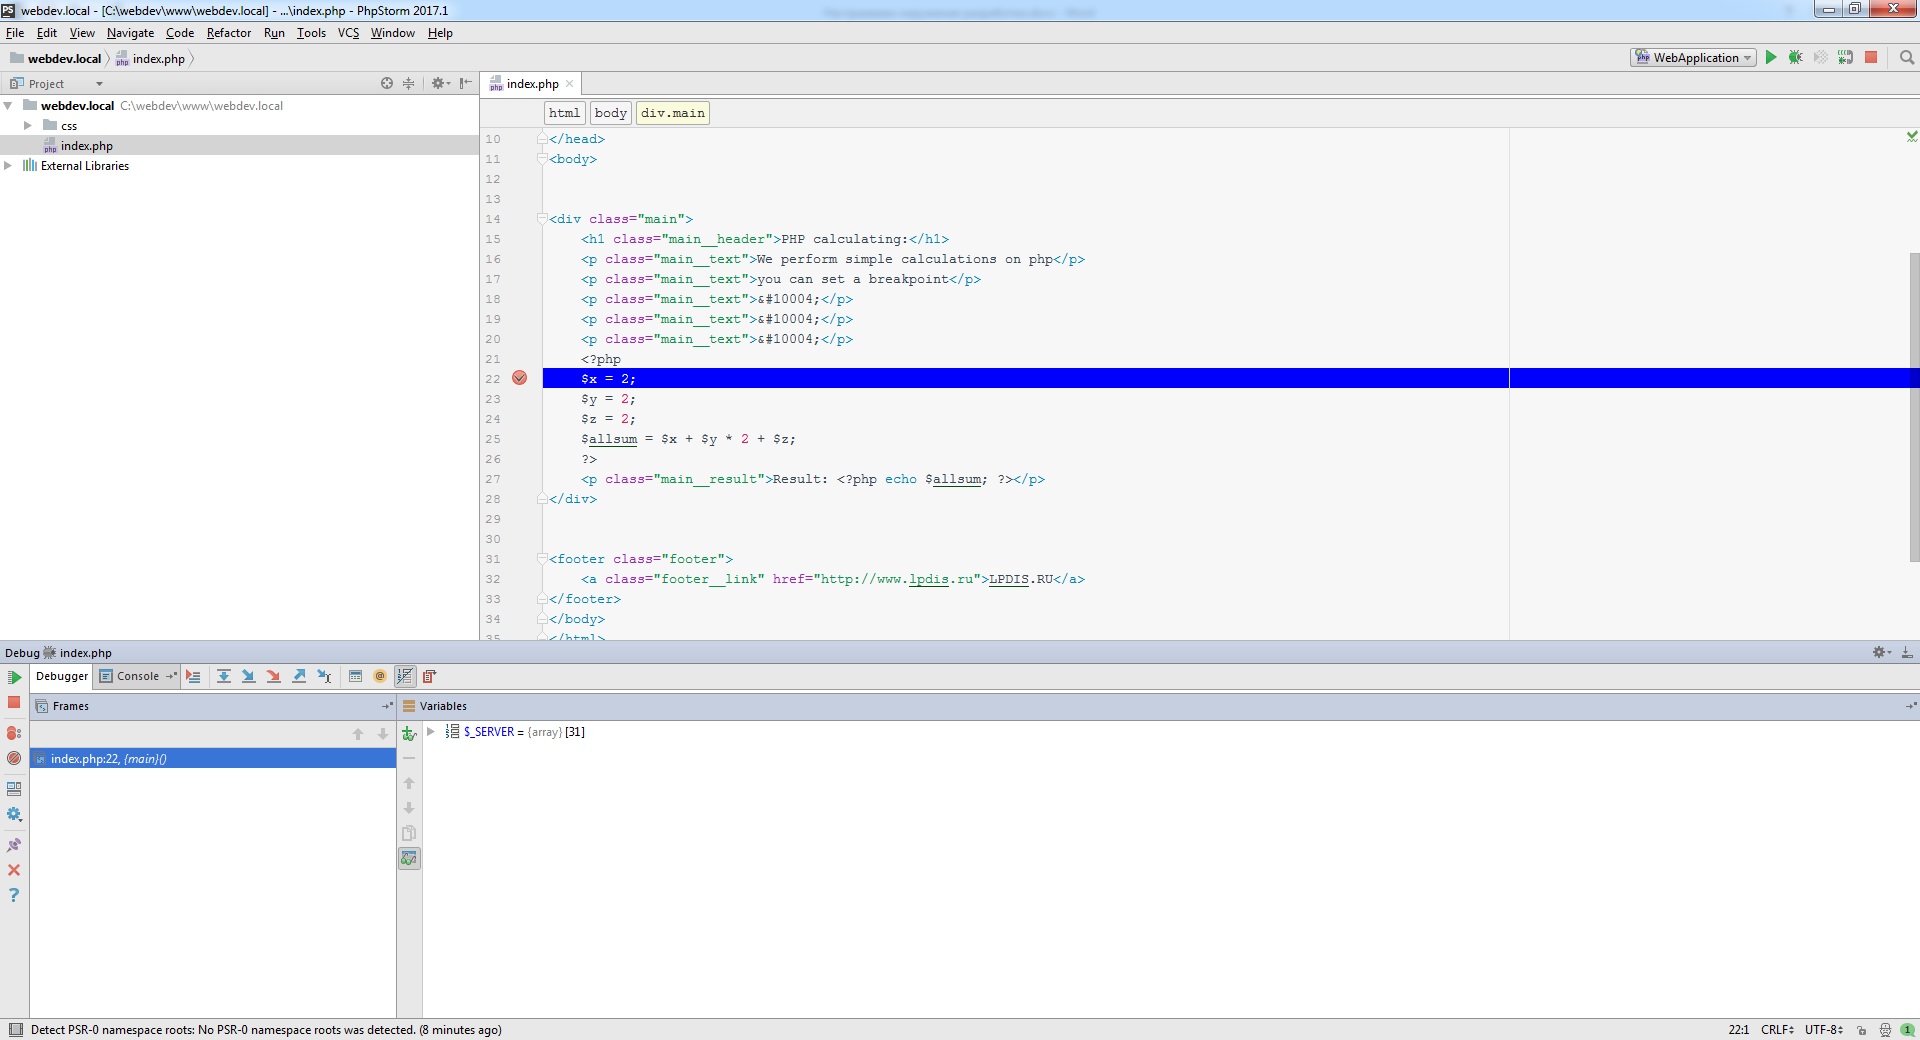
After these settings, you can safely set breakpoints and debug your PHP sites. Once in PHPStorm we install brexpoin, you need to refresh the page in the browser, and see that it hangs in download mode, and in PHPStorm the breakpoint has worked.
For example, put brekpoint on the line
$ x = 2;
And click "Run WebApplication":

As you can see, our debugger has stopped at our breakpoint and shows us the variables (variables):
If we press the F8 key , we will see that the debugger moves step by step, showing all of our variables:
In this way, we set up and set up our working environment in which we can fully work.