 June 6, 2012 at 14:21
Homemade silicon carbide LED
- Transfer
This article describes the process of creating a working home-made LED. For a long time I thought that creating active electronic components from scratch myself was an impossible idea. How wrong I was. Galenic (from lead sulfide PbS. - approx. Transl. ) Diode detector belongs to the era of the origin of the radio. The LED appeared at about the same time. This is my first (actually second, after galen) attempt to create a semiconductor.
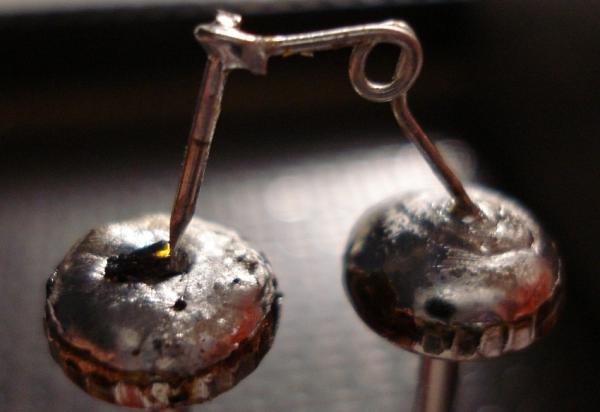
All you need is a few details that are in every home, as well as a few pieces of silicon carbide (SiC). Silicon carbide can be bought cheaply on Ebay. A small piece is enough for a dozen LEDs.
First of all, you need to choose the right SiC crystal for your LEDs. Take silicon carbide and gently break it into pieces so small that they can only be taken with tweezers. Find a metal surface and lay on it a few of these pieces. Connect the metal to the positive pole of the 10-15 V DC source. Connect the needle to the negative pole of the source. Hold a piece of silicon carbide with tweezers and make sure it has good contact with the metal. Then touch the crystal with a needle and find a place that shines well enough.
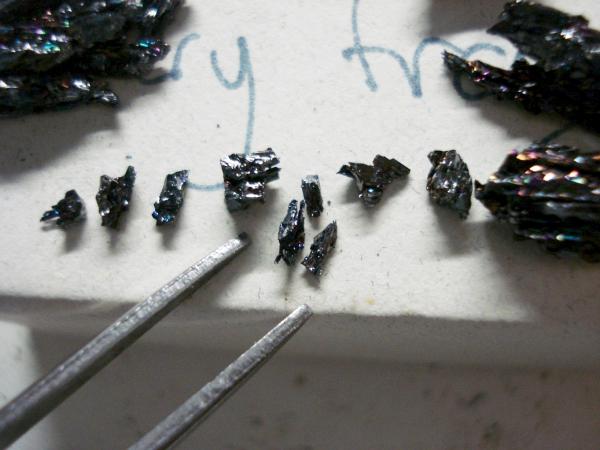
After you find a suitable crystal, you need to fix it somewhere motionless. For this purpose I took a nail with a wide hat. It also serves as a good heat sink.

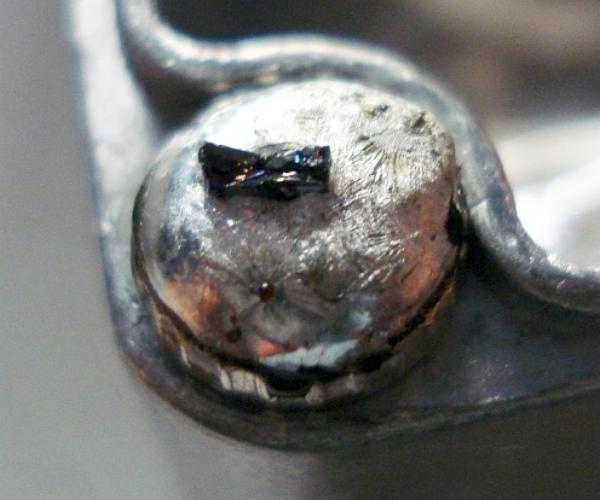
Put solder on the nail head and melt it with a soldering iron. While the solder is liquid, put a SiC crystal in it with tweezers, making sure that the side of the crystal that will emit light is on top. You can slightly drown the crystal so that solder grabs it from all sides. After you remove the soldering iron and the solder solidifies, the crystal will be firmly fixed. If it did not work out, you can repeat the process again and again, silicon carbide does not react with solder.
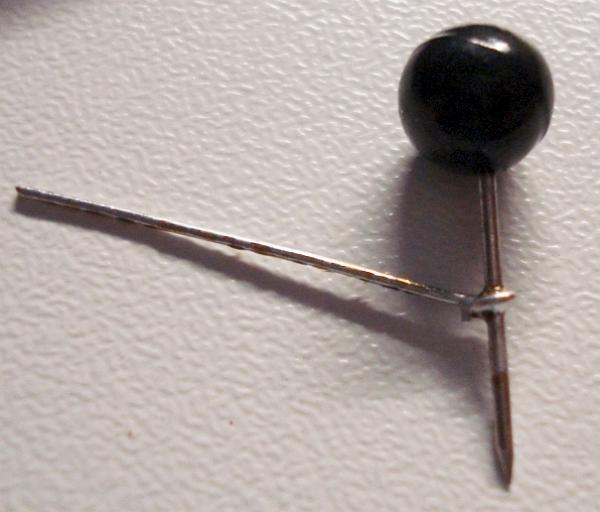
Now you need to make a point contact. Take a pin and wrap a wire around it. I took a foot from a 0.25-watt resistor. Solder the wire to the pin and bite off the excess, as shown in the figure.
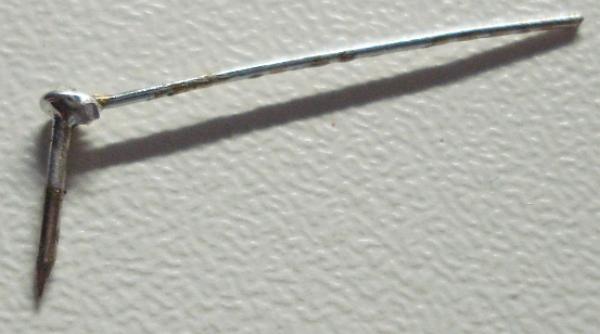
Make a loop on the wire to spring, and solder its end to the second nail fixed next to the first one on which the crystal is located. The whole structure should be located as shown in the figure below:
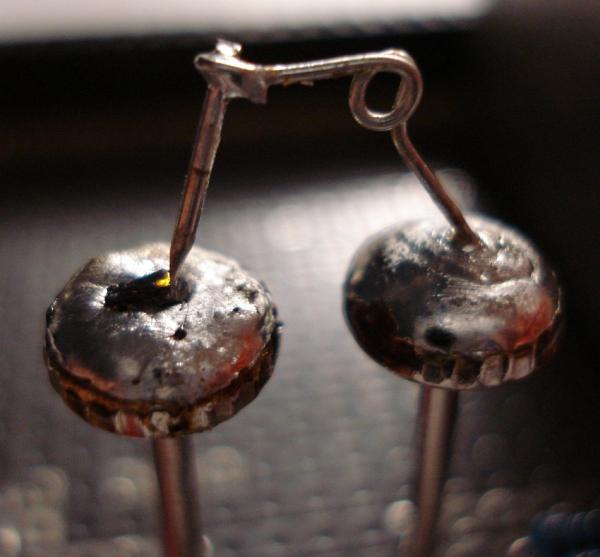
I just have two nails soldered into the breadboard, but I recommend strengthening the structure with a couple more pieces of metal.
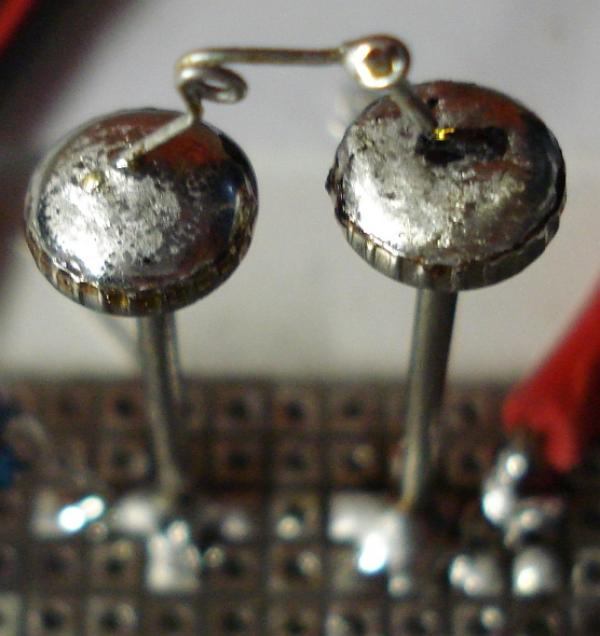
And finally, you need to carefully bend the spring so that the tip abuts against the area of the crystal that emits light.

The best operating point for this LED is around 9 volts. In this case, the LED consumes approximately 25 mA. With these parameters, the glow is quite bright, and the LED does not overheat. To make sure that it was a diode, I inverted the polarity of the power source, and, of course, did not receive any glow.
To show that the process can be repeated many times with the same result, I made a second LED. The result is exactly the same. I assembled the second LED in just 10 minutes.


The manufacture of LEDs in the described manner is really simple and cheap. However, if you suggest a more reliable and easy way, I will be happy to try it.
All you need is a few details that are in every home, as well as a few pieces of silicon carbide (SiC). Silicon carbide can be bought cheaply on Ebay. A small piece is enough for a dozen LEDs.
First of all, you need to choose the right SiC crystal for your LEDs. Take silicon carbide and gently break it into pieces so small that they can only be taken with tweezers. Find a metal surface and lay on it a few of these pieces. Connect the metal to the positive pole of the 10-15 V DC source. Connect the needle to the negative pole of the source. Hold a piece of silicon carbide with tweezers and make sure it has good contact with the metal. Then touch the crystal with a needle and find a place that shines well enough.
After you find a suitable crystal, you need to fix it somewhere motionless. For this purpose I took a nail with a wide hat. It also serves as a good heat sink.
Put solder on the nail head and melt it with a soldering iron. While the solder is liquid, put a SiC crystal in it with tweezers, making sure that the side of the crystal that will emit light is on top. You can slightly drown the crystal so that solder grabs it from all sides. After you remove the soldering iron and the solder solidifies, the crystal will be firmly fixed. If it did not work out, you can repeat the process again and again, silicon carbide does not react with solder.
Now you need to make a point contact. Take a pin and wrap a wire around it. I took a foot from a 0.25-watt resistor. Solder the wire to the pin and bite off the excess, as shown in the figure.
Make a loop on the wire to spring, and solder its end to the second nail fixed next to the first one on which the crystal is located. The whole structure should be located as shown in the figure below:
I just have two nails soldered into the breadboard, but I recommend strengthening the structure with a couple more pieces of metal.
And finally, you need to carefully bend the spring so that the tip abuts against the area of the crystal that emits light.
The best operating point for this LED is around 9 volts. In this case, the LED consumes approximately 25 mA. With these parameters, the glow is quite bright, and the LED does not overheat. To make sure that it was a diode, I inverted the polarity of the power source, and, of course, did not receive any glow.
To show that the process can be repeated many times with the same result, I made a second LED. The result is exactly the same. I assembled the second LED in just 10 minutes.
The manufacture of LEDs in the described manner is really simple and cheap. However, if you suggest a more reliable and easy way, I will be happy to try it.









