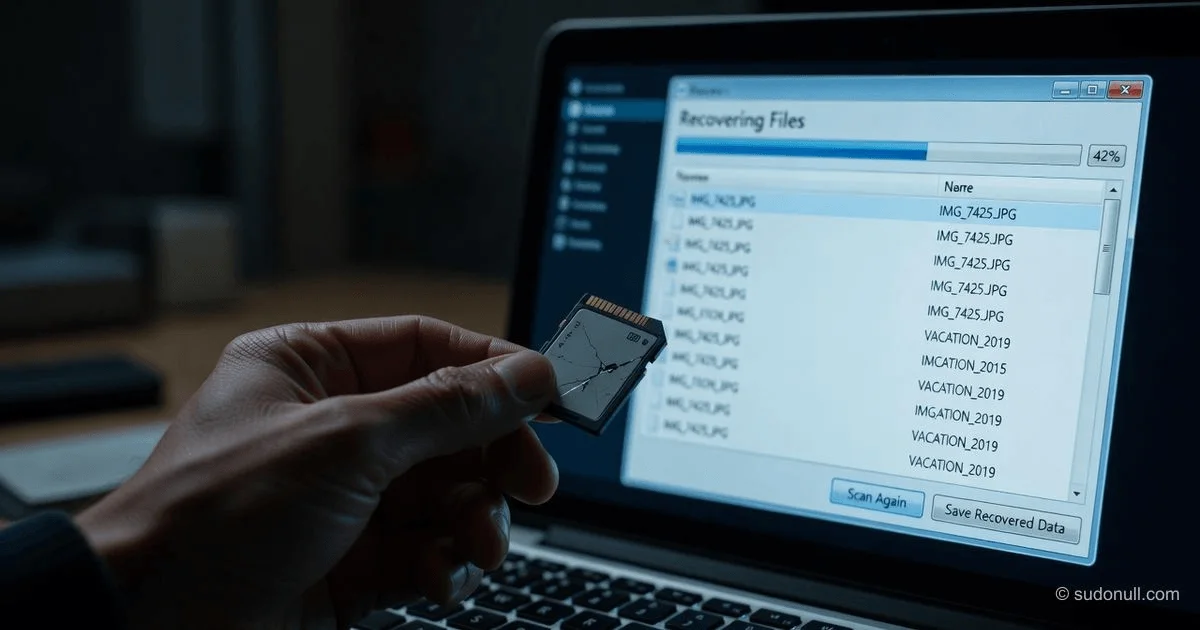
How to Recover Deleted Photos from an SD Card for Free (2026 Guide)
Losing precious photos from an SD card—whether from a camera, phone, or drone—can feel like a disaster. However, deletion is rarely permanent. When you delete a photo, the image data often remains on the card until it is overwritten by new information. This guide provides a validated, step-by-step roadmap to recover those lost memories using free, trusted tools and built-in operating system features, without paying for expensive software.
⚠️ The Golden Rule: Stop Using the Card Immediately
Before attempting any recovery method, understand the single most critical rule: stop using the affected SD card. As long as the card remains untouched, deleted photos are likely still present on the storage chips. However, every new file saved to the card (even a small text file) risks permanently overwriting the exact sectors where your photos reside, making recovery impossible.
- Eject the SD card from your camera or phone.
- Do not format the card or save new data to it.
- Insert the card into a computer (Windows or Mac) using a built-in reader or an external USB adapter to begin the recovery process.
Method 1: The "Free" Checklist (No Software Required)
Before downloading third-party tools, verify that your files aren't actually hiding in plain sight.
1. Check the Trash/Recycle Bin
If you deleted the files while the SD card was connected to a computer, the files might reside in the PC’s Recycle Bin (Windows) or Trash (Mac). Open the bin, locate the photos, right-click, and select Restore.
2. Unhide Files via Command Prompt (Windows)
Sometimes, file system errors or viruses hide files rather than delete them. You can reverse this using the attrib command in Windows.
- Connect the SD card and note its drive letter (e.g., D:).
- Open Command Prompt as Administrator.
- Type:
attrib -h -r -s /s /d D:\*.*(ReplaceD:with your SD card's letter) and press Enter. - This command removes Hidden (
-h), Read-Only (-r), and System (-s) attributes from all files, making them visible again.
3. Restore from a Cloud or Local Backup
The most reliable free recovery is always from a backup. Check your cloud storage settings.
- Windows Users: Open OneDrive or Google Drive to see if automatic camera upload was enabled.
- Android Users: Check Google Photos (often pre-installed).
- Physical Backup: Connect the external hard drive you previously used to back up your SD card.
Method 2: Free and Open-Source Software (Unlimited Recovery)
If the manual checks fail, software is required. Beware of "Free" scams. Many tools labeled "free" limit recovery to 100MB or 500MB. For unlimited free recovery, open-source tools are the gold standard.
1. PhotoRec (Cross-Platform: Windows, Mac, Linux)
Best for: Severe corruption, formatted cards, or maximum recovery power. PhotoRec ignores the file system entirely. It scans the raw data on the card looking for specific "signatures" (headers) of photo files (JPG, CR2, NEF, etc.). While it uses a text-based interface (not pretty), it is arguably the most effective free tool available.
- Step 1: Download and extract PhotoRec (it comes packaged with TestDisk).
- Step 2: Run
photorec_win.exe. - Step 3: Select your SD card and choose [Proceed].
- Step 4: Select [File Opt] to choose which photo formats to save.
- Step 5: Choose a destination folder on your computer's hard drive (not the SD card) to save the recovered photos.
2. Recuva (Windows Only)
Best for: Windows users who want a simple, wizard-driven interface. Developed by the makers of CCleaner, Recuva offers a user-friendly experience. The free version has no data limit for recovery, though it lacks the advanced raw scanning of PhotoRec.
- Step 1: Download and install Recuva (avoid installing it on the SD card itself).
- Step 2: Run the Wizard. Select Pictures as the file type.
- Step 3: Point the scan to your SD card drive.
- Step 4: Enable Deep Scan for a thorough search of deleted files.
3. TestDisk (Cross-Platform)
Best for: Repairing partition tables. If your SD card shows as "Raw" or 0 bytes in Windows Explorer, the partition structure is broken. TestDisk can rewrite the partition table to regain access to the photos.
Method 3: Commercial Software with Generous Free Limits
If you prefer a modern graphical interface and are willing to accept a file-size limit, these are reputable options for 2026.
| Software | Free Limit | Best Feature | Platform |
|---|---|---|---|
| Disk Drill | Up to 500 MB | "Recovery Vault" for future protection; preview before recovery | Windows, Mac |
| EaseUS Data Recovery Wizard | Up to 2 GB | High success rate for formatted cards | Windows, Mac |
| Stellar Data Recovery | Up to 1 GB | Scans over 270 file types | Windows, Mac |
How to use (General Workflow):
- Download and install the software on your computer (not the SD card).
- Launch the software and select your SD card as the target location.
- Initiate a Deep Scan. Quick scans look for deleted labels; Deep scans look for the actual data.
- Preview the photos. Legitimate software will let you see the thumbnail before recovery.
- Select the photos and recover them to your computer's hard drive.
Advanced Technique: Creating a Forensic Image (For Damaged Cards)
For severely corrupted cards that crash when scanned, you should create a "byte-level backup" (a digital clone) before attempting recovery. This prevents further damage to the original card.
Using the free tool DataDump (from Digital Detective), you can extract a raw binary image of the SD card to your hard drive. You then run your recovery software (like PhotoRec) on this image file rather than the fragile physical card. This is the standard professional workflow for data rescue.
Success Rate Matrix
Based on data recovery best practices, your chances of success depend entirely on what happened after the deletion.
| Scenario | Estimated Success Rate | Reasoning |
|---|---|---|
| Accidental Deletion (No new usage) | 95%+ | The data is intact; only the file pointer is removed. |
| Quick Format | 90%+ | Only the "table of contents" is erased; the photos are still there. |
| Corrupted / RAW File System | 70-90% | Tools like PhotoRec can bypass the broken file system to find data. |
| Full Overwrite (New photos taken) | 0-30% | Physically overwritten sectors are unrecoverable, even by labs. |
| Physical Damage (Water/Fire/Broken) | 0% (DIY) | Physical damage requires a professional clean-room service (costly). |
❌ What Not to Do (Common Mistakes)
- Do not use CHKDSK on a failing card. While
chkdskis good for fixing logical errors on healthy drives, on a failing SD card it may force changes that destroy data. - Do not save recovered files back to the SD card. Always save to your PC’s desktop. Saving to the same drive risks overwriting the very files you are trying to recover.
Frequently Asked Questions
Q1: Can I recover photos from a formatted SD card for free? Yes. A "Quick Format" does not erase the photo data; it erases the address book. Tools like PhotoRec or TestDisk are specifically designed to scan formatted cards and recover data based on file signatures.
Q2: Is it possible to recover photos without a computer? Without a computer, your options are limited to cloud backups (e.g., Google Photos or iCloud). Most Android or iOS devices cannot scan the raw sectors of an SD card internally. You will need to insert the card into a computer.
Q3: If Recuva is free, why do some tools charge? Recuva is free for basic use, but it is limited to Windows and lacks some advanced video repair features. Paid tools often invest in "fragmented video reconstruction" (fixing broken 4K videos) or offer 24/7 support. For standard JPEG photos, the free tools are usually sufficient.
Q4: How do I prevent this from happening again? Enable automatic backups. For Android phones, turn on Google Photos backup. For cameras, use Wi-Fi SD cards that auto-upload to your phone, or make it a habit to copy photos to your computer and cloud storage immediately after shooting.
Q5: The recovered photos won't open. What happened? The file is likely "fragmented" (spread across the card in pieces). While PhotoRec extracts raw data, it struggles to stitch fragmented videos or large files together. In this specific case, a tool like Wondershare Recoverit (free trial to preview) has patented algorithms to reassemble fragments, though the free version is limited.
Key Takeaways
- Stop using the SD card immediately. Every new photo or file you save drastically reduces your chance of recovery.
- Try free solutions first: Use CMD to unhide files, then move to PhotoRec (unlimited, open-source) before paying for any software.
- Do not save recovered files to the same SD card. Always export them to your computer’s hard drive.
- For corrupted cards: Use DataDump to create a forensic image clone before attempting scans to preserve the original data.
- If software fails: If the card is physically clicking, not detected, or water-damaged, turn off the device. DIY software cannot fix physical hardware failure; you need a professional lab.
— Editorial Team







No comments yet.