Setting up Zyxel smart hardware in standalone and cloud modes

What is the article about?
1. A short overview and unboxing of the Zyxel XGS1930-28HP smart switch and NWA1123-ACv2 access point
2. Description of the configuration process:
- offline
- “Cloudy” mode using the Nebula Control Center (NCC)
3. solution of a number of minor problems that arose during the setup process.
For those who are too lazy to read:
1. No critical problems were found when setting up the equipment.
2. Using the Zyxel NCC greatly simplifies and speeds up the process of setting up the equipment (as compared to the standalone setting)
3. The free license NCC is suitable for use with prod in the following cases:
3.1. A small amount of equipment
3.2. No requirements for the long-term storage of historical monitoring data and logs
4. The NCC functionality is sufficient to configure the equipment for typical SOHO cases.
5. As of “now” - the NCC is not quite suitable for cases that require fine-tuning of the ACL directly on the switch - the “stand-alone” rule editor works better.
Content
1. What are we testing?
1.1. Zyxel XGS1930-28HP Switch
1.1.1. Photo
1.1.2. General information
1.1.3. Components
1.2. Zyxel NWA1123-ACv2 Access Point
1.2.1. Photo
1.2.2. General information
1.2.3. Package
2. Testing
2.1. Testbed Configuration
2.2. Offline configuration
2.2.1. Switch
2.2.2. Access Point
2.3. Reset
2.4. Setup using the Nebula Control Center
2.4.1. A few words about the service
2.4.2. Licensing NCC
2.4.3. Switch configuration using NCC
2.4.3.1. Register the switch in NCC
2.4.3.2. Setup process
2.4.4. Setting up an access point
2.4.4.1. Registering an access point in the NCC
2.4.4.2. The configuration process
3. The opinion of the author
4. Thank you
What are we testing?
Zyxel XGS1930-28HP Switch
A photo
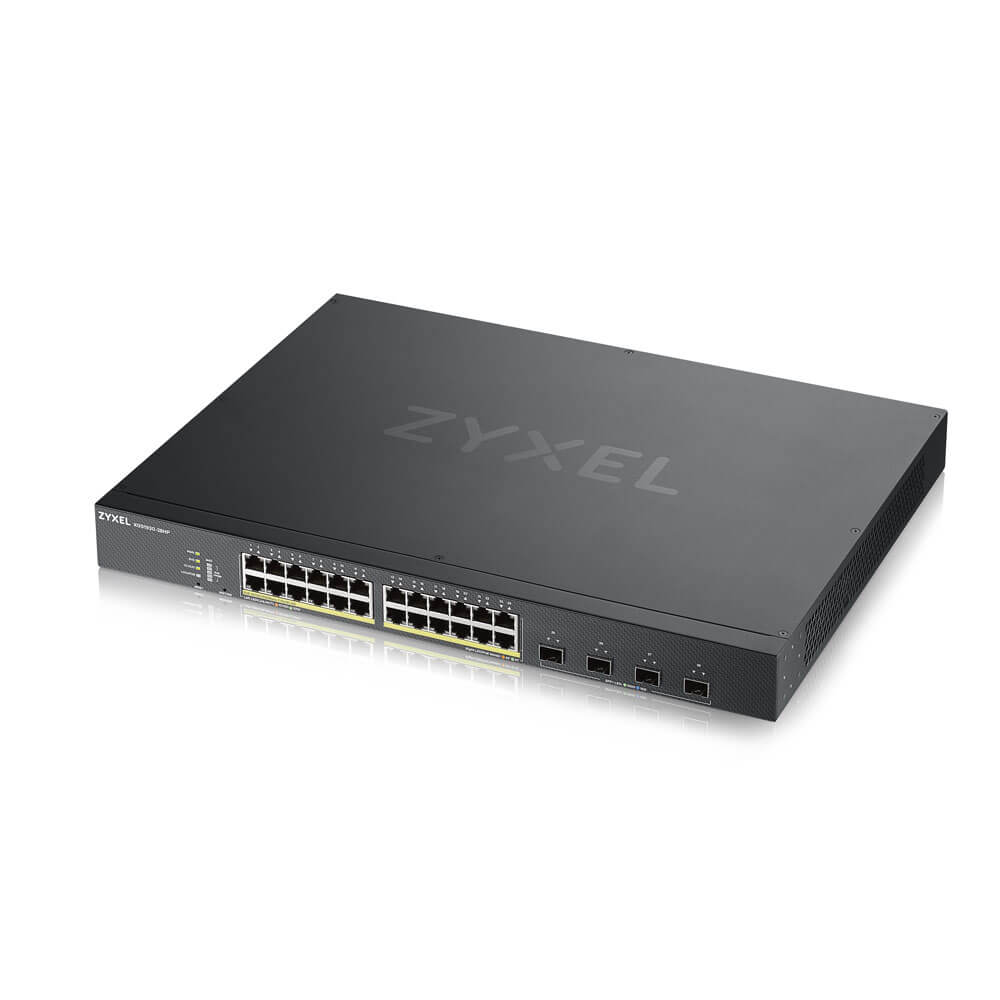 |  |  |  | |
general information
| Manufacturer | Zyxel |
| Model | XGS1930-28HP |
| Switch Type | L2 + |
| Qty 1G RJ45 ports with PoE 802.3at support | 24 |
| PoE budget | 375 W (up to 15.4 W on all ports, 30 W / max port) |
| Qty 10G SFP + ports | four |
| The number of BP | one |
| Stacking support | not |
| Monitoring and management capabilities | - Web interface - SNMP v1-3 - RMON - limited CLI - “cloud” management with SaaS from the manufacturer |
| Full specification | www.zyxel.com/products_services/24-48-port-GbE-Smart-Managed-Switch-with-4-SFP--Uplink-XGS1930-Series/specifications |
Equipment
The switch comes in a standard carton box.
All parts are assembled in a separate box of a smaller size.
The package bundle looks like this:

1 - switch
2 - user manual
3 - “Safety Warnings”
4 - EU Declaration of Conformity (information on compliance with EU regulators)
5 - warranty card
6.7 - rack mounts (“ears”)
8 - set desktop “rubber feet” for mounting
9 - a set of bolts for attaching “ears” to a switch
10 - a set of bolts for mounting a switch in a 19 ”rack
11 - a power cable C13 / Schuko Tester
notes:
The sample provided is a typical modern L2 + PoE access level switch.
Suitable for connecting end devices in corporate networks (Small Business).
Despite the relatively high throughput and availability of 10G-port - is not suitable for use in the data center due to:
- a relatively high latency switching
- the lack of a backup power supply
L2 + functionality is typical for Smart / Small Business lines from other vendors (static routing, L3-L4 ACL, DCHP Relay).
No DHCP snooping support.
Management methods are limited (which is typical for smart switches in general)
No:
- full control of the switch via the CLI
- configuration options via the COM port
Zyxel NWA1123-ACv2 Access Point
A photo
 |  |  |  |  |
general information
| Manufacturer | Zyxel |
| Model | NWA1123-ACv2 |
| Supported frequency ranges | 2.4 GHz (IEEE802.11 b / g / n) 5 GHz: (IEEE 802.11 a / n / ac) |
| Number of radio modules | 2 |
| Antennas | 2T2R MIMO |
| Number of Ethernet ports | 1x1G RJ45 |
| Nutrition | 802.3af / at or local PSU |
| Monitoring and management capabilities | - Web interface - SNMP v1-3 - RMON - CLI - “cloud” management using SaaS from the manufacturer |
| Full specification | www.zyxel.com/products_services/802-11ac-Dual-Radio-Ceiling-Mount-PoE-Access-Point-NWA1123-ACv2/specifications |
Equipment

1 - Zyxel NWA1123-ACv2 access point
2 - external power supply unit with UK Plug
3 - Schuko plug (EU Plug) for external power supply unit
4 - mounting bracket
5 - 2 sets of dowels
6 - 2 screws
7 - user manual
8 - warranty card
10 - Safety Warnings
11 - EU Declaration of Conformity (EU regulatory compliance information)
Testing
Testbed Configuration
We emulate a fairly typical network of a small office (Small Business).
Network segmentation:

Switch port distribution:

Wireless networks: Tester

notes:
1. Use MikroTik RB750UP as a test bench router.
It is used for:
- terminating VLANs and routing traffic between them
- terminating uplink
- static routing of Internet traffic and SNAT on the external interface
Since Routing performance within this test is not critical - 100M ports on the router will be enough.
2. In the vlan.MGMT segment, we use DHCP (Zyxel recommendation for optimal initial configuration)
3. Access restrictions between internal network segments are implemented using a switch ACL (in order to become familiar with the ACL configuration process).
Stand assembled:

Offline setup
Switch
1. Download the manual, read.
2. We catch the switch and point in DHCP
3. We go to the switch web interface by IP address.
4. Select the offline configuration mode, log in as the default account (admin / 1234)

5. Try to configure the VLANs and ports using the Wizard Tester

notes:
1. The Wizard's capabilities are very limited, it is better to immediately apply the settings by - default and go to a full web interface.
What is wrong:
- you can configure no more than 5 VLANs at a time
- the trunk port can be tied to only the entire set of VLANs (but not a subset).
- You cannot change MGMT VLAN.
- there is no support for the hybrid port operation mode.
The port can either be untagged (access) or pass traffic of all tagged VLANs (trunk)
2. There are in fact no configuration options through the CLI (which is, in general, normal for this class of switches):

6. We create MGMT VIF via the web interface (“Basic setting”> “IP Setup”> “IP Configuration”)
7. Add access restrictions for the guest network.
The process is not entirely intuitive, but simple enough.
You must:
- create: L2-L4 classification rules (“Classifier”)
- create access policies based on traffic classification rules (“Policy rule”)
7.1. We get acquainted with the classifier. Go to “Advanced Application”> “Classifier”> “Classifier configuration”.


Create several classification rules for the guest network:

7.2. Go to “Advanced Application”> “Policy Rule” and create several policies based on the classification rules.


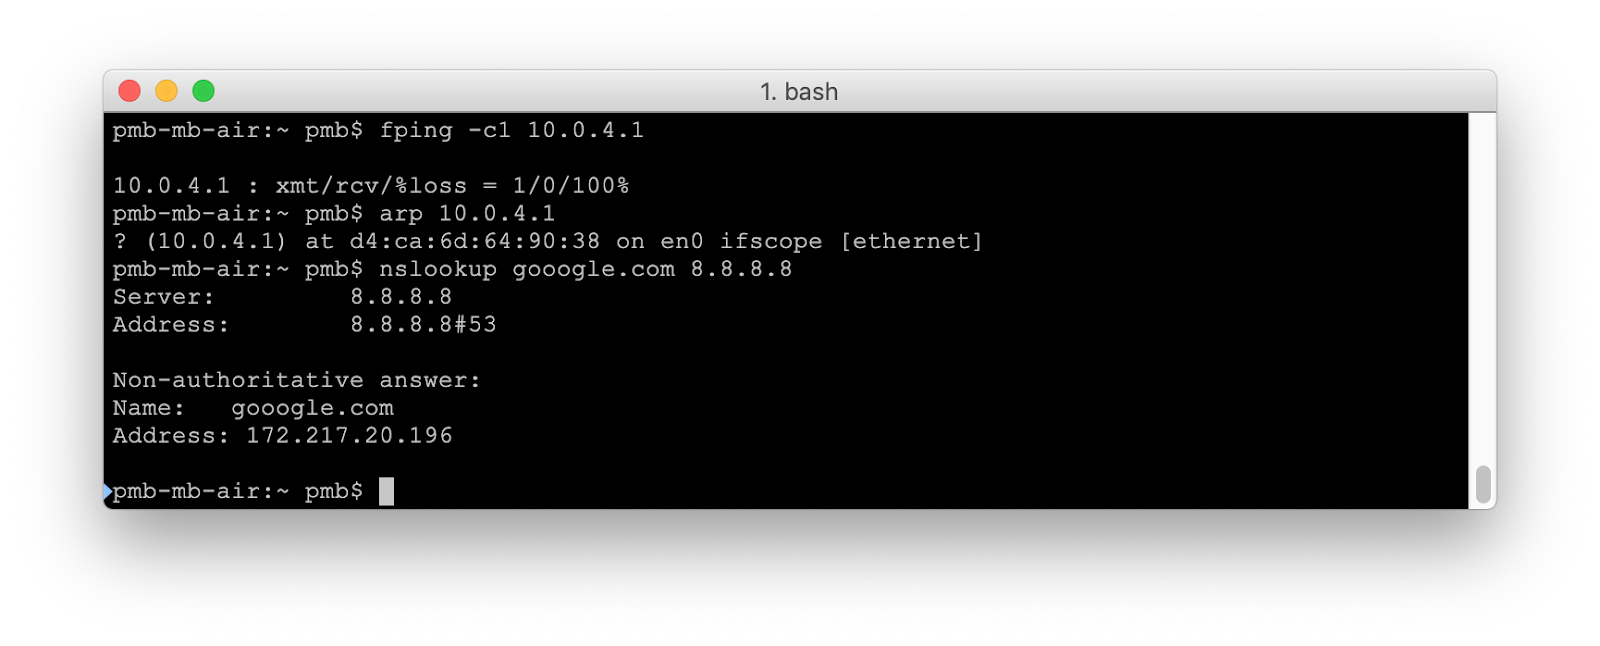
7.3. Checking the operation of the ACL:
Access point
1. Downloading the manual, reading
2. Going to the web interface of the access point
3. Log in with the default credentials (admin / 1234)
4. Change the password (mandatory step, without this, it will not work any further)
5. Create an SSID. The settings are hidden pretty deep.
5.1. Add security profiles for guest and corporate networks
“Configuration”> “Object”> “AP Profile”> “SSID”> “Security list”


5.2 . Add guest and corporate SSID
“Configuration”> “Object”> “AP Profile"> “ SSID ”>“ SSID list ”

6. Go to“ AP Management ”and choose which SSID of which band will broadcast.
Suppose a guest SSID should be broadcast at 2.4 + 5 GHz, and a corporate one - only at 5 GHz.

7. Optionally - change the settings of radio interfaces and broadcast channels.
Reconfigure the management interface.
“Configuration”> “Network”
For our case:
- change the VID Management-VLAN'a
- change the IP address
- change the tagging mode
After this, the management session with the access point is interrupted (due to the loss of L2-connectivity).
8. Change the mode of the access point port on the switch (trunk instead of access)

9. Check the access point availability by the management interface and the operation of both SSIDs


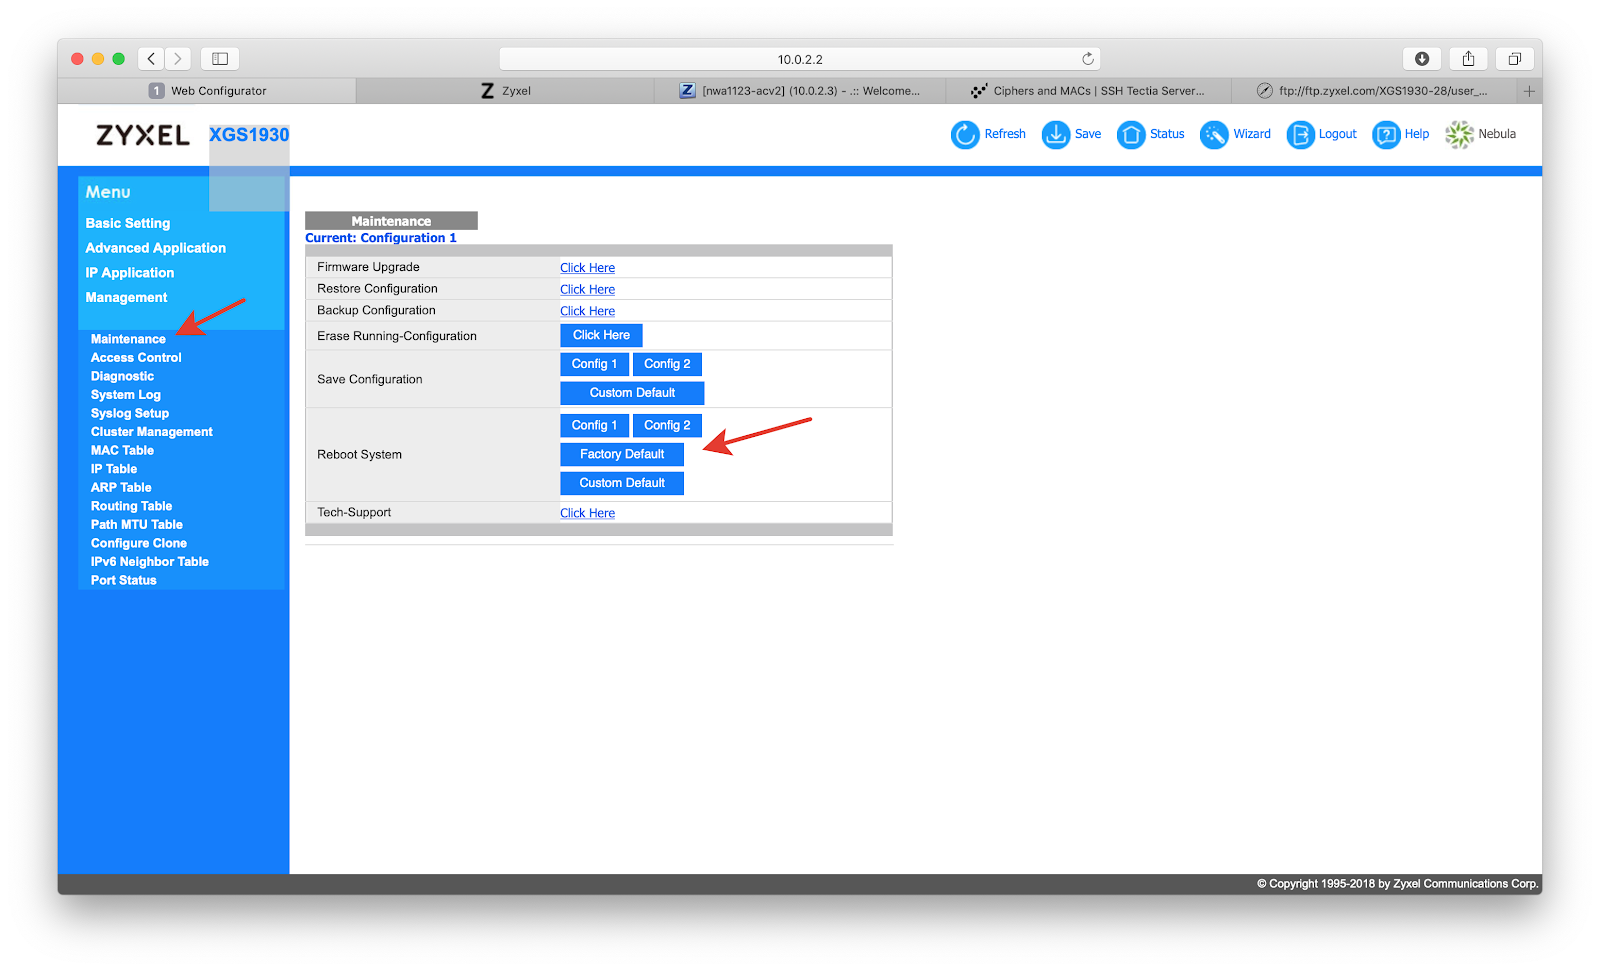
Reset
At the access point:

At the switch:
Setup using the Nebula Control Center
A few words about the service
Nebula Control Center (NCC) is a SaaS solution for monitoring and controlling Zyxel network equipment.
Supported:
- switches
- access points
- security gateways.
Detailed functionality is described here .
NCC licensing
There are 3 types of licenses:
1. free, limited in functionality
2. paid with annual renewal
3. paid for life
Detailed comparison of licenses
Only the number of devices is licensed, there is no difference in functionality between paid licenses.
Regarding the free version:
1. The number of managed devices is not limited
2. Functional limitations relate to:
- Security (authorization on 802.1X ports, auditing capabilities for actions, etc.)
- Mass configuration management
- monitoring (ability to configure triggers, reduced retention periods historical data)
Conclusion: The
free NCC license is usable in prod with:
- a small number of equipment (i.e., in the case where the mass configuration management functionality is not required)
- no requirements for the long-term storage of historical monitoring data and logs
Switch
Register a switch with the NCC
1. The registration process is as follows:
2. Register an account on nebula.zyxel.com
3. Preferably, set up two-factor authentication
4. Create Organization and Site
5. Bind the device to the account by scanning the QR code or manually entering the MAC address and serial number in Nebula
6. PROFIT!
A QR code can be found in the web interface ( “Basic”> “Cloud Management”> “Nebula Switch Registration” ) or on the device box.
Scan the QR code you need using the Nebula Mobile application ( Apple App Store , Google Play )
For the curious: an attempt was made to re-register the device under a different account.
It did not work;)
After registering with the NCC:
- the switch settings are reset to the factory settings
- the current firmware and config are uploaded to the switch from the cloud.
- blocked local authentication
- the switch appears in the NCC web interface
looks as follows:
Deshbord:
<img the src = « lh5.googleusercontent.com/8n99bHt-Z5NMcIQCFboeXuvBZGVMSOGc3DJHPIDsWP-WZsL33BSSYzXCAAJWjHMfKnfbJ_h3AOITwaa1ABDBqB0GexleNp8NxMX5FPjD1GuowxNCA9w1QXvnNw99iy27H0kjTQYZ >
Switch Profile:

Logs:

Information on the port:

Setup process
Let's return to the initial task and switch configuration
1. We configure VLANs and ports.
Access point port:
Router:

Terminal:

Tester note: when configured via NCC, for some reason, only hybrid and access ports (but not trunk) modes are supported.
You cannot configure a port without specifying a native VLAN / PVID.
Alternatively, you can specify the unused prod VLAN as the PVID.

2. Change MGMT-VLAN (“Switch”> “Switch Configuration”> “VLAN Configuration”)
3. Configure the ACL for the guest network.
This is done via “Switch”> “Switch Configuration”> “IP Filtering”.
The rule editor looks like this:

Tester Note:for comparison, once again I will give screenshots of the local ACL editor.
Cloudy obviously loses in number of options.
Access point
Register access point in NCC
According to the documentation, for the access point, the process should proceed as follows:
1. Authorization of the access point web interface
2. Change of the default password
3. Scan the QR code using a mobile application.
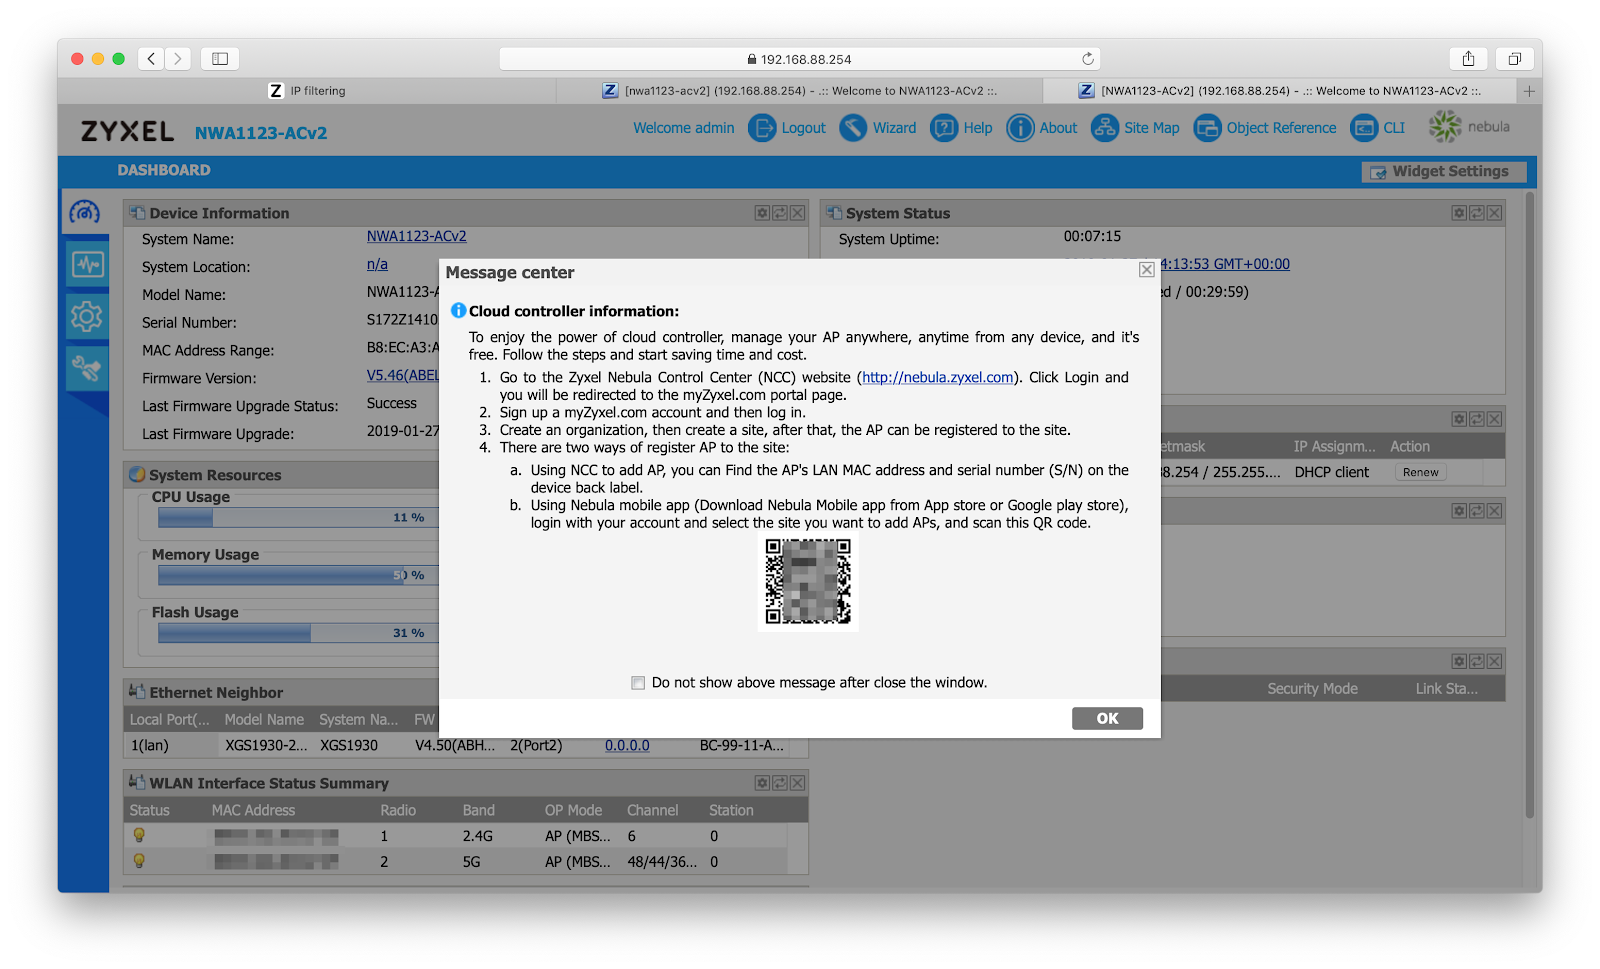
QR code appears in PopUp after authorization.
Tester's note:
If the QR code is not displayed, the most likely cause is an outdated firmware (as happened in my case).
It is updated as follows:
- download the firmware from the corresponding section of the manufacturer's site
- unpack the archive with the firmware
- go to “Maintenance”> “File Manager”> “Firmware Package”
- fill in the * .BIN file with the firmware
- wait 3-5 minutes The process of flashing.
Thin moments:
- Progressbar “Uploading firmware” during the flashing will be filled indefinitely, this is normal .
- A sign that the process is in progress - fast flashing red LED on the spot.
- A sign that the process is over and the point is working normally - slow flashing of the LED-indicator in green.
- In the web interface, nothing is displayed, the progress bar will continue to fill.
At the end of the flashing we update the page.
We are met by the authorization window and the next Wizard.
Click “Cancel” and see the updated interface and QR code:
Scan the QR code in Nebula Mobile, wait for 5-10 minutes.
During this time:
- point settings are reset to the factory settings
- current firmware and config are poured from the cloud.
Note of the tester: an interesting point - unlike the switch, local authorization on the point is not blocked.
After tuning point you can go to the web interface and see the connection status to the cloud:

Deshbord for access points:

Profile AP:

page logs:
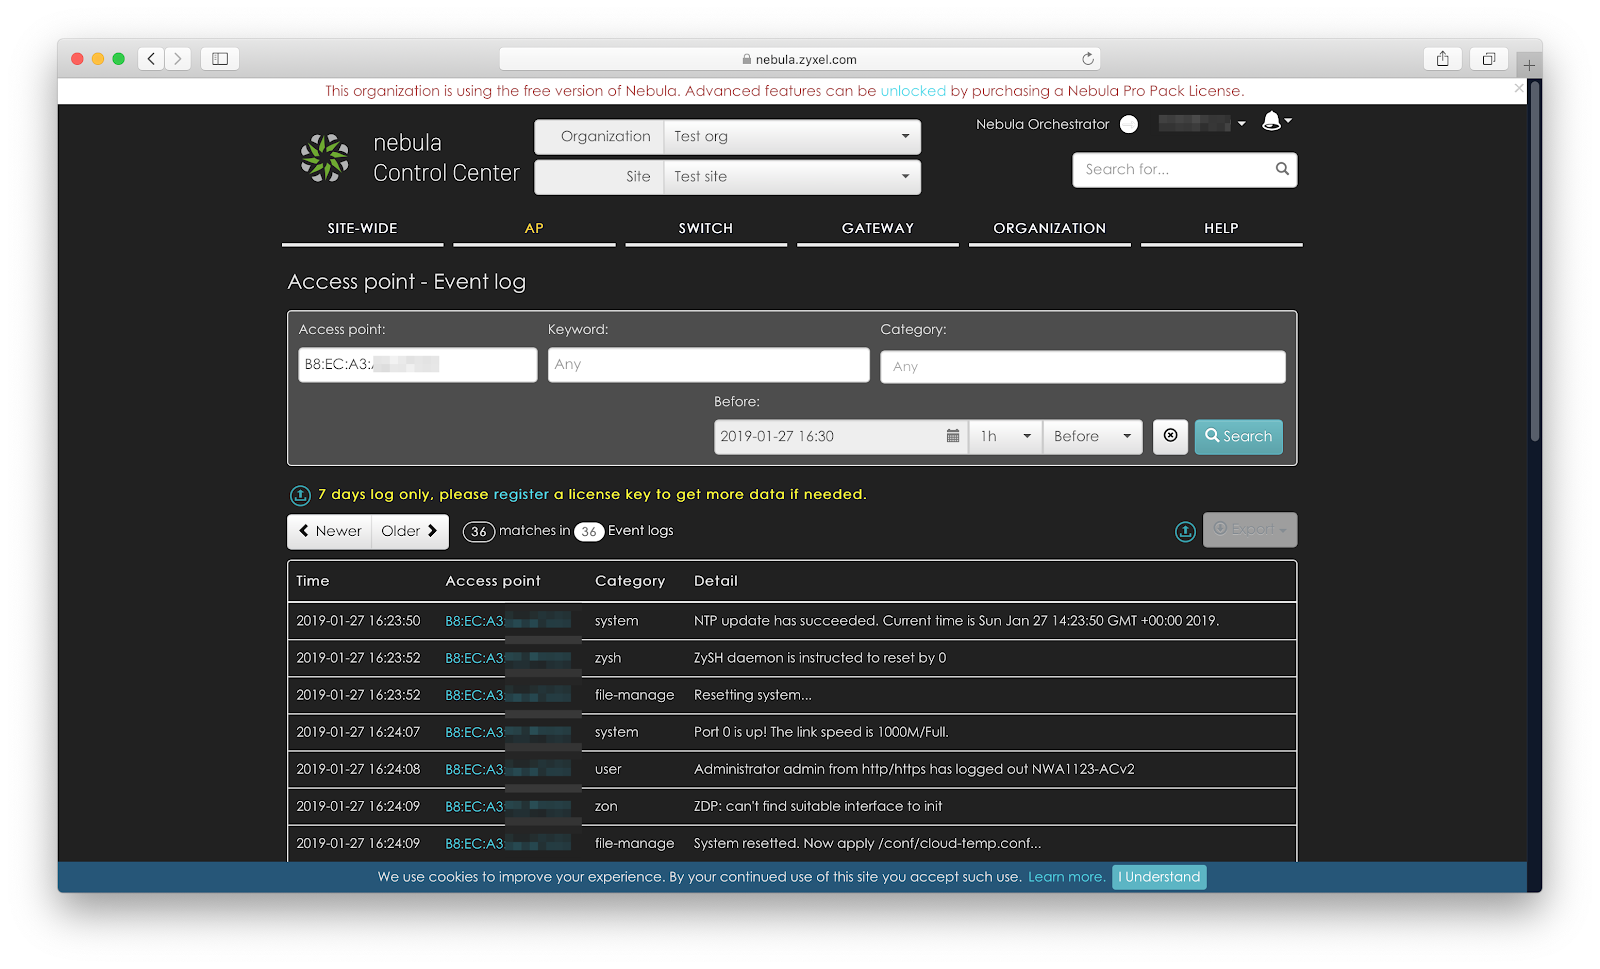
the ability to filter logs less than for switches.
Setup process
1. Go to the access point profile, change the MGMT VLAN.

2. Go to “AP”> “Configure”> “SSIDs”, create a guest and corporate SSID:
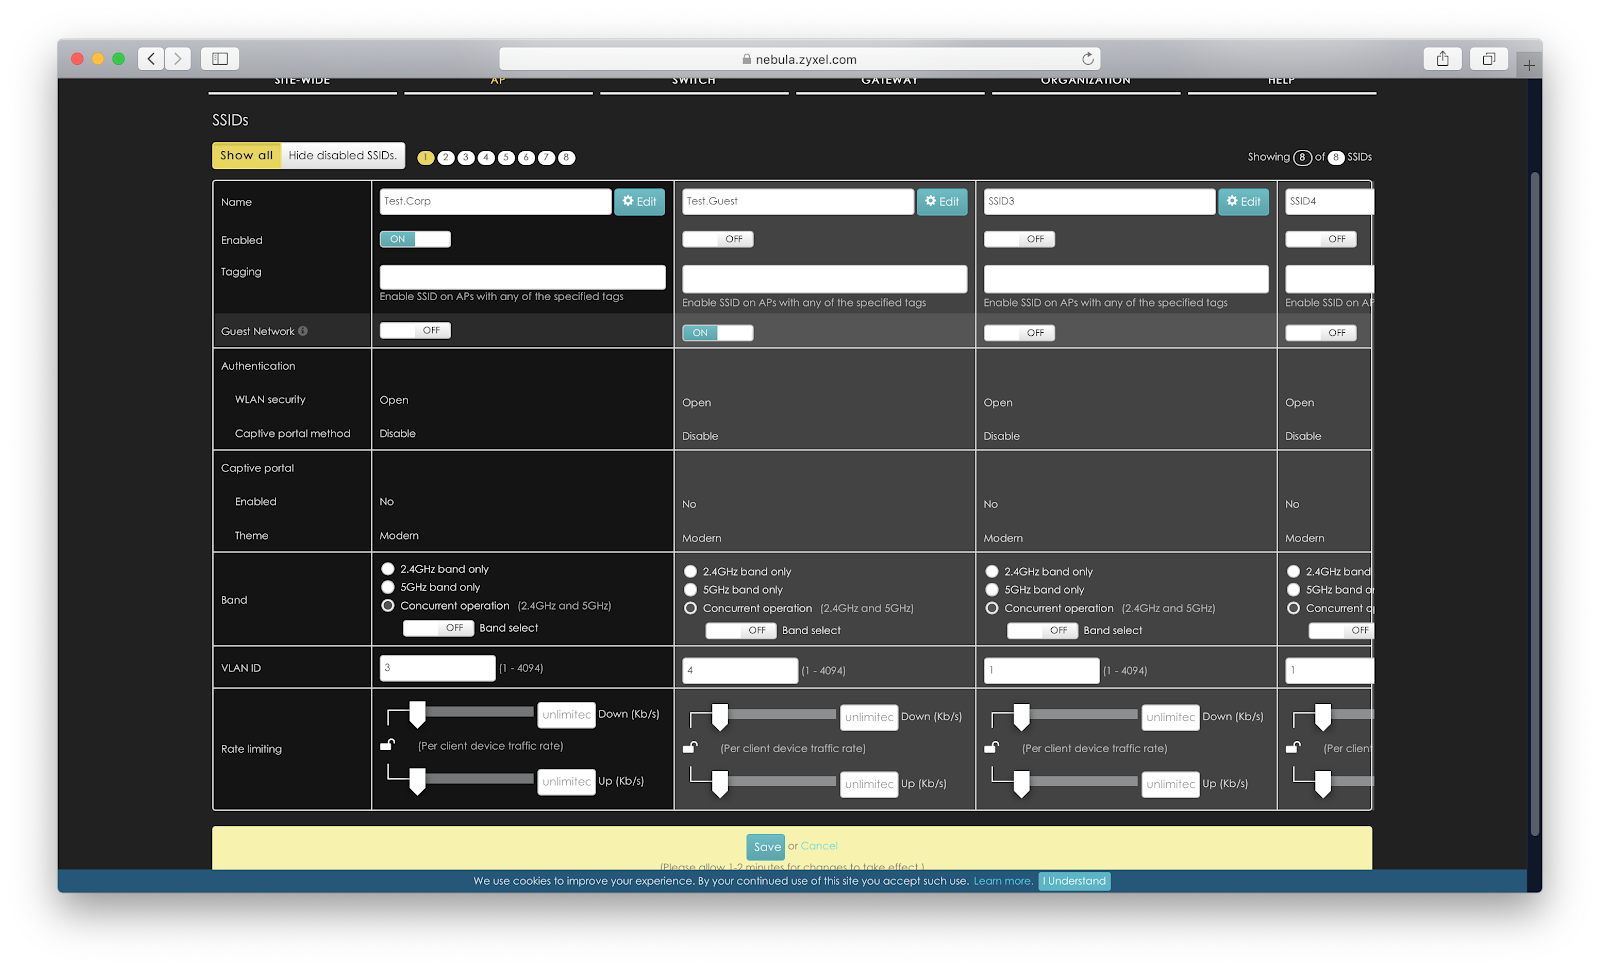
Do not forget to enable the second SSID.
3. Go to “AP”> “Configure”> “Authentication”.
Create a security profile for a corporate and guest SSID.


3. Configure the radio part:

4. Connect to both networks, check the work.
Opinion tester
1. Critical problems when setting up the equipment was found.
2. Using the Zyxel NCC greatly simplifies and speeds up the process of setting up the equipment (as compared to the standalone setting)
3. The free license NCC is suitable for use with prod in the following cases:
3.1. A small amount of equipment
3.2. No requirements for the long-term storage of historical monitoring data and logs
4. The NCC functionality is sufficient to configure the equipment for typical SOHO cases.
5. As of “now” - the NCC is not quite suitable for cases that require fine-tuning of the ACL directly on the switch - the “stand-alone” rule editor works better.
thank
- to colleagues from MTI for prompt delivery of test equipment
- colleagues from Zyxel for constructive answers to the questions that arose in the process of writing this article
- readers who have mastered this sheet to the end;)