Hello world on ESB Toolkit
What is ESB Toolkit and why is it interesting?
ESB Toolkit is a toolkit for BizTalk server that simplifies the development of integration applications.
Despite the fact that this is a powerful tool that allows you to create serious products, the first thing that captivates is a low "threshold" for entering the development topic for BizTalk. Many tasks that are difficult to solve by orchestration are easily solved with the help of ESB Toolkit.
Microsoft has created excellent documentation that provides examples of many common tasks. But by my example, I realized that this documentation became useful when a general idea of working with this tool appeared. Apparently, the conditioned reflex of the lazy programmer is triggered - do not read the documentation until you have at least something working, or a lot of time has been wasted.
Actually, the main goal of this post is to create a simple application so that you can "touch" the ESB Toolkit. Those familiar with BizTalk probably read an example of transferring files from one folder to another using a filter on SendPort. In this post, the example is repeated using static routing in the ESB Toolkit.
Preconditions
BizTalk Server 2010 and Visual Studio 2010 will be used for development.
Before development, you need to install the ESB Toolkit and its components for Visual Studio. Installation is described on the Microsoft website, the link is at the end of the post.
Training
First, prepare a new application, which we will use in development.
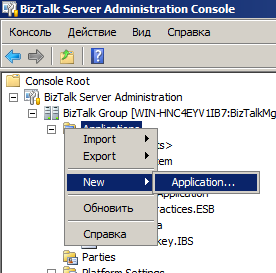
Let's name the application EsbToolkitTest.

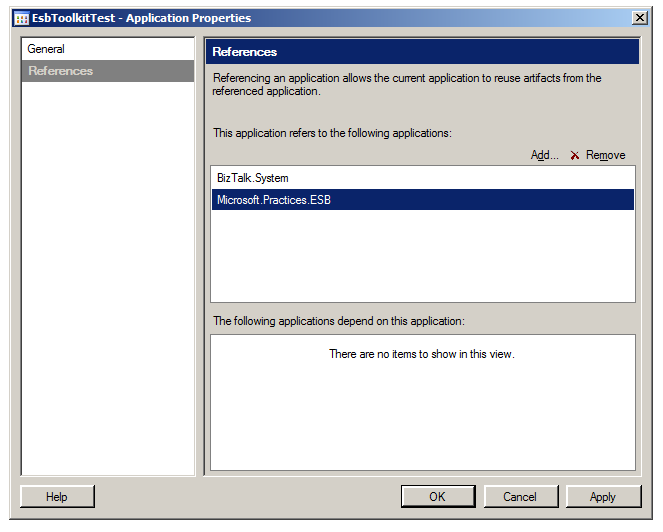
In References, you must add a link to the Microsoft.Practices.ESB application.
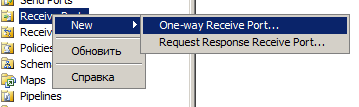
In the created application, create a Receive Port and add Receive Location to it.
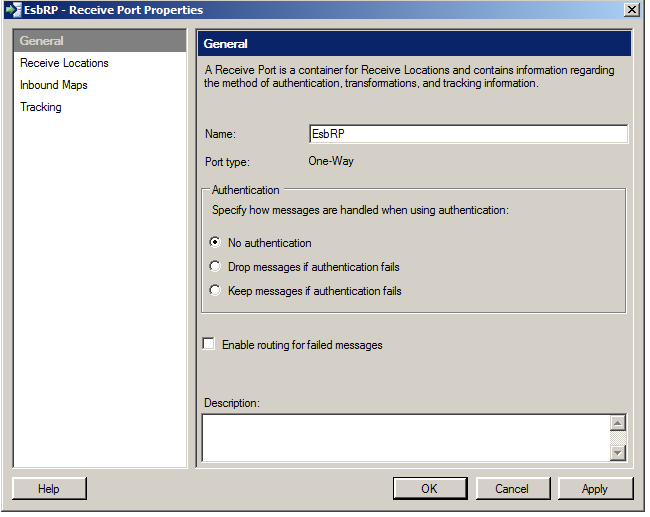
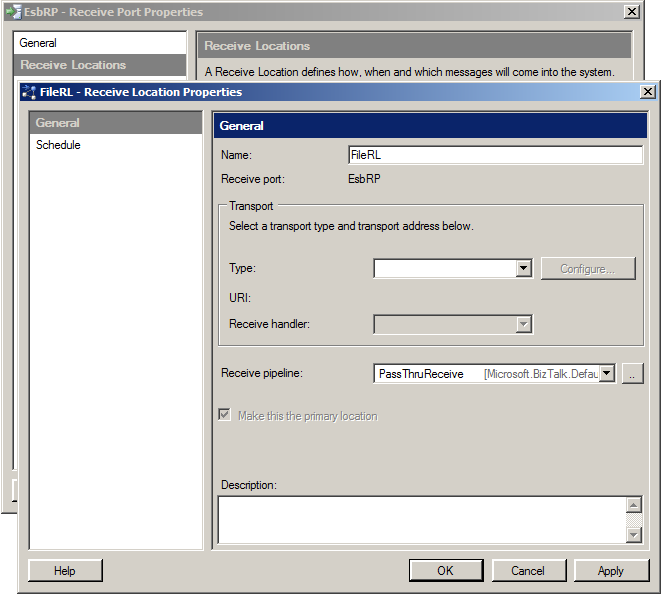
We configure Receive Location to collect files from the folder. For example, C: \ ESB \ input.

We must not forget that the BizTalk user must have read and write permissions to this folder. Or configure access on behalf of another user in the Authentication tab.
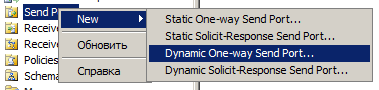
It is also necessary to create a dynamic SendPort.

Set the following parameters in the Send Port filter:
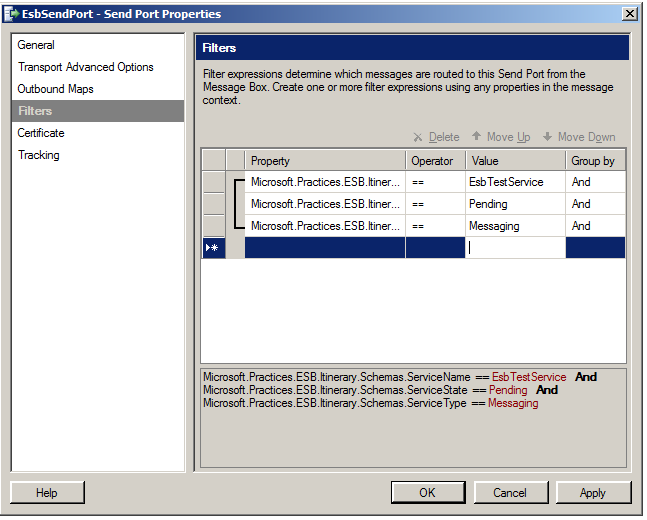
These parameters will allow our port to receive a message from Itinerary. Please note that ServiceName is optional here.
That's it, preparation is finished, you can create an Itinerary.
Create Itinerary
Routes (Itinerary) is the main component of the ESB Toolkit. With their help, we determine what will happen to our message. After installing the components, you can create routes in many types of projects. In this example, we will create a route in an Itinerary project.
So, in Visual Studio we create a new project. On the BizTalk Projects tab, the BizTalk ESB Itinerary Designer project should be available to us. Call our route TestItinerary.
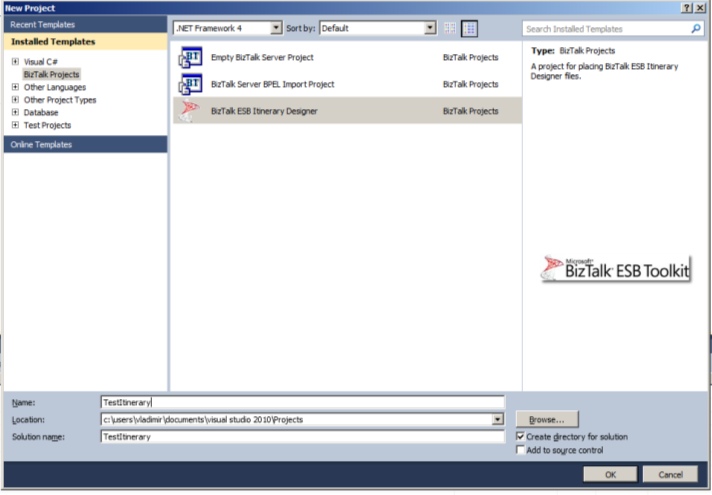
If you do not have such a project template, you need to install it from the folder with the ESB Toolkit. My template is located in the folder C: \ Program Files \ Microsoft BizTalk ESB Toolkit 2.1 \ Tools \ Itinerary Designer. The template is installed by running the Microsoft.Practices.Services.Itinerary.DslPackage.vsix file, after which it appears in Visual Studio.
In the created project, the TestItinerary.ititnerary route should already be added. Double-click to open Itinerary Designer. Naturally, there are no components there now, and it pleases us with an empty gradient.
In the toolbox on the left, we are presented with a list of available components.
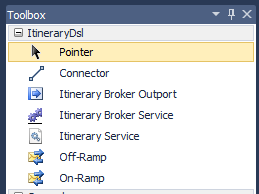
In this example, OnRamp, OffRamp, Itinerary Service, and, of course, Connector will come in handy.
On-Ramp is our data source and service container.
Itinerary Service - here will be our routing logic.
Off-Ramp is our transmission component. It will need to be bound to the Send Port. Pay attention - the port must be dynamic, because The real address is resolved inside the route.
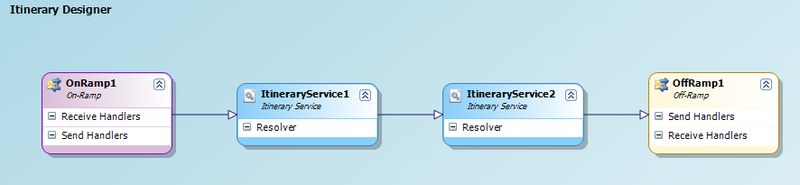
So, we transfer one On-Ramp, two Itinerary Service, one Off-Ramp to the Itinerary Designer area and connect them with connectors as shown in the figure.
To connect two components with a connector, you must first click on the connector in the Toolbox, then click on the first component, then click on the second. Active users of graphic editors sometimes have a hitch here, because they try to “pull” the connector from the first component to the second. A trifle, but it can deliver a couple of unpleasant minutes.
Now we need to configure each of the components and the itinerary itself. We select the OnRamp1 component and prescribe the following properties to it:
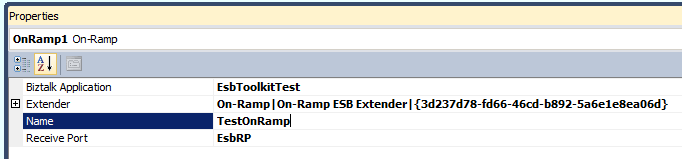
Those. we indicate from which Receive Port of which application you want to receive data, rename the component to TestOnRamp and specify Extender. Why every time choose Extender for On-Ramp, if one single “On-Ramp ESB Extender” is available for it, it is not clear. Apparently, in some situations there may be some other options, but I have not come across this.
Note that until you select Extender, some properties will not appear.
Advice on setting the properties of components - indicate those properties that you see at the moment, and do not pay attention to the fact that some are not yet available - they will appear during the filling process. This is due to the fact that in properties you often have to specify the type of component, and different types have different sets of properties.
After On-Ramp, go to ItineraryService1. We set the following properties for it:
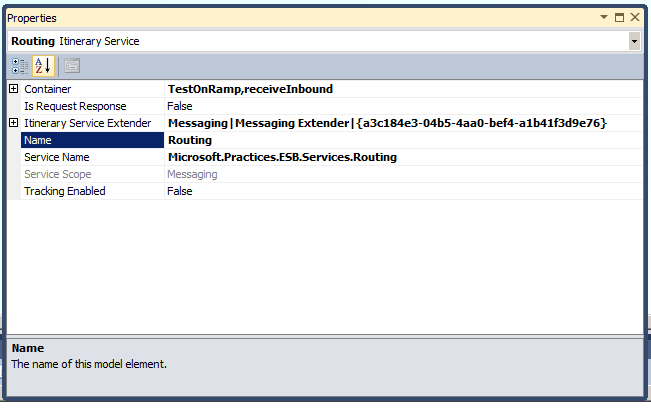
i.e. our on-ramp will be the container for this service, the Extender will be the Messaging Extender. In the Service Name, specify Microsoft.Practices.ESB.Services.Routing - this service will be responsible for routing. And rename the component to “Routing”.
In addition to defining properties, we need to add a resolver to the routing service. In our case, it will resolve the address. We will have a Resolver static - its properties will be rigidly registered and will not be dynamically changed.
So, right-click on our Routing service and select Add-> Resolver.
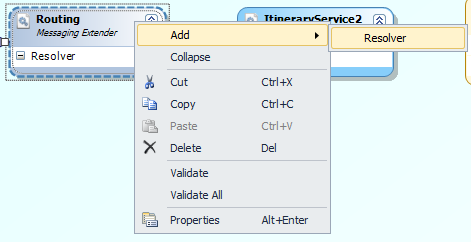
If you call the context menu of not only the entire component, but its specific resolver, then this menu appears:
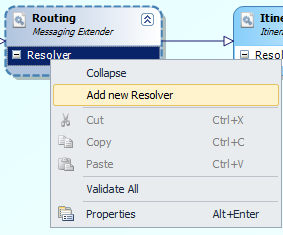
The highlighted item here is similar to the previous one and there is no difference between them.
We call our resolver “staticResolver” and set the following properties for it: I
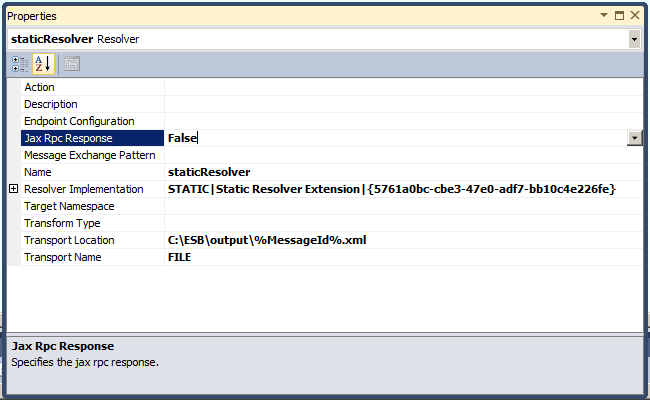
remind you that the BizTalk user must have write permissions to the folder specified in the Transport Location. The static resolver allows you to set the SendPort properties in some detail, but for an example, the type of transport and destination address are enough for us.
All the properties of the routing service we have defined. Go to the Off-Ramp component. The ItineraryService2 component is skipping for now.
For the Off-Ramp component, we set the following properties:

i.e. we tied our Off-Ramp to the previously created Send port. Off-Ramp, we also gave a more harmonious name: "TestOffRamp".
Now go to the ItineraryService2 component. This component will play the role of an off-ramp service. We set the following properties for it:

i.e. we indicated that this is an Off-Ramp service for TestOffRamp, and renamed it.
That's all, all the components we have configured, and our Itinirary Designer should look like this: It

remains to set the properties of Itinerary itself. To do this, click on a place free of components and press F4.
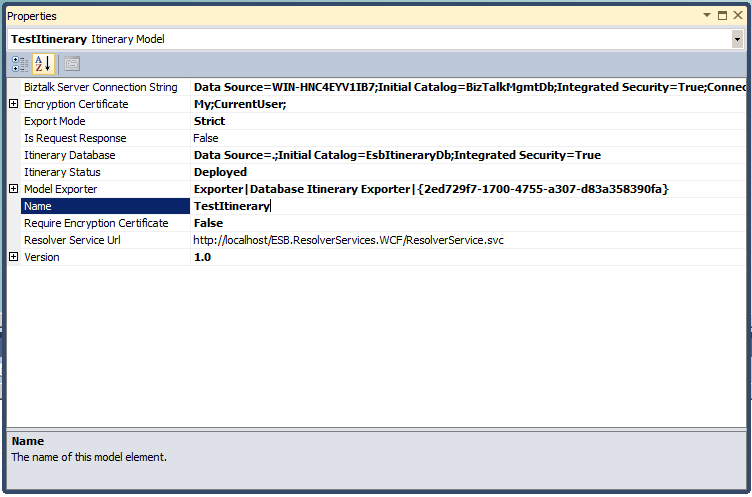
We set the following properties: We will analyze in more detail the properties that we changed:
1. Model Exporter - we specified the Database Itinerary Exporter, i.e. our route will not be exported to XML, but immediately to the database, from where BizTalk will take it.
2. Require Encryption Certificate - False, because we don’t need him now.
3. Itinerary Status - Deployed. If you leave the Published route, it will be in the database, but will not be available. Those. BizTalk cannot call it.
You also need to pay attention to the Name property - this is the name of our route by which it should be searched. Copy it to the clipboard - it will come in handy for us now.
Save the created route, then right-click on the place free from the components and select the “Export model” item. Now our route has been exported to the database and is available for calling from BizTalk.
Configure Receive Port
Once again, go to the BizTalk Server Administration Console and open the properties of the Receive Location we created. We did not change the pipeline and it remained PassThruReceive. It's time to change it and customize our Itinerary selection.
Select the pipeline ItinerarySelectReceivePassthrough and open its properties.
In the Stage 1: Decode - Component: ESB Itinerary Selector section, you must specify the properties to select Itinerary.
In ItineraryFactKey, specify Resolver.Itinerary, and in ResolverConnectionString - ITINERARY: \\ name = TestItinerary;
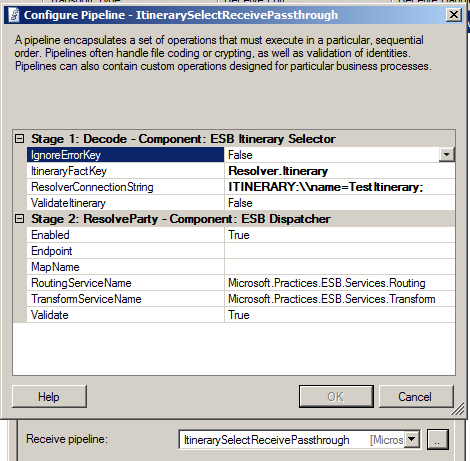
The Name parameter sets the name of our route. Now we have used static route selection, but you can also use dynamic, for example, based on business rules.
Start, finish and conclusions
Launch the application in the BizTalk Server Administration Console.
In the folder C: \ ESB create a test document. For example, this: Copy the document to the folder C: \ ESB \ input and watch how it appears in the folder C: \ ESB \ output. Everything, our application worked, you can rejoice. The first conclusion that begs this example - ESB Toolkit - is something cumbersome and the same result can be achieved much easier. But you need to consider - everything that we set here statically can be determined dynamically. Those. only a little complicating the task, we get dynamic content-based routing and transformation. And even the choice of route itself can be dynamic. If this topic is interesting, then in the next post I will give an example of a dynamic solution based on business rules.
Hello world
The most important link
I wanted to call it “Useful Links”, but realized that only one would be useful:
ESB Toolkit on the Microsoft website.
Here you can find all the most important ESB Toolkit, what it is, links to documentation and downloading of the toolkit itself. By the way, I recommend downloading the poster - a very useful and visual thing. Resource in English. Unfortunately, I could not find a Russian analogue.