Networks for the smallest. Part one (which is after zero). Connect to cisco equipment
- Tutorial
All issues
8. Networks for the smallest. Part Eight. BGP and IP SLA
7. Networks for the smallest. Part Seven. VPN
6. Networks for the smallest. Part Six Dynamic Routing
5. Networks for the smallest: Part Five. NAT and ACL
4. Networks for the smallest: Part Four. STP
3. Networks for the smallest: Part Three. Static routing
2. Networks for the smallest. Part two. Switching
1. Networks for the smallest. Part one. Connecting to cisco
0. Networks for the smallest. Part zero. Planning
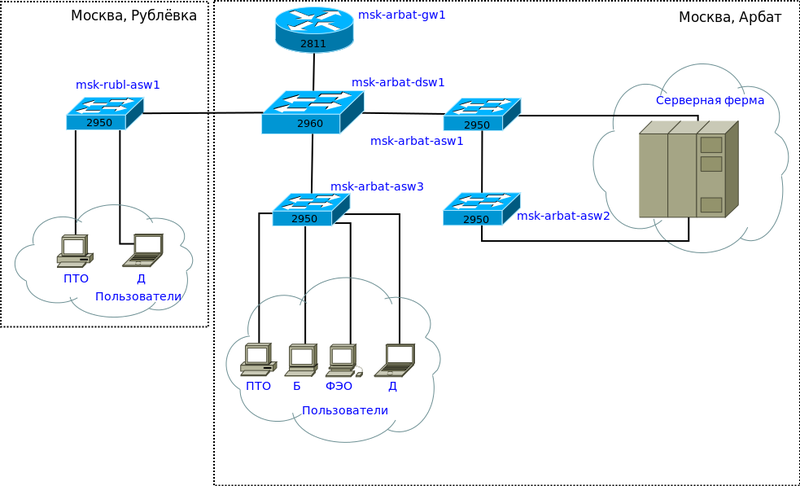
Subject cisco on a habr cannot be called popular, often interesting articles remain almost unnoticed. But we were pleasantly surprised by the hype around our previous publication . More than a thousand people added it to their favorites, and this definitely indicates that a continuation is necessary.
In addition, many people with experience in real-world network planning and construction made very correct points about redundancy. The fact is that the network scheme proposed last time is a model, a laboratory, on which we will work out and understand technologies, therefore we were not puzzled by such things. In real life, especially if you are a service provider / provider, various redundancy schemes are needed: VRRP , STP ,Link Aggregation , Dynamic Routing Protocols.
We will try to take into account all the comments and at the end of the cycle we will probably consider how the network should be built so that six months after the launch the engineer does not have excruciating pain.
Today we will turn to the part that is a little boring, but important for beginners: how to connect, set or reset a password, log in via telnet. We also consider existing programs - cisco emulators and equipment interface.
As promised, this time it’s all in an adult way: with a video.
Under the cut, the same in text and a little more detailed form.
So, here they come - the treasured boxes with the inscription Cisco on board.
Wednesday
Let's start with the environment in which we will work.
At the moment there are two well-known software packages that allow you to simulate a network built on Cisco equipment:
a) the Tsiskovsky product Packet Tracer, which in theory is not freely distributed. It is an emulator and has only some Cisco IOS features. Generally speaking, it is very limited and many things are implemented in it only partially. No subtle settings. On the other hand, version 5.3.2 currently supports the creation of GRE tunnels, dynamic routing protocols (including even BGP!). Moreover, it is very easy to learn and has in its arsenal of servers (FTP, TFTP, DHCP, DNS, HTTP, NTP, RADIUS, SMTP, POP3), workstations and switches. Now it is already under Linux, although in the old days it also started fine from under Wine.
b) The GNS3 simulator licensed under the GNU GPL. In this package, you must download true Cisco IOS images. On the one hand, this is a plus - you work with a real cisco interface and are limited only by your imagination, existing standards and workstation performance, on the other, firstly, you still need to be able to get these IOSs, and secondly, this is a more complicated product to understand, and thirdly, it has only routers and “type” switches.
I believe that to get acquainted with the principles, it is better to start with the Packet Tracer, and then switch to heavy artillery as needed. We are not small children, where we will not tell where to get what we need.
Connection Methods
In Packet Tracer, you can manage equipment in the following ways:
The interface of the last three is identical - only the connection method differs. Of course, the GUI is not our method.
In real life, the following are available:
- Telnet / ssh
- Terminal connection from a workstation via a console cable
- Web interface ( Cisco SDM ).
The last option is not even mentioned in a decent society. Even if you are an adherent of the mouse and browser, I really do not recommend it.
In my example, when working with other equipment, I came across the fact that configured through the web does not work. Although you crack, but does not work. And the same length generally had a bug in one version of the firmware for switches: if you change the VLAN settings in the web interface from under Linux, then the switch becomes inaccessible for management. This is an officially recognized problem). Telnet is a standard, well-known utility, like ssh . To access cisco using these protocols, you need to configure access passwords, more on that later. The ability to use ssh depends on the IOS license.
Console management
Well, you brought the router, printed it out, gave power to it. He languidly rustled coolers, winks at you with the LEDs of his ports. And then what to do next?
We will use one of the oldest and ageless ways to control almost any smart device: the console. To do this, you need a computer, the device itself and a suitable cable.
Here, every vendor is much different. Which connectors they don’t use: RJ-45, DB-9 male, DB-9 mother, DB-9 with non-standard pinout, DB-25.
The tsiska uses the RJ-45 connector on the device side and the DB-9 mother (for connecting to the COM port) on the PC side.
The console port looks like this:
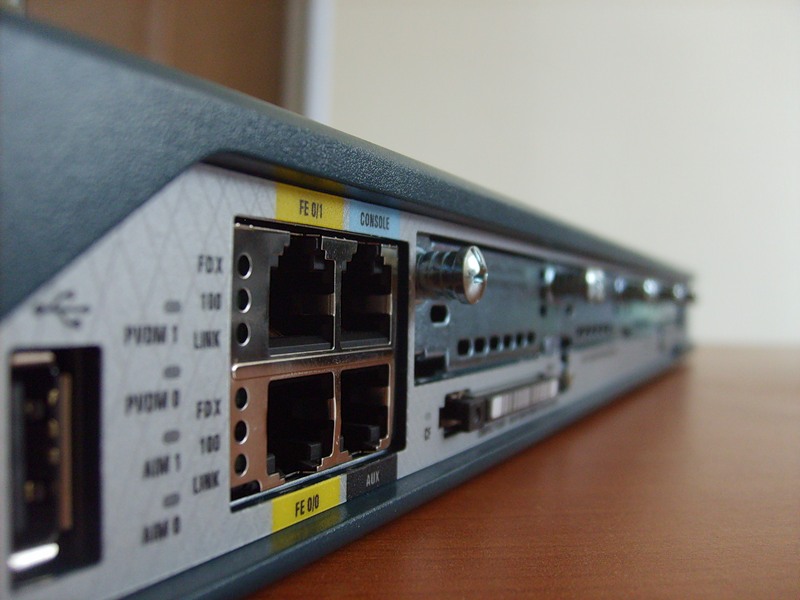
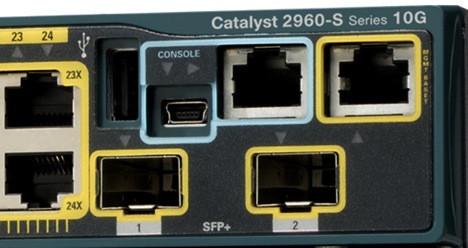
Always highlighted in blue. Recently, USB control has become possible.
And this is the cisco console cable:
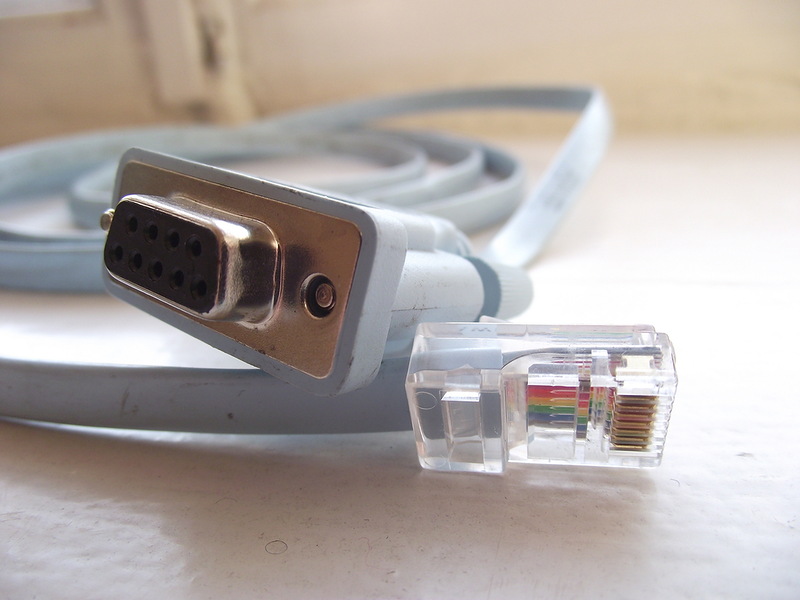
Previously, it was delivered in each box, now it often costs separate money. In principle, a similar cable from HP is suitable.
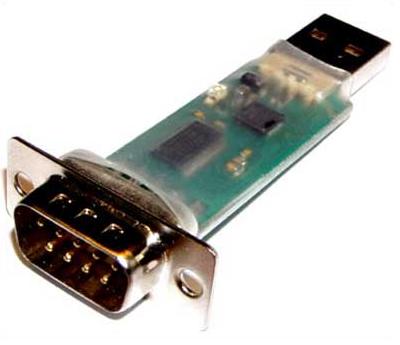
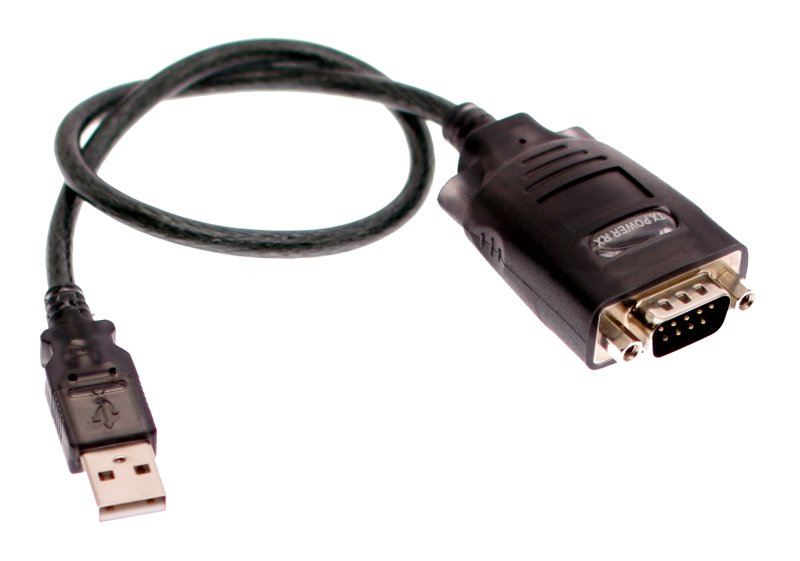
The problem is that modern PCs often do not have a COM port. Frequently used USB-to-COM converters come to the rescue:
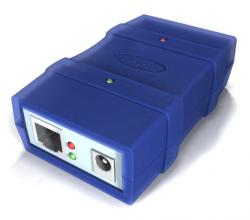
Either RS232-Ethernet converters, rarely used for these purposes,
After you stuck the cable, determined the COM port number, you can use Hyperterminal or Putty in Windows and Minicom in Linux to connect.
Management through the console is available immediately, but for telnet you need to set a password. How to do it?
Turn to PT.
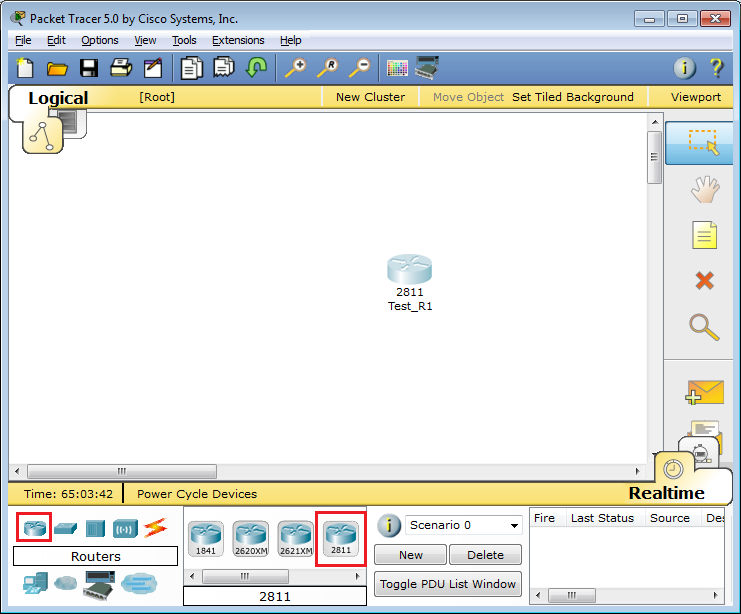
Let's start by creating a router: select it in the panel below and transfer it to the workspace. Give some name
What would you do if it were the most real iron router? They would take the console cable and connect them to it and to the computer. We’ll do the same here:

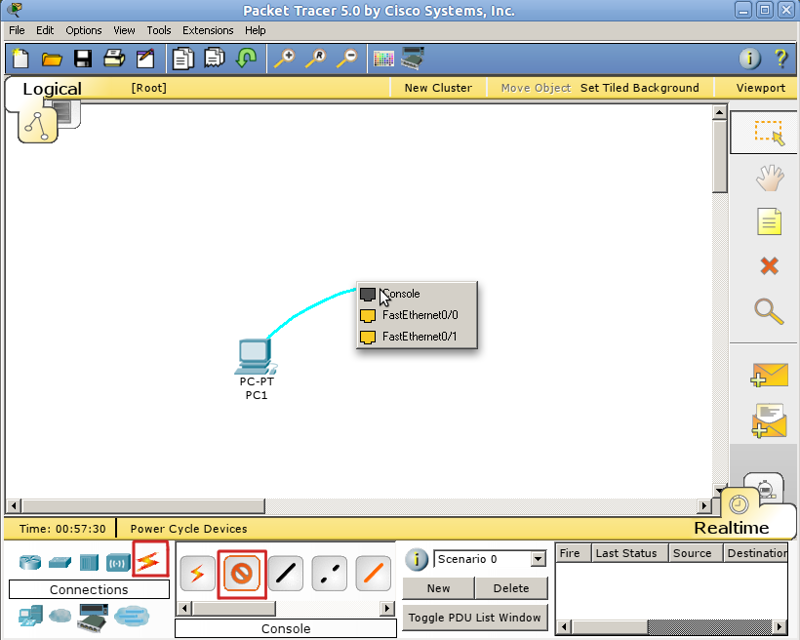
By clicking on the computer we call the settings window, in which we are interested in the Desktop tab. Next, select Terminal, where we are given a choice of parameters.

However, all the default parameters suit us, and changing them makes no sense.
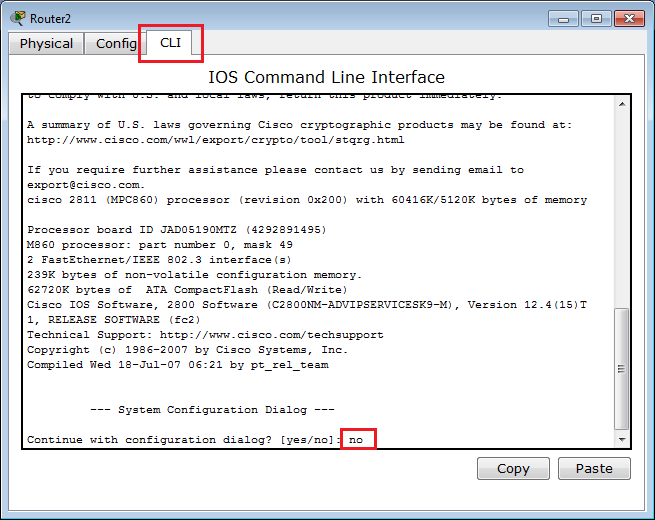
If there is no configuration file (startup-config) in the non-volatile memory of the device, and it will be the same when you turn on the new hardware for the first time, we will be greeted by the Initial Configuration Dialog prompt:
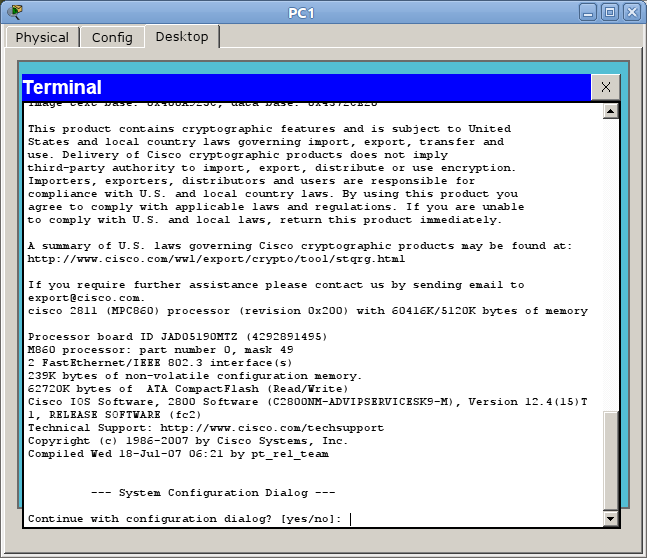
In short, this is a wizard that allows you to configure the device’s main parameters (hostname, passwords step by step) , interfaces). But this is not interesting, so we answer no and see the invitation
Router>This is a standard invitation absolutely for any cisco line, which characterizes the user mode , in which you can view some statistics and carry out the most simple operations like ping. Entering a question mark will show a list of available commands:
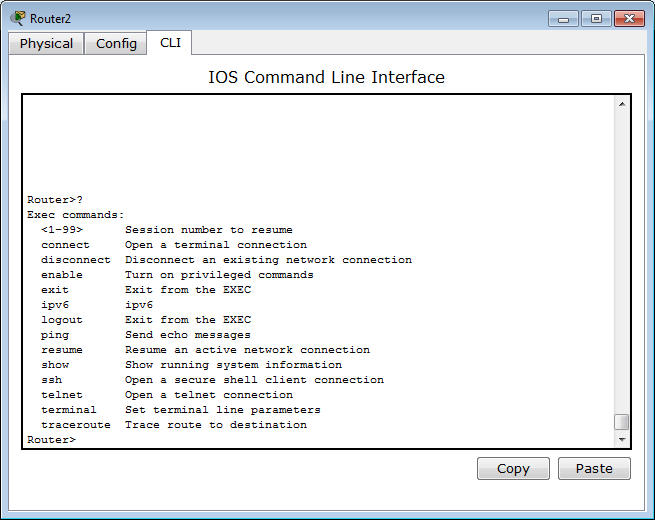
Roughly speaking, this is a mode for a network operator, an engineer of the first technical support line, so that he doesn’t damage anything, spoil it or learn too much.
A much greater opportunity provides a mode with a talking name privileged . You can get into it by typing > enable . Now the invitation looks like this:
Router#Here the list of operations is much more extensive, for example, you can run one of the most frequently used commands that demonstrates the current device settings as a “config” #show running-config . In privileged mode, you can view all information about the device.
Before setting up, we’ll mention a few useful things when working with the cisco CLI that can greatly simplify life:
- All commands in the console can be shortened. The main thing is that the reduction clearly points to the team. For example, show running-config is shortened to sh run . Why not up to sr ? Because s (in user mode) can mean either a show command or a commandssh , and we get the % Ambiguous command: “sr” error message (ambiguous command).
- Use the Tab key and question mark. By pressing Tab, the abbreviated command is added to the full one, and the question mark following the command displays a list of further options and a little help on them (try it yourself in PT).
- Use the keyboard shortcuts in the console:
Ctrl + A - Move the cursor to the beginning of the line
Ctrl + E - Move the cursor to the end of the line Cursor
Up, Down - Move through the history of commands
Ctrl + W - Erase the previous word
Ctrl + U - Erase the entire line
Ctrl + C - Exit configuration mode
Ctrl + Z- Apply the current command and exit configuration mode
Ctrl + Shift + 6 - Stop long-running processes (the so-called escape sequence)
- Use command output filtering. It happens that the team displays a lot of information in which you need to dig a long time to find a specific word, for example.
We facilitate the work by filtering: after the command we set | , write the type of filtering and, in fact, the desired word (or part of it). Types of filtering (aka output modifiers):
begin - output of all lines, starting from the one where the word was found,
section - output of sections of the configuration file in which the word occurs,
include - output of lines where the word occurs,
exclude- output lines where the word does not occur.
But back to the modes. The third main mode, along with user and privileged: global configuration mode . As the name implies, it allows us to make changes to the device settings. It is activated by the command #configure terminal from privileged mode and displays the following prompt:
Router(config)#In global configuration mode, sometimes quite necessary commands of other modes (the same show running-config, ping, etc.) are not executed. But there is such a useful thing as do . Thanks to it, we can, without leaving the configuration mode, execute these same commands, simply adding do in front of them. Like that:
Router(config)#do show running-configTelnet Access Configuration
From this mode, we will configure the interface for connecting the computer via telnet:
The command to enter the FastEthernet 0/0 interface configuration mode :
# Router(config)# interface fa0/0By default, all interfaces are disabled (administratively down state). Turn on the interface:
Router(config-if)#no shutdownConfigure the IP address:
Router(config-if)#ip address 192.168.1.1 255.255.255.0shutdown - means “shut down the interface”. Accordingly, if you want to cancel the command, use the word no in front of it. This rule is common to the CLI and applies to most commands.
We are connected. To do this, use a crossover cable . (Although in real life this is often no longer necessary - all cards can understand reception / transmission, however, there are also routers whose ports do not rise when using the wrong type of cable - so be careful)
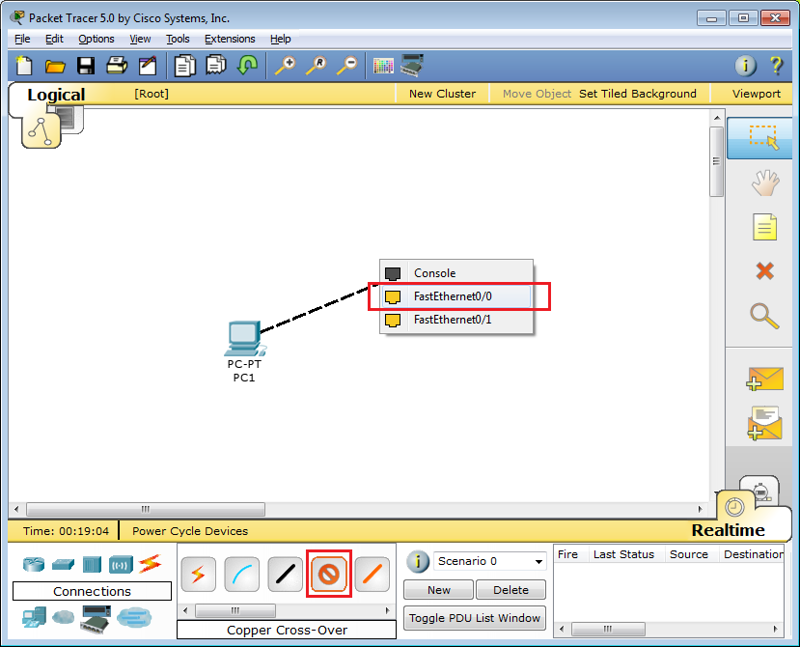
Configure the IP address of the computer via Desktop.
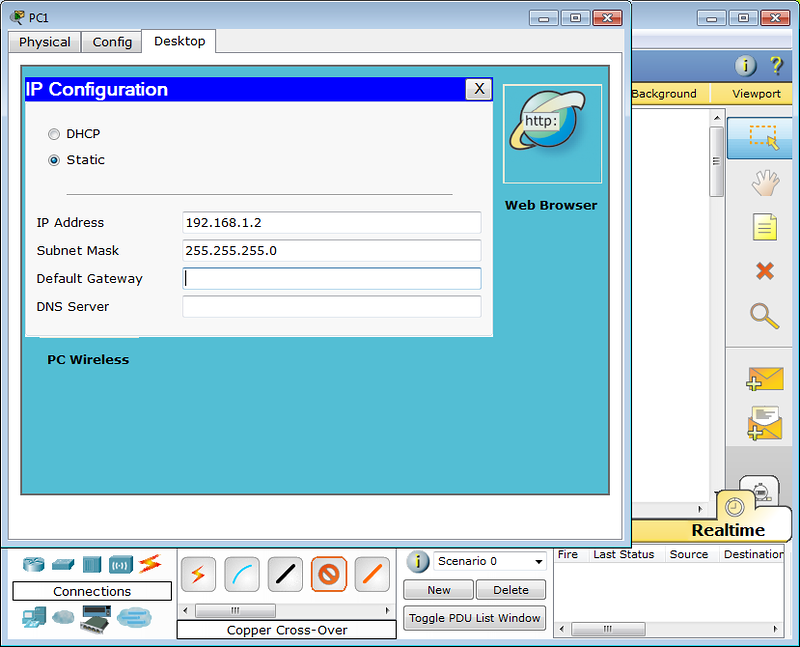
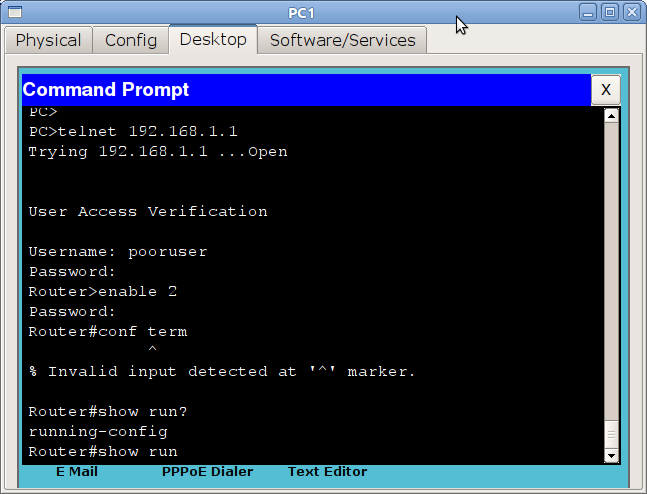
And we try to connect by selecting Command Prompt in the Desktop panel:
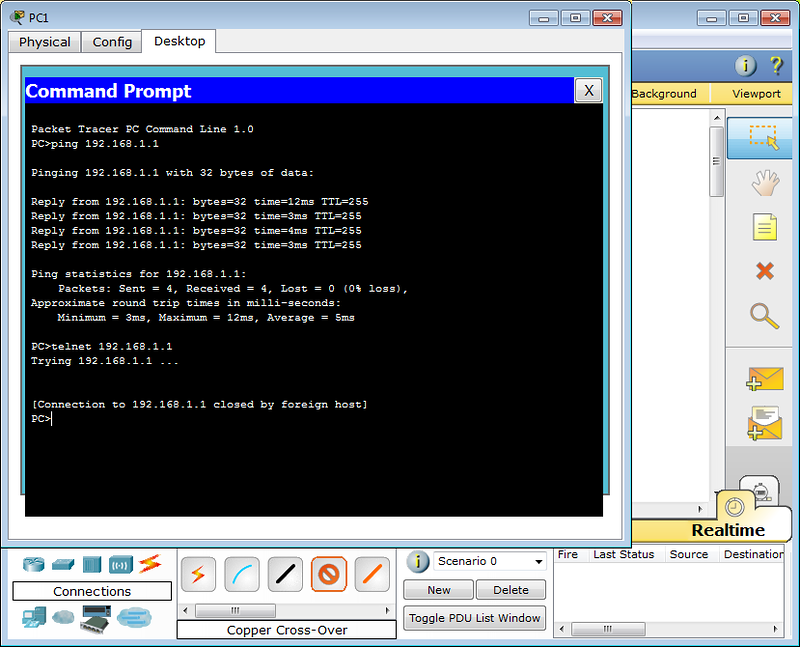
As expected, the tsiska does not start without a password. In real life, it usually displays the phrase “Password required, but none set”
Passwords
A telnet or ssh connection is called a virtual terminal (vt) and is configured as follows:
Router(config)#line vty 0 4
Router(config-line)#password cisco
Router(config-line)#login
0 4 is 5 user virtual terminals = telnet sessions.
This is already enough to get into user mode, but not enough for privileged mode:
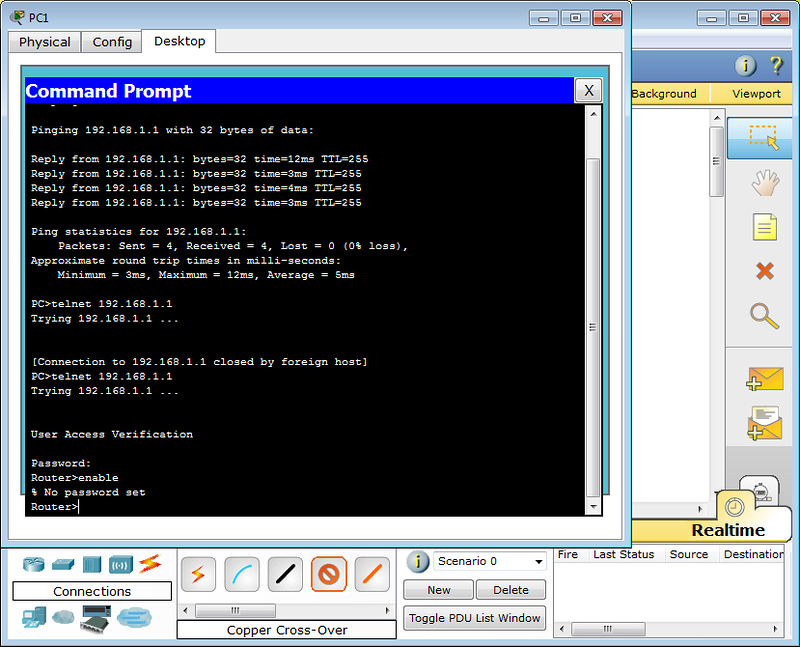
Configure the password for enable mode:
Router(config)#enable secret test
What is the difference between secret and password ? About the same as ssh from telnet. When setting up secret, the password is stored in encrypted form in the configuration file, and password in the open. Therefore, the use of secret is recommended .
If you still set the password with the password command , then you should also use service password-encryption , then your password in the configuration file will be encrypted:
line vty 0 4
 password 7 08255F4A0F0A0111
A friend of mine told me a story:
He once stood smoking near one of his nodes, located in a residential building. With a tool bag, a laptop in hand. Suddenly two drunks with a package come up and offer to buy, opening the package and showing some kind of switch. They ask for 500 rubles. Well, he bought it. According to the labels and the model of the switch, the guy concluded to which provider he belongs. He came home, started picking - the telnet is closed, the console is password-protected. Dumped a config on snmp. Passwords are stored in clear form, the name is given out by the provider. He is personally acquainted with their admin, called him instead of “Hello” and issued a username and password to the handset. It was audible how the brain creaked for the first 20 seconds: everywhere there are access lists, authorization, binding to a poppy address. How?! In general, all is well that ends well.
You can read a little about it here . Well, or a little more in Russian, here .
We want to draw your attention:
now it is customary to configure accesses not through virtual terminals, but with the commands #username and #aaa new-model . In version PT 5.3.2 they already exist and work quite well.
To do this, do:
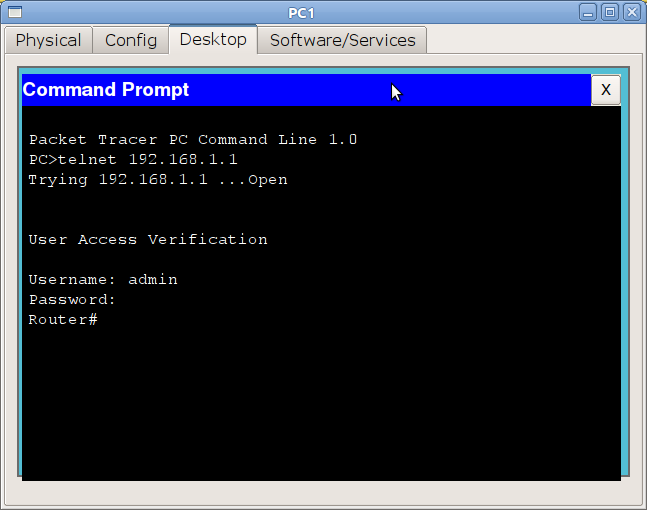
Router(config)#aaa new-model
Router(config)#username admin password 1234
The first command is to activate the new
Be careful : the priority of the aaa new-model command is higher than the virtual terminal commands, and therefore, even though you have a password configured in line vty mode, if you do not have users in the local database, you will not be able to log into the device remotely.
Now, when connected, the router will ask for a username and its corresponding password.
With a deeper setup line vtythere is one danger.
There is such a parameter: access-class . Its setting allows you to limit the IP addresses from which you can connect. And then one day, as a smart Masha, I decided to take up security on the network and on almost everything installed the equipment with these access lists so that the mosquito would not fly. One fine moment I had to go into the field and that day I cursed my accuracy - I couldn’t reach anywhere — I didn’t leave the slightest loophole. In general, be careful with this team or leave loopholes for yourself.
When working with access-lists and other dangerous things, the incorrect configuration of which can deprive you of access to the device, you can use the wonderful reload in min command , where mintime in minutes. This command will reboot the device after the specified time, if it is not interrupted by the reload cancel command . Those. the scheme of work is as follows: you are remotely digging something that can in theory (Murphy’s law is not forgotten) interrupt your communication session with the device. We save the current (working) config in startup-config (it is used at boot), put reload in 15, enter the key command about which we have doubts ;-), and we get the connection disconnected, the worst fears were justified. We are waiting for 15 minutes, the device is rebooted with a working config, the connection is voila, there is a connection. Or (if the connection has not been interrupted), check that everything works, and do reload cancel .
If you want to restrict password access through the console port, you will need commands
Router(config)#line console 0
Router(config-line)#login
Router(config-line)#password cisco
Privilege Level
Another important point that little attention is paid to in the articles: privelege level.
As is clear from the Latin sound, this is the level of user rights. There are 16 levels in total: 0-15.
privilege level 0 - these are disable, enable, exit, help and logout commands that work in all modes
privilege level 1 - These are user mode commands, that is, as soon as you get to the tsiska and you see the Router prompt > you have level 1.
privilege level 15 - These are privileged mode commands, such as root on Unix
Example 1
Router(config)#line vty 0 4
Router(config-line)privilege level 15
After logging into the router with this configuration, you will immediately see Router # with all the associated rights.
All levels 2 through 14 are manually configured. That is, for example, you can give the go-ahead to a user with privelege level 2 to execute the show running-config command
Example 2
Configure rights for a particular user will have already mentioned before the team username
Router(config)#username pooruser privilege 2 secret poorpass
Router(config)#privilege exec level 2 show running-config
Router(config)#enable secret level 2 l2poorpass
In the first line, we assign the level of rights to the user, in the second command, allowed for this level, in the third we set the password to enter privileged mode with this level.
After that, from user mode, you can run the enable 2 command and enter the password l2poorpass to get into privileged mode, in which all level 1 commands + level 2 commands will be available.
What might it be for? In Russian realities, almost for nothing, because usually engineers need to go to the device right away with full rights. Well, except that they put the 15th level so that double authentication does not pass. And all the other levels, again, so that junior staff (technical support, for example) could go in and monitor some parameters or configure a non-critical function.
Ssh
It is impossible not to mention that telnet is an unprotected protocol and transmits password and data in clear text. Using any packet analyzer, you can calculate the password.
Therefore, we highly recommend using ssh - any cisco devices with not very trimmed firmware can act as an ssh server.
The following set of commands will allow you to enable ssh and disable telnet access:
	Router(config)#hostname R0
	Router(config)#ip domain-name cisco-dmn
	Router(config)#crypto key generate rsa
	Router(config)#line vty 0 4
	Router(config-line)#transport input ssh
The host name must be different from the Router, the domain name must be specified. The third line generates a key and then only ssh is allowed. The key length must be more than 768 bits if you want to use ssh version 2, and you want it. All.
Another final attention to beginners: do not forget about the write memory command - it saves the current configuration. However, it is enough to get burned twice, forgetting to save, in order to permanently earn immunity to this - whoever encoded at night or wrote a term paper will understand.
Using PT, we will configure the equipment not through the terminal or telnet, but directly through the CLI of the device, which is called by clicking on the router icon - this is more convenient:
Well, sweetie: password reset
So, what should you do if you got a bushy tsiska with an unknown password on the table or you forgot it at a very bad time? In fact, it is repeatedly described and easily google, but it is necessary to repeat it.
Practically on any network device, it is possible to reset the password, having physical access. If this is not possible or it is a separate paid service, then most likely you have some Russian crafts in your hands (no offense, of course, to our manufacturers, but I read these lines twice in the documentation :))
So, cisco:
1) Connect to the device with a console cable,
2) Send it to reboot (at least for power, at least with the #reload command )
3) When such line ######## ... ### runs on the screen, which means loading the image (40-60 seconds after switching on), it is necessary to send a Break signal . How to do this in different programs read here . You are in ROMMON mode.
4) In this mode, enter the command: confreg 0x2142 , it will make the device ignore startup-config at boot time.
5) Enter reset to reboot
6) After loading, running-config will be pristine and startup-config contains the last saved configuration as before. Now is the time to change the password or merge the config.
7) Most important: return registers :
Router(config)#config-register 0x2102If you do not, then your entire configuration will be relevant until the first reboot) And it’s good if this device is nearby, and you will remember that you messed up. I was not lucky)
In the next article, we will turn to the vlan and the local network. Mandatory reading:
OSI .
VLAN
Unregistered readers of Habrahabr can ask their questions in LJ .
I want to thank thegluck user for their help in writing this article.