 January 7, 2012 at 11:02
Making a WallI Robot
- Transfer
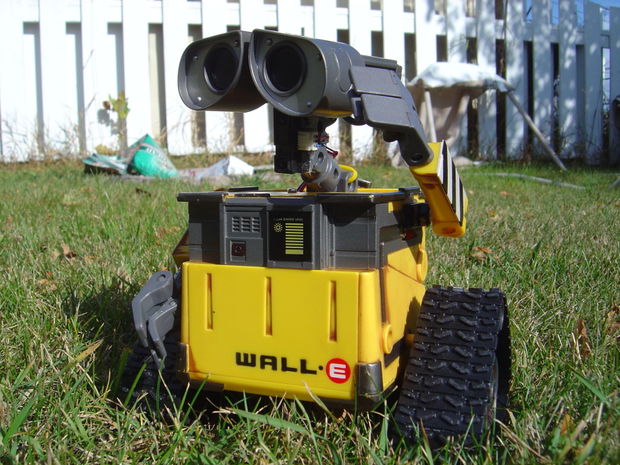
Translator's note: the robot is awesome smart! Be sure to watch the video under the cut!
See the first small introduction here - http://www.youtube.com/watch?v=OJiMUzJHYFk
I started with the Interactive WallI toy. The current price for toys'r'us is $ 34.99.
I am fond of robots and I have extensive experience in programming and design to give robots emotions and life. The first piece of advice I can give you is to be sure. Second tip - be creative. Use them together, and your mind will do the rest for you :)
The stores have many spare parts available. My workshop is nothing special. I try to buy those parts that are cheaper. Sometimes I disassemble other toys, because servos are, unfortunately, the most expensive of all spare parts :)
For fasteners, I use cable ties, as well as small screws, bolts and nuts. All are available in cheap assembly kits at your local store.
To change cases, I use Dremel tools and sometimes my soldering iron to melt the plastic. When sanding, please keep a vacuum cleaner nearby. Caution: When melting, keep the fan window open!
In addition, if you decide to melt the plastic, please use a separate tip on the soldering iron.
Now about the software part ... In fact, it is very simple. I program my robots using the EZ-Robot Project and the EZ-B EZ-B Robot Controller. They almost do not require any programming. You can simply connect servomotors and control the robot from your PC. It also contains voice recognition and a bunch of other useful things. You can get them here: http://www.ez-robot.com .
Here's a video of sally in action ...
And here is a nice video where WallI fell, chasing his ball :)
Here is another old video of my first version
Step 1. Materials
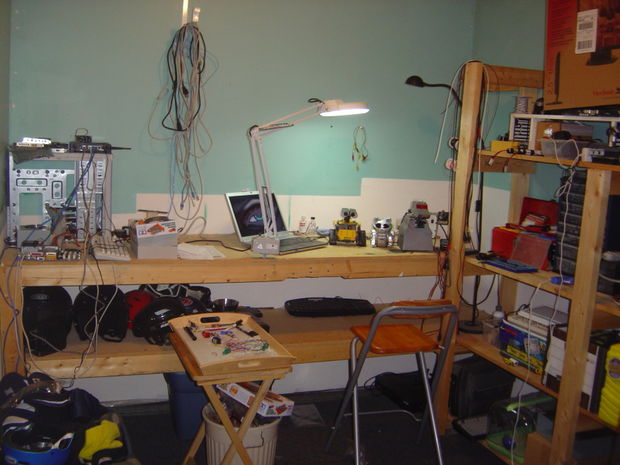
Ok, I hope you found a good place to get started. The table should be such that it would not be a pity to burn / scratch / stain it (Simply put, do not use your dining table!)
Here is a list of things I used ...
- 1 EZ-B with SDK or EZ-Builder software
www.ez-robot.com - 2 servos for transmission
www.hvwtech.com/products_view.asp?ProductID=114 - 1 standard servo for the head (left and right)
www.hvwtech.com/products_view.asp?ProductID=878 - 2 hand servos (up and down movements)
www.hvwtech.com/products_view.asp?ProductID=863 - 1 servo head tilt
www.hvwtech.com/products_view.asp?ProductID=862 - 2 analog distance sensors
www.hvwtech.com/products_view.asp?ProductID=88 - Multiple 3-wire cables
www.hvwtech.com/products_view.asp?ProductID=690 - 1 box of screws / bolts / nuts.
Available at your local hardware store. - Glue Gun
Available in Hobby Shops - 1 bottle of super-glue (probably we will have glue “Moment” - approx. Transl.)
Or any other good glue for plastic - 1 soldering iron
I use temperature-controlled soldering irons, which are expensive, but are recommended in this case. Sometimes you can meet them in online stores. - 1 set of screwdrivers.
They are usually sold in plastic boxes with a transparent top.
Step 2. Disassemble the toy

Using a screwdriver, disassemble the toy. Remember where it was, because we will need to collect it back.
Note: Do not disassemble your eyes.
Step 3. Hands

You need to mount the servos on the top of the toy body. This will be your first body modification.
The photo shows how the servo wheel and the original mechanism are installed.
Use Dremel to cut the plastic at the ends. Make sure you use a low speed.
“I used a glue gun to create a nice tight fit for servos.”
“I made two tiny holes in the plastic to screw in the screws for reliability.”
Mounting hands on servos is a bit more complicated. I do not have a clear photo of how I did it.
In addition, when you understand how to mount your arm, make sure that the servo and arms are in the center position. Because the servo does not rotate 360 degrees.
Step 4. Setting the head and neck

The neck will mount on a GWS standard servo. This will allow her to move left and right.
Note: Like hands, the servo should be centered;)
I used a Dremel combination with a soldering iron to smooth the neck adapter. I smelted 3 small holes for installing screws on the servo.
To install the servo and bracket on the head, you will need to make a larger hole.
At first, I secured my neck with cable ties, but then I put the bolt and nut.
Step 5. Drive. Part 1

Now let's give the Wall and Wheel!
The toy has no engines or transmissions. Thus, you have to make it yourself.
Bending and turning the wheels to the metal axis come off. I ended up using Dremel and cutting most of the plastic parts. In any case, you want the wheels inside to be flat, so don’t worry :)
Now we are going to just pull the cap on the wheels out of the center. This will remove the screw. After that, the wheels will fall apart.
If any part of the servo sticks out, cut it off using the Dremel tool.
On both sides the same ... Look at the photo :)
Step 6. Drive. Part 2

Ok, now we will mount the transmission to the body.
Look carefully at the picture to see how much to cut.
It’s best not to rush at this step. I use a marker to outline where to cut.
After attach the servos with the mounting bracket. Then glue them with hot glue.
To securely mount the servo, I used cable ties.
Step 7. Distance Sensor

I believe that you want your Wall And see.
I installed a distance sensor on his neck using Dremel.
The wires that go together in the sensor are very small and break easily. I replaced their 3-cable wires, which were discussed in the first step.
Step 8. Head tilt

Nothing makes WallI more alive than turning its head. This adds certain features to his personality.
I connected both parts of the eyes so that they rotate together. But you don’t have to do that to make WallI look a little funnier (and worse - approx. Transl.)
NOTE: Don't try to move this tiny servo by hand! You will break the plastic gears inside. Believe me, I already broke them once, trying to do it.
Step 9. Programming

This part is not the most difficult since I use the EZ-Robot Project. This is a robot controller board that connects to a computer via Bluetooth. The board comes with software called EZ-Builder. The software allows you to control the robot without the need for programming. You can also add many other features, including voice recognition.
Here are some links to get you started ...
EZ-Builder: www.ez-robot.com/EZ-Builder
Additional modules: www.ez-robot.com/Add-Ons Answer
form: www.ez-robot.com/Community/Forum
How to work with servo: www.ehow.com/how-does_4970258_how-servo-motor-works.html
Step 10. Your robot!
My WallI creates two-dimensional maps of the objects around it. This prevents him from getting stuck or crashing into anything. This is very difficult to implement.
In addition, his movements are not random, but depend on what is happening. All this I did based on many years of observation and programming.
Step 11. Battery

My WallI consumes a lot of energy because it has 6 servos and microcontrollers.
Due to size limitations, I was limited to a small battery.
My choice fell on the LION battery at 2000mha 7.4 volts. This battery gives my WALLI about 60 minutes of life without recharging.
Step 12. Enjoy!
I hope you enjoy your new robot. For more information about my projects and robots, visit my website www.dj-sures.com/robots
Bye-bye!
DJ










