Embed a second hard drive in Mac Mini 2011
The newest version of the Mac Mini does not have an optical drive. The server version of the Mac Mini with a second hard drive costs from 45 thousand rubles. Apple also provides the option to upgrade to a normal Mac Mini (only at authorized reseller stores). It will cost accordingly.
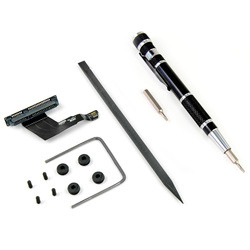
With straight arms and related equipment, you can mount the second hard drive yourself. To do this, you need the hard drive itself . In addition, you will need a special bent mini-SATA cable (if you look, you can find it on eBay ) and a set of Torx screwdrivers (Torx T6, Torx T8). You can also order a cable with screwdrivers here. To integrate the second hard drive, you need to completely remove all other components from the Mac Mini, since it will be located at the very bottom (when viewed from the cover). Under the cut - a lot of photos.
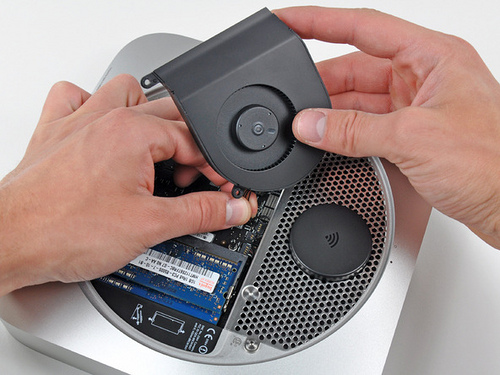
1. The Mac Mini Upgrade Kit contains all the necessary screwdrivers along with a mini-SATA cable and additional rubber tabs. 2. First, unscrew the first two nuts (11.3 mm (T6 Torx)) and carefully lift the fan, disconnect the fan cable from the system board, now it can be removed from the case.
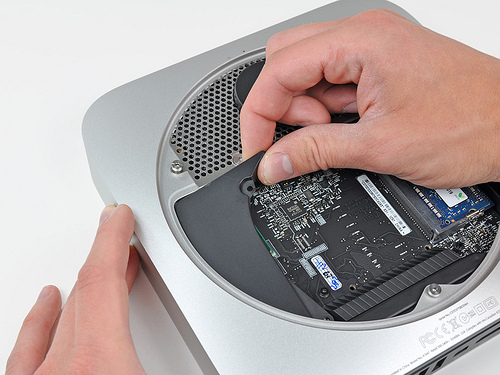
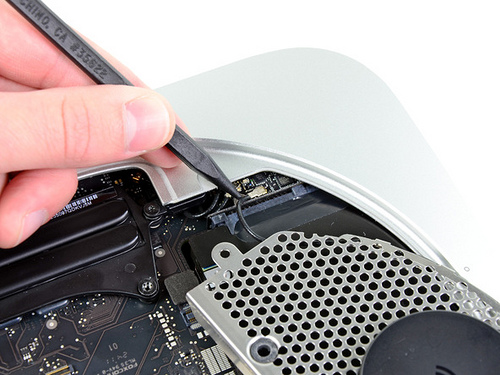
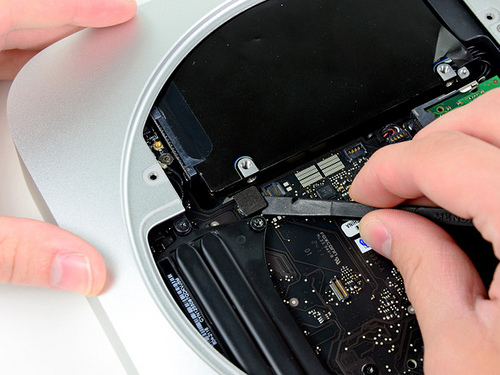
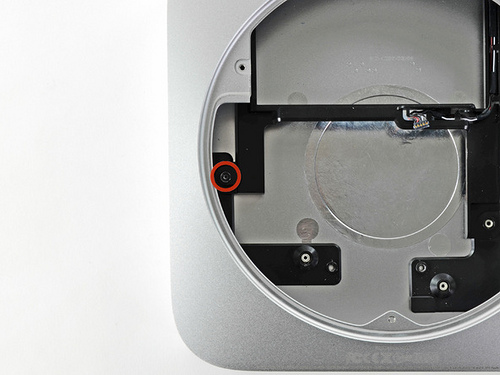
3. In order to remove the asymmetric piece of iron, which is located near the fan, some sleight of hand is required. First you need to unscrew the nut (3.5 mm (T6 Torx)), with which it is attached to the body, then raise the protruding edge and carefully remove it from the gap. 4. The next step is to remove the antenna for wireless communication. To do this, first unscrew the four nuts at the edges of the antenna (2 x 6.6 mm (T8 Torx), 2 x 5.0 mm (T8 Torx)). Carefully raise the antenna by the straight edge. Now you can disconnect the cable that is mounted on the board responsible for Bluetooth and AirPort connections. 5. The next step is a hard drive. Its connectors are disconnected with a screwdriver from the motherboard. There are two such connectors on both edges of the disk.
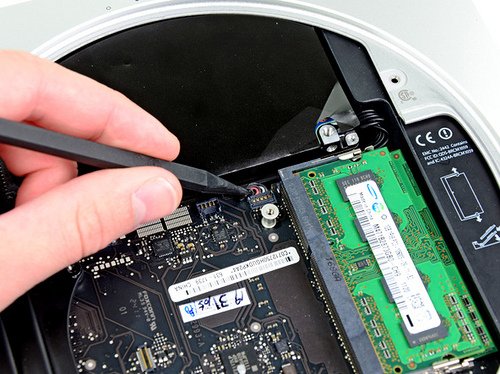
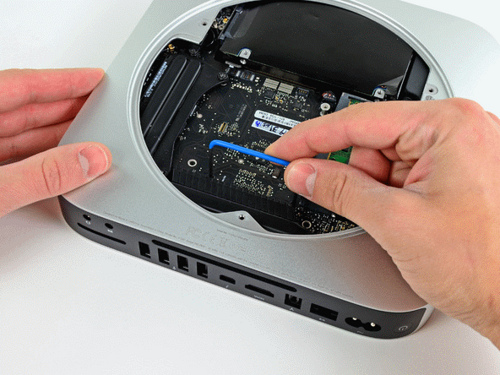
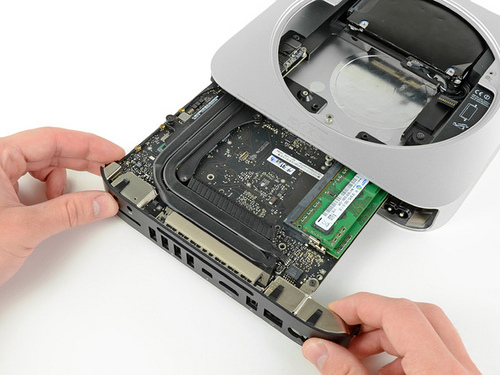
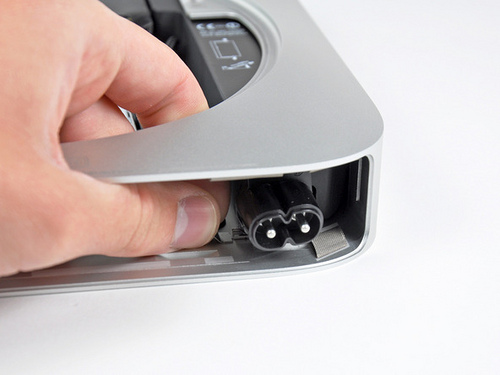
6. Unscrew the three visible nuts (5.0 mm (T8 Torx), 16.2 mm (T6 Torx), 26 mm (T6 Torx)) and remove the motherboard. The most difficult step in disassembling and reassembling your Mac Mini. It is necessary to push the board out of the gap, the edges of which are covered by other parts. To do this, you will need a special device similar to a bracket or two thin screwdrivers. We use a screwdriver to shift the board a couple of millimeters. 7. After the motherboard is moved away, you can disconnect the cable with which it is attached to the power supply. 8. Now you can remove the motherboard and hard drive. 9. Take out the power cable. To do this, unscrew the nut by 7.6 mm (T6), extend the socket that holds the power cable and rotate the cable itself 90 degrees.
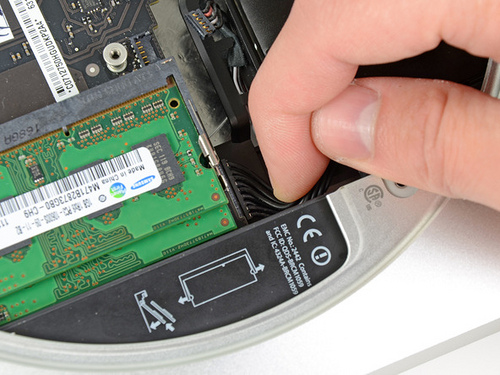
10. Unscrew the tray for the hard disk (7.9 mm nut (T6)). 11. You can insert a new hard disk into an empty tray. To do this, connect to it a mini-SATA cable. 12. In the hard drive itself, screw the nuts with which it will be mounted in the tray. The new hard drive will be located at the very bottom of the case. Now you need to repeat all the steps exactly the opposite, and also remember to connect the mini-SATA cable from the new hard drive to a free SATA slot on the motherboard. Source: iFixit , Mac & I (print)


With straight arms and related equipment, you can mount the second hard drive yourself. To do this, you need the hard drive itself . In addition, you will need a special bent mini-SATA cable (if you look, you can find it on eBay ) and a set of Torx screwdrivers (Torx T6, Torx T8). You can also order a cable with screwdrivers here. To integrate the second hard drive, you need to completely remove all other components from the Mac Mini, since it will be located at the very bottom (when viewed from the cover). Under the cut - a lot of photos.
1. The Mac Mini Upgrade Kit contains all the necessary screwdrivers along with a mini-SATA cable and additional rubber tabs. 2. First, unscrew the first two nuts (11.3 mm (T6 Torx)) and carefully lift the fan, disconnect the fan cable from the system board, now it can be removed from the case.
3. In order to remove the asymmetric piece of iron, which is located near the fan, some sleight of hand is required. First you need to unscrew the nut (3.5 mm (T6 Torx)), with which it is attached to the body, then raise the protruding edge and carefully remove it from the gap. 4. The next step is to remove the antenna for wireless communication. To do this, first unscrew the four nuts at the edges of the antenna (2 x 6.6 mm (T8 Torx), 2 x 5.0 mm (T8 Torx)). Carefully raise the antenna by the straight edge. Now you can disconnect the cable that is mounted on the board responsible for Bluetooth and AirPort connections. 5. The next step is a hard drive. Its connectors are disconnected with a screwdriver from the motherboard. There are two such connectors on both edges of the disk.
6. Unscrew the three visible nuts (5.0 mm (T8 Torx), 16.2 mm (T6 Torx), 26 mm (T6 Torx)) and remove the motherboard. The most difficult step in disassembling and reassembling your Mac Mini. It is necessary to push the board out of the gap, the edges of which are covered by other parts. To do this, you will need a special device similar to a bracket or two thin screwdrivers. We use a screwdriver to shift the board a couple of millimeters. 7. After the motherboard is moved away, you can disconnect the cable with which it is attached to the power supply. 8. Now you can remove the motherboard and hard drive. 9. Take out the power cable. To do this, unscrew the nut by 7.6 mm (T6), extend the socket that holds the power cable and rotate the cable itself 90 degrees.
10. Unscrew the tray for the hard disk (7.9 mm nut (T6)). 11. You can insert a new hard disk into an empty tray. To do this, connect to it a mini-SATA cable. 12. In the hard drive itself, screw the nuts with which it will be mounted in the tray. The new hard drive will be located at the very bottom of the case. Now you need to repeat all the steps exactly the opposite, and also remember to connect the mini-SATA cable from the new hard drive to a free SATA slot on the motherboard. Source: iFixit , Mac & I (print)