IPhone game application development
IPhone game application development
Start
In October 2008, at a regular meeting with two friends, I found out that both of them are developing games for the iPhone. At that time I already had an almost complete shareware project for Windows.
Eager to port it to the iPhone, I began to work in this direction.
Goals
Create and configure development tools for the Windows platform without buying the device itself, Mac and related development tools. My Mac purchase was delayed until I fully understood what and how it worked.
An almost finished project and tools for it were under Windows, so it was decided to do everything under Windows.
A few days to search the Internet and I started to implement this idea.
Step One - Setting up the environment and compiler for Windows, more specifically for Cygwin
About a month was spent building the toolchain under Cygwin. The result was a huge makefile for building the toolchain and a compiled HelloWorld application that had nowhere to run since I did not have a device. When I say that it took a month, this does not mean that I worked on it for 8 hours a day a month, mainly work was done on weekends and after work. It took a lot of time to recompile, fix problems with paths, fix compilation problems and configure the CygWin environment (I only rearranged Cygwin three times).
Step Two - Recompiling the finished Windows project under the iPhone toolchain
This step also took about 1 month. I first met with GCC, the command line, makefile, how the Windows programmer learned a lot of interesting and useful things. Separately, I want to highlight the time spent changing the code for the needs of GCC and iPhone SDK. A lot of time was spent disassembling header files, searching for functions under Unix environments (sometimes they did not match or were absent). Bringing your code into a portable form using #define and interfaces went pretty painlessly, as did building the Third Party libraries that I needed, like Lua. I saved time very much on the fact that the project was originally tied to OpenGL and OpenAL. Both of my friends warned me that there are many problems when working with sound on the iPhone, in my case OpenAL worked right away, moreover, I didn’t even touch the sound code. It also helped that at one time the engine core (each game programmer should have its own home engine) was tested under Embeded Visual Studio for smartphones. During this period, the development and testing process itself is more or less established. It is very convenient to make changes in Far or Visual Studio and also check compilation for the iPhone toolchain. Checking the health of the game after changing the code was tested in Windows. At some point, it was decided to check the working capacity under Linux, for which Fedora Linux was installed on VirtualBox. I especially want to note that the presence of Unit tests made it possible to quickly identify and fix most of the problems (I could only run on Linux, but that was already enough). I also want to advise you to enable the maximum level of warings and stop compilation if there are warings (-Werror for GCC), and fix them all, only thanks to this, several insidious bugs were fixed. Objective-C was used only in 3 files; everything else is written in C ++. It was not possible to deal with the processing of dependencies between source files (.cpp) and header files (.h) for correct recompilation if only .h files were changed.
Total:
- The game runs on Windows compiled for the iPhone platform. By the so-called config platforms, I could run a game that behaved almost like on a real device, including resolution like a device, landscape orientation, texture dimension, etc.
Example config platform.cfg[PLATFORM_]
; COMMON
[PLATFORM_IPHONE]
; настоящий девайс
maxTextureSize = 256
touchInput = 1
hideArrowCursor = 1; отключен курсов для айфона
defines = PLATFORM=IPHONE
fixedVideoResolution = 1
[PLATFORM_IPHONE_WIN32]
; игра под винду в “режиме совместимости”
maxTextureSize = 256
SupportNonPower2 = 0 ; на виндовс такие текстуры возможны
touchInput = 1
#hideArrowCursor = 1 ;курсор показывается для виндовс
fixedVideoResolution = 1 - Windows version
- A workable toolchain for compiling a program on an iPhone. Then, quite unexpectedly, I found CygwinPutty - a modification of PuTTy to work under Cygwin, made it Portable and rendered the link to Quick Launch

Step three - purchase a device and develop for the device itself
To test the operability on the iPhone, I bought an iPod Touch 3g 8GB (as it turned out later, the 8gb version of the iPod Touch is 2g iron). A jailbreak was made, and it worked the first time. Added a few lines to the makefile so that it uploads the compiled project to the device. For apload, scp was used from the command line, in order not to enter passwords, authorization via keys was constantly enabled.
Step Four - Optimization and Debugging
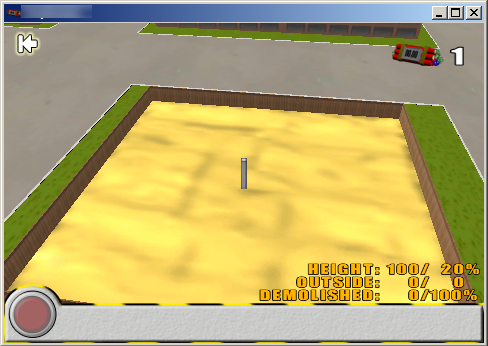
Almost immediately, it turned out that the processor on my iPod Touh 2g could not cope with the simulation of physics, while it could not cope so much that the question really began to stop developing this game for the iPhone. On large scenes, the simulation could take up to 300 ms per frame, which is naturally unacceptable. In the end result, I separated the rendering from the physics simulation. Rendering went with maximum FPS if the detonation of charges was not started, and was limited to 10 FPS at the start of detonation. Physics after launch was considered forward and to the maximum, that is, as soon as you pressed the explosion button and you sounded the sound of a siren, physics could already be calculated for 1-2 seconds in advance. Of course, I had to reconfigure the physics simulation in order to somehow fit in performance, as a result, I got a small slow mo. For the future, activity was planned on the final setup of physics, so that it would be exactly as much as it interferes with performance on my iPod Touh 2g. Accordingly, iPod Touch 2g devices were taken as a minimum base. After playing with the settings of the GCC optimizer, -O3 was selected. Of course, optimization was performed on a 3D scene, the number of DrawCall was reduced, a proxy for OpenGL states was added, the vertex buffer (VBO) was screwed, the number of renderings with AlphaTest turned on was almost reduced to zero.
Debugging was done through the logs and gdb installed on the device. Considering that the code for Windows was licked and well tested, there were no problems. Memories were cleaned up under Windows through the Visual Leak Detector. Possible problems with OpenGL and profiling through geDebugger.
Step Five - MacOS and xcode
In principle, in this state it is already possible to upload a project for sale on Cydia, but I really wanted to get on the AppStore, for this of course you need to collect under Mac and compile xCode. MaOS 10.6.5 and xCode on VirtualBox were installed.
A few days were spent building for the iPhone simulator and the project was completed.
Step six - purchase a certificate and pass certification
In order for xCode to assemble the application for the device, the developer must buy the “iOS Developer Program” - such a privilege costs $ 99 per year. I ordered and received a credit card, and in full confidence that everything will be fine, I began to register as a developer for the iPhone.
Apple does not accept credit cards from Ukraine. They demand to fill out a form and send it by fax (for Russia, as I understand it, the situation is similar).
- January 28, 2011 - Filled out and sent via PamFax
- February 2, 2011 the answer came
Step Seven - Mac Mini
After a while, the Mac Mini was purchased.
For several reasons:
- The compilation speed under the virtual machine was very slow.
- The search and verification phase was completed - it was necessary to start doing everything in a legal way.
Nevertheless, I did not refuse to use the toolchain. The main development is carried out on a Windows machine. Toolchain is used to verify compilation.
Step Eight - Lite Edition Release
Since the game mechanics are not casual at all, it was decided to release the Lite version of the first.
- June 1, 2011 - Posted on review.
- June 8, 2011 - Ready for Sale
Step Nine - Realizing feedback on the Lite version
As it turned out, some of my UI decisions weren’t as intuitive as I thought.
For example:

In the picture, the old and new interfaces, the
Play button (arrow below) was clearly incomprehensible to the players, many simply had no idea to click on it. Solution - a click on the level launches the level immediately, the Play button has been removed. The page switching buttons were redrawn and replaced with simple arrows.
Technical details
GameCenter Integration
Passed without problems thanks to the example of GKTapper - developer.apple.com/library/ios/#samplecode/GKTapper/Introduction/Intro.html
GameCenterMenager.h and GameCenterMenager.m passed to my code without changes
OpenFeint Integration
I spent a day searching for a problem because of which the OpenFeint dashboard did not show up, after reading the documentation it turned out - I forgot to hide my window on events
- (void)dashboardWillAppear

{

 self.hidden=YES;

}

- (void)dashboardDidDisappear

{

 self.hidden=NO;

}
Facebook Integration
It was done as written at developers.facebook.com/docs/guides/mobile .
But there were problems due to the fact that OpenFeint already used some kind of old Facebook sdk and there were errors when linking. The solution was very simple - in the headers of the Facebook sdk I had to set up defines of this type #define FBDialog MFBDialog
Also during the testing process it turned out that Facebook shows captcha if your links to pictures are outside the facebook domain.
Twitter Integration
MGTwitter was used - github.com/mattgemmell/MGTwitterEngine
I also had to add a dialog to pre-show the post on Twitter (it was not in this sdk). I got out through UIWebView in which the page in the input form was shown, clicks on the Post and Skip buttons were intercepted and then forwarded to MGTwitter.
Rate me
A small library was selected https://charcoaldesign.svn.beanstalkapp.com/source/cocoa/iRate/trunk/
For the light version, an interval of 7 days and 7 starts was selected.
For a full 20 days and 20 starts.
Multi touch
To debug multitouch for Windows, a small server for the device was written, to which the Win32 game connected at startup and received all the device’s touch events.
Belief Control
SVN for code and data. On Mac, the code is taken from the shared directory from the Windows machine. While I work alone this is not a problem and saves time.
Expenses
- iPod Touch 2g 8GB - $ 270
- iOS developer - $ 100
- MacMini - $ 800
- Free time
Result
- Lite version in the AppStore
- Full version in the AppStore
- Experience
What was good
- Choosing the main Windows platform. The ability to quickly start and by pressing the R button to reload / load resources saves a lot of time. My experience as a programmer on this platform for about 10 years is to relearn for xcode for a long time. It’s very convenient and easy to shoot video.
- Goals - this is one of the few home projects that has been completed. Often all my home projects fall into a long box due to lack of time. This time I had a clearly set goal.
What was bad
- I did art on my own and partially didn’t work very well.
- Interfes - was originally developed for windows and was quite complicated, for iPhone I had to remove all screenshots and leave only the main menu.
- Playtests - playtests were conducted on oneself. The main problem is “blurring the eyes” - I could not notice obvious problems that were immediately visible to a simple player.
- The rhythm of work is to work at such a pace is very difficult.
References:
- A useful link to register with the iOS Developer Program is www.iphones.ru/forum/index.php?showtopic=31536&st=0?s=3988650a9a235fc5021ea885f11572f5
- Very good instruction from buying a certificate to building an application - habrahabr.ru/blogs/macosxdev/86597
- stackoverflow.com - almost all solutions to my code problems were taken from here
- www.raywenderlich.com - the primary sources for integrating tweeter and facebook.
- www.saurik.com/id/4 - The version of the toolchain that earned