Solving Ubuntu Parental Control with Dansguardian and Privoxy
I am of the opinion that Ubuntu is quite suitable for the role of user-friendly desktop operating system.
Accordingly, I think that when buying computers and laptops at the cost of licensed Windows, it is quite possible to save money by installing a free (open) OS (remember how many, about 5 years ago, laptops with Linux were sold, and how many now).
For children, I bought a nettop Acer Aspire Revo R3700 , which, probably, is worth a separate review (dual-core Atom + Ion), screwed it on the back of the monitor, since both support the VESA mount standard (it turned out to be a kind of compact all-in-one), demolished the pre-installed Linpus and installed Ubuntu 10.10
In principle, both I and my children were happy with everything - everything works quite fast (pah-pah-pah), surf the Internet, watch pictures, listen to music, play children's and educational games - for this, a nettop is suitable, in my opinion , perfect. The only thing depressing was the banners on various, even children's (!), Sites with all kinds of content (primarily visual), from which I really wanted to protect the children.
And here I was disappointed when I found out that there is simply no built-in (full-time) parental control in Ubuntu. In Windows Vista and 7 - there are, there are many separate "Windows" programs, for example, Internet Censor (I tried Windows for some time, in principle, I was satisfied).
But in Ubuntu this is tight. I came across the Gnome Nanny in the repository - I installed it, then demolished it. Terrible warnings pop up that the Internet will turn off and the computer will turn off, but ... nothing happens. Perhaps the calculation was on the consciousness of children (sarcasm), although, rather, I just did not understand. True, he did everything according to the manual, but did not want to spend weeks figuring out the reasons. I’ll
also make a reservation right away that the provider forbids the use of third-party DNS, otherwise I might just have limited myself to some OpenDNS, where, it seems, ads are cut and there is a filter for adult content.
Briefly about how my home network is built: there is a D-Link Dir-615 router, the main home computer, as well as the Popcorn Hour A-110 media player , are connected to it via a network cable, over Wi-Fi - a children's nettop, iPad, netbook, laptop, a couple of smartphones on Android, another WD TV Live media player and ... like everything.
Returning to the problem of parental control: I came across a program called Dansguardian , read, thought, decided to install.
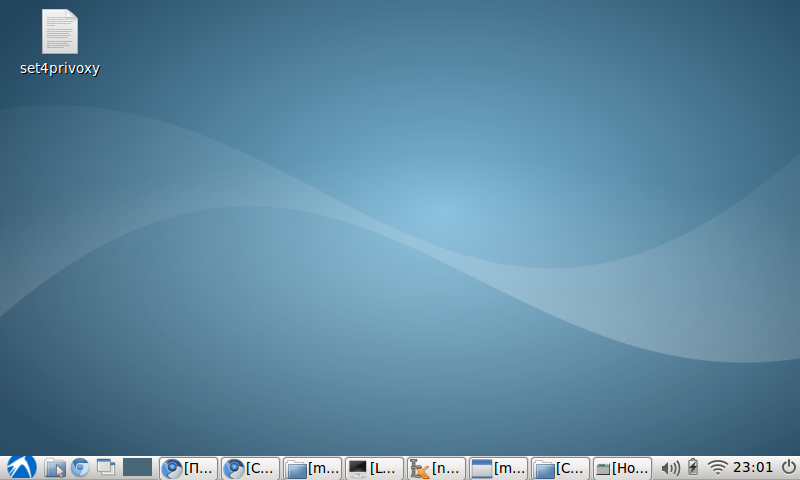
For experiments, I got an old EEE PC 701 4G (just in case, maybe someone does not know: the number in front of G means only “the capacity of the built-in memory (solid state drive) in gigabytes”, and not the built-in 4G modem), I installed Lubuntu 10.10 on it ( By the way, Lubuntu was pleased - undemanding to resources, therefore, fast, familiar to those who are “after Windows”, all the hardware worked literally “out of the box”):

After that, I started two accounts, one [kid] (in square brackets here and hereinafter - the account designation, which you can choose to your liking, where kid is the child's account, parent is the parent's account) and [parent]. [kid] - with user rights, [parent] - with administrator rights.
We go under the child’s account, open the terminal (“Start” (hehe, how else to call the button on the taskbar in the lower left corner?) -> Standard -> LXTerminal) We type
(of course, without square brackets):
Enter the password. Next:
Enter the password, follow the prompts on the screen, after which you should have, as you guessed, Dansguardian and Privoxy (a lightweight proxy server - through which, in fact, Dansguardian will work).
Further, just in case, you can check whether privoxy is started by the command
After that you need to configure the installed programs, for this we edit the configuration files:
We look for the line listen-address, we bring it to the following form (do not forget to remove the comment sign #):
We look for the accept parameter -intercepted-requests and assign it a value of 1:
Everything, the privoxy proxy configuration is complete, save, exit.
Next, we configure dansguardian itself:
At the very beginning of the file it is written that the UNCOMMITED line must be deleted for the settings to take effect. We delete it. Next, we look for an uncommented line that begins with the word language and change it:
This is necessary so that the page with the "Access denied" template is in Russian.
We search and change the following lines (if the default is the same in the file, then, of course, you do not need to change it): Save, close. Next, restart both programs: Next, launch the default browser (pre-installed by Chromium), go to some thread playboy.com and see ... that it successfully loads, as before! In order not to tear the hair on my head (as I did it for a couple of days in a row), read on. In general, this should be because we did not change the proxy server settings in the browser. With familiar clicks, we go into the advanced settings of Chromium (“It's the same Chrome!”) And we see a depressing picture: That's right, Lubuntu does not have a “guy” proxy server settings interface. As a temporary solution, we write in the terminal:

The browser starts, go to playboy.com and see this picture: Urra! But the joy is overshadowed by the fact that if we restart the browser, the proxy settings will fly off, and this is not an option. And the child, having matured, will learn to bypass the proxy server by putting some Firefox and unchecking the box "use proxy server settings". So you need a more reliable option. And here iptables and ufw come to our aid. I will say right away that my remaining hair almost turned gray until I reached the correct settings for this whole farm (I understand that someone will laugh at such a "lamer"). So, ufw (Uncomplicated Firewall) is included in Lubuntu, as I later found out, by default. Therefore, we do the following: At the end of the file, after COMMIT, from the next line we insert the following lines:

Save, close, restart: That's it, now a smart child will not be able to bypass the proxy. Further things worth working on:
In general, judging by the description above, everything seems simple, but in fact I spent several sleepless nights trying to understand why the settings do not work.
I look forward to comments - where, how not to get additional useful information from them, to learn a lot of newthings and how to do the same, only easier and better . The article was written, first of all, for myself (so that I could go to Habr and compare the forgotten settings) and for those who, like me, suffer from parental control in Ubuntu.
The following materials helped a lot when configuring dansguardian and privoxy:
How to transparent proxy
Ubuntu Documentation> Community Documentation> UFW
and Dansguardian Documentation
The publication of this article was made possible thanks to MrCleaner , for which many thanks to him.
Accordingly, I think that when buying computers and laptops at the cost of licensed Windows, it is quite possible to save money by installing a free (open) OS (remember how many, about 5 years ago, laptops with Linux were sold, and how many now).
For children, I bought a nettop Acer Aspire Revo R3700 , which, probably, is worth a separate review (dual-core Atom + Ion), screwed it on the back of the monitor, since both support the VESA mount standard (it turned out to be a kind of compact all-in-one), demolished the pre-installed Linpus and installed Ubuntu 10.10
In principle, both I and my children were happy with everything - everything works quite fast (pah-pah-pah), surf the Internet, watch pictures, listen to music, play children's and educational games - for this, a nettop is suitable, in my opinion , perfect. The only thing depressing was the banners on various, even children's (!), Sites with all kinds of content (primarily visual), from which I really wanted to protect the children.
And here I was disappointed when I found out that there is simply no built-in (full-time) parental control in Ubuntu. In Windows Vista and 7 - there are, there are many separate "Windows" programs, for example, Internet Censor (I tried Windows for some time, in principle, I was satisfied).
But in Ubuntu this is tight. I came across the Gnome Nanny in the repository - I installed it, then demolished it. Terrible warnings pop up that the Internet will turn off and the computer will turn off, but ... nothing happens. Perhaps the calculation was on the consciousness of children (sarcasm), although, rather, I just did not understand. True, he did everything according to the manual, but did not want to spend weeks figuring out the reasons. I’ll
also make a reservation right away that the provider forbids the use of third-party DNS, otherwise I might just have limited myself to some OpenDNS, where, it seems, ads are cut and there is a filter for adult content.
Briefly about how my home network is built: there is a D-Link Dir-615 router, the main home computer, as well as the Popcorn Hour A-110 media player , are connected to it via a network cable, over Wi-Fi - a children's nettop, iPad, netbook, laptop, a couple of smartphones on Android, another WD TV Live media player and ... like everything.
Returning to the problem of parental control: I came across a program called Dansguardian , read, thought, decided to install.
For experiments, I got an old EEE PC 701 4G (just in case, maybe someone does not know: the number in front of G means only “the capacity of the built-in memory (solid state drive) in gigabytes”, and not the built-in 4G modem), I installed Lubuntu 10.10 on it ( By the way, Lubuntu was pleased - undemanding to resources, therefore, fast, familiar to those who are “after Windows”, all the hardware worked literally “out of the box”):

After that, I started two accounts, one [kid] (in square brackets here and hereinafter - the account designation, which you can choose to your liking, where kid is the child's account, parent is the parent's account) and [parent]. [kid] - with user rights, [parent] - with administrator rights.
We go under the child’s account, open the terminal (“Start” (hehe, how else to call the button on the taskbar in the lower left corner?) -> Standard -> LXTerminal) We type
(of course, without square brackets):
su [parent]Enter the password. Next:
sudo apt-get install -y privoxy dansguardianEnter the password, follow the prompts on the screen, after which you should have, as you guessed, Dansguardian and Privoxy (a lightweight proxy server - through which, in fact, Dansguardian will work).
Further, just in case, you can check whether privoxy is started by the command
sudo /etc/init.d/privoxy statusAfter that you need to configure the installed programs, for this we edit the configuration files:
sudo leafpad /etc/privoxy/configWe look for the line listen-address, we bring it to the following form (do not forget to remove the comment sign #):
listen-address 127.0.0.1:8118We look for the accept parameter -intercepted-requests and assign it a value of 1:
accept-intercepted-requests 1Everything, the privoxy proxy configuration is complete, save, exit.
Next, we configure dansguardian itself:
sudo leafpad /etc/dansguardian/dansguardian.confAt the very beginning of the file it is written that the UNCOMMITED line must be deleted for the settings to take effect. We delete it. Next, we look for an uncommented line that begins with the word language and change it:
language = 'russian-1251'This is necessary so that the page with the "Access denied" template is in Russian.
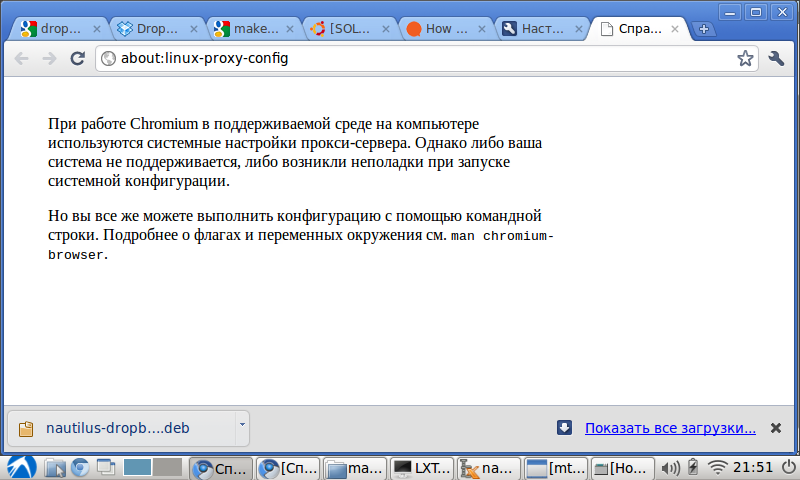
We search and change the following lines (if the default is the same in the file, then, of course, you do not need to change it): Save, close. Next, restart both programs: Next, launch the default browser (pre-installed by Chromium), go to some thread playboy.com and see ... that it successfully loads, as before! In order not to tear the hair on my head (as I did it for a couple of days in a row), read on. In general, this should be because we did not change the proxy server settings in the browser. With familiar clicks, we go into the advanced settings of Chromium (“It's the same Chrome!”) And we see a depressing picture: That's right, Lubuntu does not have a “guy” proxy server settings interface. As a temporary solution, we write in the terminal:
filterport=8080


proxyip=127.0.0.1


proxyport-8118
sudo service dansguardian force-reload

sudo service privoxy force-reload

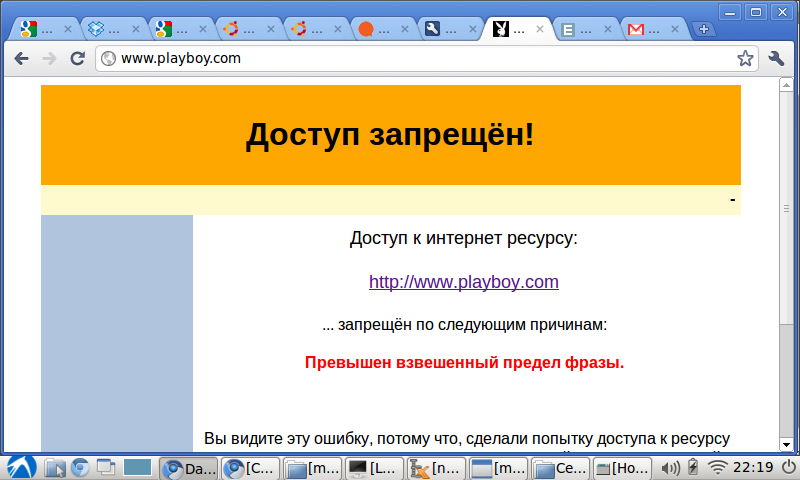
sudo chromium-browser --proxy-server=127.0.0.1:8080The browser starts, go to playboy.com and see this picture: Urra! But the joy is overshadowed by the fact that if we restart the browser, the proxy settings will fly off, and this is not an option. And the child, having matured, will learn to bypass the proxy server by putting some Firefox and unchecking the box "use proxy server settings". So you need a more reliable option. And here iptables and ufw come to our aid. I will say right away that my remaining hair almost turned gray until I reached the correct settings for this whole farm (I understand that someone will laugh at such a "lamer"). So, ufw (Uncomplicated Firewall) is included in Lubuntu, as I later found out, by default. Therefore, we do the following: At the end of the file, after COMMIT, from the next line we insert the following lines:

sudo leafpad /etc/ufw/before.rules# Rules for Dansguardian + Privoxy
*nat
:PREROUTING ACCEPT [0:0]
:POSTROUTING ACCEPT [0:0]
:OUTPUT ACCEPT [0:0]
-A OUTPUT -p tcp -m tcp --dport 80 -m owner --uid-owner root -j ACCEPT
-A OUTPUT -p tcp -m tcp --dport 80 -m owner --uid-owner [parent] -j REDIRECT --to-port 8118
-A OUTPUT -p tcp -m tcp --dport 8118 -m owner ! --uid-owner dansguardian -j REDIRECT --to-port 8080
-A OUTPUT -p tcp -m tcp --dport 80 -m owner ! --uid-owner privoxy -j REDIRECT --to-port 8080
# don't delete the 'COMMIT' line or these rules won't be processed
COMMIT
Save, close, restart: That's it, now a smart child will not be able to bypass the proxy. Further things worth working on:
sudo ufw disable && sudo ufw enable
- customize the page with the "Access denied" template (for example, find a funny picture with Smeshariki and write a more cheerful text that go to this site "No way!")
- carefully look through the dansguardian directory - everything is written in detail in the comments in the files, how and what to configure
- learn to make a list of bad words in Russian (dansguardian seems to be bad with encodings other than utf-8, judging by the forums)
- it is advisable to find ready-made lists of bad Russian words already on the net (so as not to make up yourself and not to be sophisticated in obscene language)
In general, judging by the description above, everything seems simple, but in fact I spent several sleepless nights trying to understand why the settings do not work.
I look forward to comments - where, how not to get additional useful information from them, to learn a lot of new
The following materials helped a lot when configuring dansguardian and privoxy:
How to transparent proxy
Ubuntu Documentation> Community Documentation> UFW
and Dansguardian Documentation
The publication of this article was made possible thanks to MrCleaner , for which many thanks to him.
