December 14, 2010 at 13:37
Gigabyte's MIB T5142 - Stand Case for the price of a monitor bracket
I want to offer the habrosociety a small photo review of one rather interesting computer case. What makes it interesting, it becomes immediately clear if you look at the photo.
I stumbled upon it in search of a housing for a home media center, which was supposed to hang on the wall of the kitchen so that there, for example, you could watch a movie or broadcast on IP-TV. The main selection criteria were low noise and compact size. In addition, the problem of placing the monitor was to be solved. I looked at mITX-cases with an external PSU and DC-ATX converter, and in one of the reviews I saw the MIB T5142. A short search showed that this case is for sale in Moscow, and when I visited the site of one of the companies, I found that this case costs half the price of an average ITX case that does not have a monitor mount. And even is available. Without wasting time, I went and bought this building, and now I want to get to know you better.
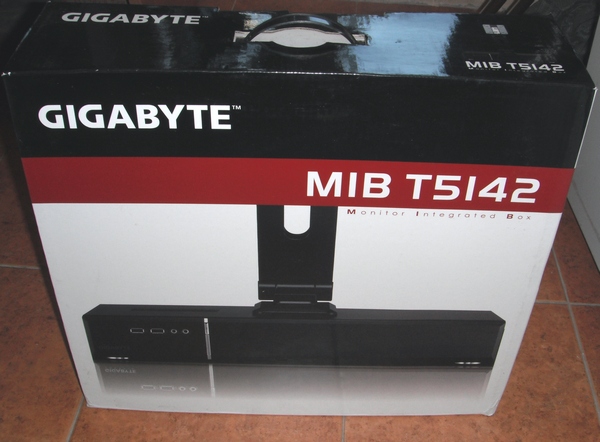
As the seller told me, after I checked “the presence of mechanical damage” during the purchase: “What can happen to it with such packaging?” We must pay tribute - the product is packaged to fame. Outside, it is a colorful cardboard box with a convenient plastic handle (though, while I was taking the purchase home, one edge of this handle broke and stopped holding) ...
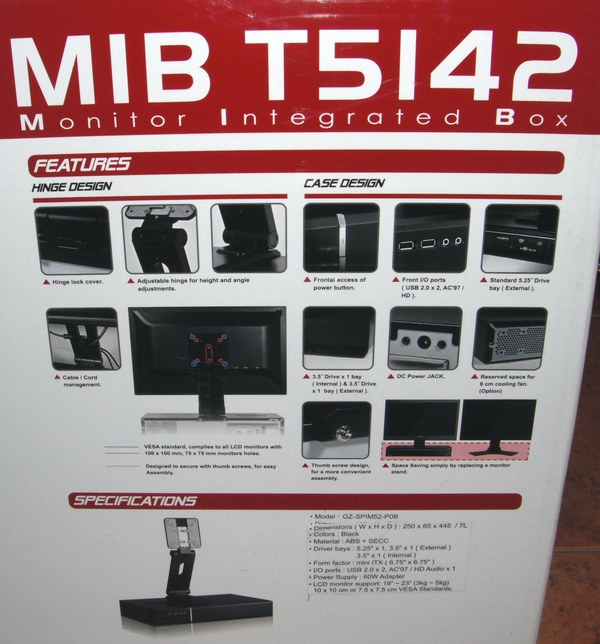
... on which, in particular, the advantages of this case and its characteristics are painted ...
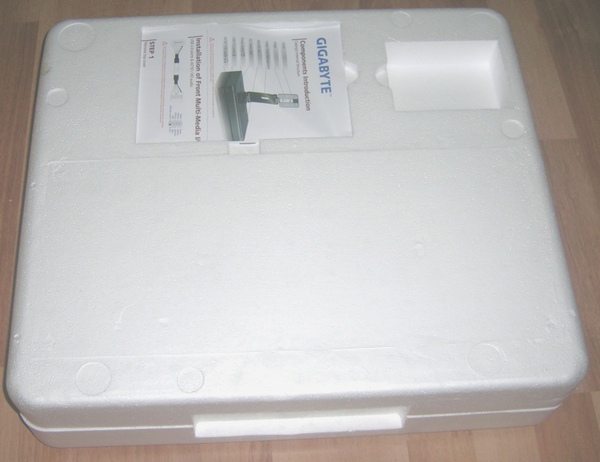
... and inside there is a monolithic foam block of two halves, protecting its contents, as well as instructions in a separate package.
Inside the foam, in separate cells ...
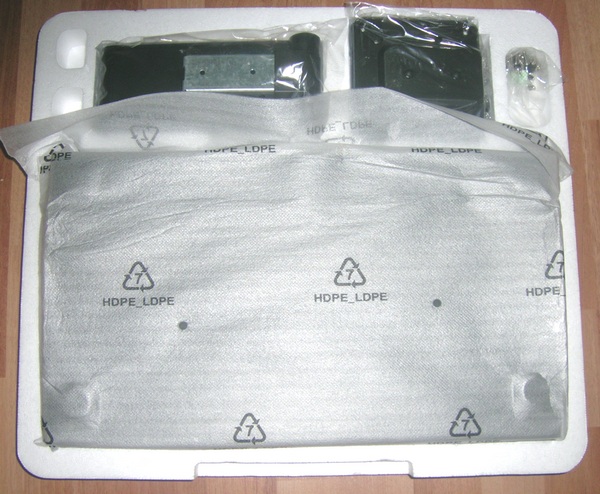
... are: the case itself, a
monitor bracket in two parts,

an external AC-DC power supply (60W), a

bag with fasteners.
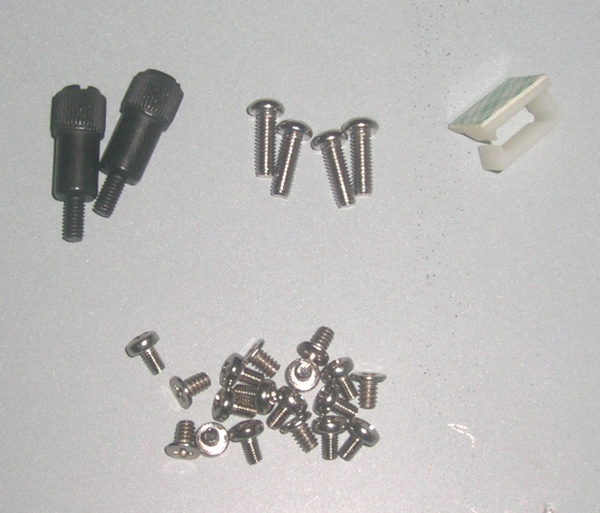
As a result, everything you need and nothing more (read - you do not have to overpay for unnecessary).
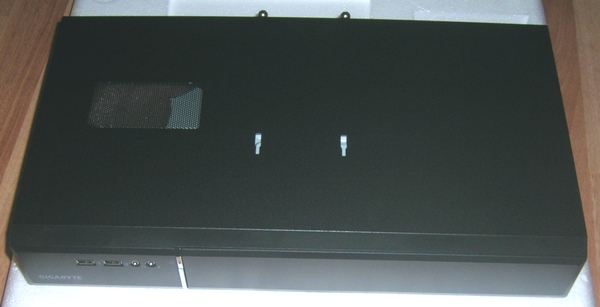
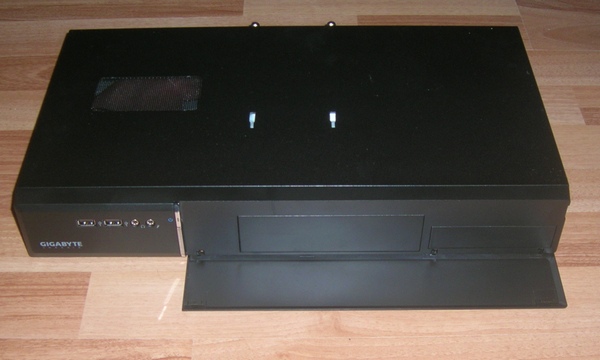
First of all, I examined the purchase from the outside. On the top cover there were slots for installing the bracket under the monitor and the ventilation grill above the processor heatsink and chipset.
On the front panel there are two USB connectors and connectors for mini-jack for headphones (speakers) and a microphone. On a beautiful silver vertical strip is the power button, equipped with a blue LED. There are no other indicators for this case.
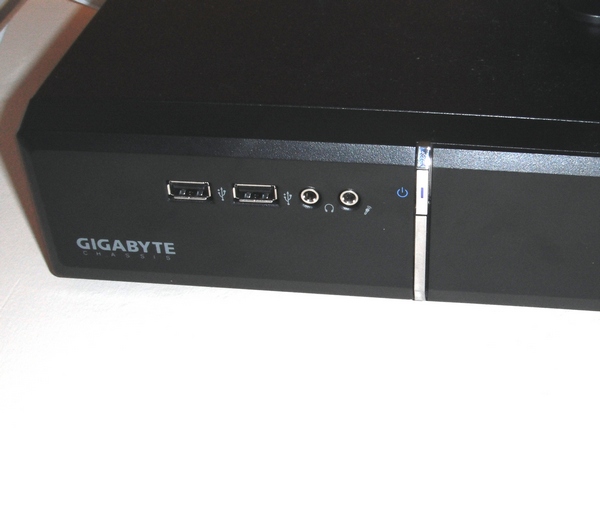
A large part of the front panel is occupied by a hinged cover, behind which there are external compartments: 3.5 ”and 5.25”. The lid is fixed with magnets, so it fits snugly (no need to press to open) and holds perfectly in any position of the case.
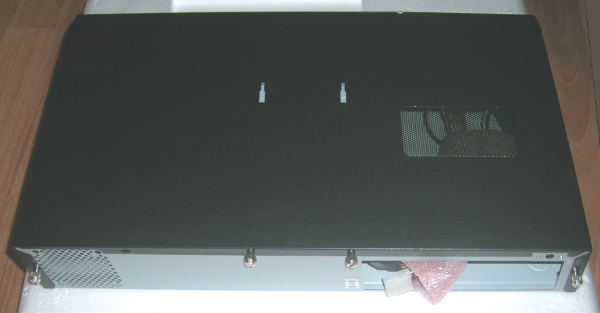
On the back wall there is a ventilation grill designed for the installation of a 60mm fan, as well as a cutout for the rear panel of the motherboard.
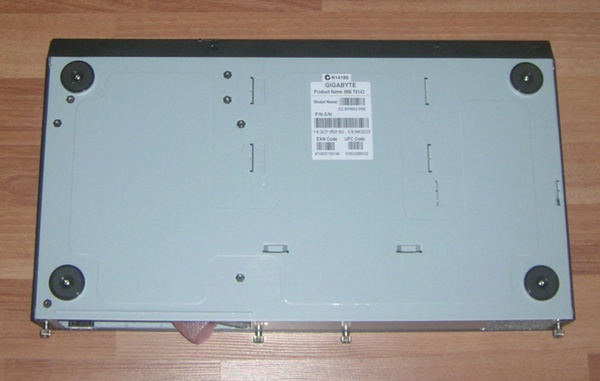
Below the case stands on 4 round legs, fastened with screws (this will be important later).
We go inside. The top cover is fastened with four screws in large knurled heads, so it is easy to remove without tools. Inside are found:


After removing the packaging from the wires, you can recount them:
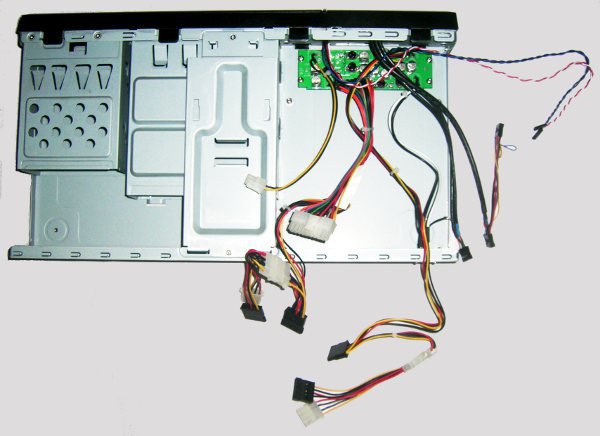
Considering how the motherboard will be placed, we note that the case DOES NOT PROVIDE the installation of expansion cards. Pay attention, for someone it will be essential. Although mITX-boards usually have one PCI / PCIx slot, you can’t insert a board into it and, moreover, put it on the rear panel, without a significant modification of the case.
Summarizing, again, everything you need and nothing more. It would be nice, of course, to get a 24-pin ATX-connector, but apparently the manufacturer decided that the power of the converter is not enough to meet the new standard (although there are boards that require 24-pin power, which fit perfectly into the declared power).
Those who were interested only in the review of the case can stop reading from this place and go to the store (unless, of course, the case is of interest to you). Next, I want to talk about how I made a media center based on this building, and those who read my previous story about the industrial building know that I won’t be stopped by the need to modify the computer hardware with a drill and a jigsaw (or even a grinder) - in general, I warned :) There
were three problems that I had to solve with tools that were not quite traditional for computer scientists: to place two HDDs in the case, take care of cooling and hang the entire structure on the wall.
To put two disks in a tight, honestly speaking, 3.5 ”basket seemed unreasonable to me, despite the fact that there was an empty five-inch drive bay nearby. Since there were no “proprietary" 5.25 ”to 3.5” sleds at hand, the easiest way was to fix the disk on one side standardly, and on the other on a steel corner. Simple, tight, imperceptible from the outside.

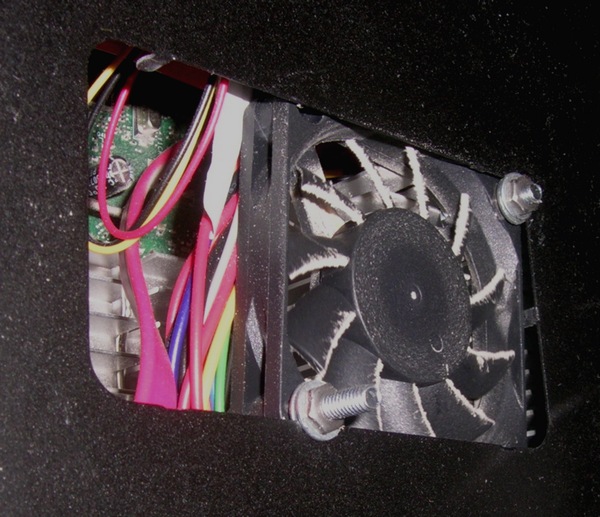
For the media center, I used a Celeron-based D201GLY2 board. This board, although without a CPU cooler, will not survive without airflow, especially since I did not find drivers for FC13 for the integrated video, and vesa loads the processor to full when playing movies and it quickly heats up. The simplest solution was to remove the grill on the upper panel (it is mounted on curved petals, so this solution is reversible) and fix a 60 * 60mm cooler in the hole that has formed. I didn’t even have to drill anything, the screws with washers clamped perfectly over the edges. The only thing you need is a little acrobatics to attach the cooler connector to the motherboard when installing the cover. The noise is minimal, unlike the option “mount the cooler on the radiator”, because the fan is very rigid and there are no obstacles to the air flow.
And finally, I wanted the whole structure to hang on the wall. I had to take up heavy equipment and make a mount for the body from the steel strip (securing it for the holes for the rear legs and for additionally drilled holes closer to the center) and small active speakers. With a total construction weight of about 10 kg (with a circuit board, screws and an old 15 ”monitor), everything keeps perfectly on two dowel-screws. Unfortunately, I didn’t find a “rear view” photo (I probably forgot to take it), therefore I give only a view of the whole structure in its place.

The case itself, in my opinion, is a unique option that is suitable for assembling both a media center and a medium power workstation (on modern low-power processors) that will look great in any interior. I had no complaints about the quality of workmanship, and the price of this product, which, as I wrote in the title, is comparable to the average price of the bracket for attaching the monitor to the wall, will not allow the "toad" to affect your decision to purchase.
The choice is yours, dear hub users, I hope my review helped you in this.
I stumbled upon it in search of a housing for a home media center, which was supposed to hang on the wall of the kitchen so that there, for example, you could watch a movie or broadcast on IP-TV. The main selection criteria were low noise and compact size. In addition, the problem of placing the monitor was to be solved. I looked at mITX-cases with an external PSU and DC-ATX converter, and in one of the reviews I saw the MIB T5142. A short search showed that this case is for sale in Moscow, and when I visited the site of one of the companies, I found that this case costs half the price of an average ITX case that does not have a monitor mount. And even is available. Without wasting time, I went and bought this building, and now I want to get to know you better.
Unpacking, package overview
As the seller told me, after I checked “the presence of mechanical damage” during the purchase: “What can happen to it with such packaging?” We must pay tribute - the product is packaged to fame. Outside, it is a colorful cardboard box with a convenient plastic handle (though, while I was taking the purchase home, one edge of this handle broke and stopped holding) ...
... on which, in particular, the advantages of this case and its characteristics are painted ...
... and inside there is a monolithic foam block of two halves, protecting its contents, as well as instructions in a separate package.
Inside the foam, in separate cells ...
... are: the case itself, a
monitor bracket in two parts,
an external AC-DC power supply (60W), a
bag with fasteners.
As a result, everything you need and nothing more (read - you do not have to overpay for unnecessary).
We study the device
First of all, I examined the purchase from the outside. On the top cover there were slots for installing the bracket under the monitor and the ventilation grill above the processor heatsink and chipset.
On the front panel there are two USB connectors and connectors for mini-jack for headphones (speakers) and a microphone. On a beautiful silver vertical strip is the power button, equipped with a blue LED. There are no other indicators for this case.
A large part of the front panel is occupied by a hinged cover, behind which there are external compartments: 3.5 ”and 5.25”. The lid is fixed with magnets, so it fits snugly (no need to press to open) and holds perfectly in any position of the case.
On the back wall there is a ventilation grill designed for the installation of a 60mm fan, as well as a cutout for the rear panel of the motherboard.
Below the case stands on 4 round legs, fastened with screws (this will be important later).
We go inside. The top cover is fastened with four screws in large knurled heads, so it is easy to remove without tools. Inside are found:
- DC-DC converter board, from which several bundles bundled in soft polypropylene leave
- removable baskets for mounting drives (one for 3.5 ”, the other for 5.25”),
- a removable jumper, which gives rigidity to the entire body and holds the monitor bracket (pay attention to the cutouts in the jumper, repeating the shape of the cutouts on the top cover).
After removing the packaging from the wires, you can recount them:
- 20-pin ATX connector
- Optional 4 pin 12VDC connector,
- Two identical harnesses with connectors for powering hard drives, Molex and SATA, plus two Molex splitter extensions on Molex + SATA. Enough to power drives in any combination.
Considering how the motherboard will be placed, we note that the case DOES NOT PROVIDE the installation of expansion cards. Pay attention, for someone it will be essential. Although mITX-boards usually have one PCI / PCIx slot, you can’t insert a board into it and, moreover, put it on the rear panel, without a significant modification of the case.
Summarizing, again, everything you need and nothing more. It would be nice, of course, to get a 24-pin ATX-connector, but apparently the manufacturer decided that the power of the converter is not enough to meet the new standard (although there are boards that require 24-pin power, which fit perfectly into the declared power).
Putting together a media center
Those who were interested only in the review of the case can stop reading from this place and go to the store (unless, of course, the case is of interest to you). Next, I want to talk about how I made a media center based on this building, and those who read my previous story about the industrial building know that I won’t be stopped by the need to modify the computer hardware with a drill and a jigsaw (or even a grinder) - in general, I warned :) There
were three problems that I had to solve with tools that were not quite traditional for computer scientists: to place two HDDs in the case, take care of cooling and hang the entire structure on the wall.
To put two disks in a tight, honestly speaking, 3.5 ”basket seemed unreasonable to me, despite the fact that there was an empty five-inch drive bay nearby. Since there were no “proprietary" 5.25 ”to 3.5” sleds at hand, the easiest way was to fix the disk on one side standardly, and on the other on a steel corner. Simple, tight, imperceptible from the outside.
For the media center, I used a Celeron-based D201GLY2 board. This board, although without a CPU cooler, will not survive without airflow, especially since I did not find drivers for FC13 for the integrated video, and vesa loads the processor to full when playing movies and it quickly heats up. The simplest solution was to remove the grill on the upper panel (it is mounted on curved petals, so this solution is reversible) and fix a 60 * 60mm cooler in the hole that has formed. I didn’t even have to drill anything, the screws with washers clamped perfectly over the edges. The only thing you need is a little acrobatics to attach the cooler connector to the motherboard when installing the cover. The noise is minimal, unlike the option “mount the cooler on the radiator”, because the fan is very rigid and there are no obstacles to the air flow.
And finally, I wanted the whole structure to hang on the wall. I had to take up heavy equipment and make a mount for the body from the steel strip (securing it for the holes for the rear legs and for additionally drilled holes closer to the center) and small active speakers. With a total construction weight of about 10 kg (with a circuit board, screws and an old 15 ”monitor), everything keeps perfectly on two dowel-screws. Unfortunately, I didn’t find a “rear view” photo (I probably forgot to take it), therefore I give only a view of the whole structure in its place.
conclusions
The case itself, in my opinion, is a unique option that is suitable for assembling both a media center and a medium power workstation (on modern low-power processors) that will look great in any interior. I had no complaints about the quality of workmanship, and the price of this product, which, as I wrote in the title, is comparable to the average price of the bracket for attaching the monitor to the wall, will not allow the "toad" to affect your decision to purchase.
Advantages:
- convenient combination of a case and a stand for a monitor;
- a lot of space for drives;
- good workmanship and reliable packaging;
- attractive price (bought in September this year for 1195 rubles).
Disadvantages:
- few indicators;
- the inability to install expansion cards;
- not the largest power converter power (there are 120 watts);
- you may have to work on the cooling problem.
The choice is yours, dear hub users, I hope my review helped you in this.