How to Heal Shuttle XPC
Quite unexpectedly, the old Shuttle XPC SN41G appeared in the family. He appeared already problematic. Rather, it was once new, modern and problem-free, but at the time of its appearance, it already suffered from senile diseases. After a rather thoughtful inclusion, it turned out that a working Windows XP operating system was installed on the computer. Moreover, the worker was only nominally - it was too hard tossing and turning. I did not want to spend money on updating a rather old configuration or assembling a new computer in the old case. It was not possible to rearrange the OS either - the OEM disk with Windows XP was lost a long time ago. Therefore, it was decided to cure the existing configuration and install Ubuntu, which should work well on this hardware.
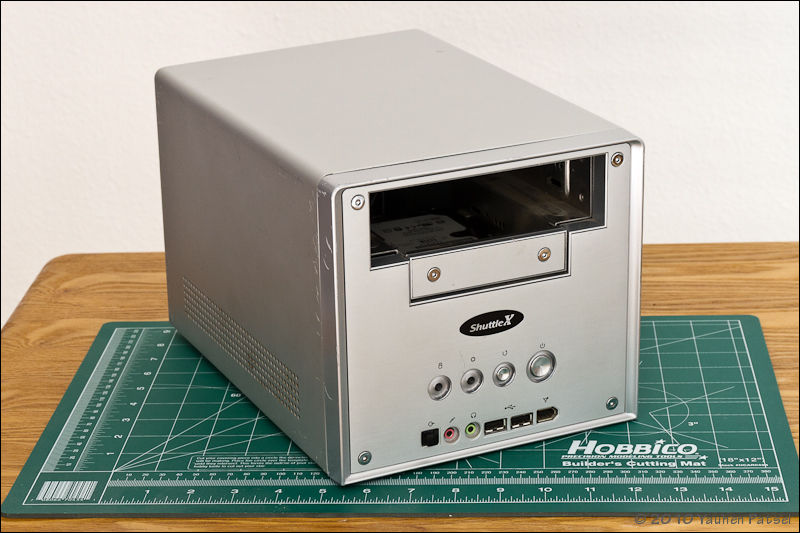
The hardware was as follows:
Motherboard: Shuttle FN41 (based on the Nvidia nForce2 IGP + MCP-T chipset)
Integrated graphics card: Nvidia GeForce4 MX
Processor: AMD Athlon XP 2000+
RAM: 1GB DDR
Hard drive: WDC WD400BB 40GB
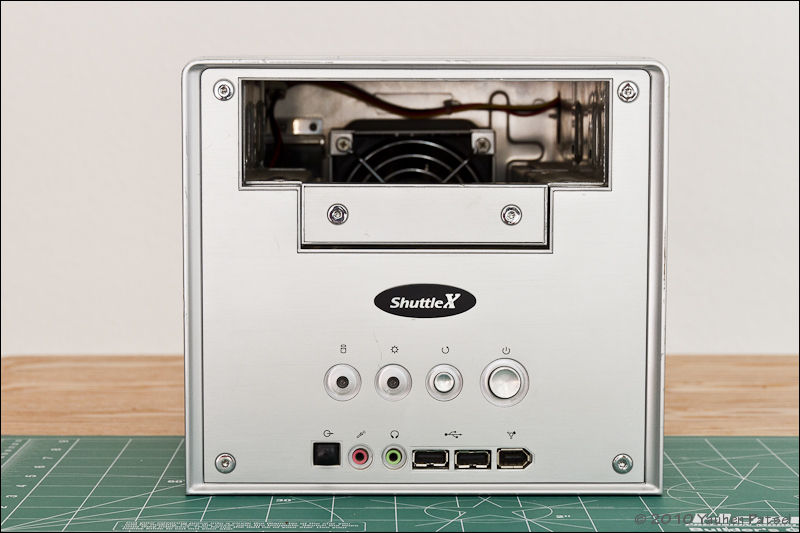
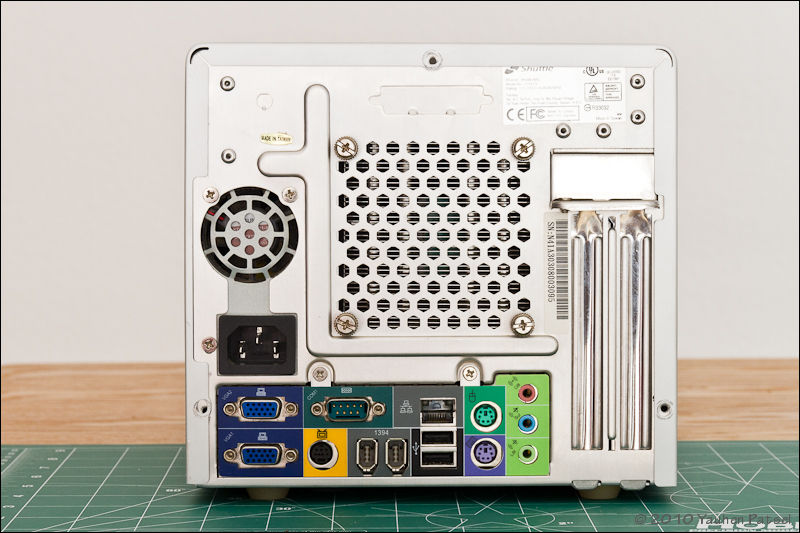
In the beginning, it was necessary to deal with the problem of a pensive start - the computer simply did not want to start by pressing the power button, and started independently after 20-30-40 minutes after pressing. There was power on the motherboard, a glowing LED on the motherboard indicated this. However, he behaved strangely - slowly went out when the power button was pressed. The problem was clearly in the power supply or motherboard power circuits. And after a quick search on the Internet, there were a bunch of reviews on this model with similar signs. For the most part, this problem was resolved by replacing the power supply. Of course, you could buy a new PSU and forget about the problem. However, this is not our method, and the Flex ATX format power supply was not cheap.
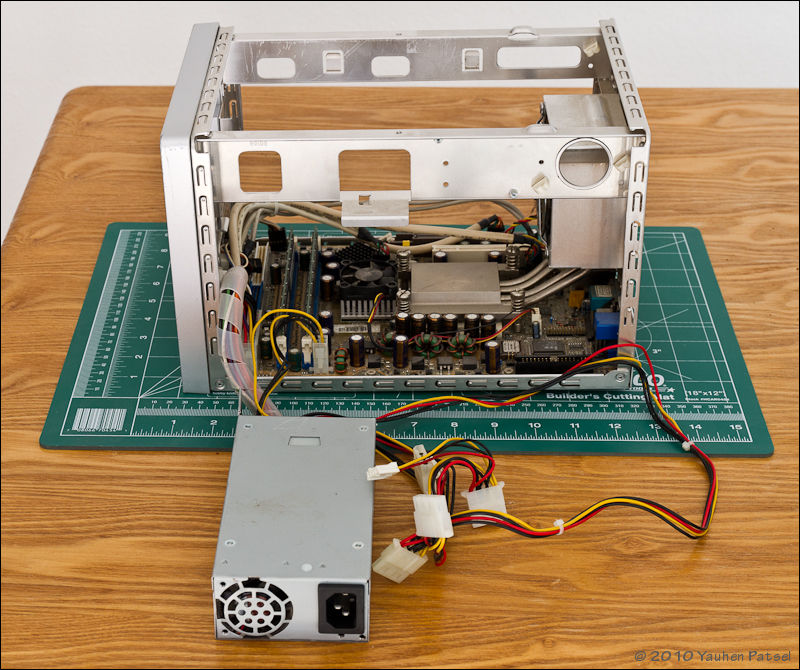
PSU Achme AM630BS20S, output power 200 W
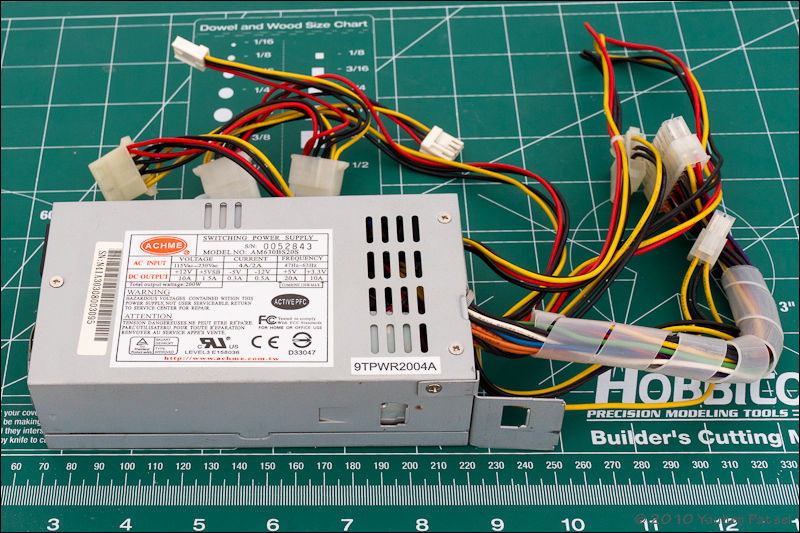
It was decided to disassemble the PSU, for which I had to work hard - the PSU is very heavily packed, and some parts were fastened with some kind of yellow compound. After disassembling, one of the possible reasons for the unstable operation of the unit became visible - swollen capacitors. As it turned out, Fuhjyyu capacitors have long been known for their “quality."
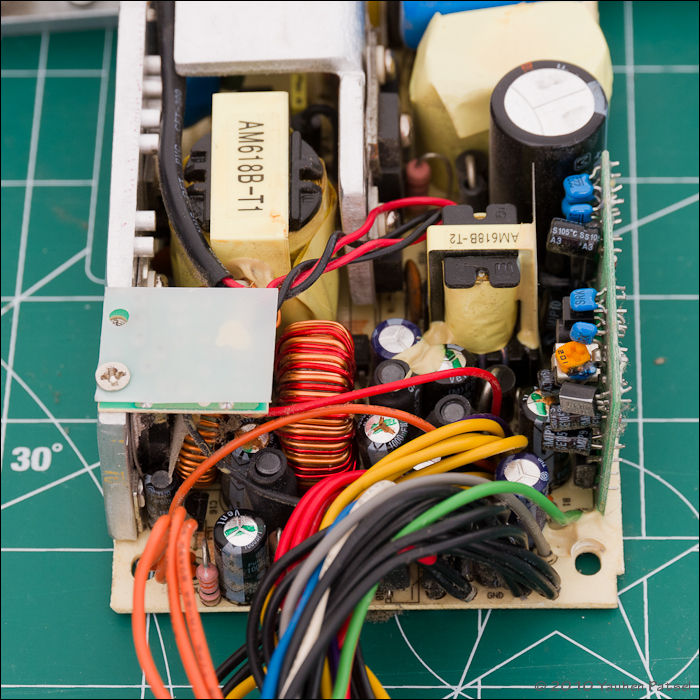
In total, I counted 5 pieces of identical capacitors 1000uF x 10V, on which there were traces of swelling. I had to remember the soldering skills and solder the old capacitors. One of them was flooded with a compound, so I had a chance to torment while it was evaporated. During my radio engineering youth, metal braiding helped a lot when soldering parts - it was enough to attach it to the output and warm it with a soldering iron, as it collected almost all of the solder from the contact pad. It turns out that this practice also existed in the United States, and it was even put on a commercial basis - in the store you can buy pre-packaged copper braid of the required width and length (I used Super Wick).
The culprits of the holiday are electrolytes from Fuhjyyu
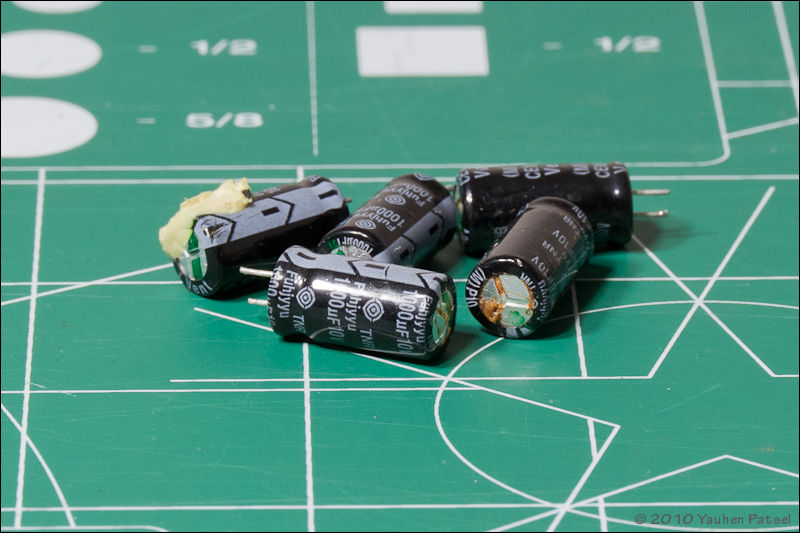
Buying new 6 (one was purchased for stock) capacitors cost only $ 2. The soldering iron handling skills were remembered on the go, and after a couple of hours the new capacitors took their rightful places on the PSU board, and the soldering places looked pretty decent. It is time to launch the PSU. Moving away, I connected the disassembled PSU to the network, and, lo and behold, nothing happened. That is, there was no short circuit, no smoking parts :) Having closed with an ordinary wire 2 pins in the power connector, I heard the sound of an accelerating fan - the PSU started working. After assembling, the BP checked it again - it works (which surprised me very much).

Now I had to start the final check - but did I fix the problem with a pensive start of the system? I connected the PSU to the motherboard, pressed the power button and ... instantly heard the sound of accelerating fans and the passing of POST. However, things didn’t go further than the POST - the system simply froze and waited for the 1.44 "drive to appear, which naturally was not in the system. This happened during previous launches, so it wasn’t a surprise. The battery on the motherboard simply died and the user BIOS settings were not saved. After replacing the battery with a live one, the system started up without problems,
since the computer was disassembled, but it would not hurt to clean it.
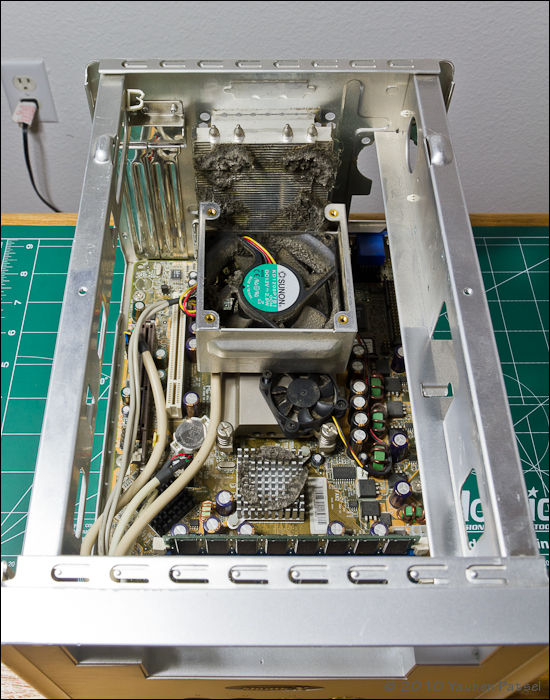
No sooner said than done. Using a can of compressed air, cotton buds and patience, the dust was removed from all secluded corners, at the same time the fans and radiators of the processor and chipset were cleaned.
It's time to start assembling. However, there was only one hitch - the monitor. On the motherboard there was a built-in video card with VGA outputs. But I did not have an extra monitor with this input! Again, quite by accident, in the bins of the motherland (that is, in the closet), even the legendary LCD SGI 1600SW display appeared in something. What is its legend besides the big name Silicon Graphics? The fact that this widescreen monitor with a diagonal of 17.3 "and a resolution of 1600x1024 pixels was introduced back in 1998 (at an immodest price of $ 2500). This monitor has an unusual interface - OpenLDI. Modern video cards with this interface are not produced, and most old-timers connect this monitor through third-party, rather expensive adapters. Fortunately,

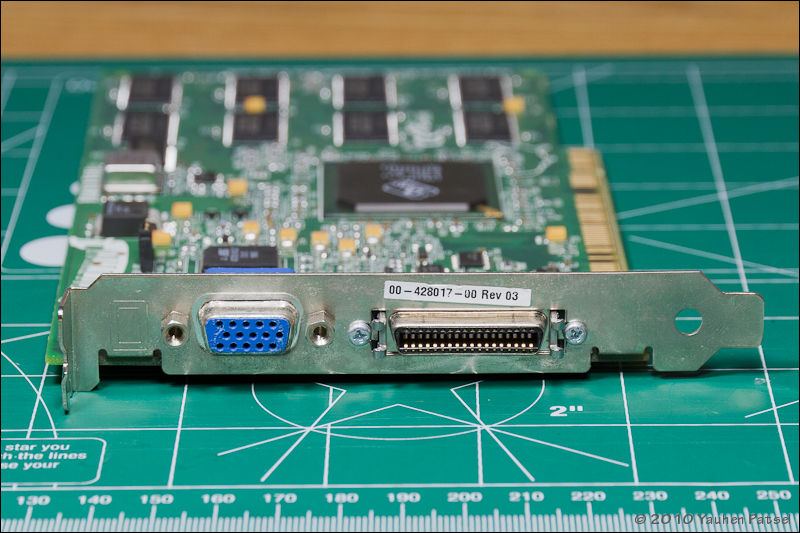
With a new graphics card, the computer worked instantly, naturally, only in VGA mode.
Installing Ubuntu 10.10 went without any problems, even found drivers for the video card. There were drivers, and the monitor worked, but the resolution was set to 640x480, and the desktop rectangle did not occupy the entire display, but only its part, corresponding to 640x480 pixels. Fortunately, the Internet cannot do without inquisitive people who have already encountered similar problems - with the help of hints, idiomatic expressions and editing configuration files, we managed to get the video card to work in the right resolution of 1600x1024.
The computer was assembled and cleaned for the final photo shoot. After the photo shoot, he was set to his rightful place, turned on, ... and then he presented an unpleasant surprise - the monitor went out, and the LED located next to the power button of the monitor winked faintly. In the same way, the LED behaved on the monitor power supply (fortunately, it is separate). After some experiments, it was decided to replace the monitor BP. Fortunately, the bins of the Motherland turned out to be quite rich and they found a power supply with the required voltage of 12V, the maximum current of 3A and, importantly, with the desired polarity of the power connector. I connected it instead of the dead PSU and the monitor came to life!

So, after several hours of work (in reality, lasting for a month and a half), we managed to revive the old Shuttle and give it a new ticket to life.
The hardware was as follows:
Motherboard: Shuttle FN41 (based on the Nvidia nForce2 IGP + MCP-T chipset)
Integrated graphics card: Nvidia GeForce4 MX
Processor: AMD Athlon XP 2000+
RAM: 1GB DDR
Hard drive: WDC WD400BB 40GB
In the beginning, it was necessary to deal with the problem of a pensive start - the computer simply did not want to start by pressing the power button, and started independently after 20-30-40 minutes after pressing. There was power on the motherboard, a glowing LED on the motherboard indicated this. However, he behaved strangely - slowly went out when the power button was pressed. The problem was clearly in the power supply or motherboard power circuits. And after a quick search on the Internet, there were a bunch of reviews on this model with similar signs. For the most part, this problem was resolved by replacing the power supply. Of course, you could buy a new PSU and forget about the problem. However, this is not our method, and the Flex ATX format power supply was not cheap.
PSU Achme AM630BS20S, output power 200 W
It was decided to disassemble the PSU, for which I had to work hard - the PSU is very heavily packed, and some parts were fastened with some kind of yellow compound. After disassembling, one of the possible reasons for the unstable operation of the unit became visible - swollen capacitors. As it turned out, Fuhjyyu capacitors have long been known for their “quality."
In total, I counted 5 pieces of identical capacitors 1000uF x 10V, on which there were traces of swelling. I had to remember the soldering skills and solder the old capacitors. One of them was flooded with a compound, so I had a chance to torment while it was evaporated. During my radio engineering youth, metal braiding helped a lot when soldering parts - it was enough to attach it to the output and warm it with a soldering iron, as it collected almost all of the solder from the contact pad. It turns out that this practice also existed in the United States, and it was even put on a commercial basis - in the store you can buy pre-packaged copper braid of the required width and length (I used Super Wick).
The culprits of the holiday are electrolytes from Fuhjyyu
Buying new 6 (one was purchased for stock) capacitors cost only $ 2. The soldering iron handling skills were remembered on the go, and after a couple of hours the new capacitors took their rightful places on the PSU board, and the soldering places looked pretty decent. It is time to launch the PSU. Moving away, I connected the disassembled PSU to the network, and, lo and behold, nothing happened. That is, there was no short circuit, no smoking parts :) Having closed with an ordinary wire 2 pins in the power connector, I heard the sound of an accelerating fan - the PSU started working. After assembling, the BP checked it again - it works (which surprised me very much).
Now I had to start the final check - but did I fix the problem with a pensive start of the system? I connected the PSU to the motherboard, pressed the power button and ... instantly heard the sound of accelerating fans and the passing of POST. However, things didn’t go further than the POST - the system simply froze and waited for the 1.44 "drive to appear, which naturally was not in the system. This happened during previous launches, so it wasn’t a surprise. The battery on the motherboard simply died and the user BIOS settings were not saved. After replacing the battery with a live one, the system started up without problems,
since the computer was disassembled, but it would not hurt to clean it.
No sooner said than done. Using a can of compressed air, cotton buds and patience, the dust was removed from all secluded corners, at the same time the fans and radiators of the processor and chipset were cleaned.
It's time to start assembling. However, there was only one hitch - the monitor. On the motherboard there was a built-in video card with VGA outputs. But I did not have an extra monitor with this input! Again, quite by accident, in the bins of the motherland (that is, in the closet), even the legendary LCD SGI 1600SW display appeared in something. What is its legend besides the big name Silicon Graphics? The fact that this widescreen monitor with a diagonal of 17.3 "and a resolution of 1600x1024 pixels was introduced back in 1998 (at an immodest price of $ 2500). This monitor has an unusual interface - OpenLDI. Modern video cards with this interface are not produced, and most old-timers connect this monitor through third-party, rather expensive adapters. Fortunately,
With a new graphics card, the computer worked instantly, naturally, only in VGA mode.
Installing Ubuntu 10.10 went without any problems, even found drivers for the video card. There were drivers, and the monitor worked, but the resolution was set to 640x480, and the desktop rectangle did not occupy the entire display, but only its part, corresponding to 640x480 pixels. Fortunately, the Internet cannot do without inquisitive people who have already encountered similar problems - with the help of hints, idiomatic expressions and editing configuration files, we managed to get the video card to work in the right resolution of 1600x1024.
The computer was assembled and cleaned for the final photo shoot. After the photo shoot, he was set to his rightful place, turned on, ... and then he presented an unpleasant surprise - the monitor went out, and the LED located next to the power button of the monitor winked faintly. In the same way, the LED behaved on the monitor power supply (fortunately, it is separate). After some experiments, it was decided to replace the monitor BP. Fortunately, the bins of the Motherland turned out to be quite rich and they found a power supply with the required voltage of 12V, the maximum current of 3A and, importantly, with the desired polarity of the power connector. I connected it instead of the dead PSU and the monitor came to life!
So, after several hours of work (in reality, lasting for a month and a half), we managed to revive the old Shuttle and give it a new ticket to life.









