Configuring ROS and working with ZED stereo camera on NVIDIA Jetson
Good afternoon, dear readers! In the last articles, I talked about popular SLAM methods and visual odometry that have support in ROS. In this article I will deviate a little from the topic and talk about setting up and working with ROS on an NVIDIA Jetson TK1 microcomputer . After installing all the necessary, we will connect and try to strealabs ZED stereo camera . Who cares please under the cat.
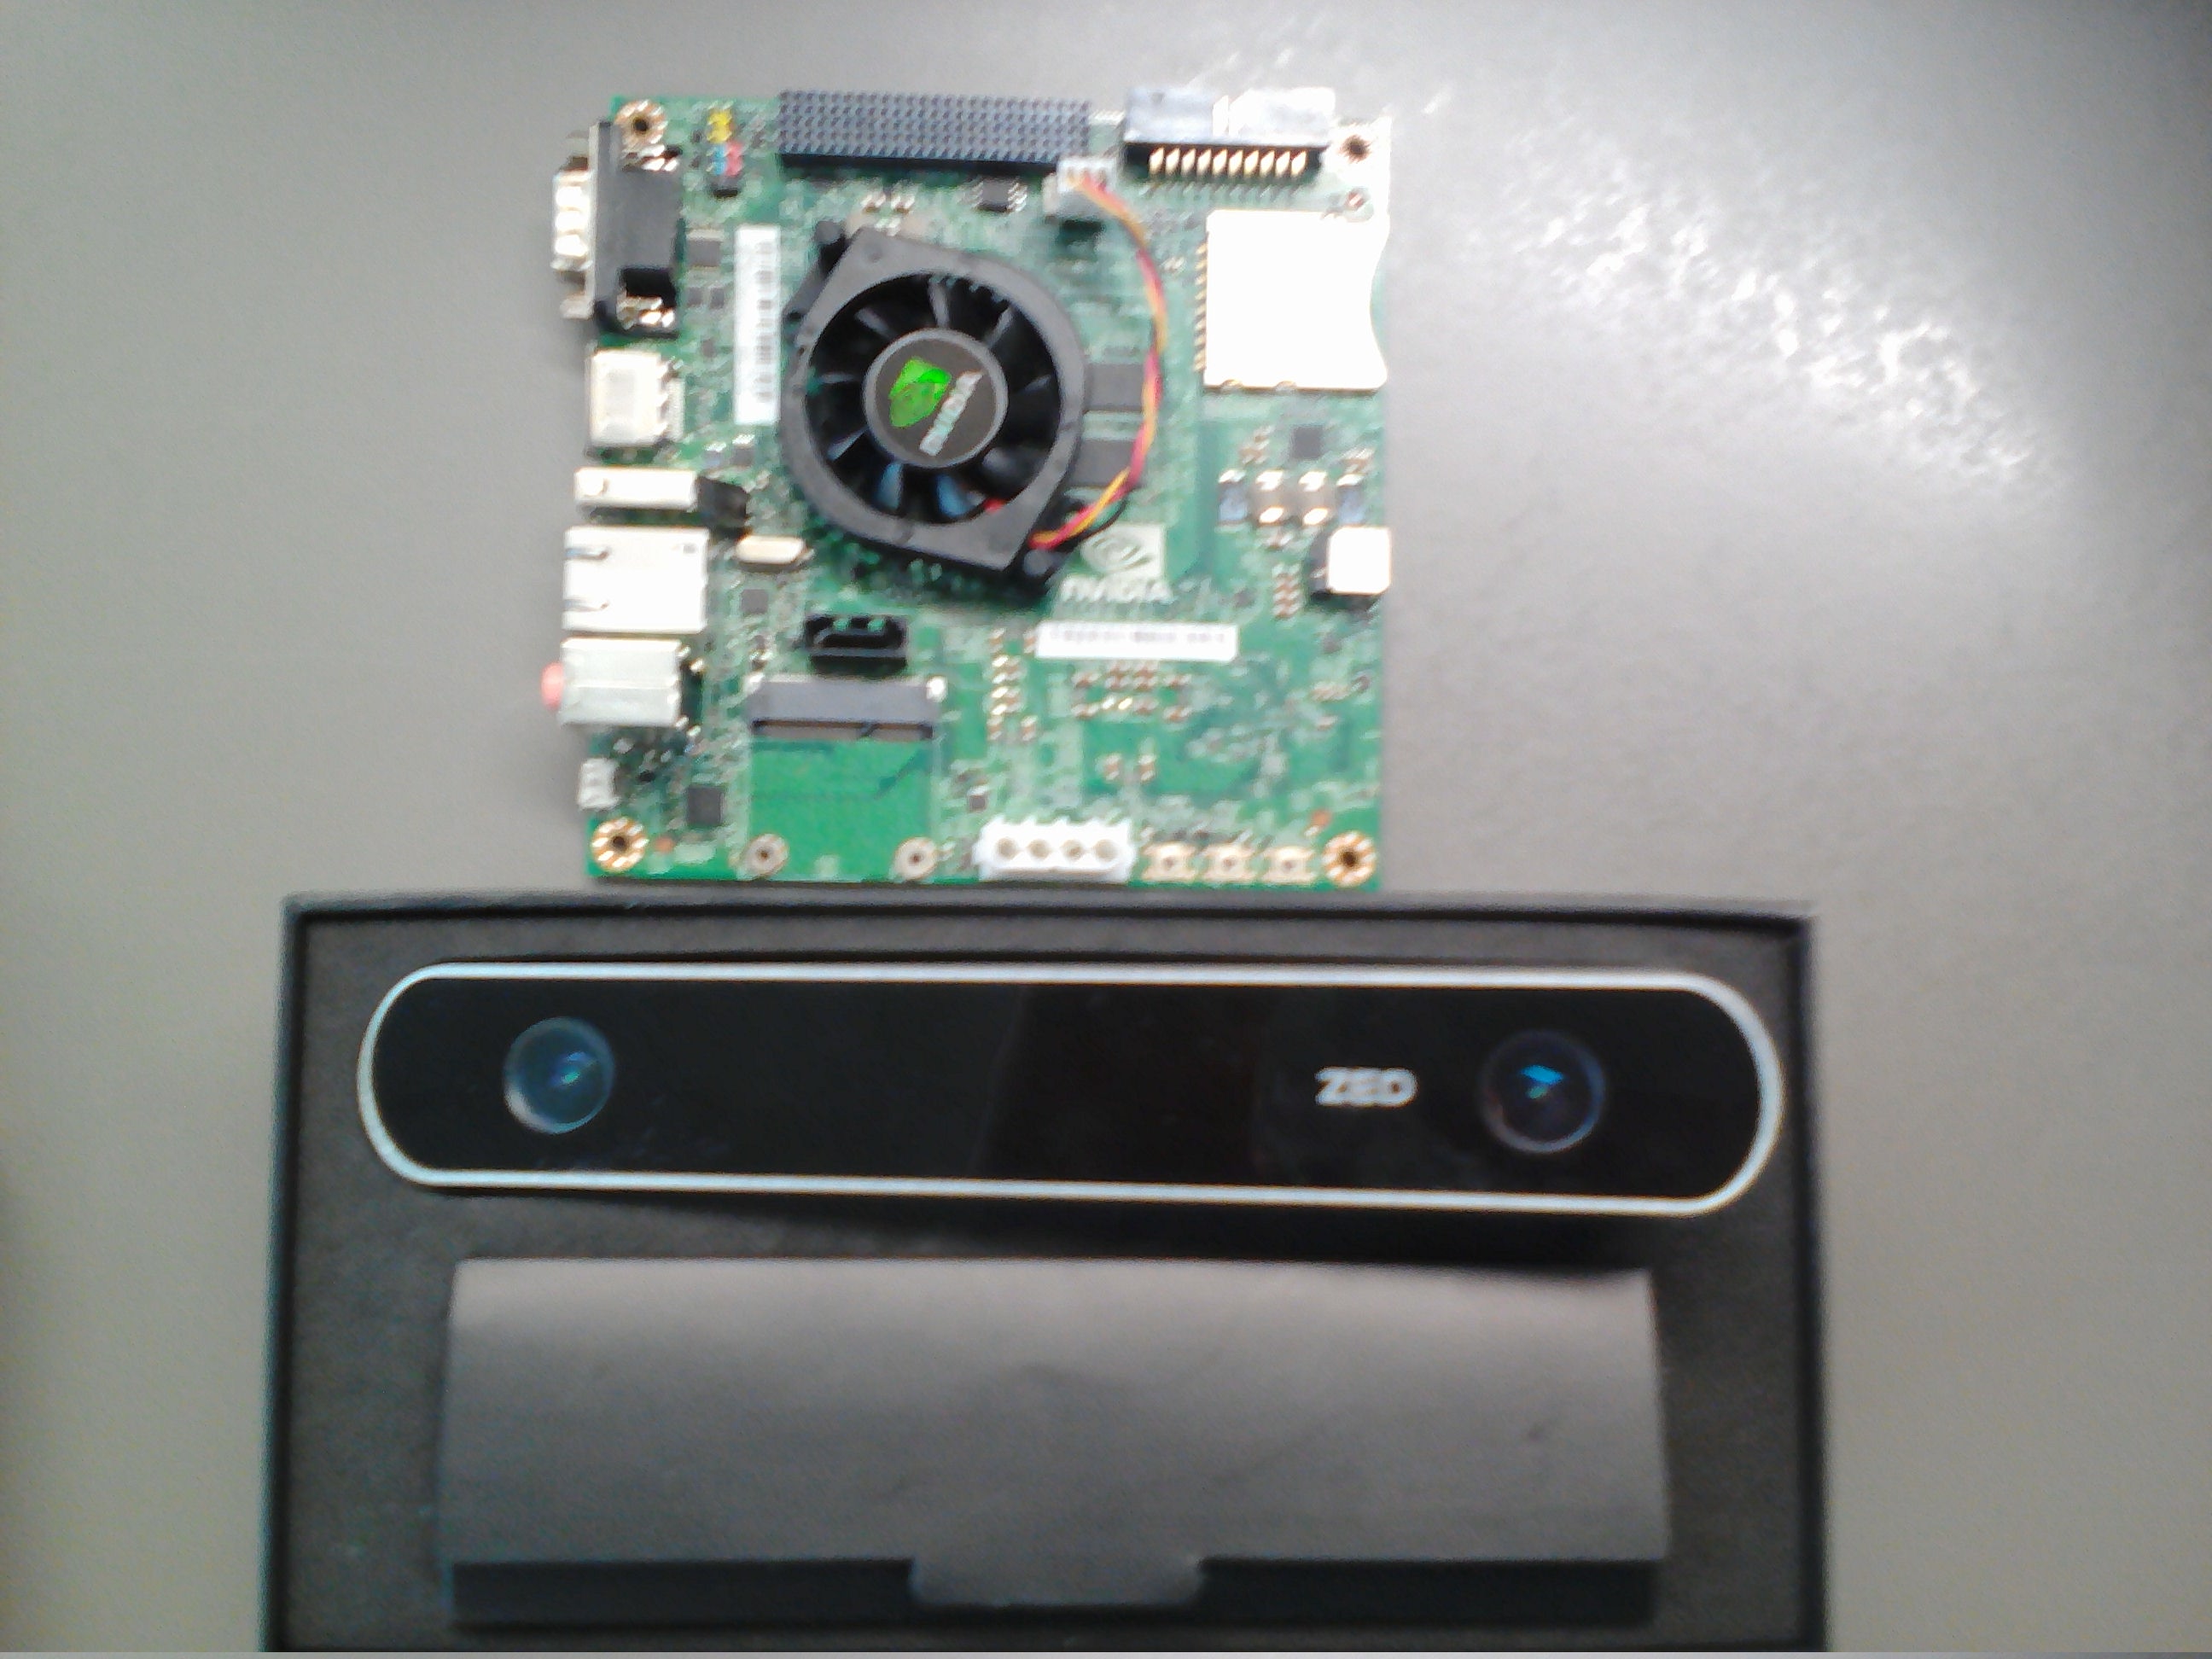
To begin, consider the NVIDIA Jetson TK1 platform. NVIDIA Jetson TK1 is an NVIDIA microcomputer based on Tegra K1 SOC (CPU + GPU on a single chip with CUDA support). NVIDIA Jetson boasts a 4-core ARM Cortex-A15 CPU with 2.3 GHz, has the same components as the Raspberry Pi (HDMI, USB 2.0 and 3.0, Ethernet), as well as PC-specific modules: SATA, mini-PCIe . The mobile Tegra K1 processor has very similar properties and architecture to the desktop GPU, which allows it to withstand heavy loads with minimal power consumption. As stated on the official pageThe processor allows you to run on the board any demanding graphics tasks, such as face recognition, augmented reality, and even computer vision tasks for unmanned vehicles. More details about all the features of the platform can be found here .
NVIDIA Jetson TK1 internal memory is represented by a 16 GB eMMC module. By default, NVIDIA Jetson TK1 is preinstalled with Ubuntu 14.04 operating system.
A 12 V AC / DC adapter is used to power the microcomputer.

The ZED stereo camera is a passive depth camera consisting of two ordinary RGB cameras 12 inches apart from each other, with an overview of up to 20 meters. Unlike active cameras (such as ASUS Xtion and Microsoft Kinect), the ZED stereo camera does not have an IR laser to measure distance. The camera is relatively inexpensive (costs $ 449). The advantage of the camera can be considered its small size (175 x 30 x 33 mm) and lightness (159 g).
The camera can be used to create outdoor maps on the drone .
More information about the camera can be found on the official page .
Connect NVIDIA Jetson TK1 using HDMI to the monitor, connect the Ethernet cable to the appropriate connector, and finally use the 12 V AC / DC adapter to the power supply.
To install the system on NVIDIA Jetson, you may need to install JetPack TK1 (instructions can be found here ). I got NVIDIA Jetson on my hands with JetPack already installed and Ubuntu 14.04, so here I am not considering its installation.
So the Ubuntu 14.04 system will start automatically. For authorization, use the login and password ubuntu.
Find out the IP address of the Jetson host:
We get the hardware characteristics:
The conclusion will be as follows:
There may be a problem with connecting to Jetson over SSH: ifconfig displays the IP address, but it is not possible to connect to Jetson at this address. To solve the problem, open the / etc / network / interface file from under the root:
and add the lines:
We made a dynamic IP address assignment. Save the changes and execute:
Now everything should work. This decision was taken from here .
Now connect to Jetson via SSH:
To work with the ZED camera, we need the ZED SDK, which requires CUDA version 6.5 installed. Download the deb file for CUDA Toolkit 6.5 for L4T from here (instruction taken from here ):
Install the repository metadata for CUDA for L4T, which has just been downloaded:
Download and install the CUDA Toolkit itself, including the OpenGL toolkit for NVIDIA:
Install cuda-toolkit-6-5:
Add the user ubuntu to the group “video” to provide access to the GPU:
Here, $ USER is ubuntu.
Add the paths to the CUDA installation folder to the .bashrc script and execute it in the current terminal:
Check that the CUDA Toolkit is installed on the device:
By default, the USB 3.0 port is configured by the system on the Jetson TK1 as USB 2.0. We need to configure it as USB 3.0. To do this, open the file / boot / extlinux / extlinux.conf as root:
Find the string 'usb_port_owner_info = 0'. If this line occurs twice, then we change the last inclusion. Rewrite 'usb_port_owner_info = 0' to 'usb_port_owner_info = 2'.
The installation procedure looks the same as on desktop Linux. It is worth noting that OpenCV is already installed when installing JetPack in order to be able to use Tegra optimization for it. Therefore, manual installation of OpenCV is not required.
To use the ZED stereo camera, we need to install the ZED SDK 1.2. As an installer, a special Jetson TK1 .run file is used. Download the installer:
Set the permissions for the file and run it in the terminal:
Accept the terms of the license agreement, press 'q' and then 'Y'. Next, perform the procedure following the instructions.
Run ZED Explorer on Jetson itself (does not work when connecting remotely via SSH):
I used in my experiments ROS Indigo. Install the dependencies for the ROS driver:
Install ROS camera for ZED camera:
Run zed_wrapper by executing the following commands in different windows of the terminal:
Show active topics:
In the list, in addition to standard topics, we will see topics with the / zed prefix:
Run rqt_image_view:
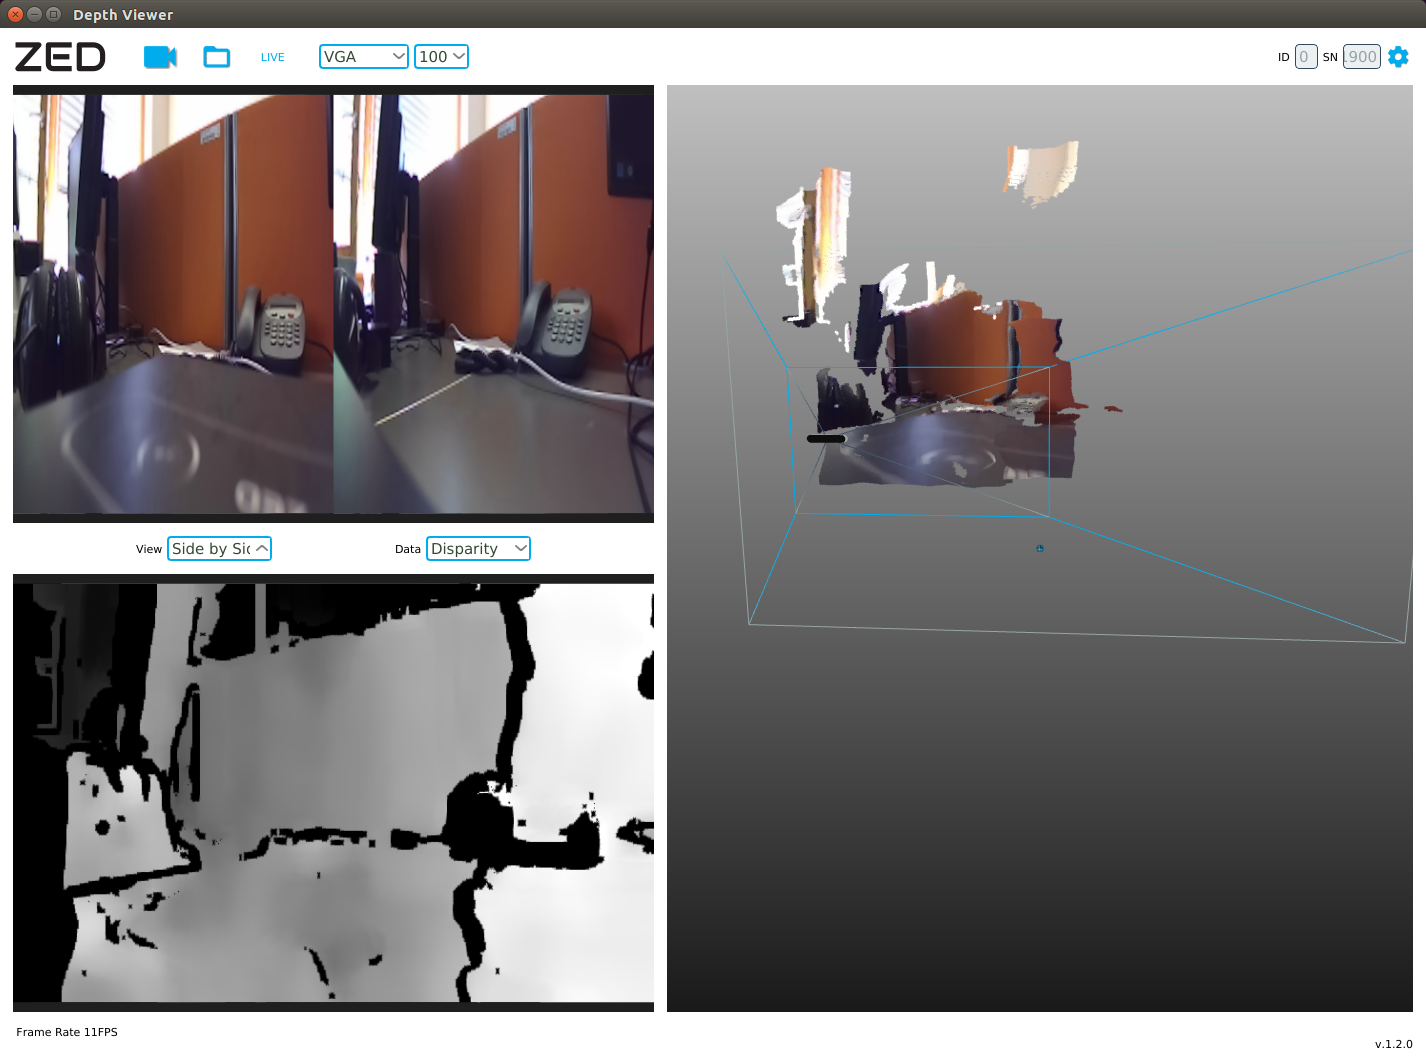
When choosing a topic / zed / depth / depth_registered, we get a depth map:

RGB image from the left camera (/ zed / left / image_raw_color):
And finally an RGB image from the right camera (/ zed / right / image_raw_color):
Data from the camera is published in the topics / zed / rgb / image_raw_color and / zed / depth / depth_registered with a frequency of 15Hz.
Find out the frequency of publishing point clouds in the topic / zed / point_cloud / cloud_registered:
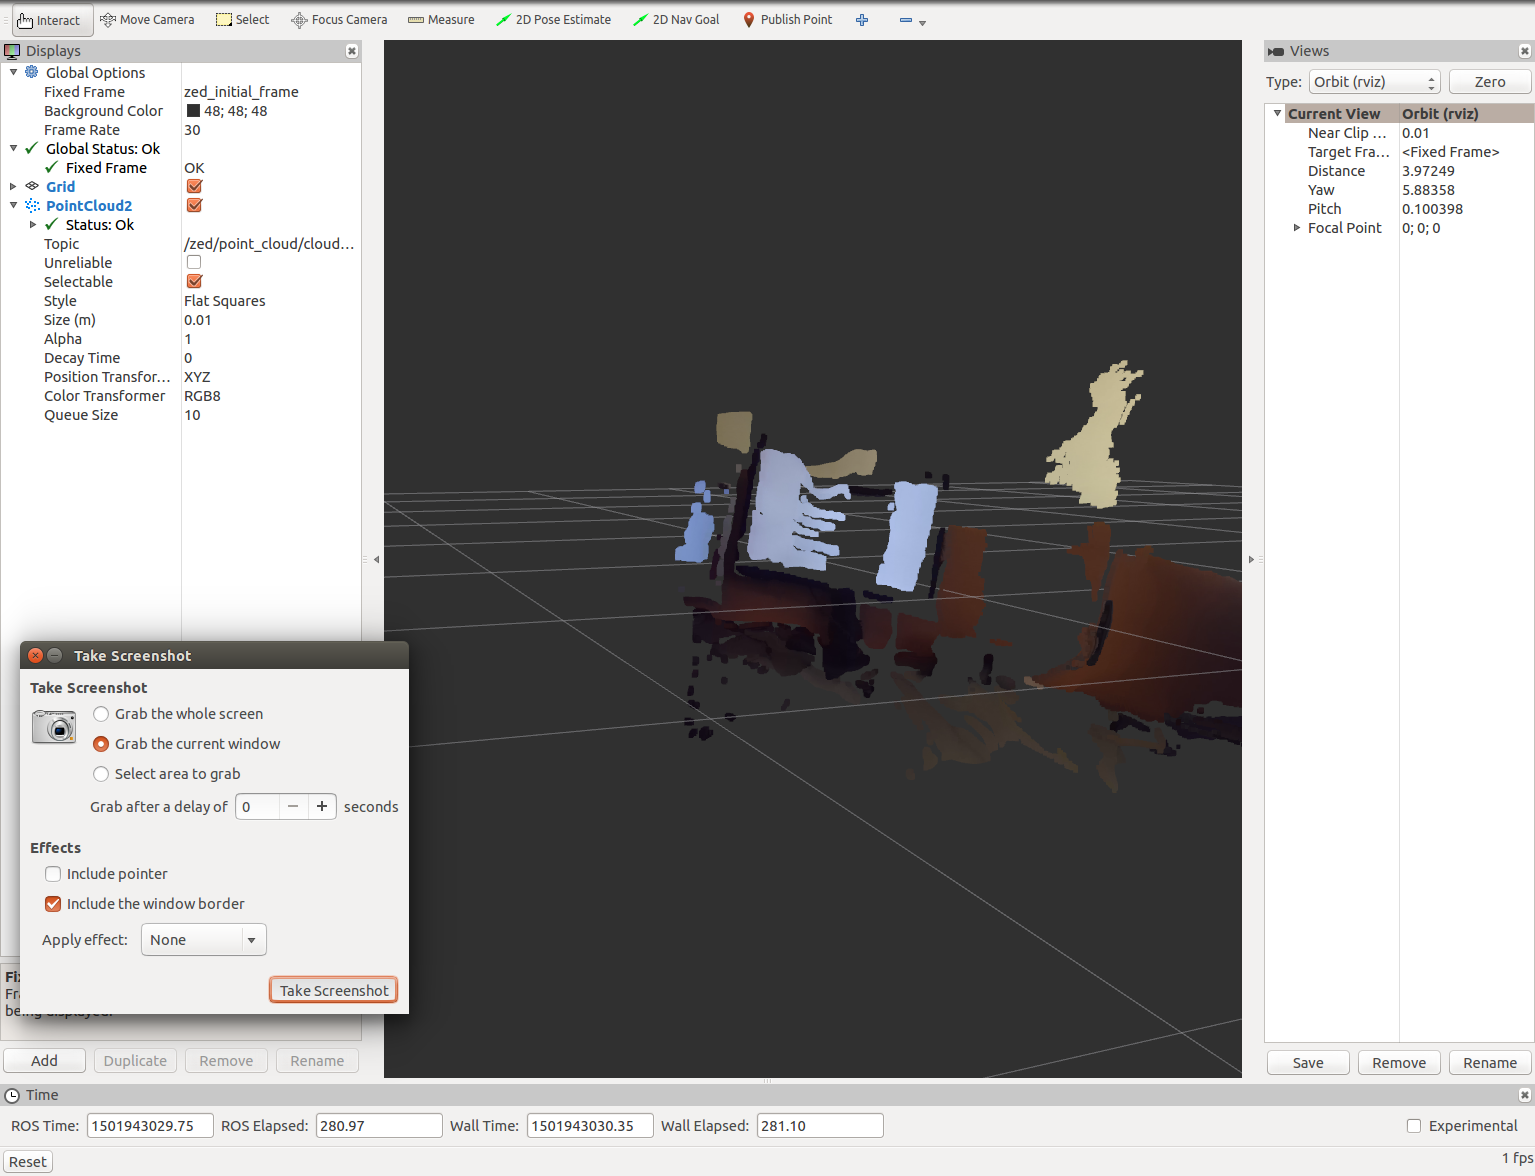
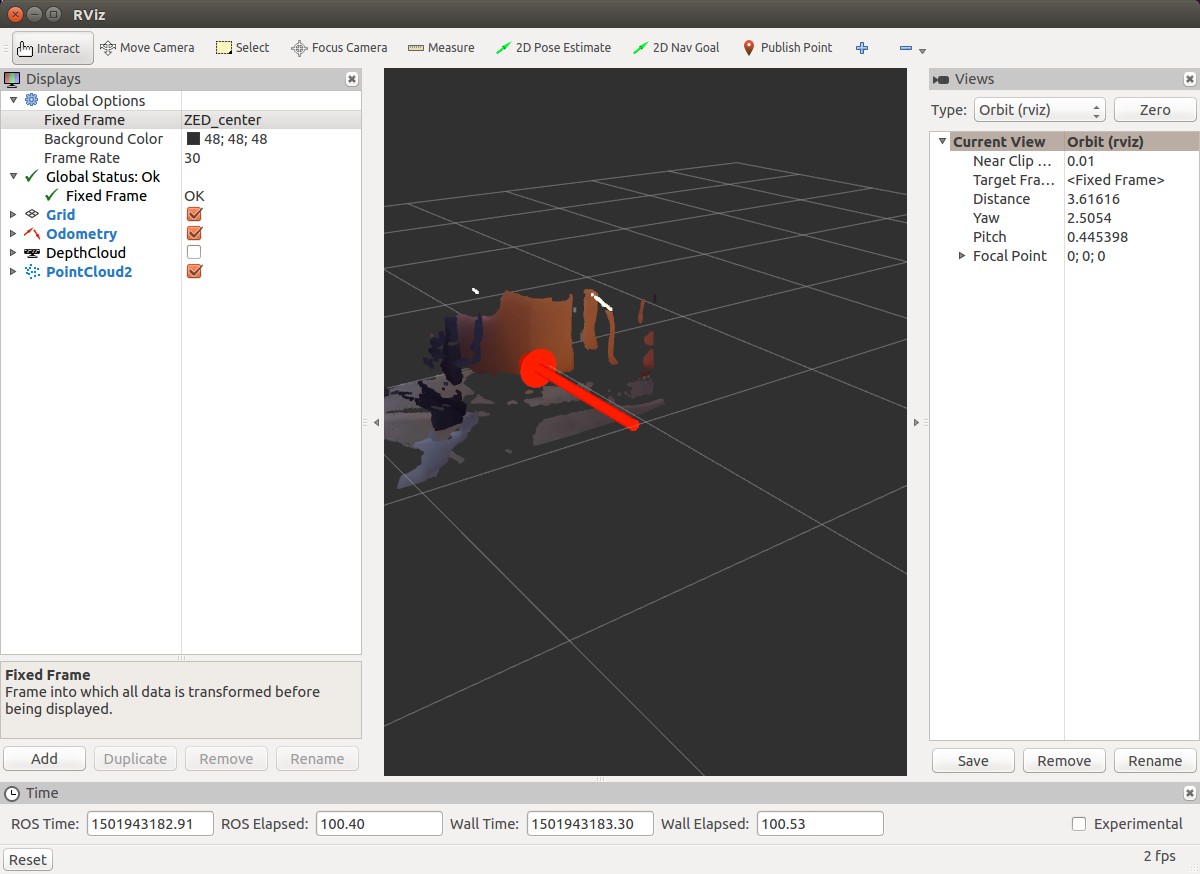
Run rviz on Jetson itself (I could not successfully launch it when connecting via ssh with the -x option):
Let's now try the ZED camera on a practical task. On NVIDIA Jetson, you can easily run the SLAM RTAB-MAP algorithm. First, install the ROS wrapper for RTAB-MAP:
Now run rtabmap using the ZED camera. If we are not running zed_wrapper, then run it:
Run rtabmap:
Select the ZED camera in the rtabmap window as the source:

I did not test the RTAB-MAP on NVIDIA Jetson, therefore, dear readers, I leave you the opportunity to try this SLAM algorithm. You can read about using RTAB-MAP in my last two articles ( here and here ).
I hope this article will be a good starting point for you to use a stereo camera ZED and microcomputer NVIDIA Jetson. I wish you good luck in your experiments and see you soon!
PS: I am interested in your opinion on the choice of an inexpensive stereo camera for experiments. ROS support does not matter much, the main thing is the price. Please write your options in the comments to the article.
PS (Upd): I would like to try passive stereo cameras such as ZED. Preferably able to work with Raspberry Pi 3.
About NVIDIA Jetson
To begin, consider the NVIDIA Jetson TK1 platform. NVIDIA Jetson TK1 is an NVIDIA microcomputer based on Tegra K1 SOC (CPU + GPU on a single chip with CUDA support). NVIDIA Jetson boasts a 4-core ARM Cortex-A15 CPU with 2.3 GHz, has the same components as the Raspberry Pi (HDMI, USB 2.0 and 3.0, Ethernet), as well as PC-specific modules: SATA, mini-PCIe . The mobile Tegra K1 processor has very similar properties and architecture to the desktop GPU, which allows it to withstand heavy loads with minimal power consumption. As stated on the official pageThe processor allows you to run on the board any demanding graphics tasks, such as face recognition, augmented reality, and even computer vision tasks for unmanned vehicles. More details about all the features of the platform can be found here .
NVIDIA Jetson TK1 internal memory is represented by a 16 GB eMMC module. By default, NVIDIA Jetson TK1 is preinstalled with Ubuntu 14.04 operating system.
A 12 V AC / DC adapter is used to power the microcomputer.
ZED stereo camera
The ZED stereo camera is a passive depth camera consisting of two ordinary RGB cameras 12 inches apart from each other, with an overview of up to 20 meters. Unlike active cameras (such as ASUS Xtion and Microsoft Kinect), the ZED stereo camera does not have an IR laser to measure distance. The camera is relatively inexpensive (costs $ 449). The advantage of the camera can be considered its small size (175 x 30 x 33 mm) and lightness (159 g).
The camera can be used to create outdoor maps on the drone .
More information about the camera can be found on the official page .
Configure Ubuntu on NVIDIA Jetson TK1
Connect NVIDIA Jetson TK1 using HDMI to the monitor, connect the Ethernet cable to the appropriate connector, and finally use the 12 V AC / DC adapter to the power supply.
To install the system on NVIDIA Jetson, you may need to install JetPack TK1 (instructions can be found here ). I got NVIDIA Jetson on my hands with JetPack already installed and Ubuntu 14.04, so here I am not considering its installation.
So the Ubuntu 14.04 system will start automatically. For authorization, use the login and password ubuntu.
Find out the IP address of the Jetson host:
ifconfig
We get the hardware characteristics:
lscpu
The conclusion will be as follows:
Architecture:          armv7l
Byte Order:            Little Endian
CPU(s):                4
On-line CPU(s) list:   0-3
Thread(s) per core:    1
Core(s) per socket:    4
Socket(s):             1
There may be a problem with connecting to Jetson over SSH: ifconfig displays the IP address, but it is not possible to connect to Jetson at this address. To solve the problem, open the / etc / network / interface file from under the root:
sudo nano /etc/network/interface
and add the lines:
auto eth0
iface eth0 inet dhcp
We made a dynamic IP address assignment. Save the changes and execute:
sudo ifup eth0
Now everything should work. This decision was taken from here .
Now connect to Jetson via SSH:
ssh -X ubuntu@<ip_address>
CUDA installation
To work with the ZED camera, we need the ZED SDK, which requires CUDA version 6.5 installed. Download the deb file for CUDA Toolkit 6.5 for L4T from here (instruction taken from here ):
wget http://developer.download.nvidia.com/compute/cuda/6_5/rel/installers/cuda-repo-l4t-r21.1-6-5-prod_6.5-14_armhf.deb
Install the repository metadata for CUDA for L4T, which has just been downloaded:
sudo dpkg -i cuda-repo-l4t-r21.1-6-5-prod_6.5-14_armhf.deb
Download and install the CUDA Toolkit itself, including the OpenGL toolkit for NVIDIA:
sudo apt-get update
Install cuda-toolkit-6-5:
sudo apt-get install cuda-toolkit-6-5
Add the user ubuntu to the group “video” to provide access to the GPU:
sudo usermod -a -G video $USERHere, $ USER is ubuntu.
Add the paths to the CUDA installation folder to the .bashrc script and execute it in the current terminal:
echo"export PATH=/usr/local/cuda-6.5/bin:$PATH" >> ~/.bashrc
echo"export $PATH=/usr/local/cuda-6.5/bin:$PATH" >> ~/.bashrc
source ~/.bashrc
Check that the CUDA Toolkit is installed on the device:
nvcc -V
USB 3.0 Setup on Jetson TK1
By default, the USB 3.0 port is configured by the system on the Jetson TK1 as USB 2.0. We need to configure it as USB 3.0. To do this, open the file / boot / extlinux / extlinux.conf as root:
sudo vi /boot/extlinux/extlinux.conf
Find the string 'usb_port_owner_info = 0'. If this line occurs twice, then we change the last inclusion. Rewrite 'usb_port_owner_info = 0' to 'usb_port_owner_info = 2'.
Installing the ZED SDK
The installation procedure looks the same as on desktop Linux. It is worth noting that OpenCV is already installed when installing JetPack in order to be able to use Tegra optimization for it. Therefore, manual installation of OpenCV is not required.
To use the ZED stereo camera, we need to install the ZED SDK 1.2. As an installer, a special Jetson TK1 .run file is used. Download the installer:
wget https://www.stereolabs.com/developers/downloads/archives/ZED_SDK_Linux_JTK1_v1.2.0.run
Set the permissions for the file and run it in the terminal:
sudo chmod +x ZED_SDK_Linux_JTK1_v1.2.0.run
./ZED_SDK_Linux_JTK1_v1.2.0.run
Accept the terms of the license agreement, press 'q' and then 'Y'. Next, perform the procedure following the instructions.
Run ZED Explorer on Jetson itself (does not work when connecting remotely via SSH):
/usr/local/zed/tools/ZED\ Explorer
Installing ROS driver for ZED stereo camera
I used in my experiments ROS Indigo. Install the dependencies for the ROS driver:
sudo apt-get install ros-indigo-tf2-ros ros-indigo-image-transport ros-indigo-dynamic-reconfigure ros-indigo-urdf
Install ROS camera for ZED camera:
cd ~/catkin_ws/src
git clone https://github.com/zastrix/zed-ros-wrapper.git
git checkout ef3ad46f14cf62ff21083829a1fa6879d20246de
cd ~/catkin_ws
catkin_make
Run zed_wrapper by executing the following commands in different windows of the terminal:
roscore
roslaunch zed_wrapper zed.launch
Show active topics:
rostopic list
In the list, in addition to standard topics, we will see topics with the / zed prefix:
/zed/depth/camera_info
/zed/depth/depth_registered
/zed/joint_states
/zed/left/camera_info
/zed/left/image_raw_color
/zed/left/image_rect_color
/zed/odom
/zed/point_cloud/cloud_registered
/zed/rgb/camera_info
/zed/rgb/image_raw_color
/zed/rgb/image_rect_color
/zed/right/camera_info
/zed/right/image_raw_color
/zed/right/image_rect_color
Run rqt_image_view:
rosrun rqt_image_view rqt_image_view
When choosing a topic / zed / depth / depth_registered, we get a depth map:
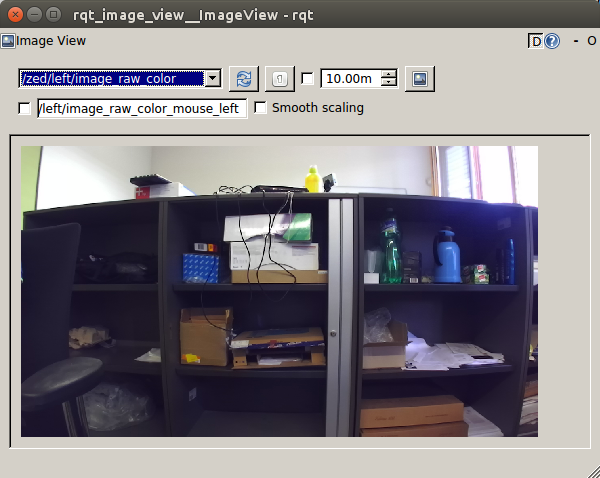
RGB image from the left camera (/ zed / left / image_raw_color):
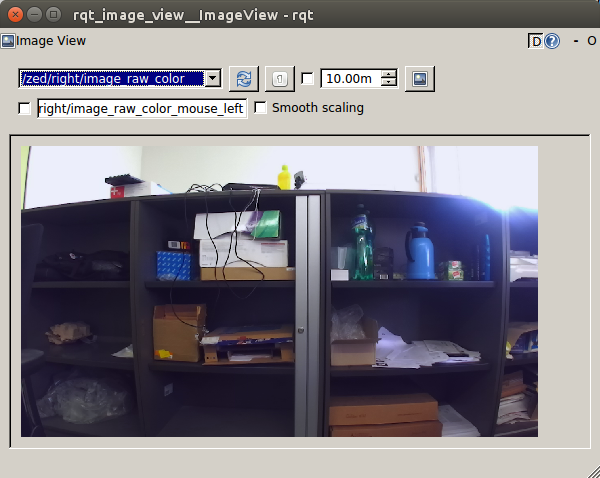
And finally an RGB image from the right camera (/ zed / right / image_raw_color):
Data from the camera is published in the topics / zed / rgb / image_raw_color and / zed / depth / depth_registered with a frequency of 15Hz.
Find out the frequency of publishing point clouds in the topic / zed / point_cloud / cloud_registered:
rostopic hz /zed/point_cloud/cloud_registered
average rate: 4.146
    	min: 0.202s max: 0.371s std dev: 0.04798s window: 11
average rate: 4.178
    	min: 0.191s max: 0.371s std dev: 0.04306s window: 16
Run rviz on Jetson itself (I could not successfully launch it when connecting via ssh with the -x option):
rosrun rviz rviz
SLAM On NVIDIA Jetson with ZED Stereo Camera
Let's now try the ZED camera on a practical task. On NVIDIA Jetson, you can easily run the SLAM RTAB-MAP algorithm. First, install the ROS wrapper for RTAB-MAP:
sudo apt-get install ros-indigo-rtabmap-ros
Now run rtabmap using the ZED camera. If we are not running zed_wrapper, then run it:
rosrun zed_wrapper zed_wrapper_node
Run rtabmap:
rtabmap
Select the ZED camera in the rtabmap window as the source:
I did not test the RTAB-MAP on NVIDIA Jetson, therefore, dear readers, I leave you the opportunity to try this SLAM algorithm. You can read about using RTAB-MAP in my last two articles ( here and here ).
I hope this article will be a good starting point for you to use a stereo camera ZED and microcomputer NVIDIA Jetson. I wish you good luck in your experiments and see you soon!
PS: I am interested in your opinion on the choice of an inexpensive stereo camera for experiments. ROS support does not matter much, the main thing is the price. Please write your options in the comments to the article.
PS (Upd): I would like to try passive stereo cameras such as ZED. Preferably able to work with Raspberry Pi 3.