Twisted pair mat
For centuries, the name of the one who invented the permanent fetish and the endless source of joy for almost all admins - the color differentiation of the twisted pair wires - is famous.
This Friday night I want to show you another piece of crafts from the category of wooden flash drives.
It all started with the fact that at home 5 meters twisted pair lay around, and at the new job there was no stand for a mug (from a wet mug, you know, such terrible stains remain on the table). Without further ado, I set about gutting the cable.
Frankly, I have never knitted before in my life, I have no idea how a scarf or a mitten is obtained from a large round skein of thread. Actually I had to study in the field.
For everything about everything, it took me five nights of leisurely knitting in front of the laptop display and under the mocking look of my wife.
Next, I will describe the technical process, subtleties and errors. Those who are not interested may not read further. And your fingers will thank you so much if you do not repeat my experience.
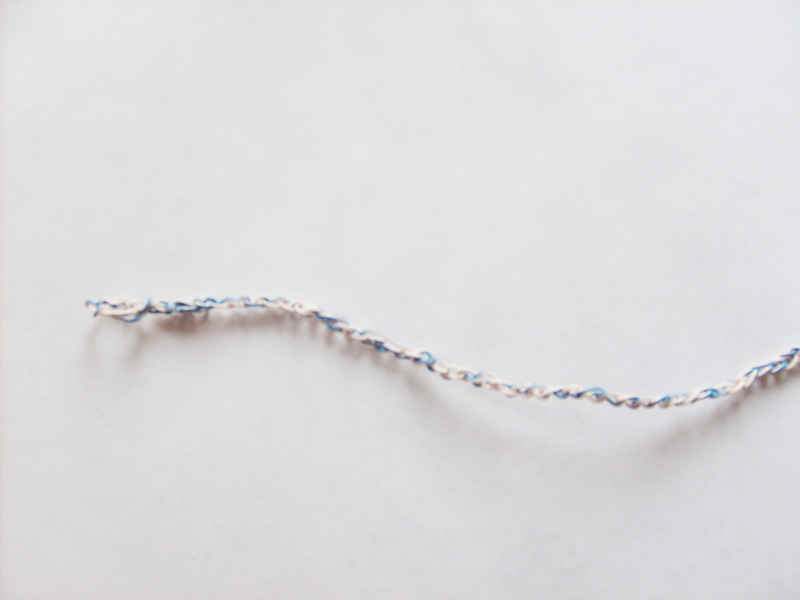
So let's get started. First we gutted a meter and a half vituhi. You don’t have to cut anything yet - it’s not known how much is useful. No need to unravel all the pairs now. Just take an orange pair and unravel the first 50 centimeters. We begin, of course, with white-orange.
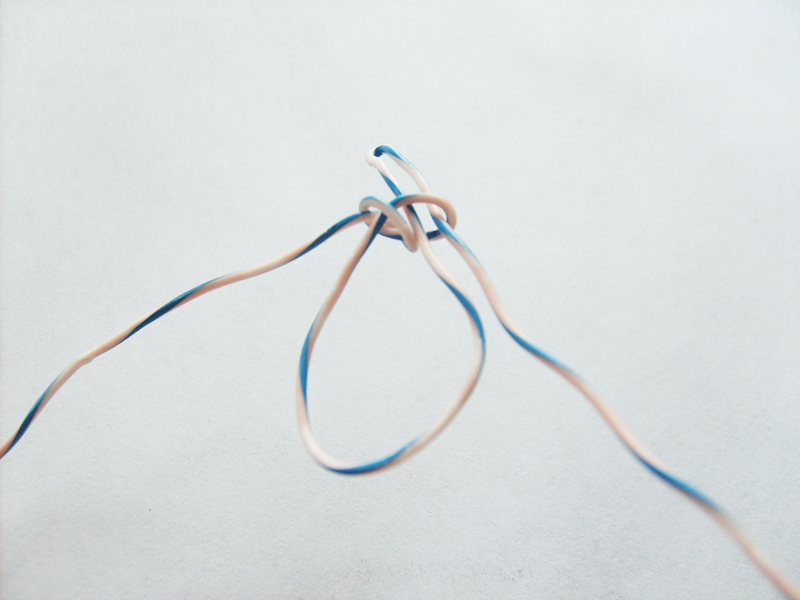
The main problem for me was that we do not have a free end of the core and nodes, at first glance, you won’t especially tie it. But this is not so. We make such a knot as the photo is shown and leave the loop - it will not work to tighten anyway.

To prevent the loop from opening, fold the cable in half and put it into this loop, which can now be tightened.
The inserted end is also tightened, leaving a small loop.


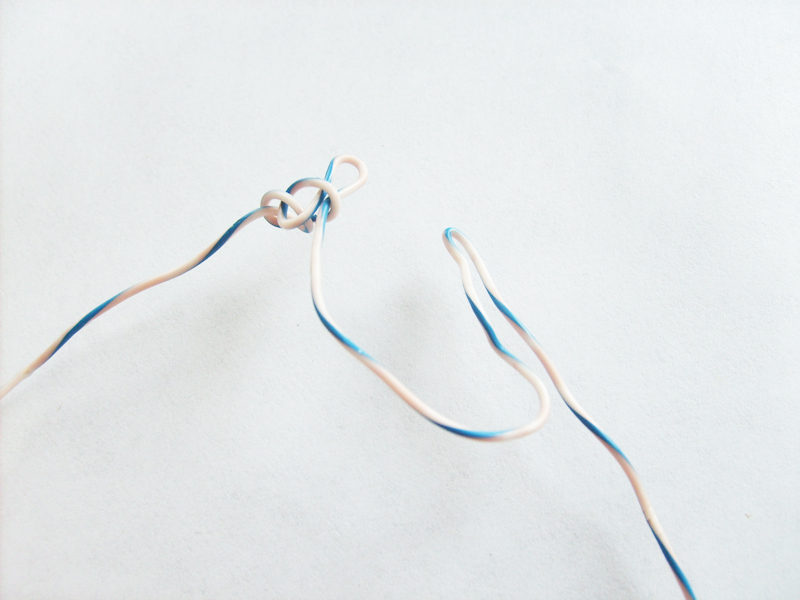
So we have formed a cycle.
for i: = 3 to how much do you need to do the above algorithm.
And now we have reached the required size.
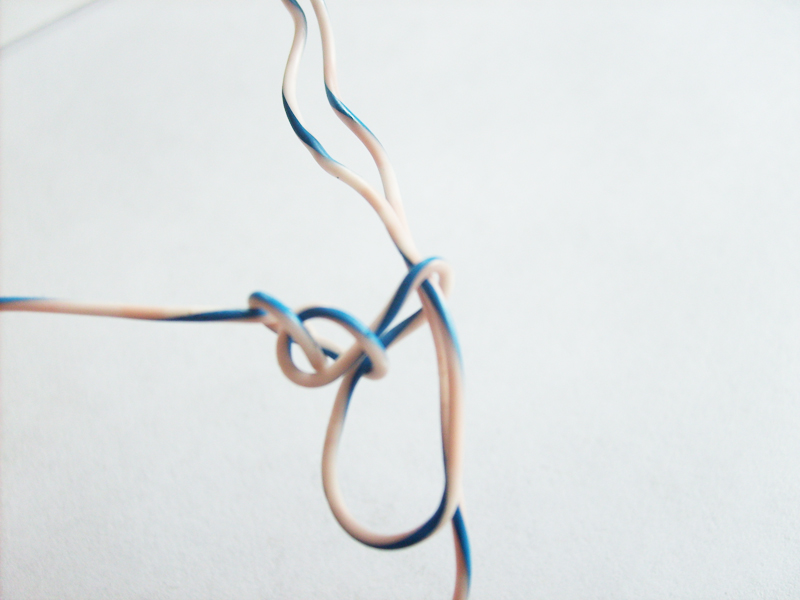
What to do now? Continue the same, then fold? Do not roll - there will be no clutch of two rows. Make a second row independent of the first and fasten with pieces of cable then? Pornography. But two minutes of thought help solve this problem. The mechanism is illustrated in the photo. On the first row already received, we relax the last bundle and make a loop into which we double the cable folded in half.

We are on the right track, but here's the bad luck: there is already a loop into which you can pass the folded cable to create a new loop, into which we will stretch the double folded cable to create a loop into which ... But how will this be connected with the first row? The answer is on the surface - now we relax the penultimate node from the first row and double the cable folded into two loops.

Voila, the ranks are connected and we have a new cycle. We repeat it to the end and by the same principle we go in the opposite direction. Each loop is better to tighten to a certain extent, otherwise they will stick out. And it is better to tighten everywhere the same way, otherwise somewhere it will be weak, and somewhere strongly because of what the rug will lead and it will not be even, but slightly convex, as it turned out for me.
Now the first trick, which I did not pay enough attention to and the rug I narrowed very much towards the end. Having reached the very last node of the third row, do not rush to go in the opposite direction. You see the tightly tightened eyelet sticks out from the previous row, it needs to be relaxed and the cable inserted into it, otherwise each next row will turn out shorter than the previous one.
We figure out how many rows you need to go through to get a square and work - a monotonous job, which at some points starts to puff out, especially when your fingers are already burning from friction and pressure.
<Spoiler> To weaken strongly tightened knots, you can use mother's knitting needles or paste from the handle.
Note that the second end of the core should be on the opposite side if you want to make a patch cord like me. Starting a row of a different color, you must leave a sufficient margin.
If you want to squeeze it, as I did, please note that you must have an odd number of rows, so that the tails of the core are from different sides.
So, after a few hours of work, you will get such a spider-like something:

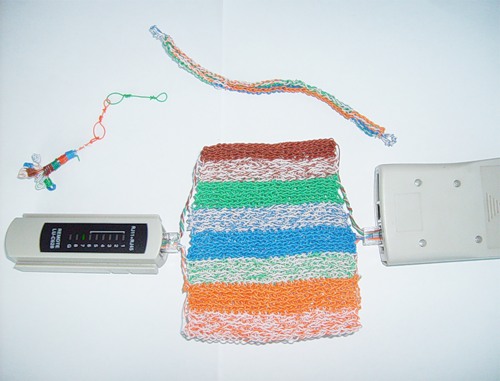
These terrible ponytails can be tidied up neatly or woven into the main carpet, but I must admit, it was laziness, and the length of the rest would not allow it, so the output we have this:
Now, even if all the patch cords suddenly disappear at once on the whole Earth, you will remove this rug from the table and save the world.
And from the scraps, you can still do something for the soul (a bouquet for a girl).
UPD: Video of some points (I apologize for the fact that without sound):
Good luck
PS Here, the Habrovchanin hollow had an idea to tie a belt. I loved it.
<And yes: do not confuse the order of colors!>
This Friday night I want to show you another piece of crafts from the category of wooden flash drives.
It all started with the fact that at home 5 meters twisted pair lay around, and at the new job there was no stand for a mug (from a wet mug, you know, such terrible stains remain on the table). Without further ado, I set about gutting the cable.
Frankly, I have never knitted before in my life, I have no idea how a scarf or a mitten is obtained from a large round skein of thread. Actually I had to study in the field.
For everything about everything, it took me five nights of leisurely knitting in front of the laptop display and under the mocking look of my wife.
Next, I will describe the technical process, subtleties and errors. Those who are not interested may not read further. And your fingers will thank you so much if you do not repeat my experience.
Process technology
So let's get started. First we gutted a meter and a half vituhi. You don’t have to cut anything yet - it’s not known how much is useful. No need to unravel all the pairs now. Just take an orange pair and unravel the first 50 centimeters. We begin, of course, with white-orange.
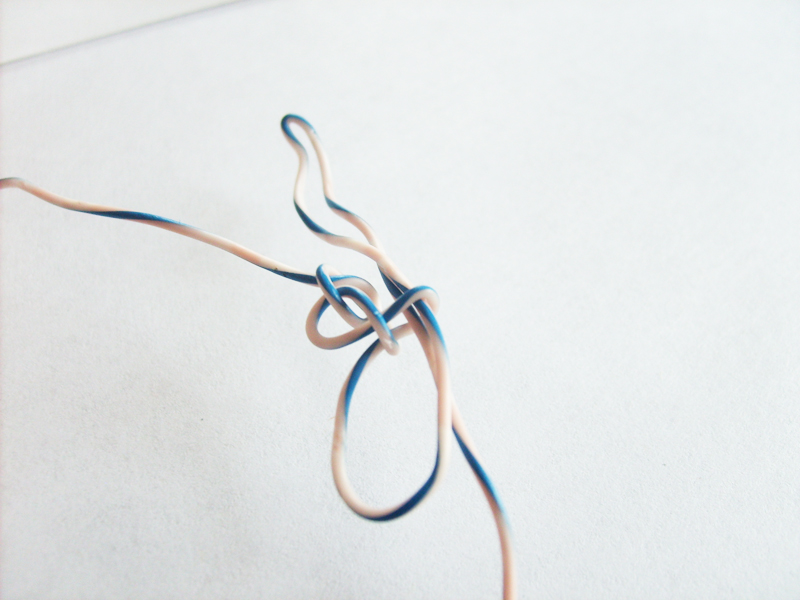
The main problem for me was that we do not have a free end of the core and nodes, at first glance, you won’t especially tie it. But this is not so. We make such a knot as the photo is shown and leave the loop - it will not work to tighten anyway.
To prevent the loop from opening, fold the cable in half and put it into this loop, which can now be tightened.
The inserted end is also tightened, leaving a small loop.
So we have formed a cycle.
for i: = 3 to how much do you need to do the above algorithm.
And now we have reached the required size.
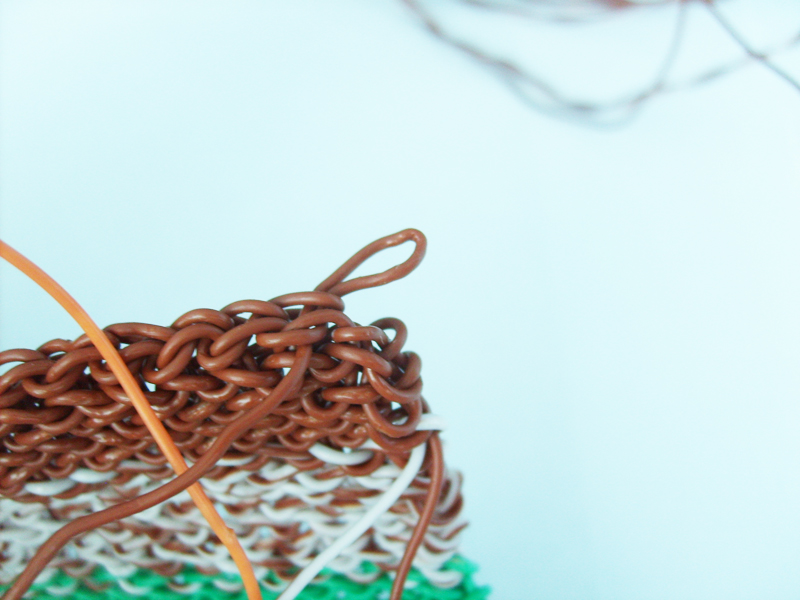
What to do now? Continue the same, then fold? Do not roll - there will be no clutch of two rows. Make a second row independent of the first and fasten with pieces of cable then? Pornography. But two minutes of thought help solve this problem. The mechanism is illustrated in the photo. On the first row already received, we relax the last bundle and make a loop into which we double the cable folded in half.
We are on the right track, but here's the bad luck: there is already a loop into which you can pass the folded cable to create a new loop, into which we will stretch the double folded cable to create a loop into which ... But how will this be connected with the first row? The answer is on the surface - now we relax the penultimate node from the first row and double the cable folded into two loops.
Voila, the ranks are connected and we have a new cycle. We repeat it to the end and by the same principle we go in the opposite direction. Each loop is better to tighten to a certain extent, otherwise they will stick out. And it is better to tighten everywhere the same way, otherwise somewhere it will be weak, and somewhere strongly because of what the rug will lead and it will not be even, but slightly convex, as it turned out for me.
Now the first trick, which I did not pay enough attention to and the rug I narrowed very much towards the end. Having reached the very last node of the third row, do not rush to go in the opposite direction. You see the tightly tightened eyelet sticks out from the previous row, it needs to be relaxed and the cable inserted into it, otherwise each next row will turn out shorter than the previous one.
We figure out how many rows you need to go through to get a square and work - a monotonous job, which at some points starts to puff out, especially when your fingers are already burning from friction and pressure.
<Spoiler> To weaken strongly tightened knots, you can use mother's knitting needles or paste from the handle.
Note that the second end of the core should be on the opposite side if you want to make a patch cord like me. Starting a row of a different color, you must leave a sufficient margin.
If you want to squeeze it, as I did, please note that you must have an odd number of rows, so that the tails of the core are from different sides.
So, after a few hours of work, you will get such a spider-like something:
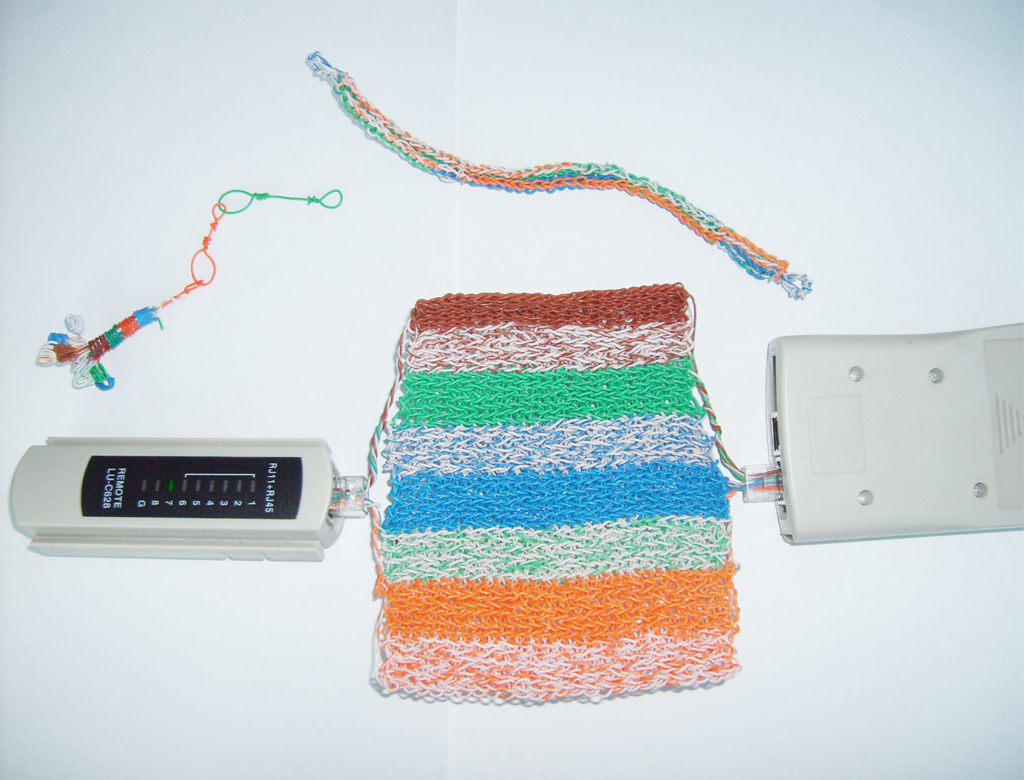
These terrible ponytails can be tidied up neatly or woven into the main carpet, but I must admit, it was laziness, and the length of the rest would not allow it, so the output we have this:
Now, even if all the patch cords suddenly disappear at once on the whole Earth, you will remove this rug from the table and save the world.
And from the scraps, you can still do something for the soul (a bouquet for a girl).
Field mat
UPD: Video of some points (I apologize for the fact that without sound):
Good luck
PS Here, the Habrovchanin hollow had an idea to tie a belt. I loved it.
<And yes: do not confuse the order of colors!>