Taming a Wild Animal: Adding Homekit Support to the Redmond SkyPlug RSP-100S Smart Socket
- Tutorial
Prehistory
For the first time I learned about this outlet from the article Redmond SkyPlug RSP-100S Smart Socket Analysis of the design and the electrical circuit diagram. Identify flaws . I remember that after reading it, I first became interested in the scheme of a transformerless power supply and how compactly the elements are placed in the socket housing, despite the fact that there is a full-fledged relay inside, and not, say, a triac.
There were no speeches about any attempts to reprogram the Bluetooth module, since the programming of BLE devices has historically been a very difficult task. Here is an example: Developing IoT devices using Bluetooth LE is clearly not a DIY level.
However, over the past year the situation has radically changed ...
It all started with the fact that the Indian programmer Sandeep Mistry (pictured) ...

... ported Wiring, also known as the Arduino framework, simply “arduino” to the Nordic Semiconductor nRF51822 and nRF52832 chips, writing the BLEPeripheral library to create the peripheral devices supported by the BLE4.x
Then the Arduino AG (ex -arduino.org) joined the collaboration with Nordic and released the Arduino Primo board ...
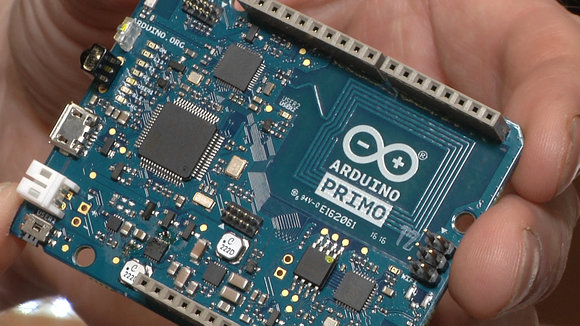
... based on the nrf52832 chip. I wonder how quickly you find the nRF52832 itself on the board (hint: the big one on the left is not him). For compatibility with Arduino, the board uses the code created by Sandip, and he himself was accepted into the state. The story repeats with espressif, esp8266 and Ivan Grokhotkov (igrr), where it all began in the same way with "folk" developments.
Adafruit and Sparkfun were also soon marked by the release of boards on the nRF52.
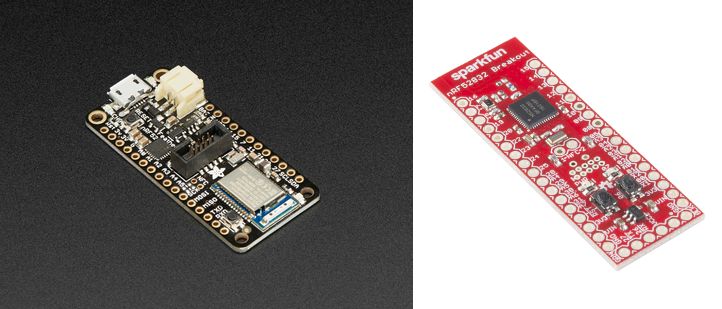
In general, it seems that the nRF5 family (nRF51822 and nRF52832) is now the most "fashionable" chip among all the majors that define the electronic DIY market. By "major" I mean Arduino, Adafruit and Sparkfun. Asians in the face of ITEAD or SEEED are still lagging behind, but I think this is not for long. At least, noname Chinese with Ali are churning out the modules on these chips, and if the modules on nRF51822 were rather awkward, then the modules on nRF52832 are excellent.
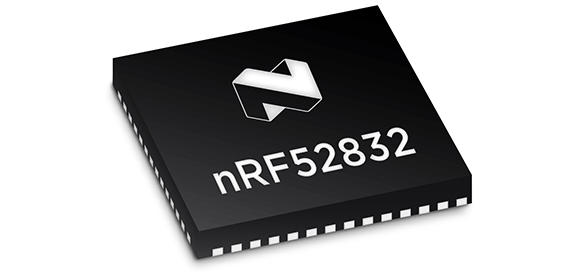
What kind of chip is so remarkable and why, apparently, does it have a big chance at last to replace the famous atmega328 in DIY crafts?
nRF5 SoC
general description
The nRF52832 is a new, powerful, low-power and flexible “system on a chip” with support for Bluetooth Smart, ANT protocols and proprietary user-designed stacks in the 2.4GHz frequency band.
The nRF52832 is built on a 32-bit ARM Cortex-M4F processor core with 512kB Flash and 64kB RAM memory. According to the work protocol, nRF52832 is fully compatible with previous nRF51, nRF24L and nRF24AP series manufactured by Nordic Semiconductor.
This is also very important, for example, I have all the home automation done on nRF24L01 and this backward compatibility makes it easy to replace the atmega328 + nRf24 combination with one nRF5
Improved processor performance
The nRF52832 contains the powerful ARM Cortex-M4F processor core, which meets the requirements of many computationally demanding performance, but at the same time compact applications capable of running on a single chip. The core is able to solve the problems of digital signal processing, perform floating point operations, perform multiplexing and accumulation operations within one working cycle, hardware supports the energy efficiently implemented division operation in real and complex forms.
Multiprotocol radio part
The 2.4 GHz radio part is compatible with Bluetooth Smart, ANT protocol stacks and any proprietary stacks. The radio has a built-in high-resolution RSSI register with the ability to automatically operate in EasyDMA mode for direct memory access at the time of receiving and transmitting data over the air. Nordic provides Bluetooth Smart, ANT and Gazel (2.4GHz) protocol stacks as downloadable content on its official website.
The Bluetooth stack in the Nordic version is called SoftDevice, remember this word, it will meet us today.
Energy efficiency
nRF52832 is a super-low-power on-chip system capable of using power in the range from 1.7V to 3.6V. All peripherals and clock generators can be quickly turned off automatically in order to reduce power consumption to a minimum level. The integrated processor core has an automated adaptive power management system. Power consumption is automatically adjusted depending on the operations currently performed by the processor core when accessing peripheral devices so that only those components of the system that are needed to perform the current task are working.
Add: the ability to reassign pins, support for up to 8 interrupts, and so on, and so forth. Almost perfect chip :)
The transformation begins
But back to our outlet. As it turned out, it is ideally suited for DIY, no worse than the cult Sonoff modules from ITEAD. The programming connector is kindly rendered and labeled XP1:
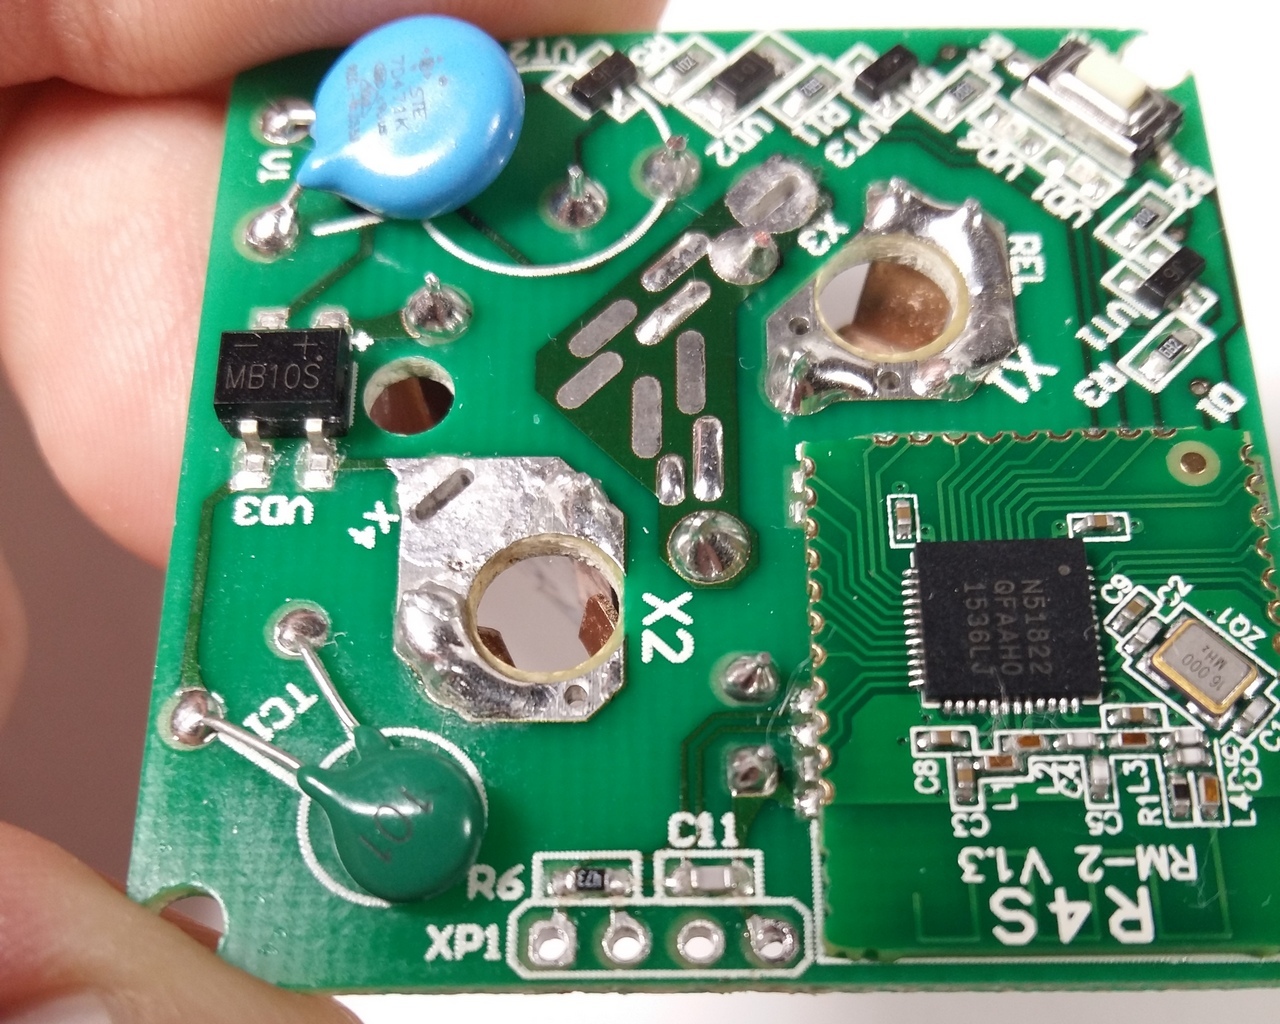
The pin order is, of course, not signed, but it doesn't matter, because we have a circuit . It has one small inaccuracy, the correct order of the pins is (from left to right):
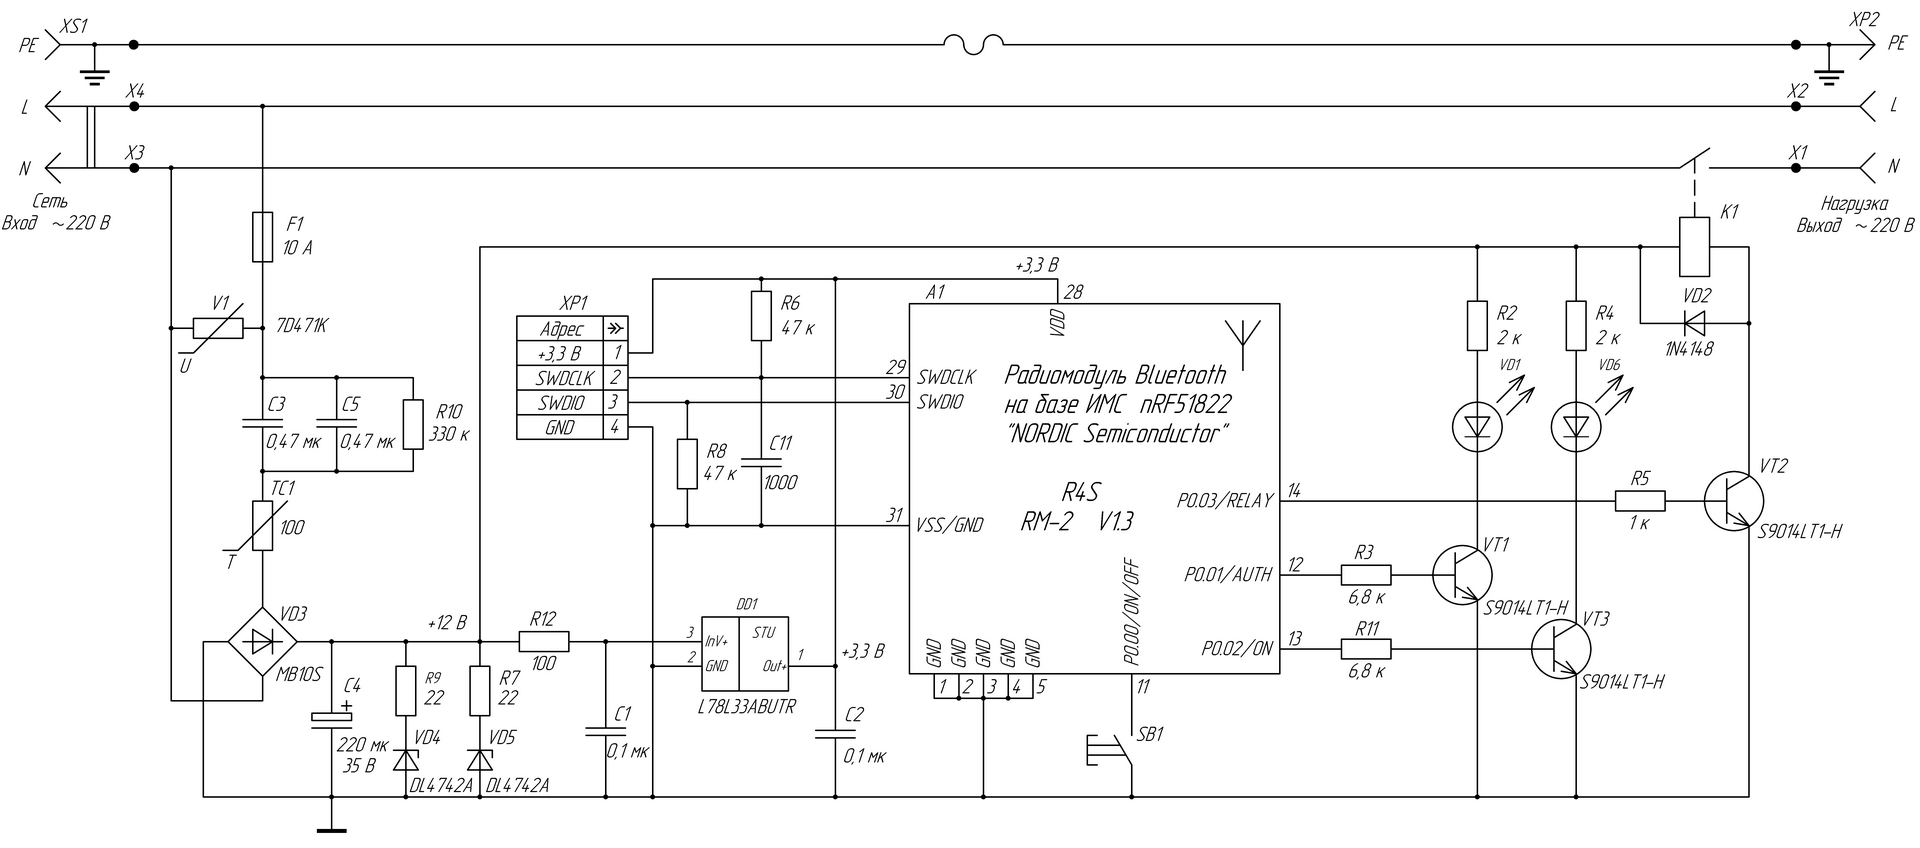
- vcc
- swdio
- swdclk
- gnd
Debug Interface - SWD. So, let's go:
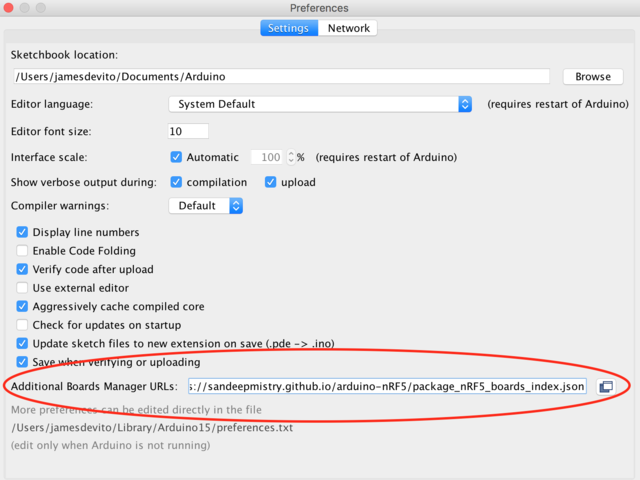
- In the Arduino IDE, go to Preferences and add the url sandeepmistry.github.io/arduino-nRF5/package_nRF5_boards_index.json in the "Additional Board Manager URL" field
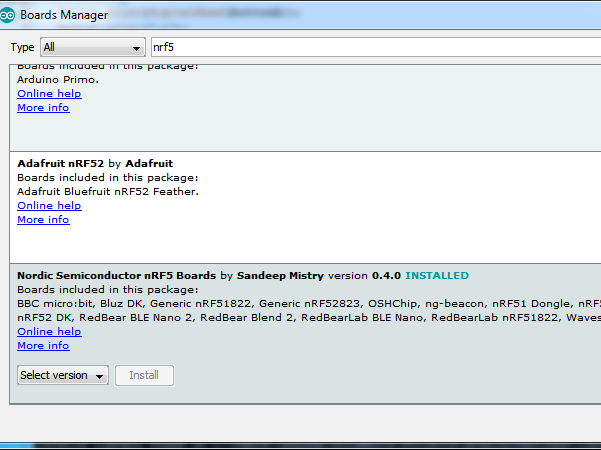
- Installing nRF5 support via Board Manager
- Install the BLE Peripheral library either through Sketch | Libraries | Manage Libraries:

Either by downloading and adding via Add .zip library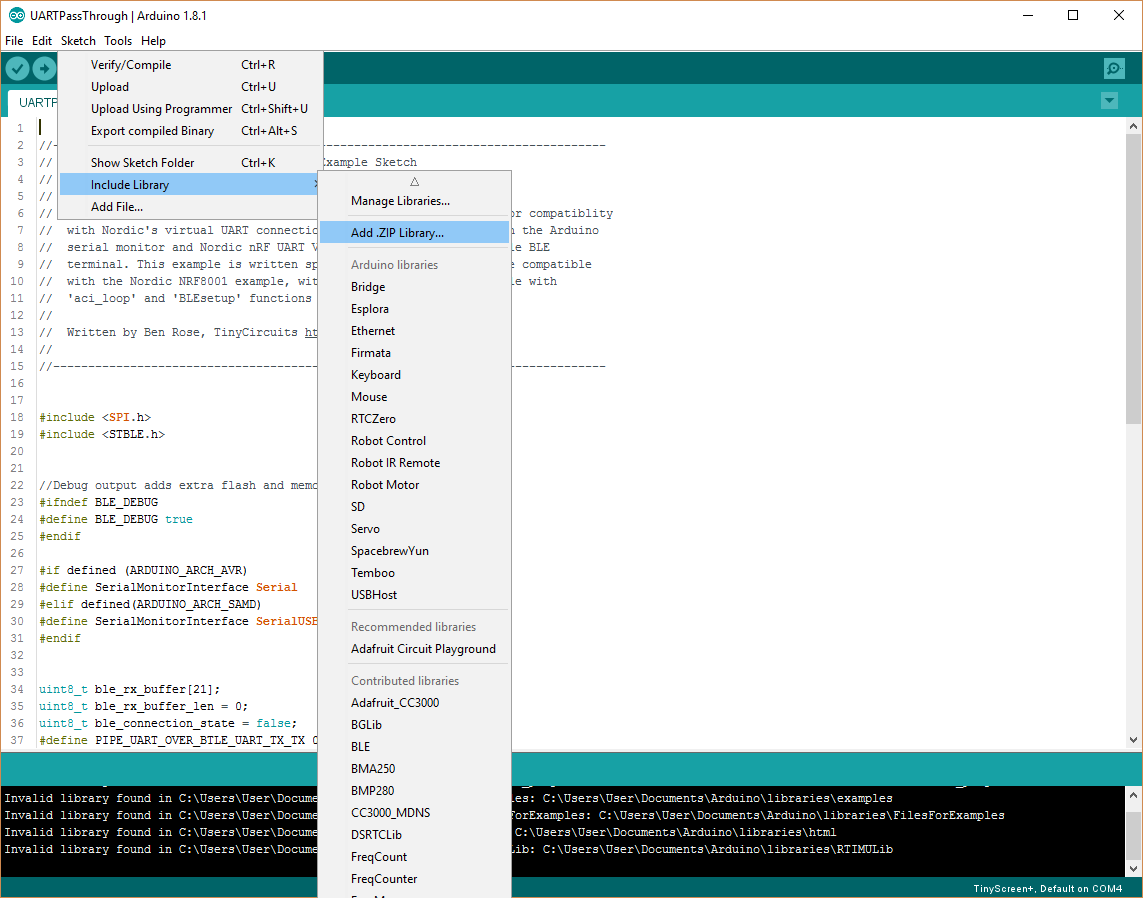
- Choose a Generic nRF51 board and a 16kB RAM version, 256kB flash (xxaa)

- Choosing Softdevice: "S110"
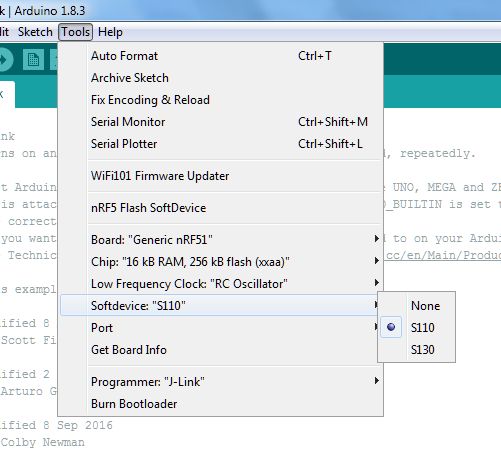
- Click on the menu item nRf5 Flash SoftDevice (this is enough to do once, then you can fill in different sketches without reflashing SoftDevice) As you remember, SoftDevice is a closed BLE stack from Nordic itself that provides high-level api for working with Bluetooth
- Select Low Frequency Clock: “RC Oscillator”

- Fill the sketchSketch#include <SPI.h>
#include <BLEPeripheral.h>
// LED pin
#define LED_PIN 3
#define ON_PIN 2
#define AUTH_PIN 1
BLEPeripheral blePeripheral = BLEPeripheral();
BLEService ledService = BLEService(«19b10000e8f2537e4f6cd104768a1214»);
BLECharCharacteristic switchCharacteristic = BLECharCharacteristic(«19b10001e8f2537e4f6cd104768a1214», BLERead | BLEWrite);
void setup() {
// set LED pin to output mode
pinMode(LED_PIN, OUTPUT);
//pinMode(ON_PIN, OUTPUT);
//pinMode(AUTH_PIN, OUTPUT);
//pinMode(0, INPUT_PULLUP);
blePeripheral.setLocalName(«LED»);
blePeripheral.setAdvertisedServiceUuid(ledService.uuid());
blePeripheral.addAttribute(ledService);
blePeripheral.addAttribute(switchCharacteristic);
blePeripheral.begin();
}
void loop() {
BLECentral central = blePeripheral.central();
if (central) {
while (central.connected()) {
if (switchCharacteristic.written()) {
// central wrote new value to characteristic, update LED
if (switchCharacteristic.value()) {
// Serial.println(F(«LED on»));
digitalWrite(LED_PIN, HIGH);
//digitalWrite(ON_PIN, HIGH);
//digitalWrite(AUTH_PIN, HIGH);
}
else {
//Serial.println(F(«LED off»));
digitalWrite(LED_PIN, LOW);
//digitalWrite(ON_PIN, LOW);
//digitalWrite(AUTH_PIN, LOW);
}
}
}
}
}
Using any SWD programmer, such as SEGGER J-Link. I used the J-Link embedded in the nrf52 Development Kit debug board, it allows you to flash not only the development kit itself, but also external boards.
At this, the programming of the socket itself can be considered complete and it ALREADY works. How to check it?
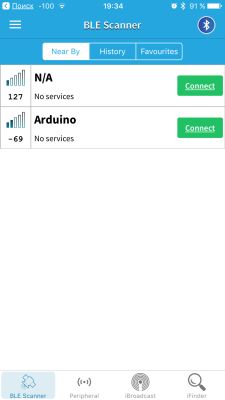
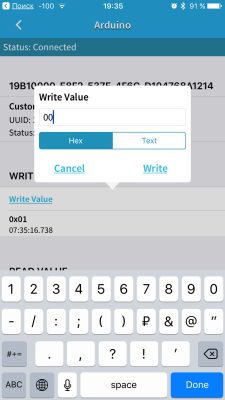
- Download the program BLEScanner

→ Link for iOS:
→ Link for Android - In the list of devices we find Arduino and click Connect.
- Next, click on the Custom Service field.
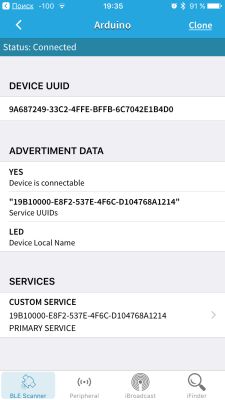
- And then on the Write Value field. Now, if you write 01, the relay turns on, 00 - turns off.
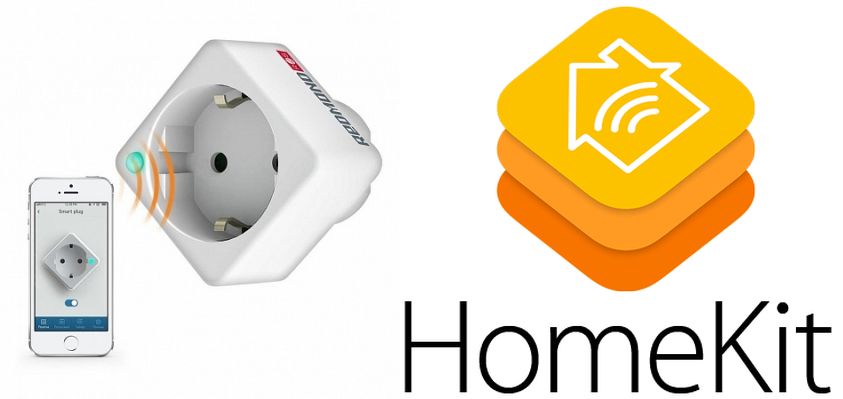
Part Two Add support for Homekit
Unfortunately, there is not yet a generally available way to tie Homekit support to a BLE device directly. This requires Apple's certification under the Mfi program, so support is only possible through a pad in the form of a Homekit server, the most famous of which is Homebridge.
We install the homebridge itself.
I have a successful homebridge on Raspberry pi 2, but for the purposes of this publication, I put another one on the Raspberry Pi Zero W (I will not go into details if interested, ready to answer questions in the comments)
sudo apt-get install npm
sudo npm install -g --unsafe-perm homebridge node-gyp
Install the BLE plugin
1) We put the NOBLE javascript library from the already known to us Sandip Mistry, and he noted here:
sudo apt-get install bluetooth bluez libbluetooth-dev libudev-dev
sudo npm install -g noble
2) Put the actual plugin
sudo npm install -g homebridge-bluetoothConfiguring Homebridge
By editing config.json in the .homebridge folder. If you have a Raspberry Pi 2, then it is in the home directory / home / pi
nano /home/pi/.homebridge/config.jsonAnd we replace its contents with
this
{
«bridge»: {
«name»: «igrushkin»,
«username»: «CC:22:3D:E3:CE:30»,
«port»: 51826,
«pin»: «314-15-926»
},
«description»: «Raspberry Pi Homebridge-Bluetooth Lightbulb Example»,
«platforms»: [
{
«platform»: «Bluetooth»,
«accessories»: [
{
«name»: «Arduino»,
«address»: «ff:86:91:c7:50:66»,
«services»: [
{
«name»: «LED»,
«type»: «Lightbulb»,
«UUID»: «19b10000e8f2537e4f6cd104768a1214»,
«characteristics»: [
{
«type»: «On»,
«UUID»: «19b10001e8f2537e4f6cd104768a1214»
}
]
}
]
}
]
}
]
}
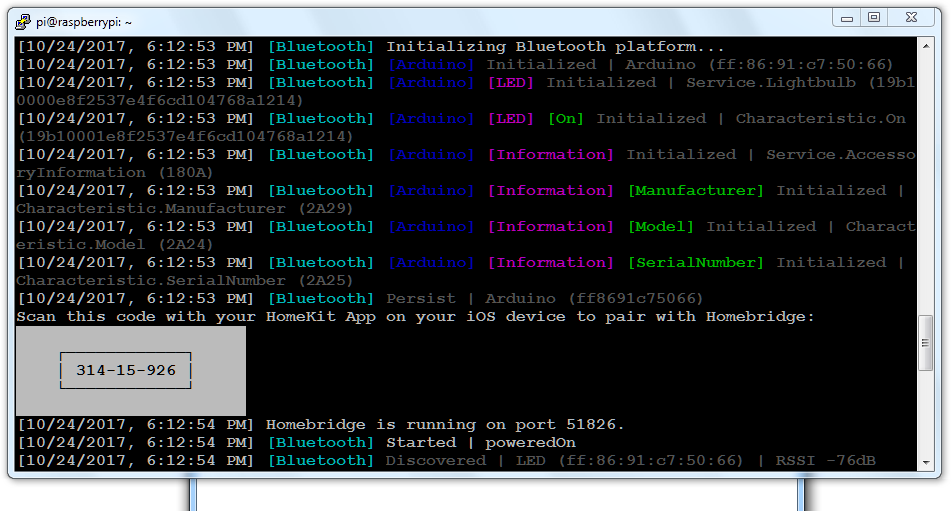
Run homebridge in debug mode (-D key, CAPITAL):
sudo homebridge -Dclosely monitor the messages. We find the line “LED - Ignored” and write out the BLE address of our outlet (analogous to the MAC address).
Alternative option: we start hcitool (the utility for work with BLE devices)
sudo hcitool lescanand find the address in the list of devices.
Exit by pressing Ctrl-C. Change the address in config.json to the correct one:
nano /home/pi/.homebridge/config.jsonRun homebridge again. This time everything should be OK, and Homebridge will happily recognize our outlet.
Conclusion
I think it makes no sense to write how to add a new device to Homekit, much has been written about it, including information on the Apple website itself. I can only say that for this it is more convenient to use the program Elgato Eve , and not the native Home application.

Used materials:
- Smart Redmond SkyPlug RSP-100S Socket Analysis of the design and the electrical circuit diagram. Identification of deficiencies
- Arduino Core for Nordic Semiconductor nRF5 based boards
- homebridge-bluetooth plugin
- noble A Node.js BLE (Bluetooth Low Energy) central module.
- NRF52832 Bluetooth smart solution