Overview of visual odometry methods in ROS: using depth cameras
Good afternoon, dear readers! In previous articles on the ROS robotic platform, I touched on the topic of localization and building a map of the area, in particular, we studied the SLAM methods: gmapping in the article and hector_slam in the article . In this article, I will continue my acquaintance with localization algorithms in ROS and present an overview of several visual odometry algorithms implemented on the ROS platform. Visual odometry is important in robotics because it allows to evaluate the movement of the robot, its current position and acceleration based on the video stream data from the camera. You can use both a regular RGB camera (in this case they talk about monocular odometry), a stereo camera (stereo odometry) and even an RGBD camera.
When using RGBD cameras such as Microsoft Kinect, it is possible to get a more accurate visual odometry than with stereo cameras, since in this case we use 3D data. In this article we will consider such algorithms. Who are interested in this topic, please under the cat.
rtabmap is essentially a SLAM algorithm in ROS. In this package, in addition to the tools for SLAM, there is an odometryViewer application for testing various methods of visual odometry. In rtabmap, visual odometry works as follows: to calculate odometry, the algorithm uses visual indications derived from an RGB image and depth data from a depth map. Using the matching of visual signs (matching) between two images, the RANSAC algorithm calculates the transformation between successive frames.
Installing rtabmap on ROS Indigo and Kinetic is very easy via apt-get:
You can also install rtabmap and rtabmap_ros from sources:
Run the odometryViewer:
A window similar to this will open :
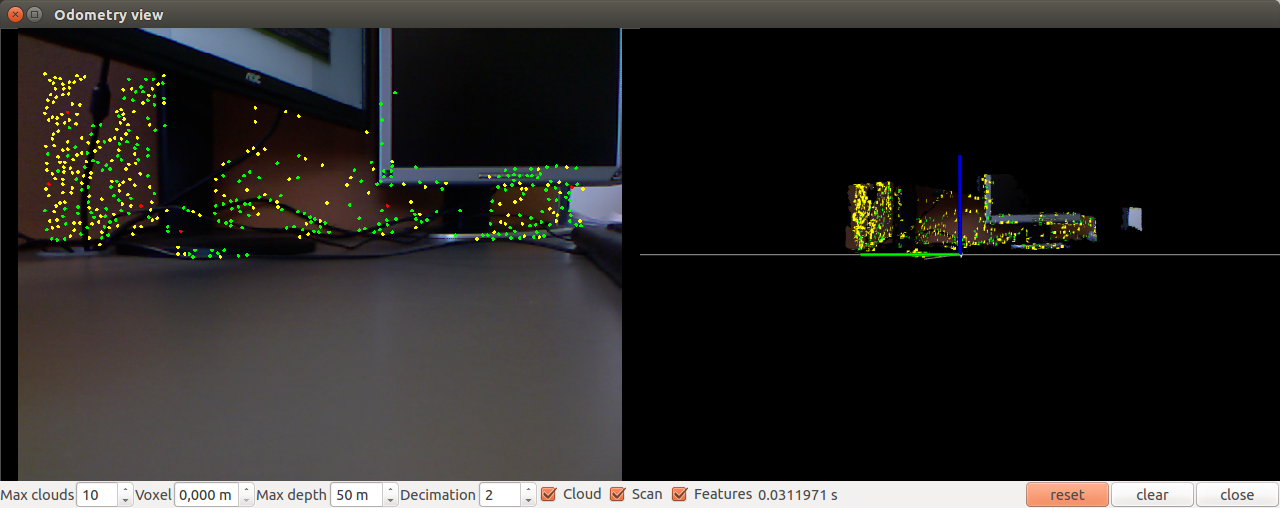
Move the camera a bit:
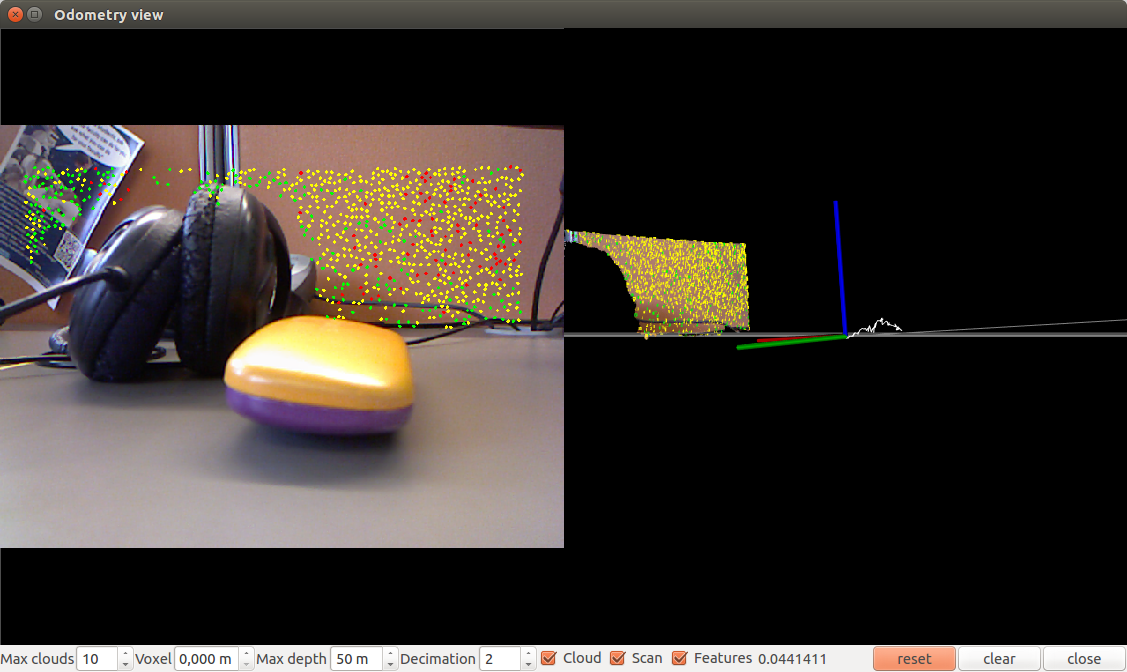
Let's try to start with the parameters. For example, using the bag-of-words method (the default SURF handle is used):
Using the bag-of-words method with a SIFT descriptor (0 = SURF, 1 = SIFT)
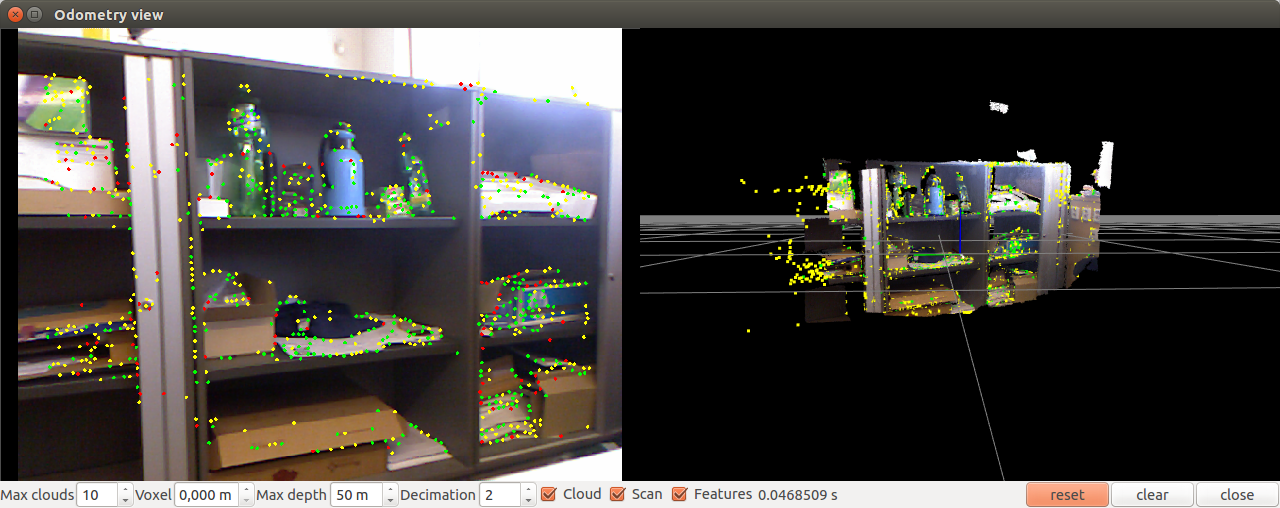
Using the FAST + BRIEF method:
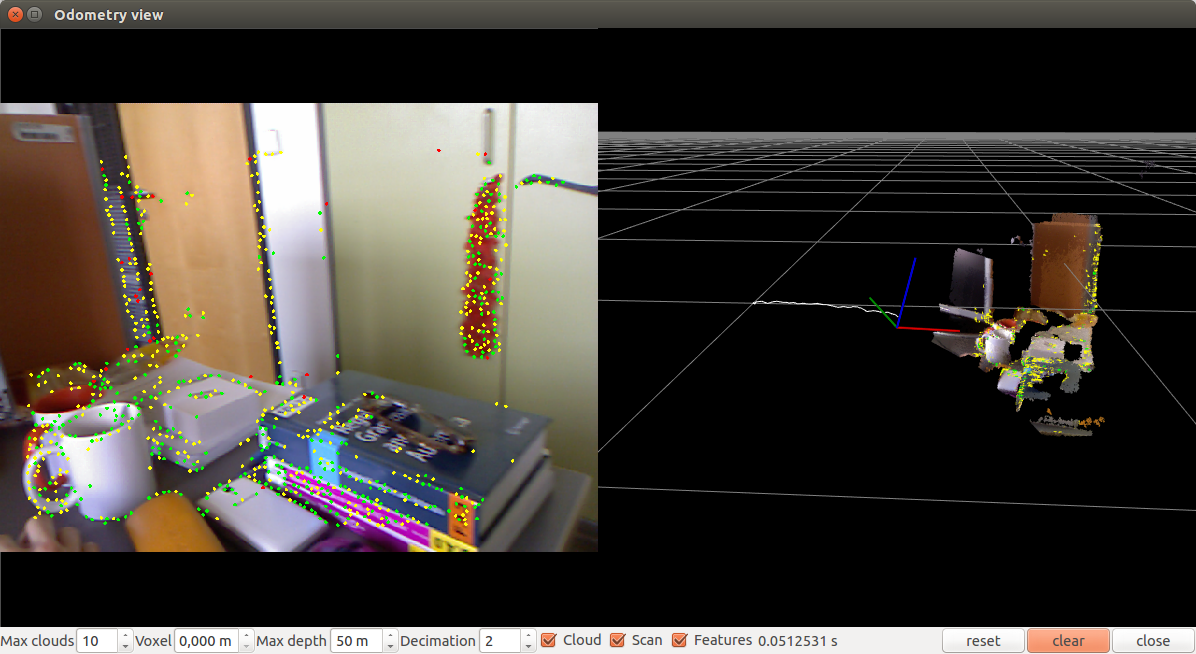
You can also try odometry based on the ICP (Iterative Closest Point) method using the -icp parameter.
You can adjust the processing frequency using the hz parameter (integer number of frames per second):
You can also configure the internal parameters of the algorithm, such as the maximum distance between the inlayers, the maximum number of visual signs for matching, the number of iterations in the RANSAC / ICP method.
In general, experiments with visual rtabmap odometry showed that the algorithm works quickly, without delays and accurately determines the position of the camera relative to the scene. The only minus of the algorithm from the rtabmap package is that when using it, it was not possible to display odometry data in rviz. Here it is necessary to study the integration with ROS more deeply.
The fovis_ros package works only under the ROS Hydro version. The repository has a branch of Indigo, but when compiled into the catkin workspace, the fovis_ros crashes with an error.
To install fovis_ros, we will need the libfovis library and the fovis_ros package itself. Download them from the github repositories:
Here we need to make sure that the current branch is selected by Hydro, otherwise problems may arise during the compilation (the current branch in the repositories is Indigo).
Now create a launch to run fovis_ros:
Run fovis_demo.launch:
The rviz window opens:
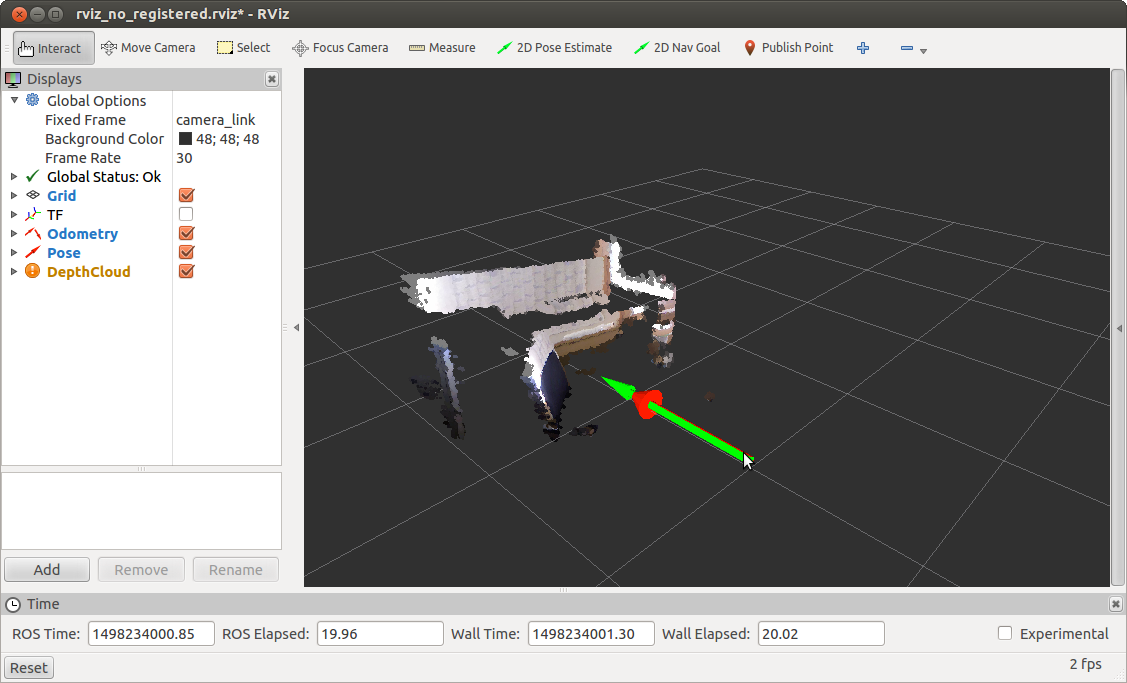
Move the camera a bit and get the updated position:
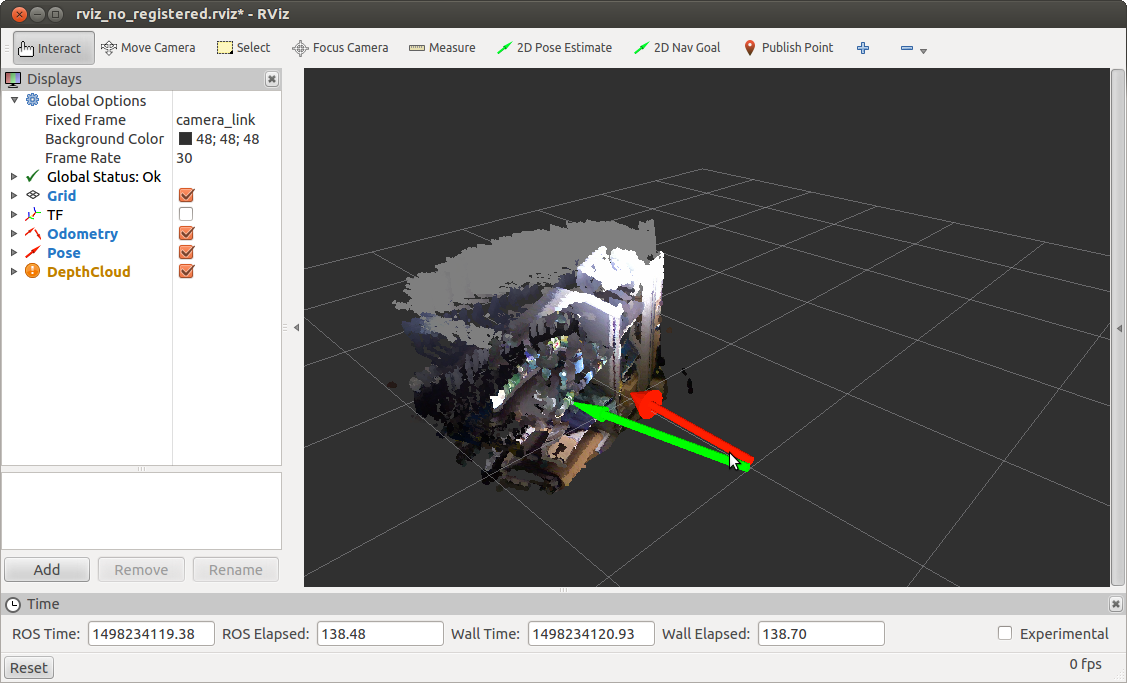
fovis_ros publishes the data in two topics: / kinect_odometer / odometry (odometry) and / kinect_odometer / pose (position).
Now let's deal with the contents of the launch files in my example. For information, the launch files are taken from the book “Learning ROS for robotics programming - Second edition” from chapter 5 under the name Computer vision.
Let's start with the main file fovis_demo.launch.
In line
we set the mode parameter to no_reg registered. This means that we use no_reg registered depth information, i.e. the depth map is not registered and is not transformed into a picture from the RGB camera. This is done to speed up the processing, since in the case of depth registration, the algorithm would work slowly.
Check the odometer update rate:
We will get a similar conclusion:
Run fovis_demo with program registration using the mode parameter: = sw_registered:
We get the following information about the odometer update rate:
Next, we define a display configuration file for rviz:
I will not consider its contents here. Just say that it determines the appearance of the rviz window: active displays for topics, global settings such as Fixed Frame, etc.
The following is the definition of the rviz parameter and the launch of the driver for the Kinect sensor, depending on the mode parameter:
Launch the fovis launch from our package also depending on the mode parameter:
Since we estimate the movement of the robot based on the movement of the camera, we need to know the offset or transformation from the camera's coordinate system to the robot's coordinate system. To do this, we publish a static transformation between the base_link → camera_link coordinate systems using the static_transform_publisher from the tf package:
Finally, run rviz:
I will not consider the rest of the launch files in this article. This can be done independently if desired. I will only say that when fovis_ros is started with the mode = sw_registered parameter, we are doing throttling frames from the RGB camera, i.e. republishing messages from one topic to another with a lower update rate (2.5 Hz) (you can read more about it here ).
For those who are interested in exploring the fovis algorithm in depth, there is an article about the details of the algorithm.
Experiments with visual odovometry fovis_ros showed that the algorithm does not work as fast as rtabmap, with small delays when moving the camera, but still quite accurately determines the position of the camera relative to the scene.
I hope this review of visual odometry algorithms will be useful in your work and will help you solve some problems. I wish you success in your projects and see you soon!
PS: I also ask you to participate in the survey and select the version of ROS that you use in your work.
When using RGBD cameras such as Microsoft Kinect, it is possible to get a more accurate visual odometry than with stereo cameras, since in this case we use 3D data. In this article we will consider such algorithms. Who are interested in this topic, please under the cat.
rtabmap
rtabmap is essentially a SLAM algorithm in ROS. In this package, in addition to the tools for SLAM, there is an odometryViewer application for testing various methods of visual odometry. In rtabmap, visual odometry works as follows: to calculate odometry, the algorithm uses visual indications derived from an RGB image and depth data from a depth map. Using the matching of visual signs (matching) between two images, the RANSAC algorithm calculates the transformation between successive frames.
Installing rtabmap on ROS Indigo and Kinetic is very easy via apt-get:
sudo apt-get install ros-<version>-rtabmap ros-<version>-rtabmap-ros
You can also install rtabmap and rtabmap_ros from sources:
source /opt/ros/<version>/setup.bash
cd ~
git clone https://github.com/introlab/rtabmap.git rtabmap
cd rtabmap/build
cmake ..
make
cd ~/catkin_ws
git clone https://github.com/introlab/rtabmap_ros.git src/rtabmap_ros
catkin_make -j1
Run the odometryViewer:
rtabmap-odometryViewer
A window similar to this will open :
Move the camera a bit:
Let's try to start with the parameters. For example, using the bag-of-words method (the default SURF handle is used):
rtabmap-odometryViewer -bow
Using the bag-of-words method with a SIFT descriptor (0 = SURF, 1 = SIFT)
rtabmap-odometryViewer -bow 1
Using the FAST + BRIEF method:
rtabmap-odometryViewer -bin
You can also try odometry based on the ICP (Iterative Closest Point) method using the -icp parameter.
You can adjust the processing frequency using the hz parameter (integer number of frames per second):
rtabmap-odometryViewer -hz 2
You can also configure the internal parameters of the algorithm, such as the maximum distance between the inlayers, the maximum number of visual signs for matching, the number of iterations in the RANSAC / ICP method.
In general, experiments with visual rtabmap odometry showed that the algorithm works quickly, without delays and accurately determines the position of the camera relative to the scene. The only minus of the algorithm from the rtabmap package is that when using it, it was not possible to display odometry data in rviz. Here it is necessary to study the integration with ROS more deeply.
Fovis_ros package
The fovis_ros package works only under the ROS Hydro version. The repository has a branch of Indigo, but when compiled into the catkin workspace, the fovis_ros crashes with an error.
To install fovis_ros, we will need the libfovis library and the fovis_ros package itself. Download them from the github repositories:
cd ~/catkin_ws/src
git clone https://github.com/srv/libfovis.git
cd libfovis
git checkout hydro
cd ..
git clone https://github.com/srv/fovis.git
cd fovis
git checkout hydro
cd ~/catkin_ws
catkin_make
source devel/setup.bash
Here we need to make sure that the current branch is selected by Hydro, otherwise problems may arise during the compilation (the current branch in the repositories is Indigo).
Now create a launch to run fovis_ros:
cd ~/catkin_ws/src
git clone https://github.com/vovaekb/fovis_demo.git
сd ~/catkin_ws
catkin_make
source devel/setup.bash
Run fovis_demo.launch:
roslaunch fovis_demo fovis_demo.launch
The rviz window opens:
Move the camera a bit and get the updated position:
fovis_ros publishes the data in two topics: / kinect_odometer / odometry (odometry) and / kinect_odometer / pose (position).
Now let's deal with the contents of the launch files in my example. For information, the launch files are taken from the book “Learning ROS for robotics programming - Second edition” from chapter 5 under the name Computer vision.
Let's start with the main file fovis_demo.launch.
In line
<argname="mode"default="no_registered"/>we set the mode parameter to no_reg registered. This means that we use no_reg registered depth information, i.e. the depth map is not registered and is not transformed into a picture from the RGB camera. This is done to speed up the processing, since in the case of depth registration, the algorithm would work slowly.
Check the odometer update rate:
rostopic hz /kinect_odometer/odometry
We will get a similar conclusion:
average rate: 8.759
        min: 0.084s max: 0.156s std dev: 0.02417s window: 9
average rate: 7.938
        min: 0.084s max: 0.180s std dev: 0.02724s window: 16
average rate: 7.493
        min: 0.084s max: 0.217s std dev: 0.03286s window: 23
average rate: 8.111
        min: 0.068s max: 0.217s std dev: 0.03645s window: 33
Run fovis_demo with program registration using the mode parameter: = sw_registered:
roslaunch fovis_demo fovis_demo.launch mode:=sw_registered
We get the following information about the odometer update rate:
average rate: 0.963
        min: 1.022s max: 1.056s std dev: 0.01676s window: 3
average rate: 0.968
        min: 1.020s max: 1.056s std dev: 0.01635s window: 4
average rate: 1.212
        min: 0.509s max: 1.056s std dev: 0.25435s window: 6
Next, we define a display configuration file for rviz:
<argname="rviz_config"default="$(find fovis_demo)/config/rviz_$(arg mode).rviz"/>I will not consider its contents here. Just say that it determines the appearance of the rviz window: active displays for topics, global settings such as Fixed Frame, etc.
The following is the definition of the rviz parameter and the launch of the driver for the Kinect sensor, depending on the mode parameter:
<includefile="$(find fovis_demo)/launch/openni_kinect_$(arg mode).launch"/>Launch the fovis launch from our package also depending on the mode parameter:
<includefile="$(find fovis_demo)/launch/fovis_$(arg mode).launch"/>Since we estimate the movement of the robot based on the movement of the camera, we need to know the offset or transformation from the camera's coordinate system to the robot's coordinate system. To do this, we publish a static transformation between the base_link → camera_link coordinate systems using the static_transform_publisher from the tf package:
<nodepkg="tf"type="static_transform_publisher"name="base_to_camera_tf"args="0 0 -0.05 0 0 0 base_link camera_link 100"/>Finally, run rviz:
<groupif="$(arg rviz)"><nodename="rviz"pkg="rviz"type="rviz"args="-d $(arg rviz_config)"/></group>I will not consider the rest of the launch files in this article. This can be done independently if desired. I will only say that when fovis_ros is started with the mode = sw_registered parameter, we are doing throttling frames from the RGB camera, i.e. republishing messages from one topic to another with a lower update rate (2.5 Hz) (you can read more about it here ).
For those who are interested in exploring the fovis algorithm in depth, there is an article about the details of the algorithm.
Experiments with visual odovometry fovis_ros showed that the algorithm does not work as fast as rtabmap, with small delays when moving the camera, but still quite accurately determines the position of the camera relative to the scene.
I hope this review of visual odometry algorithms will be useful in your work and will help you solve some problems. I wish you success in your projects and see you soon!
PS: I also ask you to participate in the survey and select the version of ROS that you use in your work.
Only registered users can participate in the survey. Sign in , please.
What version of ROS are you using?
- 0% Hydro 0
- 9% Indigo 1
- 90.9% Kinetic 10