Bolt. Leapfrog Bolt
Good afternoon, dear readers of Geektimes! Last autumn, a rather interesting 3D printer Leapfrog Bolt was presented . And our company received one of the first “live” printers in Russia that can be “touched” and tested.

Its main distinguishing feature is two independent extruders that move along the same X axis. This allows the 3D printer to print in the following modes:
• Conventional printing with one nozzle
• Printing with 2 materials
• Simultaneous printing of two parts at the same time
• Mirror printing mode of two parts
Leapfrog Bolt is positioned as a professional solution for production and design tasks.
Here is a complete list of technical specifications:
• The material used for 3D printing: ABS, PLA, HIPS, PVA, PET, PP, PC, Nylon, Woodplastic, Birckplastic and many others.
• Printing area, mm: 320x330x205 (when printed with one extruder), 320x300x205 (when printed with two extruders).
• Body Material: Aluminum;
• Layer thickness: 0.05 - 0.35 mm (Layer thickness is adjusted by the printer software settings);
• Positioning accuracy: XY: 8 microns; Z: 10 microns;
• Availability of heated platform: Yes;
• Printing platform: 8 mm tempered glass;
• Number of printheads: 2;
• Diameter of the nozzle: 0.35 mm;
• Compatibility with software: Windows, Mac OS X, Linux;
• Print speed: up to 6 mm3 / s;
• Supported formats: STL, OBJ;
• Software: Materialize;
• Touch screen: 7 ”;
• Built-in WEB-camera: Yes;
• Connecting a 3D printer to a computer: The printer connects to the computer via a USB cable, USB connector, Wi-Fi, network (UTP);
• Overall: 723mmx831mmx801mm;
• Weight: 61 kg;
• Power consumption: 400W;
• Warranty: 1 year;
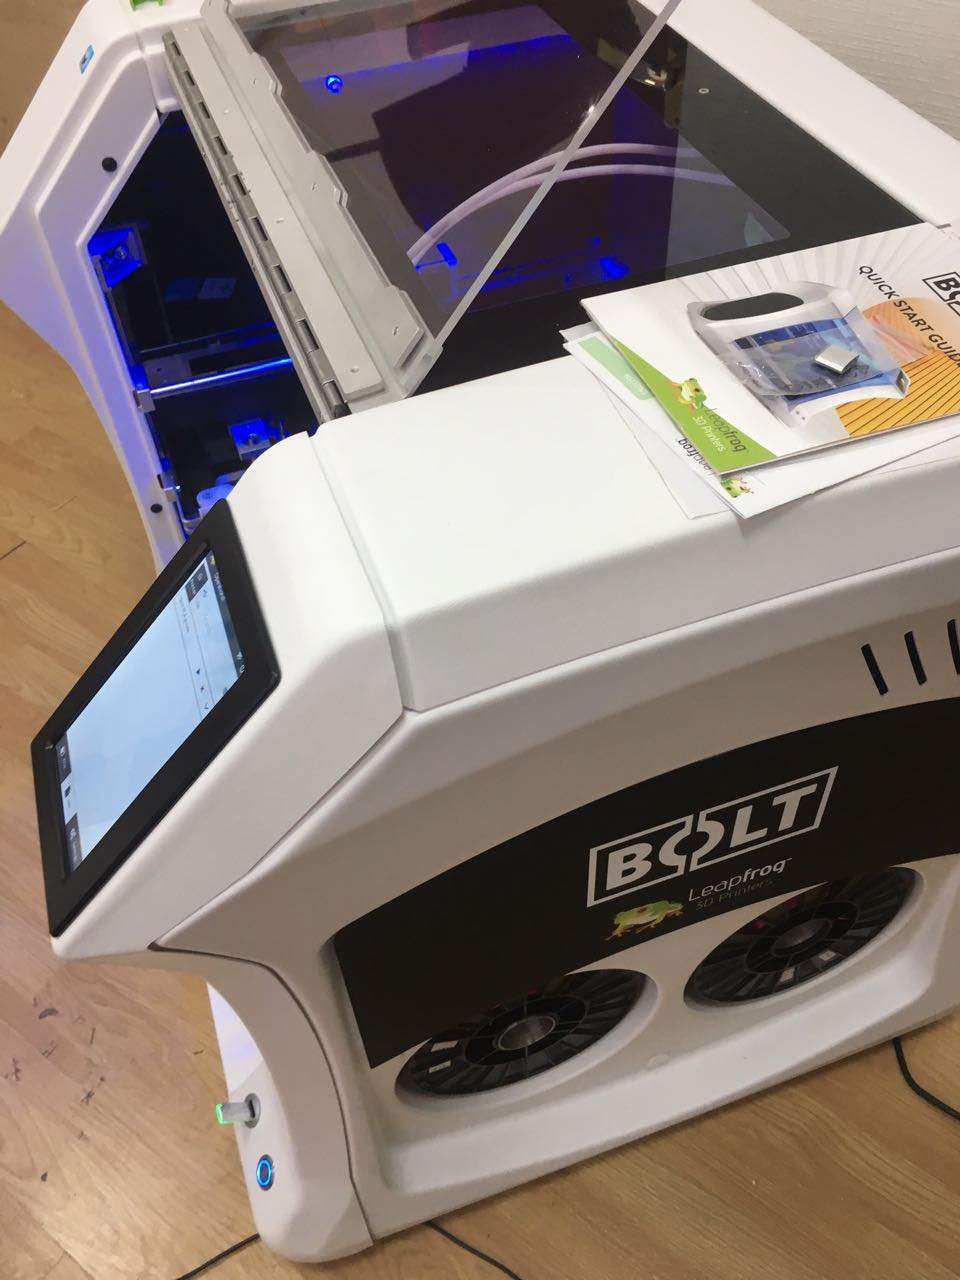
Let's look at Bolt and its features. As usual, let's start with the look.

This little white one on the left is the Leapfrog Bolt . Looks solid, is not it? Appearance and corresponds to the weight - 61 kg. As if confirming Boris Borzva's famous phrase - “Weight is reliability. Weight is good ... ”
Indeed, the printer with all its appearance shows that it is a serious industrial equipment. And not a toy for girls - office managers.
The printer housing is assembled on an aluminum frame, on which plastic decorative panels are fixed. Examine this monster from all sides. Front view.

The printer is made in a fairly concise design. A large part of the front surface of a 3D printer is taken by a transparent door that closes the work area. The door opens simply, for this it is enough to take it by the bottom edge and fold it up. No pens that complicate the design and tend to be cut off by “very strong” users. The large transparent surface allows you to observe the printing process, even while being at a distance from the printer.
On the front surface is also located 7 "touch screen control. At the bottom of the USB port for Flash-cards and the power button, with a nice blue backlight.
On the right side of the printer, located in a niche, two coils with plastic.
As you can see, a niche allows you to install large coils up to one kilogram.
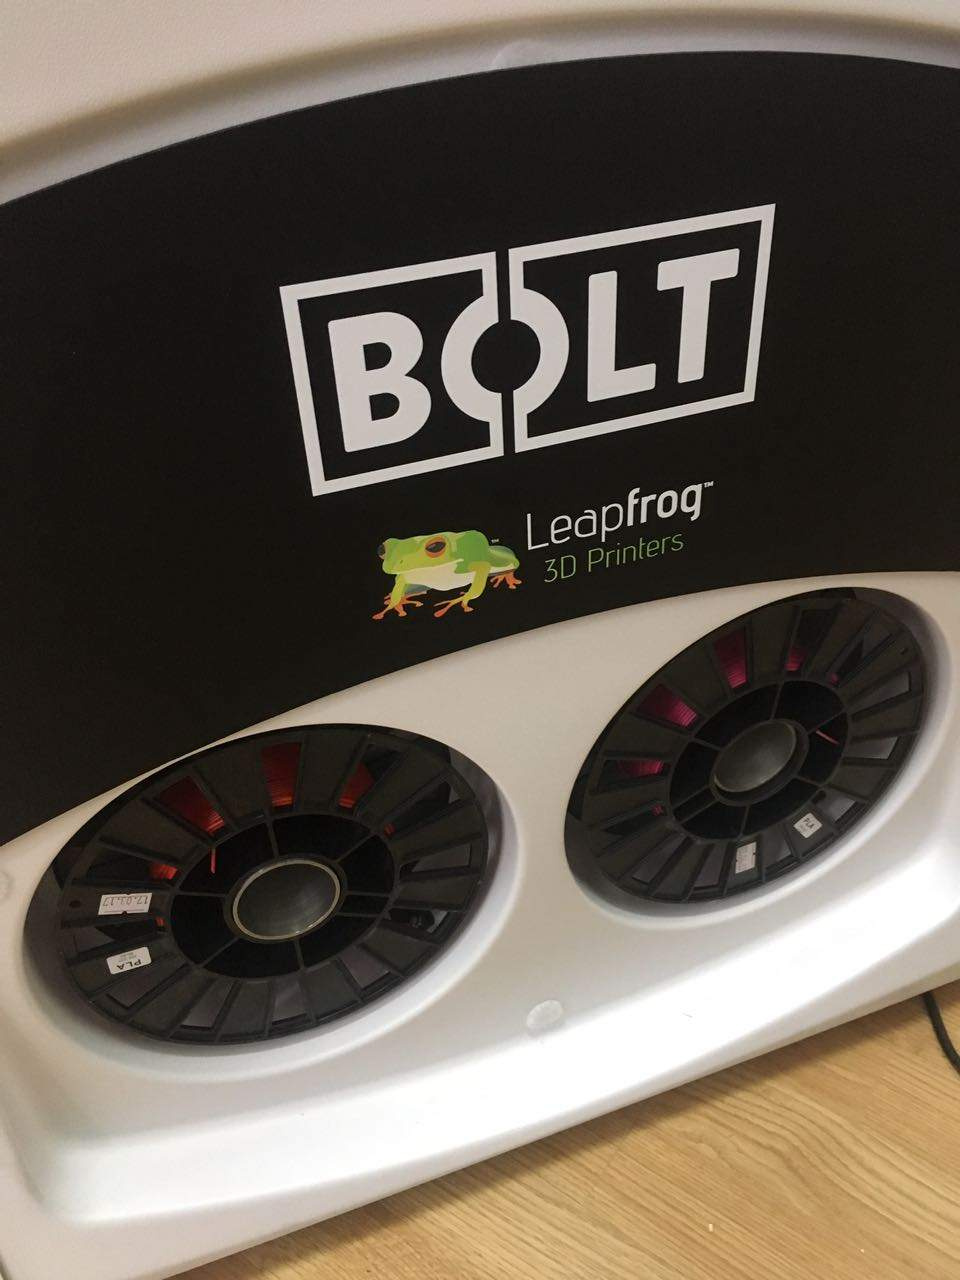
Installation of plastic is made conveniently and does not cause difficulties for anyone.
Left view of the printer.
There are no coils, just a blank wall with a logo. According to the logic of simplified design, it would make sense to place the plastic coils on different sides of the printer, as is often done.
Extruders are independent and each works on his own. But the designers were guided primarily by the ease of use of the equipment.
Agree, it is much more convenient to change the plastic on one side. And do not run around a fairly large printer. And when placing the machine in the room, it will be necessary to provide access only to the front and one side area, and not from all sides. This can be quite critical in a small room, given the size of the Leapfrog .
Open the lid and see what's inside.

As we can see, the workspace has a blue backlight. Qualitatively made, durable massive parts, do not leave behind a feeling of structural fragility.
Even the door mount looks very reliable, compared to other printers, which often have a weak spot.

It is seen that the design is designed for industrial use. Examine the "insides".

The left carriage houses the drives for extruder drives along the X axis. Each extruder moves along the X axis using a separate drive belt. All construction is made by stamping from a three-millimeter metal.
Right carriage similar design. Only already naturally without engines.

Just above the right is HEPA-filter purifying the air from the fumes that occur during printing.
The desktop is made of tempered glass. It is easy enough to remove it, having turned two clamps.
The working surface can heat up to 90C. This is sufficient for printing with most plastics. And given the fully enclosed print chamber with temperature control, you can print without any problems with any materials, including those with high shrinkage. Such as ABS and Nylon.
For ease of use of the printer, the calibration table is semi-automatic. The process is very simple and will not cause problems even for a novice user.
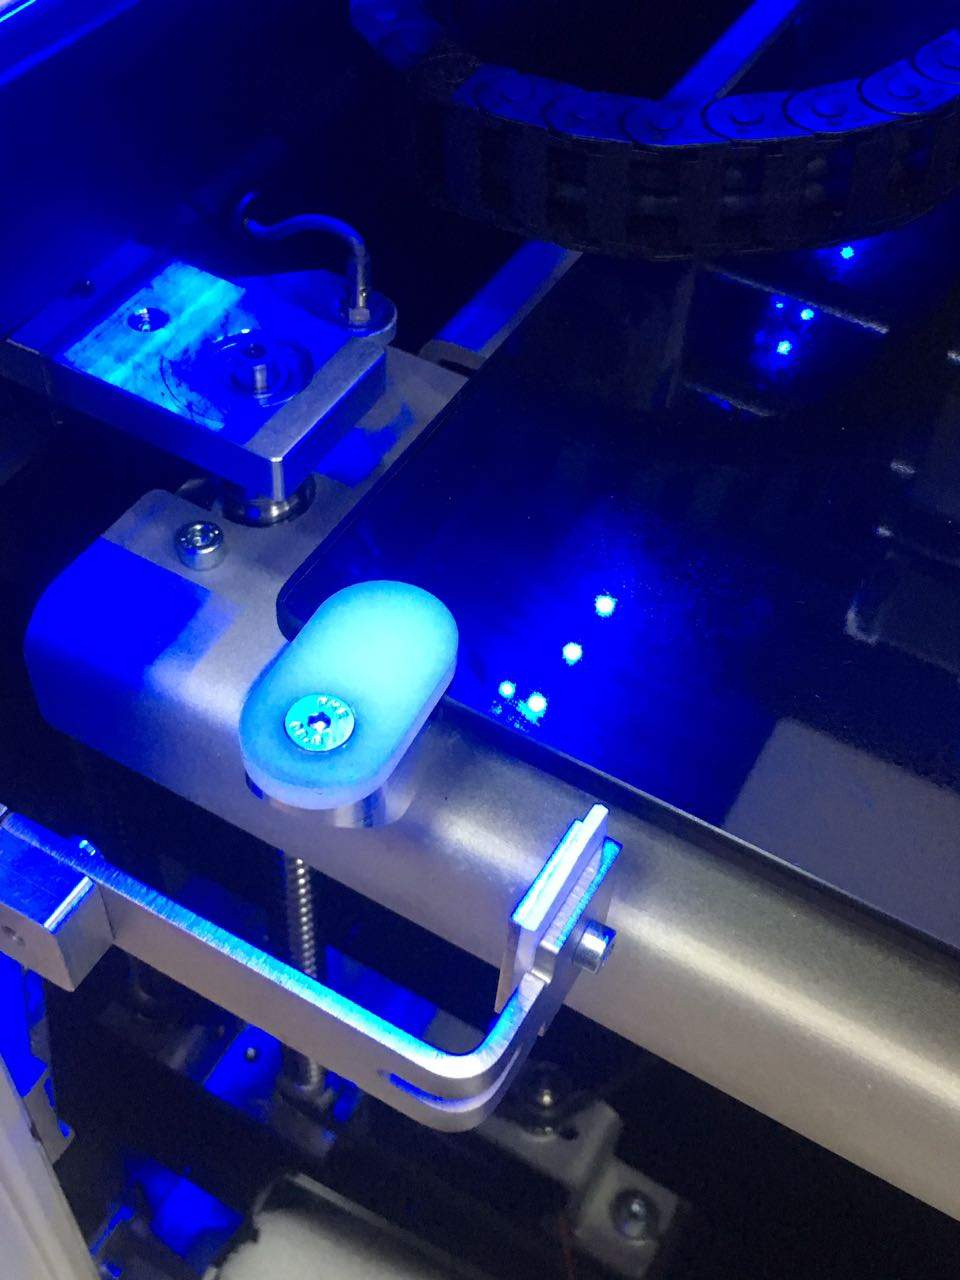
View of the table on the right side.

Below is a photo of the table on the left side. You can observe the "diapers", for cleaning the nozzle from plastic, mounted on the L-shaped bracket. With the help of this node, the plastic from the nozzle flowing out of operation is cleaned. This allows you to avoid building a technological "tower", which greatly reduces the time of two-material printing. And improves its quality.
The table is moved using ball screws located on both sides.
Below in the photo you can see the drive unit for ball screw. The same stamped structures, similar to drives on the X axis. Everything looks solid and reliable.

Let us turn to that part of the printer, which actually speaks and prints. That is, to the extruder. Leapfrog Bolt is equipped with two direct extruders. Their design is identical, except that one is a mirror image of the second.
As standard, the nozzle can heat up to 265С. This allows you to print most materials. There is also a high-temperature modification that can heat up to 360C. This will allow printing materials with a high melting point.
Another great feature of Leapfrog Bolt. The design of the extruder allows you to quickly change the hot-end with the nozzle. In order to install a nozzle with a different diameter, we do not need to risk getting burned. After all, usually the replacement of the nozzle is made in a heated state with a special key. It is enough to disconnect one connector and turn the latch.
After that, the entire node can be pulled down. This can be done in a cold state and without the use of special tools. For a professional apparatus, in which it may be necessary to frequently change the diameter of the nozzle, for different tasks, a very timely decision. And of course, reducing the risk of burns is a very important advantage.

In the photo you can see the handle lock handle. It is located at the bottom of the extruder.
As we wrote above, the left and right extruder have a mirror design. Movement along the Y axis is common. But on the X axis, each of the extruders can move independently of the other. With this solution, the 3D printer can print in synchronous and mirror mode.

When synchronous printing on both sides of the desktop are created absolutely identical parts.
In mirror print mode, parts are mirror copies. This is true when we need to create, for example, left and right symmetrical parts.
After inspecting the "insides" of the printer, a strong feeling of reliability and thoughtfulness of the structure was formed. Good quality and thoroughness can be seen in every detail.
With the device sorted out. It remains to learn how to manage a 3D printer, and what are its capabilities.
The printer is controlled via the touch screen. The interface is thought out and easy to learn. Everything is quite clear. This can be seen in the photo below.
The choice of material for printing. Profiles of all basic materials are initially registered in the printer. You can add your own or remove embedded plastic profiles.
The screen during the printing process, in addition to the progress bar, has a visual display of the model that is currently on the desktop. You can also see the elapsed and predicted printing time.

The printer is equipped with a video camera. With the help of which, you can remotely monitor the printing process. You can also display the image on the control screen.

Printer screen after printing.

Wifi network selection screen. The printer is equipped with a wireless module that allows you to remotely control printing using a Web interface.
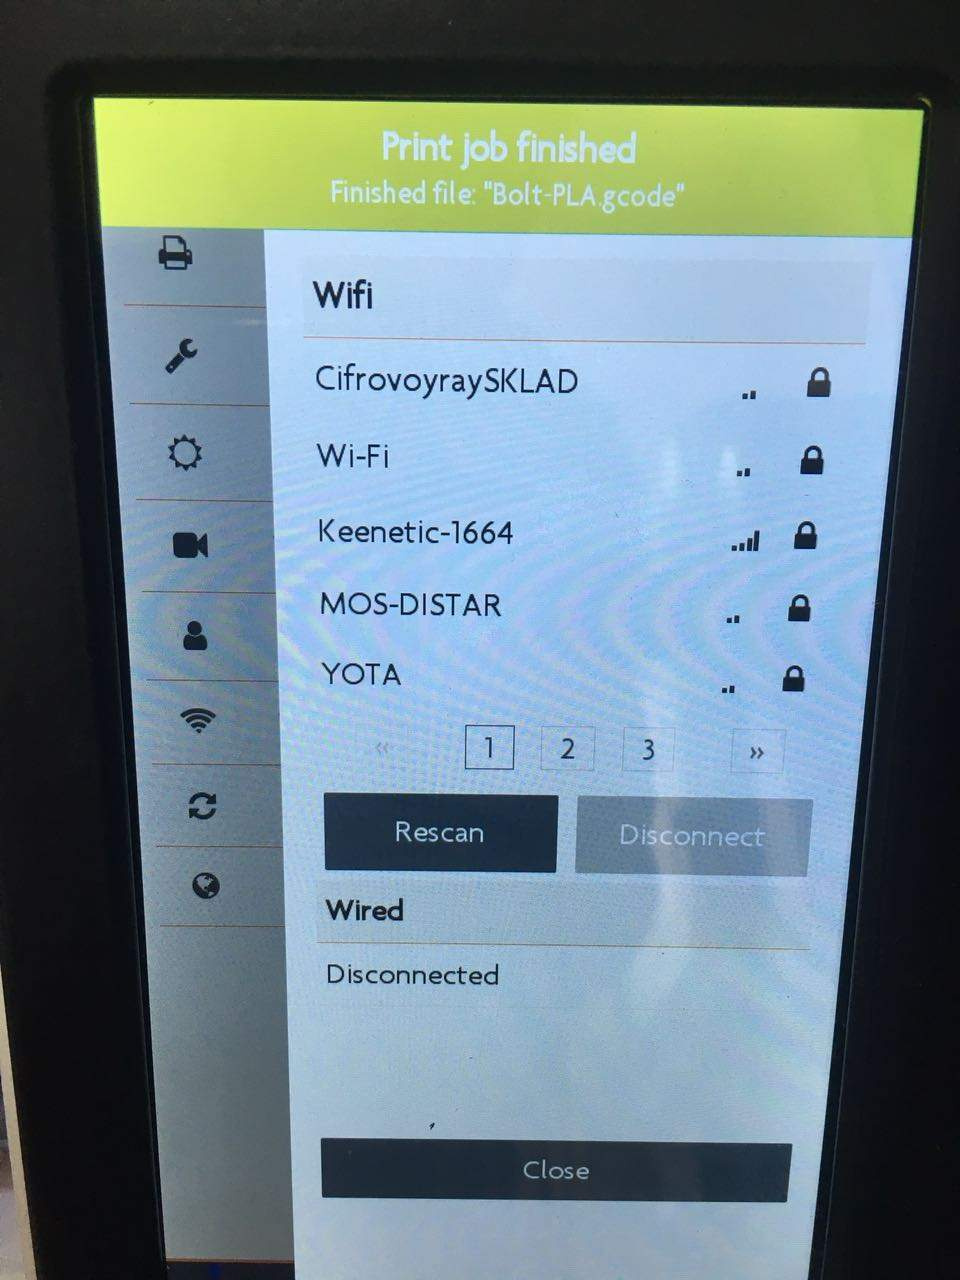
In addition to WiFi, you can use a standard Ethernet network interface for remote control.
Remote control allows full setup before the printing process, as well as monitoring with a video camera. Using the Web interface does not require the installation of additional software. This allows you to control the printer from any computer, regardless of the operating system installed. In addition, the management process is available from any smartphone, without installing additional programs.
Naturally the printer is equipped with a standard USB-interface.
You can prepare a model for printing in almost any slicer. The printer itself before purchase can be packaged as in the company's Creatr slicer . It can be downloaded free of charge from the manufacturer’s website.

You can also choose a complete set of all well-known commercial slicer Simplify3D . Printer buyers get it for free.
Print
Video of the printing process.
We decided to test the version of synchronous printing. In real use when printing multiple products, this results in a two-fold saving in printing time. Two parts printed in synchronous mode.

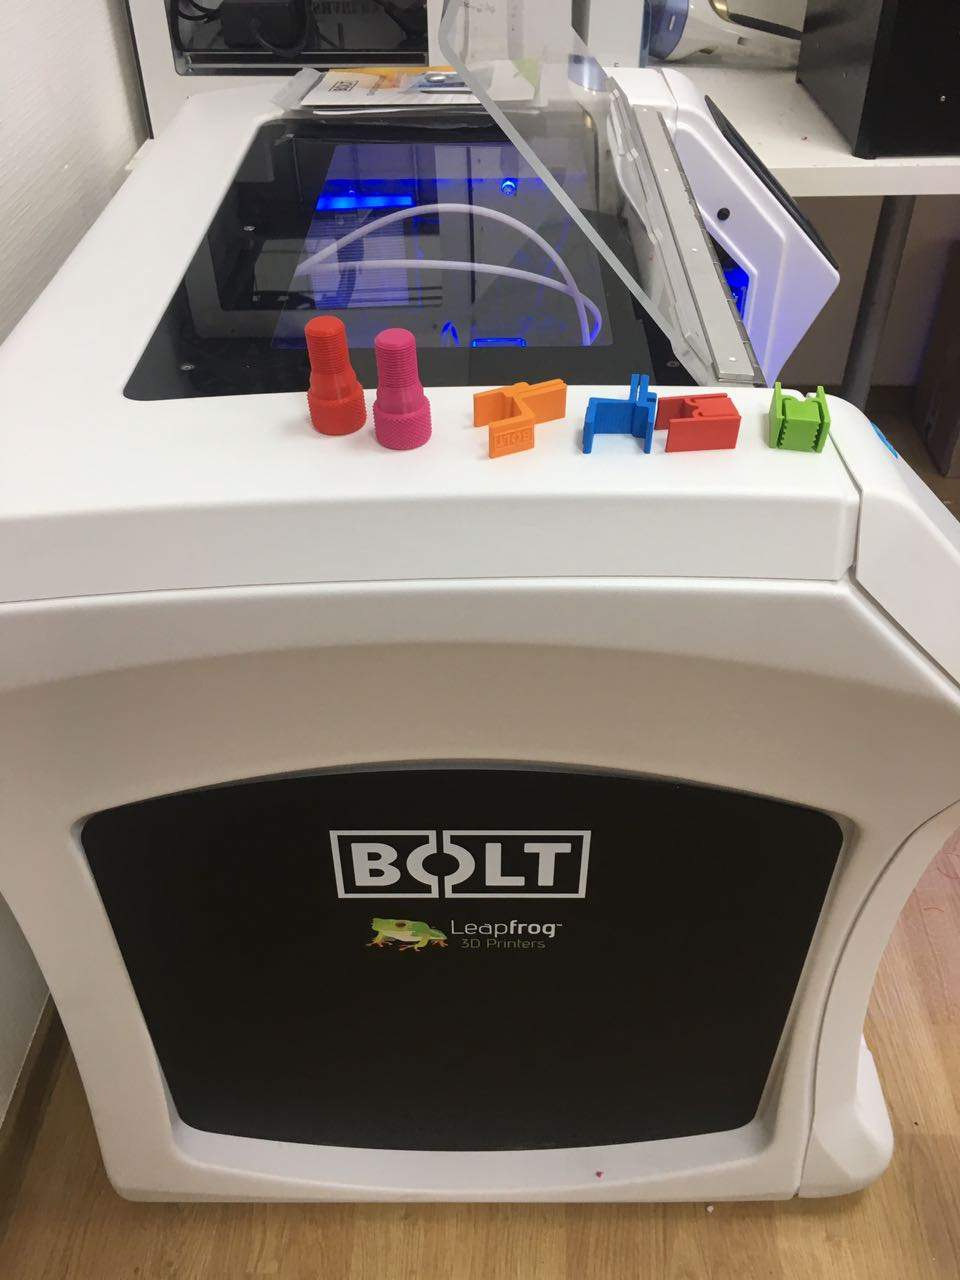
Some people may have questions about print quality due to the massiveness of extruders. But the photo below closes all such questions. Parts created by Leapfrog Bolt have excellent surface and geometry.

At the end of the printing process, the 3D printer gave us two identical parts that differ only in color.
Exact printer mechanics produce excellent print quality.
Impressions of Leapfrog Bolt:
Reliable, solidly made, thoughtful machine for professional use.
Of the obvious advantages:
• Large print area;
• Printing 2 materials at high speed;
• Synchronous print mode;
• Mirror mode;
• Convenient operation using the touch screen;
• Ability to remote control via the Web-interface;
• Ease of maintenance;
What do we have in the end? Large 3D printer designed for professional use. Buying a home will be overkill. But where you need to print a small series of parts, and the full range of features described above, Bolt will be in its place. Remote control is created so that several people can use the printer. For example, design or design department of the company.
See live and purchase Leapfrog Boltcan be in the office of our company 3Dtool at: Moscow, st. Dorogobuzhskaya d. 14, p. 40, 3 floor, office 303 (2nd entrance).
Photo printer Leapfrog Bolt made in the service center of the company 3Dtool , where all 3D-printers are tested before being sent to customers.
More information about the printer can be found on our website 3Dtool.ru .
What is it?
Its main distinguishing feature is two independent extruders that move along the same X axis. This allows the 3D printer to print in the following modes:
• Conventional printing with one nozzle
• Printing with 2 materials
• Simultaneous printing of two parts at the same time
• Mirror printing mode of two parts
Leapfrog Bolt is positioned as a professional solution for production and design tasks.
Here is a complete list of technical specifications:
• The material used for 3D printing: ABS, PLA, HIPS, PVA, PET, PP, PC, Nylon, Woodplastic, Birckplastic and many others.
• Printing area, mm: 320x330x205 (when printed with one extruder), 320x300x205 (when printed with two extruders).
• Body Material: Aluminum;
• Layer thickness: 0.05 - 0.35 mm (Layer thickness is adjusted by the printer software settings);
• Positioning accuracy: XY: 8 microns; Z: 10 microns;
• Availability of heated platform: Yes;
• Printing platform: 8 mm tempered glass;
• Number of printheads: 2;
• Diameter of the nozzle: 0.35 mm;
• Compatibility with software: Windows, Mac OS X, Linux;
• Print speed: up to 6 mm3 / s;
• Supported formats: STL, OBJ;
• Software: Materialize;
• Touch screen: 7 ”;
• Built-in WEB-camera: Yes;
• Connecting a 3D printer to a computer: The printer connects to the computer via a USB cable, USB connector, Wi-Fi, network (UTP);
• Overall: 723mmx831mmx801mm;
• Weight: 61 kg;
• Power consumption: 400W;
• Warranty: 1 year;
Appearance
Let's look at Bolt and its features. As usual, let's start with the look.
This little white one on the left is the Leapfrog Bolt . Looks solid, is not it? Appearance and corresponds to the weight - 61 kg. As if confirming Boris Borzva's famous phrase - “Weight is reliability. Weight is good ... ”
Indeed, the printer with all its appearance shows that it is a serious industrial equipment. And not a toy for girls - office managers.
The printer housing is assembled on an aluminum frame, on which plastic decorative panels are fixed. Examine this monster from all sides. Front view.
The printer is made in a fairly concise design. A large part of the front surface of a 3D printer is taken by a transparent door that closes the work area. The door opens simply, for this it is enough to take it by the bottom edge and fold it up. No pens that complicate the design and tend to be cut off by “very strong” users. The large transparent surface allows you to observe the printing process, even while being at a distance from the printer.
On the front surface is also located 7 "touch screen control. At the bottom of the USB port for Flash-cards and the power button, with a nice blue backlight.
On the right side of the printer, located in a niche, two coils with plastic.
As you can see, a niche allows you to install large coils up to one kilogram.
Installation of plastic is made conveniently and does not cause difficulties for anyone.
Left view of the printer.
There are no coils, just a blank wall with a logo. According to the logic of simplified design, it would make sense to place the plastic coils on different sides of the printer, as is often done.
Extruders are independent and each works on his own. But the designers were guided primarily by the ease of use of the equipment.
Agree, it is much more convenient to change the plastic on one side. And do not run around a fairly large printer. And when placing the machine in the room, it will be necessary to provide access only to the front and one side area, and not from all sides. This can be quite critical in a small room, given the size of the Leapfrog .
Internal organization
Open the lid and see what's inside.
As we can see, the workspace has a blue backlight. Qualitatively made, durable massive parts, do not leave behind a feeling of structural fragility.
Even the door mount looks very reliable, compared to other printers, which often have a weak spot.
It is seen that the design is designed for industrial use. Examine the "insides".
The left carriage houses the drives for extruder drives along the X axis. Each extruder moves along the X axis using a separate drive belt. All construction is made by stamping from a three-millimeter metal.
Right carriage similar design. Only already naturally without engines.
Just above the right is HEPA-filter purifying the air from the fumes that occur during printing.
Desktop
The desktop is made of tempered glass. It is easy enough to remove it, having turned two clamps.
The working surface can heat up to 90C. This is sufficient for printing with most plastics. And given the fully enclosed print chamber with temperature control, you can print without any problems with any materials, including those with high shrinkage. Such as ABS and Nylon.
For ease of use of the printer, the calibration table is semi-automatic. The process is very simple and will not cause problems even for a novice user.
View of the table on the right side.
Below is a photo of the table on the left side. You can observe the "diapers", for cleaning the nozzle from plastic, mounted on the L-shaped bracket. With the help of this node, the plastic from the nozzle flowing out of operation is cleaned. This allows you to avoid building a technological "tower", which greatly reduces the time of two-material printing. And improves its quality.
The table is moved using ball screws located on both sides.
Below in the photo you can see the drive unit for ball screw. The same stamped structures, similar to drives on the X axis. Everything looks solid and reliable.
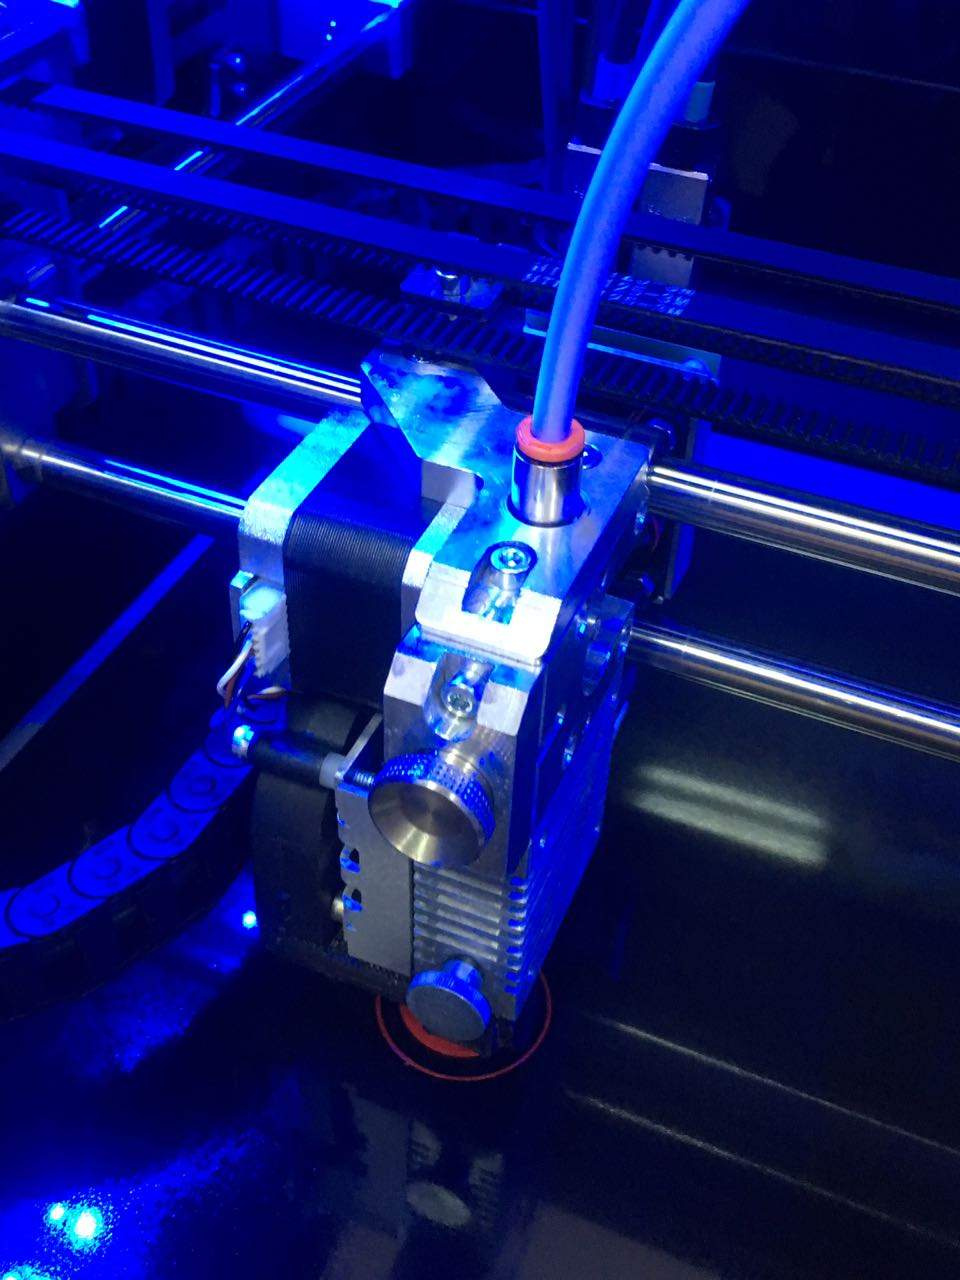
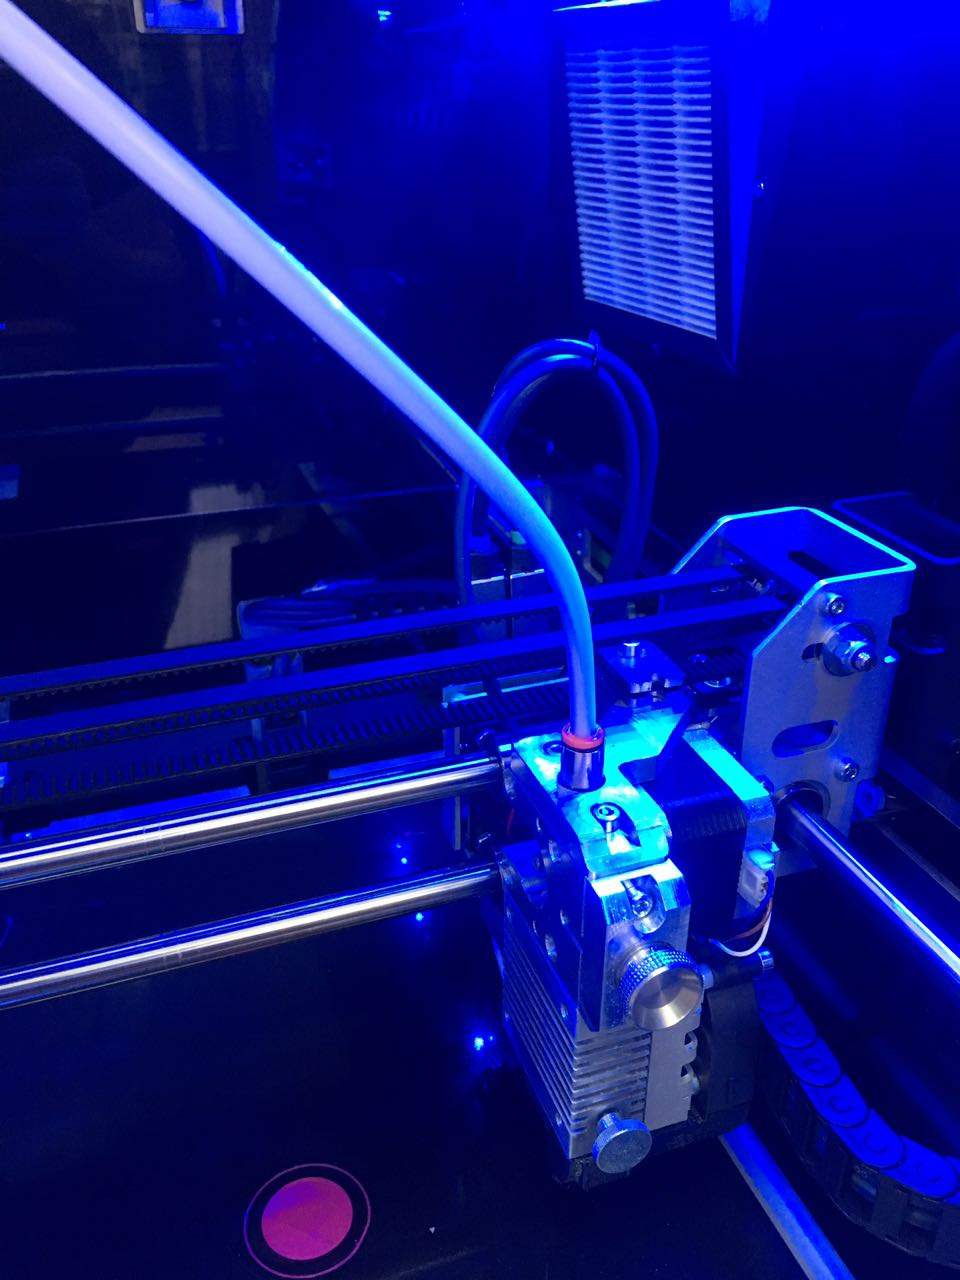
Extruder
Let us turn to that part of the printer, which actually speaks and prints. That is, to the extruder. Leapfrog Bolt is equipped with two direct extruders. Their design is identical, except that one is a mirror image of the second.
As standard, the nozzle can heat up to 265С. This allows you to print most materials. There is also a high-temperature modification that can heat up to 360C. This will allow printing materials with a high melting point.
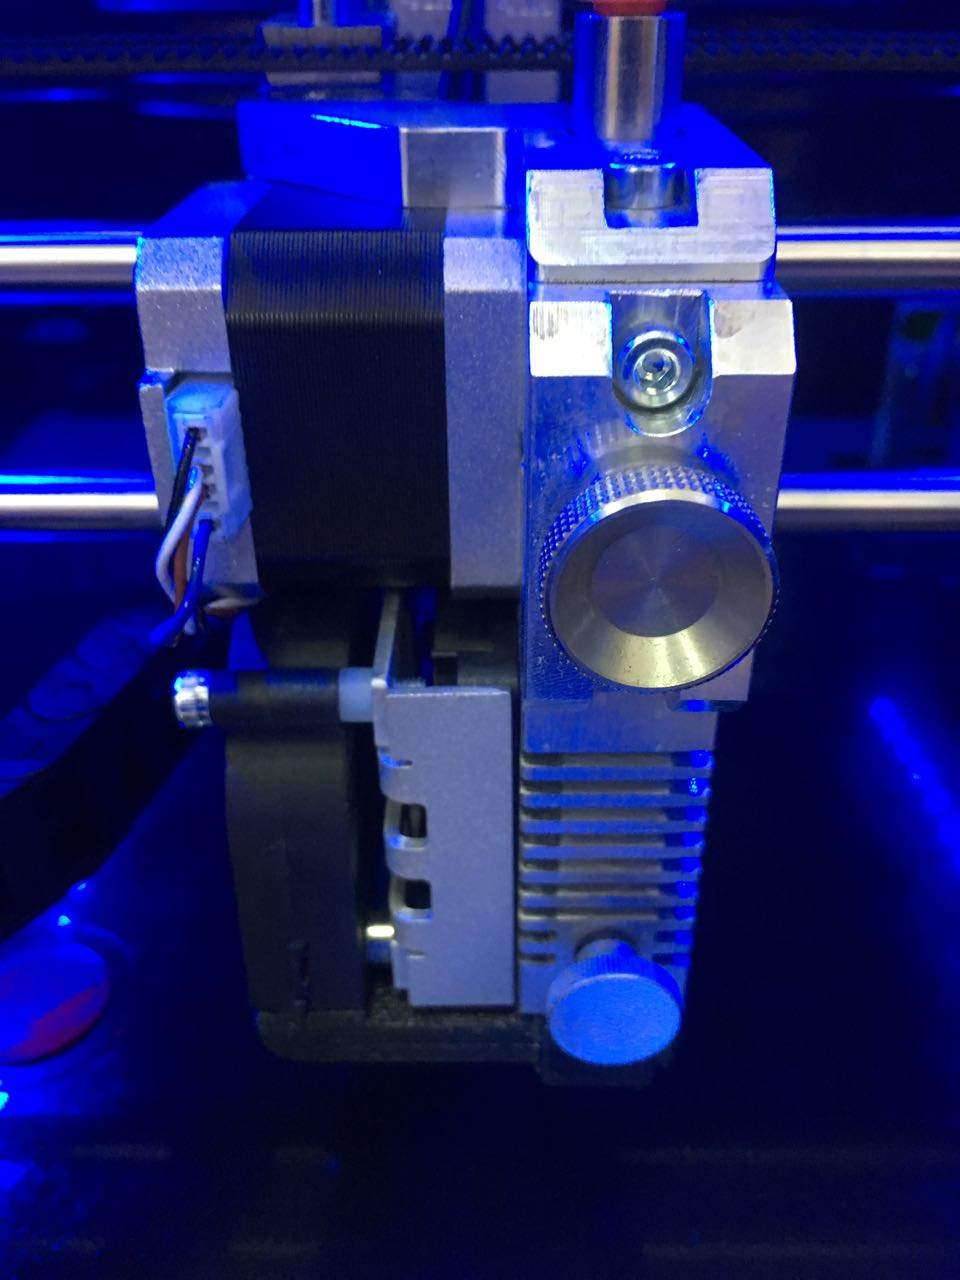
Another great feature of Leapfrog Bolt. The design of the extruder allows you to quickly change the hot-end with the nozzle. In order to install a nozzle with a different diameter, we do not need to risk getting burned. After all, usually the replacement of the nozzle is made in a heated state with a special key. It is enough to disconnect one connector and turn the latch.
After that, the entire node can be pulled down. This can be done in a cold state and without the use of special tools. For a professional apparatus, in which it may be necessary to frequently change the diameter of the nozzle, for different tasks, a very timely decision. And of course, reducing the risk of burns is a very important advantage.
In the photo you can see the handle lock handle. It is located at the bottom of the extruder.
As we wrote above, the left and right extruder have a mirror design. Movement along the Y axis is common. But on the X axis, each of the extruders can move independently of the other. With this solution, the 3D printer can print in synchronous and mirror mode.
When synchronous printing on both sides of the desktop are created absolutely identical parts.
In mirror print mode, parts are mirror copies. This is true when we need to create, for example, left and right symmetrical parts.
After inspecting the "insides" of the printer, a strong feeling of reliability and thoughtfulness of the structure was formed. Good quality and thoroughness can be seen in every detail.
Control
With the device sorted out. It remains to learn how to manage a 3D printer, and what are its capabilities.
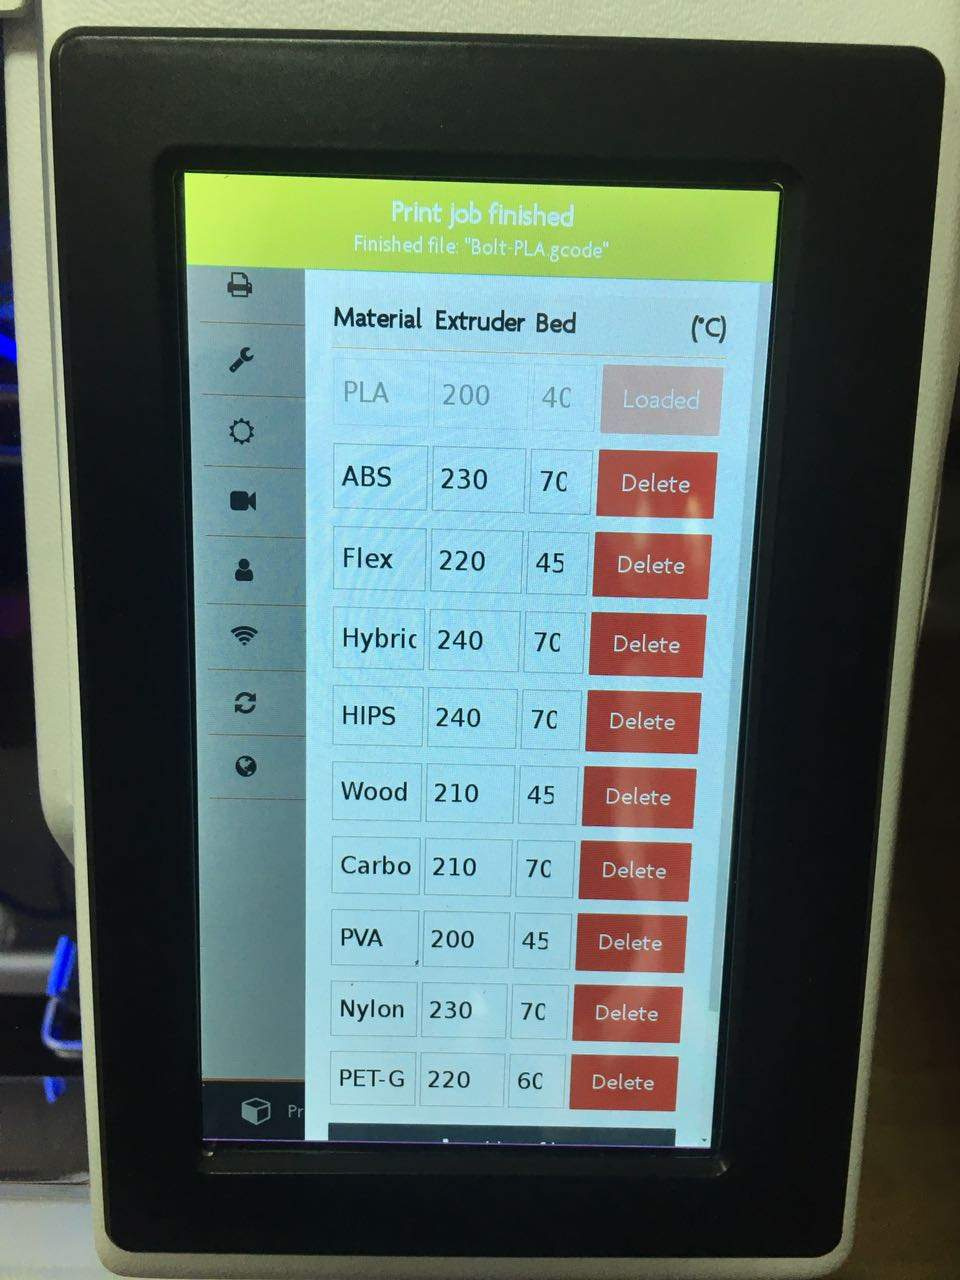
The printer is controlled via the touch screen. The interface is thought out and easy to learn. Everything is quite clear. This can be seen in the photo below.
The choice of material for printing. Profiles of all basic materials are initially registered in the printer. You can add your own or remove embedded plastic profiles.
The screen during the printing process, in addition to the progress bar, has a visual display of the model that is currently on the desktop. You can also see the elapsed and predicted printing time.
The printer is equipped with a video camera. With the help of which, you can remotely monitor the printing process. You can also display the image on the control screen.
Printer screen after printing.
Interfaces
Wifi network selection screen. The printer is equipped with a wireless module that allows you to remotely control printing using a Web interface.
In addition to WiFi, you can use a standard Ethernet network interface for remote control.
Remote control allows full setup before the printing process, as well as monitoring with a video camera. Using the Web interface does not require the installation of additional software. This allows you to control the printer from any computer, regardless of the operating system installed. In addition, the management process is available from any smartphone, without installing additional programs.
Naturally the printer is equipped with a standard USB-interface.
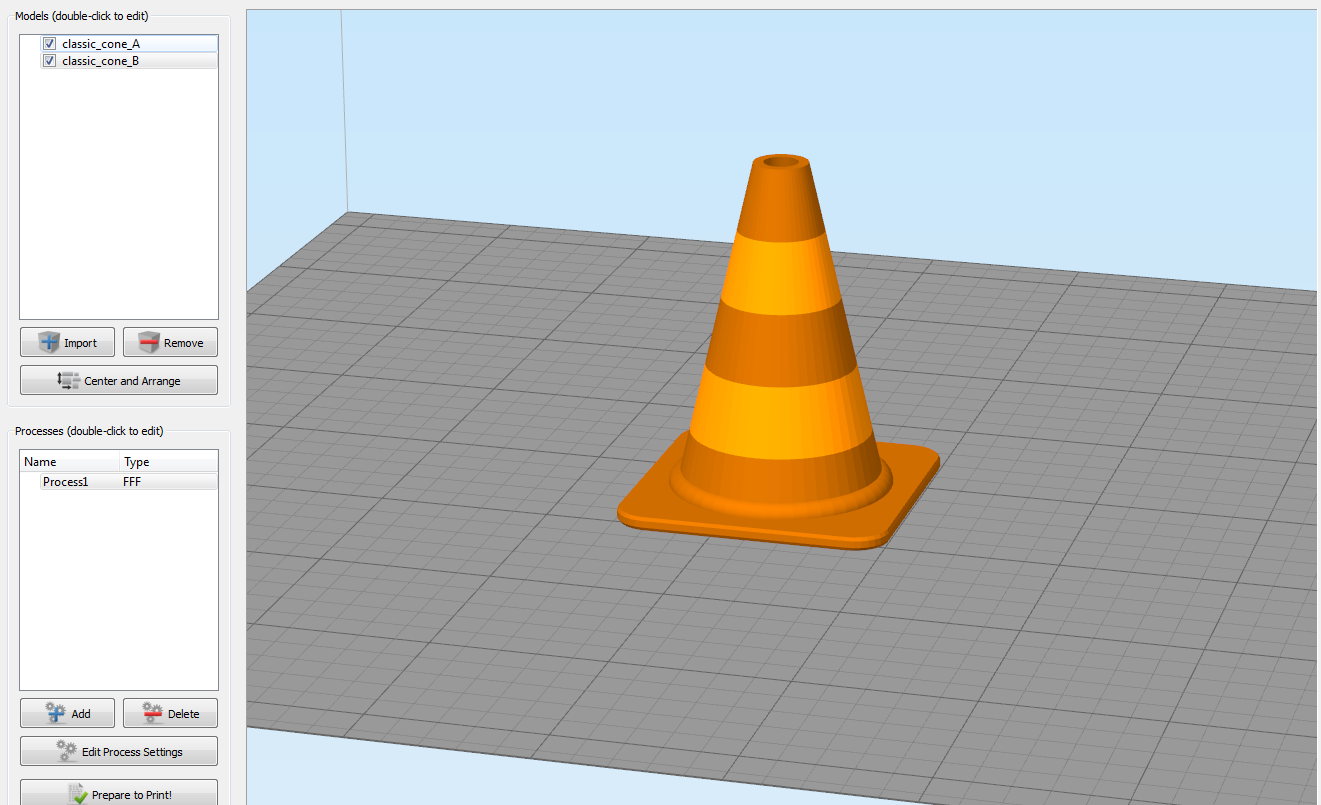
Software
You can prepare a model for printing in almost any slicer. The printer itself before purchase can be packaged as in the company's Creatr slicer . It can be downloaded free of charge from the manufacturer’s website.
You can also choose a complete set of all well-known commercial slicer Simplify3D . Printer buyers get it for free.
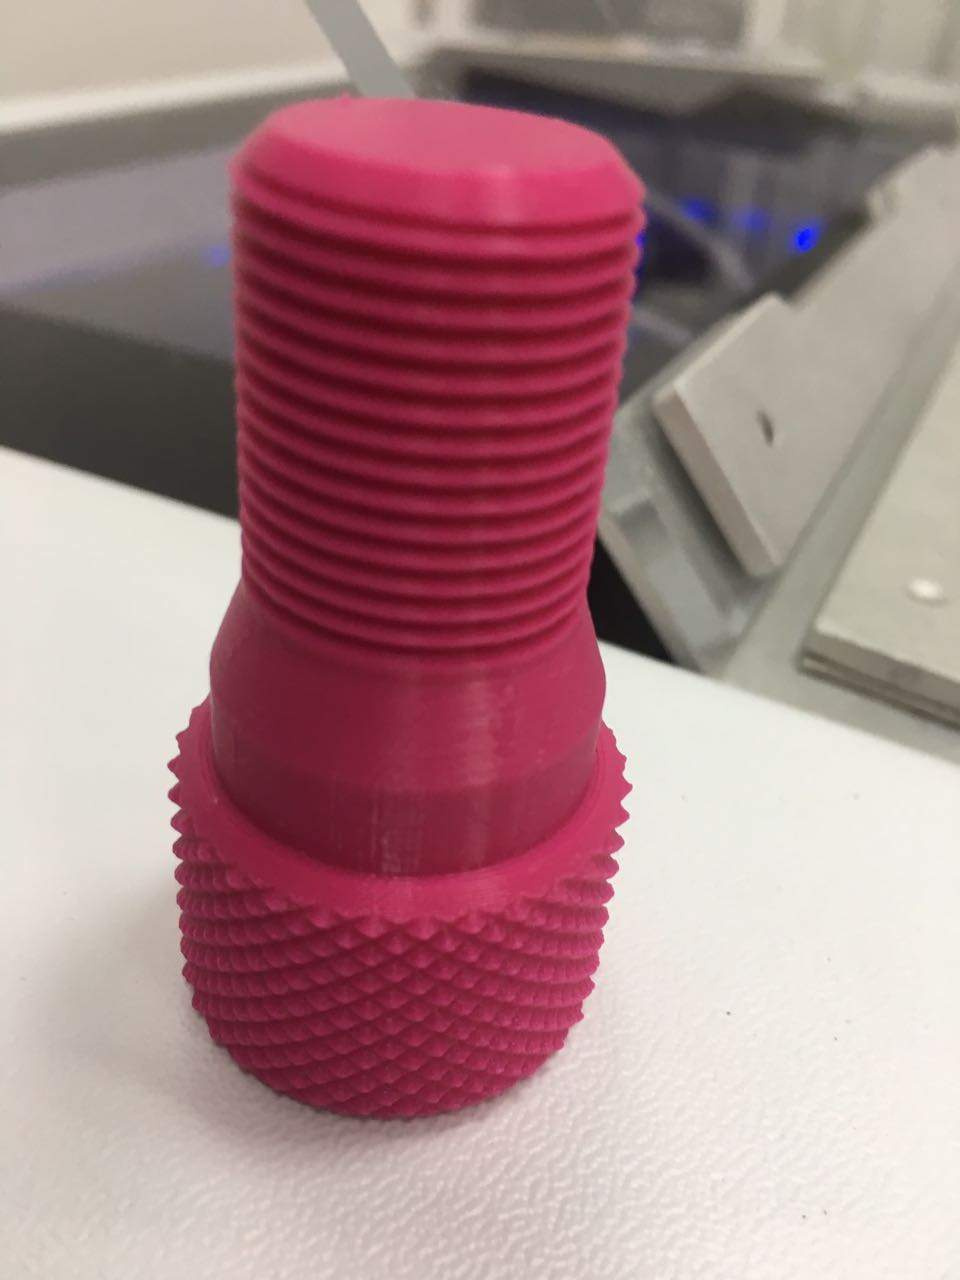
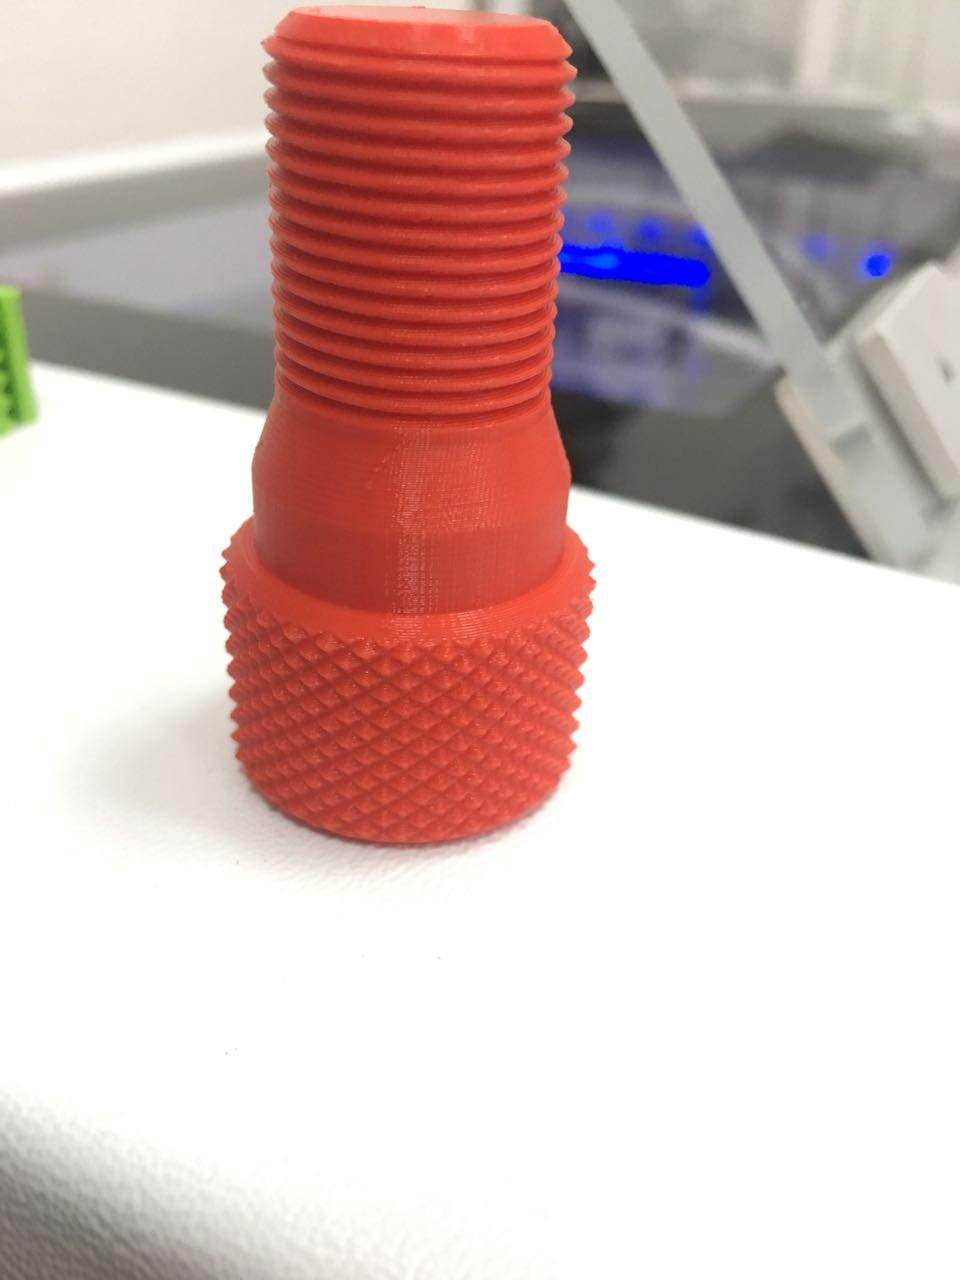
Video of the printing process.
We decided to test the version of synchronous printing. In real use when printing multiple products, this results in a two-fold saving in printing time. Two parts printed in synchronous mode.
Some people may have questions about print quality due to the massiveness of extruders. But the photo below closes all such questions. Parts created by Leapfrog Bolt have excellent surface and geometry.
At the end of the printing process, the 3D printer gave us two identical parts that differ only in color.
Exact printer mechanics produce excellent print quality.
Impressions of Leapfrog Bolt:
Reliable, solidly made, thoughtful machine for professional use.
Of the obvious advantages:
• Large print area;
• Printing 2 materials at high speed;
• Synchronous print mode;
• Mirror mode;
• Convenient operation using the touch screen;
• Ability to remote control via the Web-interface;
• Ease of maintenance;
What do we have in the end? Large 3D printer designed for professional use. Buying a home will be overkill. But where you need to print a small series of parts, and the full range of features described above, Bolt will be in its place. Remote control is created so that several people can use the printer. For example, design or design department of the company.
See live and purchase Leapfrog Boltcan be in the office of our company 3Dtool at: Moscow, st. Dorogobuzhskaya d. 14, p. 40, 3 floor, office 303 (2nd entrance).
Photo printer Leapfrog Bolt made in the service center of the company 3Dtool , where all 3D-printers are tested before being sent to customers.
More information about the printer can be found on our website 3Dtool.ru .