React Native Guide for Beginner Android Developers (with an example application)
- Transfer
We present you a translation of the article Nikhil Sachdeva, published on hackernoon.com. The author shares his experience in developing mobile applications with React Native and suggests creating his own application using this framework.

I was an Android developer and used Java for quite a long time. Only recently, I tried my hand at creating mobile applications with React Native. It made me look at the development process in a new way, to say the least. The purpose of my article is to show the differences I noticed using these two frameworks in application development.
Information from the official website:
These are the same applications as native iOS or Android applications written in Swift or Java / Kotlin languages.
So, it turns out that React Native is a framework based on React.js , which allows you to develop cross-platform applications for both Android and iOS.
You ask why go away from the usual Java and learn JavaScript and React.js? Here are some advantages of using these languages.
The main goal of developers is to provide customers with services. Nobody would like its users to be limited to just one platform only because a developer cannot create applications for other platforms. Consequently, the developer himself should not limit his abilities just because he or she is comfortable working with a specific development tool.
The React Native framework is portable, that is, its single code base, written in JavaScript, will create modules for both Android and iOS.
Having mastered React Native and JavaScript, you will discover a new world of front-end development, for example, for websites. The React Native framework is based on the same components as React, so the skills acquired here are not limited to the development of mobile applications.
Have you ever spent more than 2–3 minutes on an assembly to test / fix a basic function, while stretching the bugfix for long hours? The solution will be React Native. With him on the assembly takes much less time. With a feature like Hot Reloading, developing and testing user interfaces is easy. Thanks to this feature, the application restarts every time the JS file is saved!
The React Native API call, image rendering by URL and other processes are very simple. You no longer need to use Retrofit, OkHttp, Picasso , etc. Much less time is spent on setup. When data comes from an API on the Android platform, it is first converted to a POJO model and then used in UI elements. But the JSON data obtained in React Native is convenient for JavaScript and can be directly used for previewing UI. This allows the web interface to be made easier for GET or POST requests from the REST API.
In React Native, the flexbox module is a UI markup , a serious competitor to the XML markup on Android. Flexbox is very popular in the web development community. In React Native, UI elements should basically be developed from scratch, whereas in the native Android development, the Google Design Support Library is already connected. This gives the developer freedom in terms of interactive and responsive design.
Cons: what you might lose
1. You may hate JavaScript
Many people do not like JavaScript simply because this language is not similar to traditional languages such as Java, C ++ and others. Detailed negative reviews you can find here and here .
The React Native community is still in its infancy and supports third-party libraries that are not as popular as the native Android library (by the way, check out my slide library for Android).
Sample application
To begin, let's try to develop an application for extracting data from the API, in order to understand how simple React Native works. Obviously, the first step is to install React Native. To do this, go to the official website . Also you will find there a great instruction for beginners - read it. We will use the dummy API https://jsonplaceholder.typicode.com/photos , which contains the following data:

Please note that for Android, working with APIs using libraries such as Retrofit / OkHttp is a difficult task. However, we see that a dynamic and iterative JavaScript language simplifies this work.
Let's move on to creating a MockApp project:
react-native init MockApp
cd MockApp
Next, run it on your virtual / local device using:
react-native run-android
The following image will appear on the screen:

Application start screen The application
for working with the API that we create will look like this:
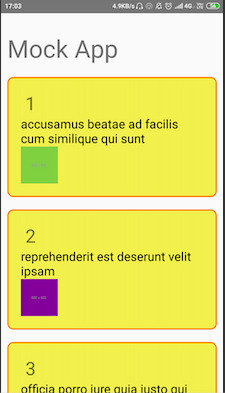
This is how the application looks
Now open the project in a text editor and adjust App.js as shown below:
There is a lot of information in this code. I will give a brief overview of all the major keywords in the code, but continue to search for each keyword that you do not understand. It will take some time.
1. componentDidMount. This is part of React Native in the application life cycle. componentDidMount () starts immediately after the component has been added to the component tree.
2. fetch. To work with network queries, there is a Fetch API in React Native .
3. State variables (isLoading, dataSource). isLoading is a variable of type bool that indicates whether API data is loaded or not. dataSource is a variable that stores the JSON response from the fetch command.
4. FlatList.This is the equivalent of RecyclerView in React Native, only much simpler. The FlatList component displays a scrolling list of data that may change, although they have a common structure. FlatList is great for working with long lists, in which the number of items may vary over time.
As we can see, in the data list we do not need to separate the variables for each element. This is the beauty of the dynamic language, that is, the JavaScript language. The type of variable is determined in real time, so working with even large amounts of data remains a simple task.
As we can see, the styles of each component are already defined. We need to set the values of the variables. This can be done in the following way:
This is where our work ends. We managed to create an application whose components can be previewed using the API.
I was an Android developer and used Java for quite a long time. Only recently, I tried my hand at creating mobile applications with React Native. It made me look at the development process in a new way, to say the least. The purpose of my article is to show the differences I noticed using these two frameworks in application development.
What is React Native
Information from the official website:
“React Native allows you to create mobile applications using only JavaScript with the same structure as React. This makes it possible to compose a multifunctional mobile UI using declarative components. ”
These are the same applications as native iOS or Android applications written in Swift or Java / Kotlin languages.
“Applications that you create with React Native are not mobile web applications, because React Native uses the same components as regular iOS and Android applications. Instead of using Swift, Kotlin, or Java, you build these components using JavaScript and React. ”
So, it turns out that React Native is a framework based on React.js , which allows you to develop cross-platform applications for both Android and iOS.
You ask why go away from the usual Java and learn JavaScript and React.js? Here are some advantages of using these languages.
Pros: what you will win
1. Cross-platform development
The main goal of developers is to provide customers with services. Nobody would like its users to be limited to just one platform only because a developer cannot create applications for other platforms. Consequently, the developer himself should not limit his abilities just because he or she is comfortable working with a specific development tool.
The React Native framework is portable, that is, its single code base, written in JavaScript, will create modules for both Android and iOS.
2. Mastering React
Having mastered React Native and JavaScript, you will discover a new world of front-end development, for example, for websites. The React Native framework is based on the same components as React, so the skills acquired here are not limited to the development of mobile applications.
3. Build time faster than Android Studio
Have you ever spent more than 2–3 minutes on an assembly to test / fix a basic function, while stretching the bugfix for long hours? The solution will be React Native. With him on the assembly takes much less time. With a feature like Hot Reloading, developing and testing user interfaces is easy. Thanks to this feature, the application restarts every time the JS file is saved!
4. JavaScript is convenient for transmitting data over a network.
The React Native API call, image rendering by URL and other processes are very simple. You no longer need to use Retrofit, OkHttp, Picasso , etc. Much less time is spent on setup. When data comes from an API on the Android platform, it is first converted to a POJO model and then used in UI elements. But the JSON data obtained in React Native is convenient for JavaScript and can be directly used for previewing UI. This allows the web interface to be made easier for GET or POST requests from the REST API.
5. UI Development
In React Native, the flexbox module is a UI markup , a serious competitor to the XML markup on Android. Flexbox is very popular in the web development community. In React Native, UI elements should basically be developed from scratch, whereas in the native Android development, the Google Design Support Library is already connected. This gives the developer freedom in terms of interactive and responsive design.
Cons: what you might lose
1. You may hate JavaScript
Many people do not like JavaScript simply because this language is not similar to traditional languages such as Java, C ++ and others. Detailed negative reviews you can find here and here .
2. Not many third-party libraries.
The React Native community is still in its infancy and supports third-party libraries that are not as popular as the native Android library (by the way, check out my slide library for Android).
Sample application
To begin, let's try to develop an application for extracting data from the API, in order to understand how simple React Native works. Obviously, the first step is to install React Native. To do this, go to the official website . Also you will find there a great instruction for beginners - read it. We will use the dummy API https://jsonplaceholder.typicode.com/photos , which contains the following data:
Please note that for Android, working with APIs using libraries such as Retrofit / OkHttp is a difficult task. However, we see that a dynamic and iterative JavaScript language simplifies this work.
Let's move on to creating a MockApp project:
react-native init MockApp
cd MockApp
Next, run it on your virtual / local device using:
react-native run-android
The following image will appear on the screen:
Application start screen The application
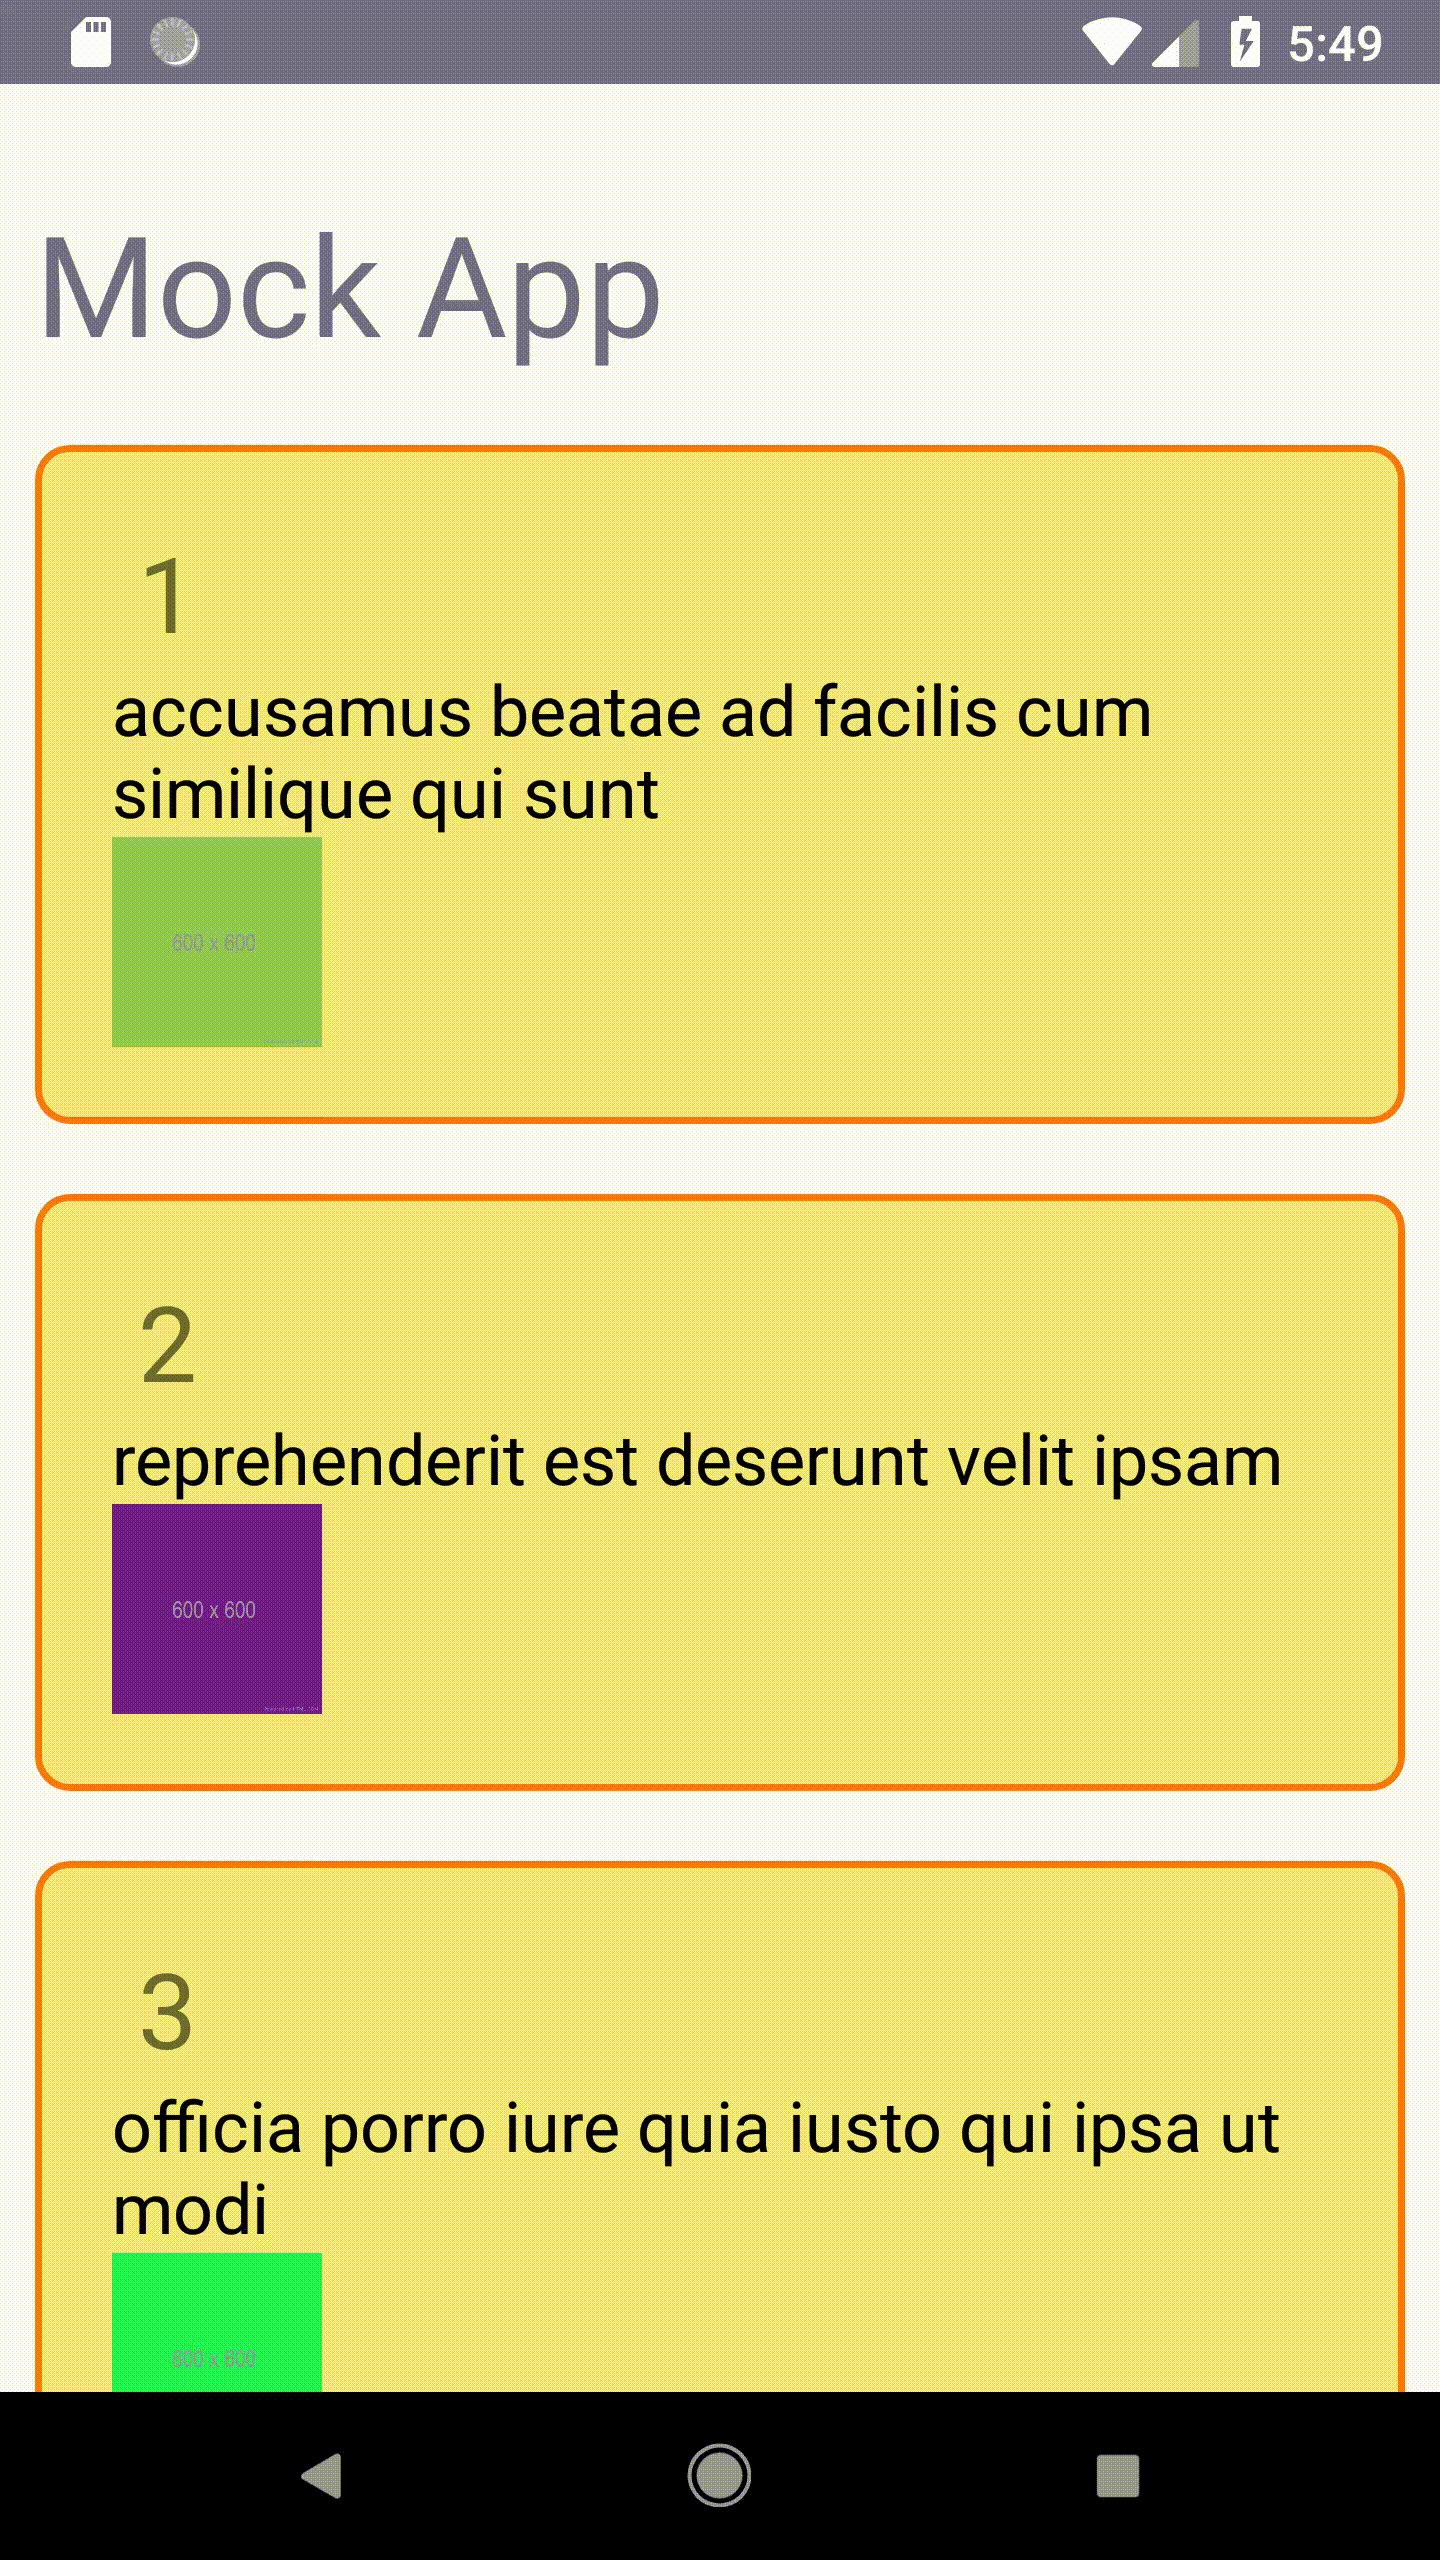
for working with the API that we create will look like this:
This is how the application looks
Now open the project in a text editor and adjust App.js as shown below:
exportdefaultclassAppextendsComponent<Props> {
constructor(props){
super(props);
this.state ={ isLoading: true}
}
componentDidMount(){
return fetch('https://jsonplaceholder.typicode.com/photos')
.then((response) => response.json())
.then((responseJson) => {
this.setState({
isLoading: false,
dataSource: responseJson,
}, function(){
});
})
.catch((error) =>{
console.error(error);
});
}
render() {
    if(this.state.isLoading){
return(
<Viewstyle={{flex:1, padding:20}}><ActivityIndicator/></View>
)}
return(
<View style={{flex: 1, paddingTop:20}}>
<Text style={styles.header}>Mock App</Text>
<FlatList
data={this.state.dataSource}
renderItem={({item}) => <View style={styles.card}><Text style={styles.id}> {item.id}</Text><Text style={styles.title}>{item.title}</Text><Image source ={{uri : item.url }}  style={styles.image}/></View>}
keyExtractor={({id}, index) => id}
/>
</View>
);
}
There is a lot of information in this code. I will give a brief overview of all the major keywords in the code, but continue to search for each keyword that you do not understand. It will take some time.
1. componentDidMount. This is part of React Native in the application life cycle. componentDidMount () starts immediately after the component has been added to the component tree.
2. fetch. To work with network queries, there is a Fetch API in React Native .
3. State variables (isLoading, dataSource). isLoading is a variable of type bool that indicates whether API data is loaded or not. dataSource is a variable that stores the JSON response from the fetch command.
4. FlatList.This is the equivalent of RecyclerView in React Native, only much simpler. The FlatList component displays a scrolling list of data that may change, although they have a common structure. FlatList is great for working with long lists, in which the number of items may vary over time.
As we can see, in the data list we do not need to separate the variables for each element. This is the beauty of the dynamic language, that is, the JavaScript language. The type of variable is determined in real time, so working with even large amounts of data remains a simple task.
As we can see, the styles of each component are already defined. We need to set the values of the variables. This can be done in the following way:
const styles = StyleSheet.create({
card: {
padding: 20,
margin: 10,
borderColor: '#ff7a00',
borderWidth: 2,
borderRadius: 10,
backgroundColor: '#f3ea68',
flex: 1,
},
header: {
fontSize: 40,
padding: 10,
},
image: {
height: 60,
width: 60,
},
title: {
fontSize: 20,
color: '#000',
},
id: {
fontSize: 30,
}
});
This is where our work ends. We managed to create an application whose components can be previewed using the API.
Finally, here is the result: