Workflow 3D artist. How not to drown in a ton of information. Part 1
Hello everyone, Habr community! Today I want to tell you about the workflow of 3D artists, how to delve into this and stay with a stable nervous system. The article is aimed at beginners in this field, experienced sharks can indulge in nostalgia, remember how it all began.
In this article I will describe the stages of creating environment models. Also in the next part, we will consider the additional stages of work for the artist on the characters.
I will tell you the story of Vasya's abstract character. Something in his life turned upside down, he decided to abandon the good old drawing and go to 3D. Vasya, of course, went to see how much the young luminaries were paid for this work and what was required. It opens the vacancy of June, and there:
And all this is not for some fabulous sums there, but for the average salary of a cashier or waiter (the authordoes not exaggerate).
Vasya closed the vacancy and cried every night from the number of scary words and questions in his head.
The end.
In order to reduce the number of broken fates, I undertake to clarify everything.
And the first thing I would like to note is never agree to work for food. There is no need to lower the cost of the work of colleagues in the workshop, but it is also not necessary, after doing one job, to ask for millions. When you feel that the level of your work is sufficient to receive money for itread: mom says that it’s good, It is advisable to find an experienced person and ask what he thinks. And only when he says that everything is more or less, then you need to go hunting.
But for now, we'll figure out where to start.
You need to understand that the list of programs required by employers is quite average, if you really want to, you can do everything in one and get the achievement "This guy could, he’s a joke with him . " But nevertheless it is more convenient to use specialized programs, because I will indicate some of them that are suitable for a certain stage of work.
And so, let's get started.
Short outline of the article:
The first thing that should be in your head is a concept . You must know exactly what you want to get at the end, I think that only an experienced person can afford a creative flight (it’s permissible to deviate a little from the concept).
There are several options: you can draw a concept yourself, in order to see what the result will be, or you can use a ready-made model sheet , of which there are a lot on the Internet (just do not forget to get permission from the author, or do it for yourself, do not publish it anywhere).
Basically, a model sheet is a concept of characters (both people and animals), but I even met a model sheet of stone (suddenly). It almost always looks like this:
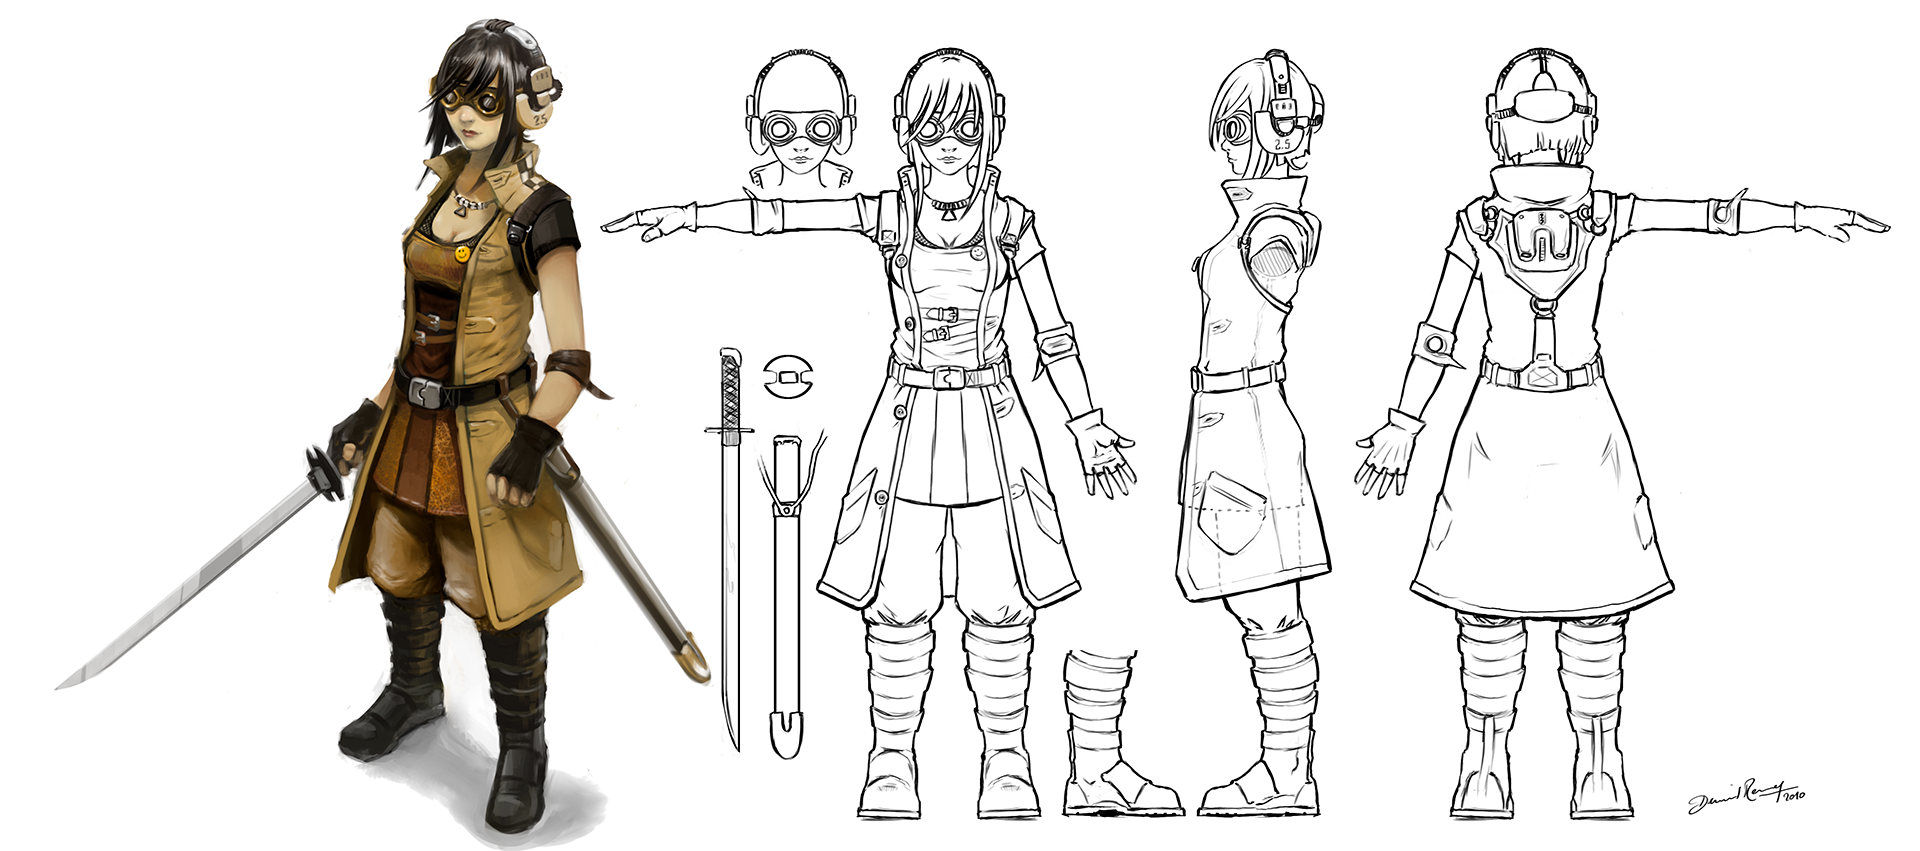
Character model sheet
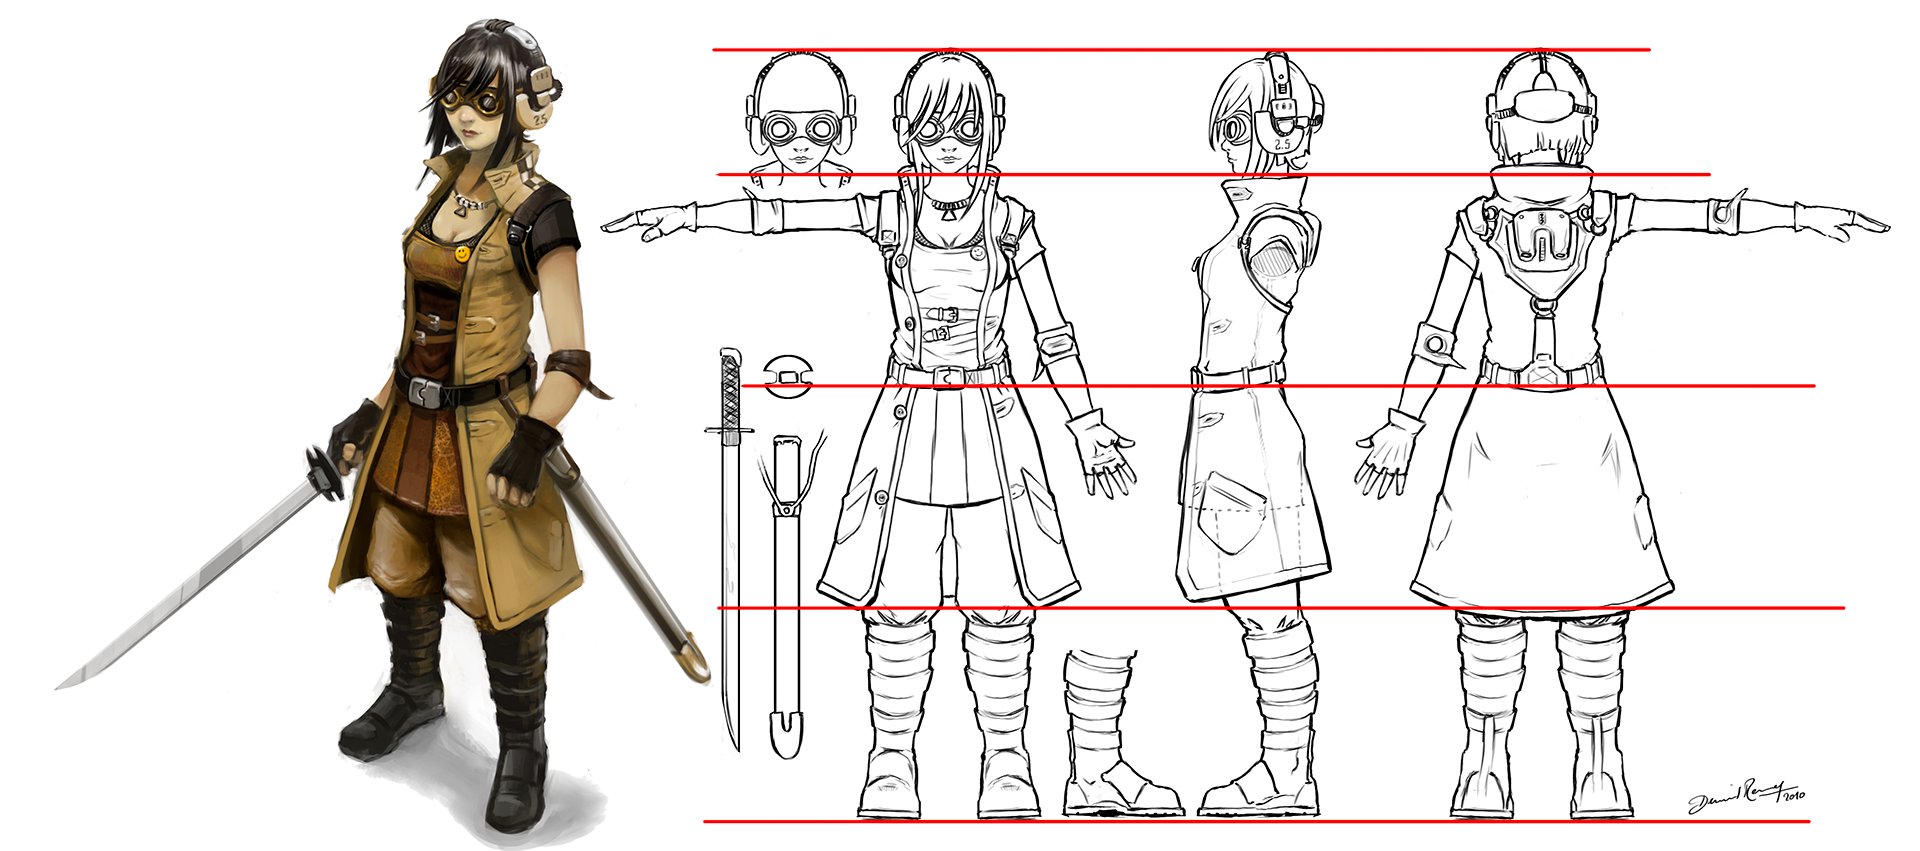
Here you need to be careful, there are 2 types: for animators and for 3D-schnicks . We need the sheet where the figure is strictly in A or T - pose, or as shown in the example, there are several sides (rear, front, side) and each side coincides with the other along the lines as in the picture below:
And about this stage, the differences begin. Each artist has his own approach to work and depends on the type of modeling, the ultimate goal.
Types of modeling
Since polygonal modeling is most often used in harsh game production, we will consider it. There are low- / mid- and high-poly models.
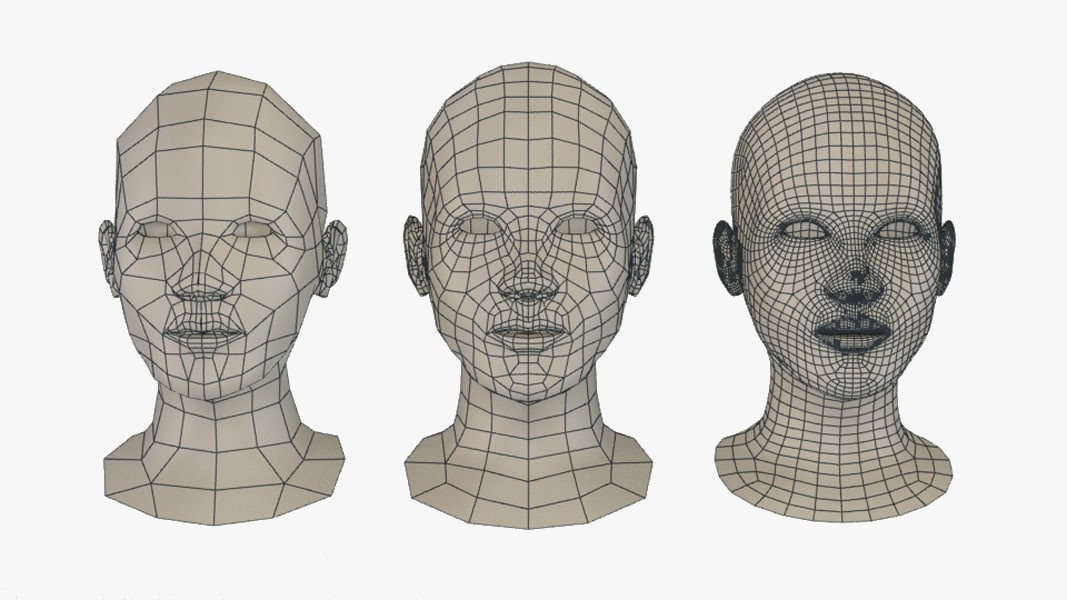
From left to right: low-poly, mid-poly, high-poly
The difference, I think, is understandable - the number of polygons and the level of detail. Now that we understand what model we have to do and what polygonage to work with, we decide which type it belongs to - hard surface or organic ?
Hard surface
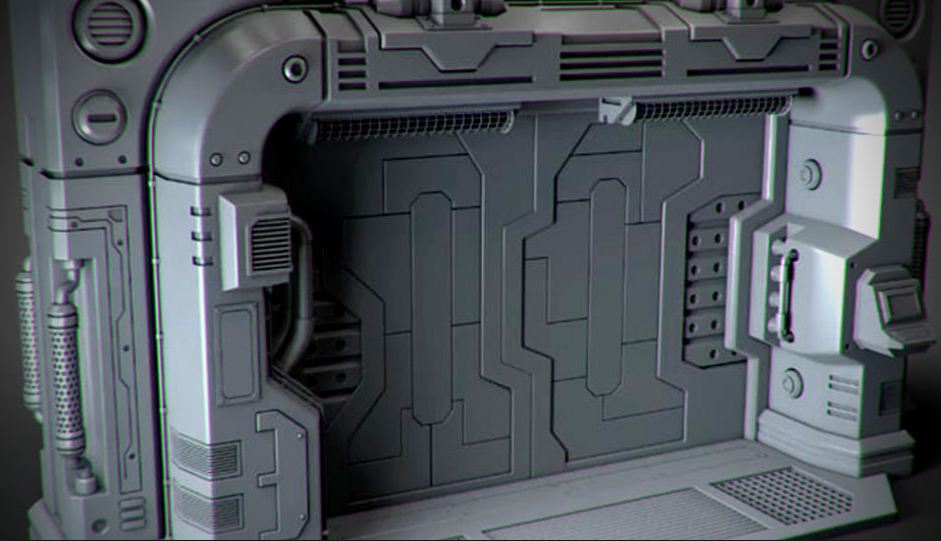
example: Organic example:
Based on this, we choose the approach, because for hard surfaces it is more convenient to use Subdivision modeling , and for organics - sculpting . But, like in any rule, there are exceptions here too: in ZBrush you can study the ZModeler tool and make a Subdiv or vice versa make organic models without using sculpting (the latter seems to me impractical).
What is subdivision modeling?
Subdivision modeling is a method of representing a smooth surface by smoothing a coarser polygon mesh.
In fact, you build a grid for smoothing, and then apply the Turbosmooth modifier, which splits one polygon into four, goes from a primitive to a smooth and complex shape. Here's what it looks like:
Gradual smoothing by stages
What is sculpting?
Everyone knows how the sculptor works. Here the principle is the same, only you need to work in a digital environment.
And if we compare sculpting and Subdiv, the main advantage is that with its help highly detailed objects are created consisting of millions of polygons, due to which the photo-realistic quality of the model is achieved, and the main area of its application is, of course, the creation of organic models having a complex shape and texture , copying real ones, creating fantastic or fairy-tale characters, animals, plants, landscapes and even furniture.
Example:
Creating such detail with Subdiv is very difficult, almost impossible.
The steps for sculpting and subdiv are different:
Subdiv:
Sculpting (for ZBrush):
Note: the details are best worked out gradually at each level.
Software: 3ds max, Maya, ZBrush, Blender.
The most difficult step for a beginner is retopology . This is a whole science, which has its own rules for animation, cinema, games.
At first, at the current stage, it would be nice to arrange parts of the model, perhaps some to merge, and others to leave. For game retopology, such elements are usually merged according to the principle "all that can be separated is separate."
Consider a more obvious example:
A character divided into subtools (highlighted in color)
Everything that is indicated by one color is one subtool.
There are several rules that should be followed when creating a retopology:
At the moment, there are 2 types of retopology: manual and automatic . It’s quite convenient to first make an automatic one and then fix the machine’s errors, but the pros still prefer to do it manually.
If the model originally had a Low-Poly version, then the whole retopology is to find a way to make a mesh from an existing mesh with an even smaller number of polygons. It may be worth removing those parts that are not visible, for example, the body under clothing.
This operation can be performed both in the software in which you modeled, and in specialized programs, such as Topogun 2 .
UV is made so that the texture fits correctly, and not like this:
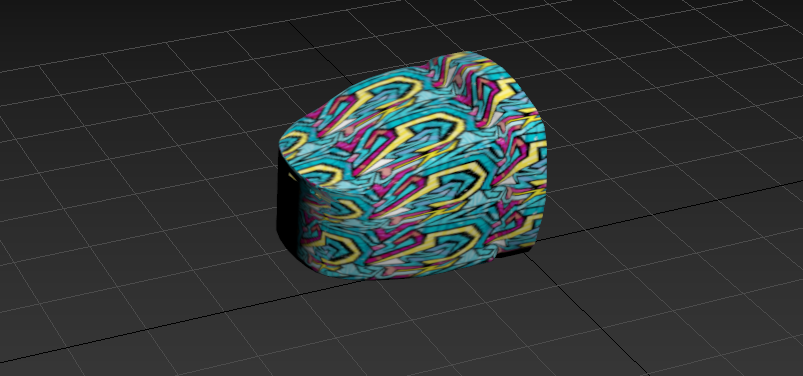
This is how the stretched texture
“UVW scan” or just “scan” looks like - this operation got its name by the usual translation from English Unwrap UVW.
Quality Scan Requirements:
You need to do UV on a low-poly model, then to bake on it details with a high-poly and, in fact, texture. At the same time, the low-poly model looks like a high-poly, but the number of polygons remains the same.
“Bake” means transferring some characteristics of the material or mesh of the model to the map image. The artist uses the same principle when depicting volume, color and light on a flat sheet of paper.
After the scan is done, we can look at the results of our work:
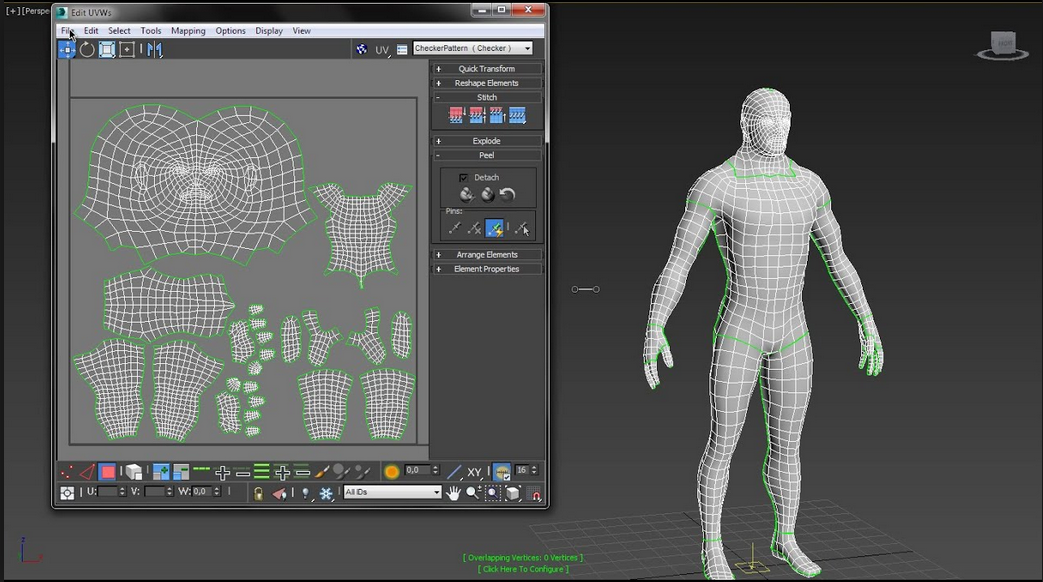
On the left is a scan of the presented model. The
green stripes on the human model are the very seams along which it is deployed.
Now every self-respecting program has the opportunity to perform such an operation, there are also specialized ones, such as UVlayout , RizomUV . I always used the capabilities of 3ds max, it was enough.
Before moving on to baking textures, it would be nice to do the following:
1. Triangulate the low-poly model , that is, split the polygons into triangles, because if the automatic partition is incorrect, problems with normals (polygon directions) can occur, which will lead to unnecessary artifacts. But I do not do this, because modern algorithms in my opinion deal well with this and, if such problems happen, I return from this step and correct it;
2. Create Cage. Cage, in simple terms, is a version of a low-poly model that is tailored to completely overlap the high-poly. When building it, the models should have the same coordinates;
It looks like this: The
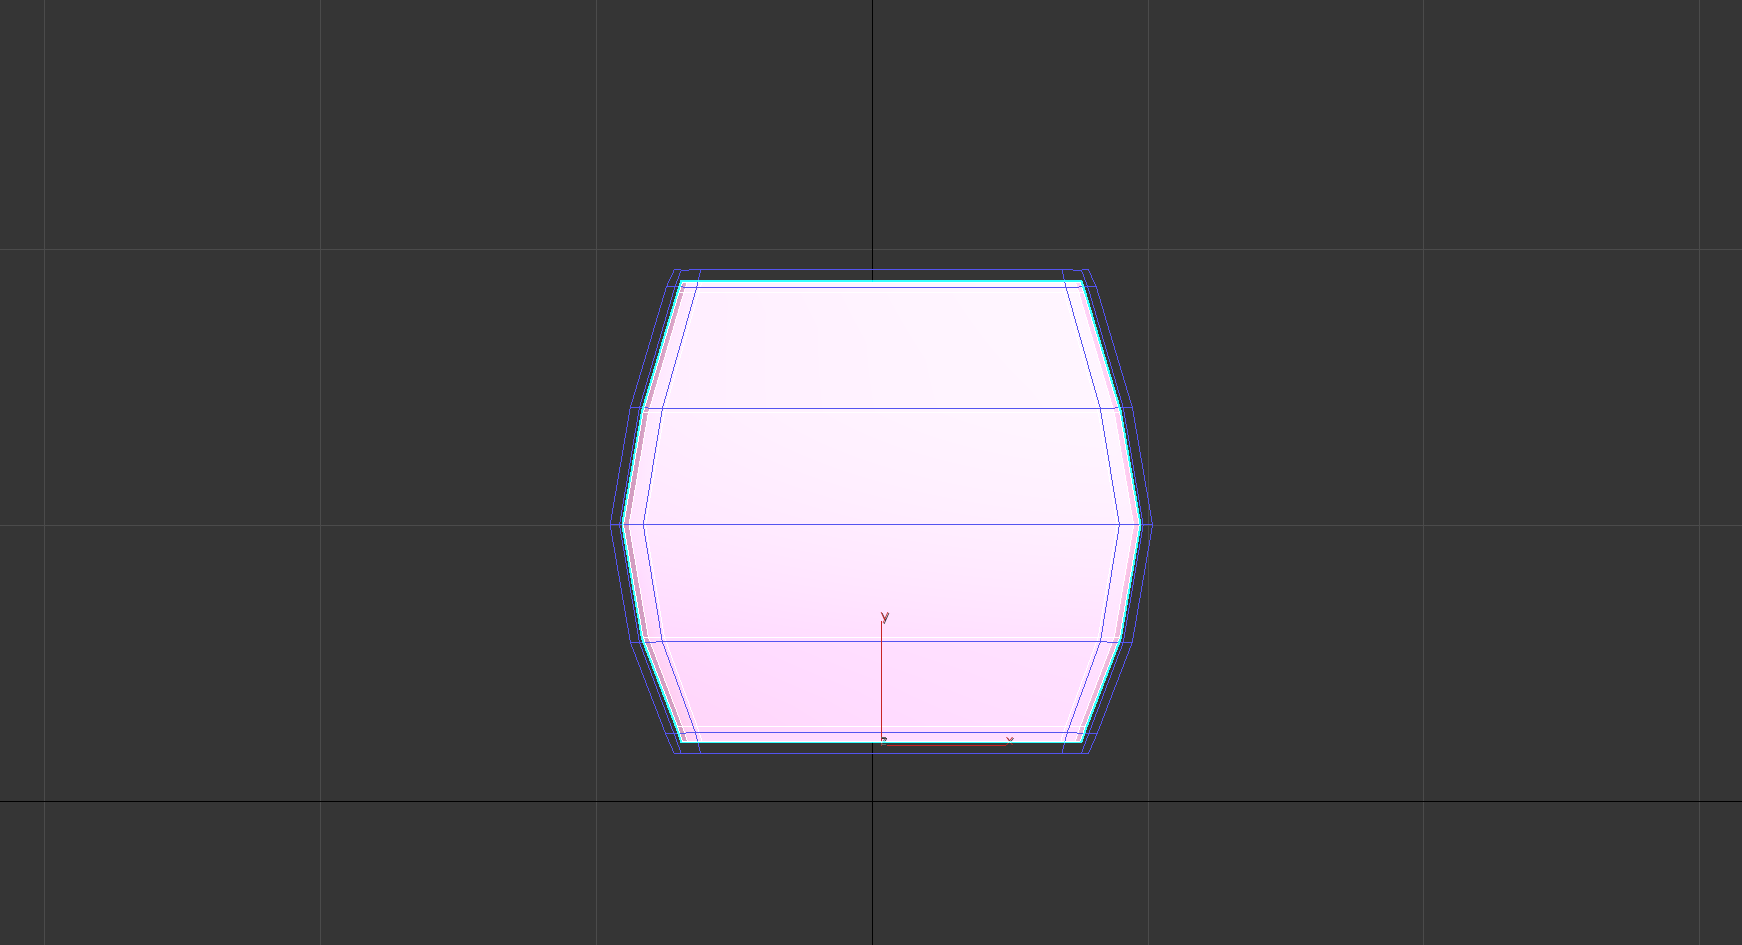
blue lattice around the model is cage, the space that will capture parts from the high-poly model
3. Assign each part of the model (in ZBrush - subtools) its material so that when imported into Substance Painter they are also divided, not merged together.
We turn to texturing.
You can bake the necessary textures in the same program in which you modeled, but I use Substance Painter for these purposes - clearly, conveniently, what else is needed.
Baking occurs automatically; all you need to do is import a low-poly model into the program (required!), Then select the appropriate option, load the high-poly model, select the resolution of the maps, load Cage or select the indent from the model and click the Bike All button Texture sets.
PBR texturing
The most common texturing technology in PBR games , Physically-Based Rendering , allows you to create photo-realistic textures using a set of maps.
Commonly used cards:
Here's what it looks like in the most primitive example:
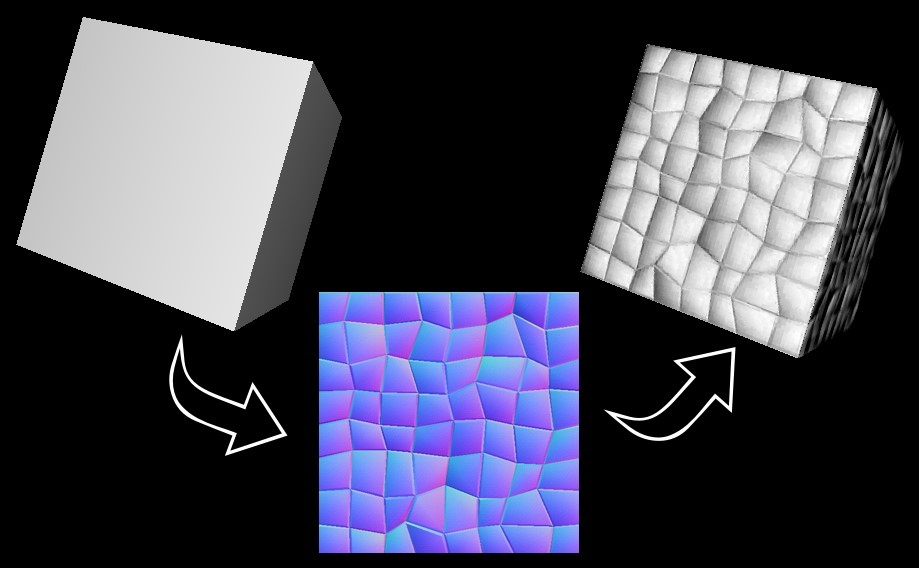
On the left there is a square without normal maps, on the right there is a normal map.
Substance Painter has a very wide functionality that makes texturing much easier: you can draw immediately on the model, use a variety of alpha, ready-made hard surface stamps, procedural maps, filters, masks - in general, complete expanse for imagination.
After you get cards that can be exported and sent immediately to any game engine, there are many templates here: for Unity 4/5, Unreal Engine, Dota 2, V-ray, Corona, etc.
Actually, this is where the work on the environment ends, the subsequent stages, which will be described in the next article, are used mainly when creating characters.
Thank you for reading, may the force be with you!
In this article I will describe the stages of creating environment models. Also in the next part, we will consider the additional stages of work for the artist on the characters.
I will tell you the story of Vasya's abstract character. Something in his life turned upside down, he decided to abandon the good old drawing and go to 3D. Vasya, of course, went to see how much the young luminaries were paid for this work and what was required. It opens the vacancy of June, and there:
- knowledge of 3ds Max / Maya / Blender (it all depends on the wishes of the employer);
- skills of low-poly, high-poly, some kind of scary Subdiv modeling;
- UV mapping
- PBR texturing
- knowledge of Substance Painter;
- Photoshop
- Substance Designer
- still it would be desirable to be able to visualize V-ray / Corona / Keyshot;
- ability to draw by hand;
- someone asks to assemble a scene in Marmoset.
And all this is not for some fabulous sums there, but for the average salary of a cashier or waiter (the author
Vasya closed the vacancy and cried every night from the number of scary words and questions in his head.
The end.
In order to reduce the number of broken fates, I undertake to clarify everything.
And the first thing I would like to note is never agree to work for food. There is no need to lower the cost of the work of colleagues in the workshop, but it is also not necessary, after doing one job, to ask for millions. When you feel that the level of your work is sufficient to receive money for it
But for now, we'll figure out where to start.
You need to understand that the list of programs required by employers is quite average, if you really want to, you can do everything in one and get the achievement "This guy could, he’s a joke with him . " But nevertheless it is more convenient to use specialized programs, because I will indicate some of them that are suitable for a certain stage of work.
And so, let's get started.
Short outline of the article:
- Concept
- Modeling
- Retopology
- UVW mapping
- Texturing
Concept
The first thing that should be in your head is a concept . You must know exactly what you want to get at the end, I think that only an experienced person can afford a creative flight (it’s permissible to deviate a little from the concept).
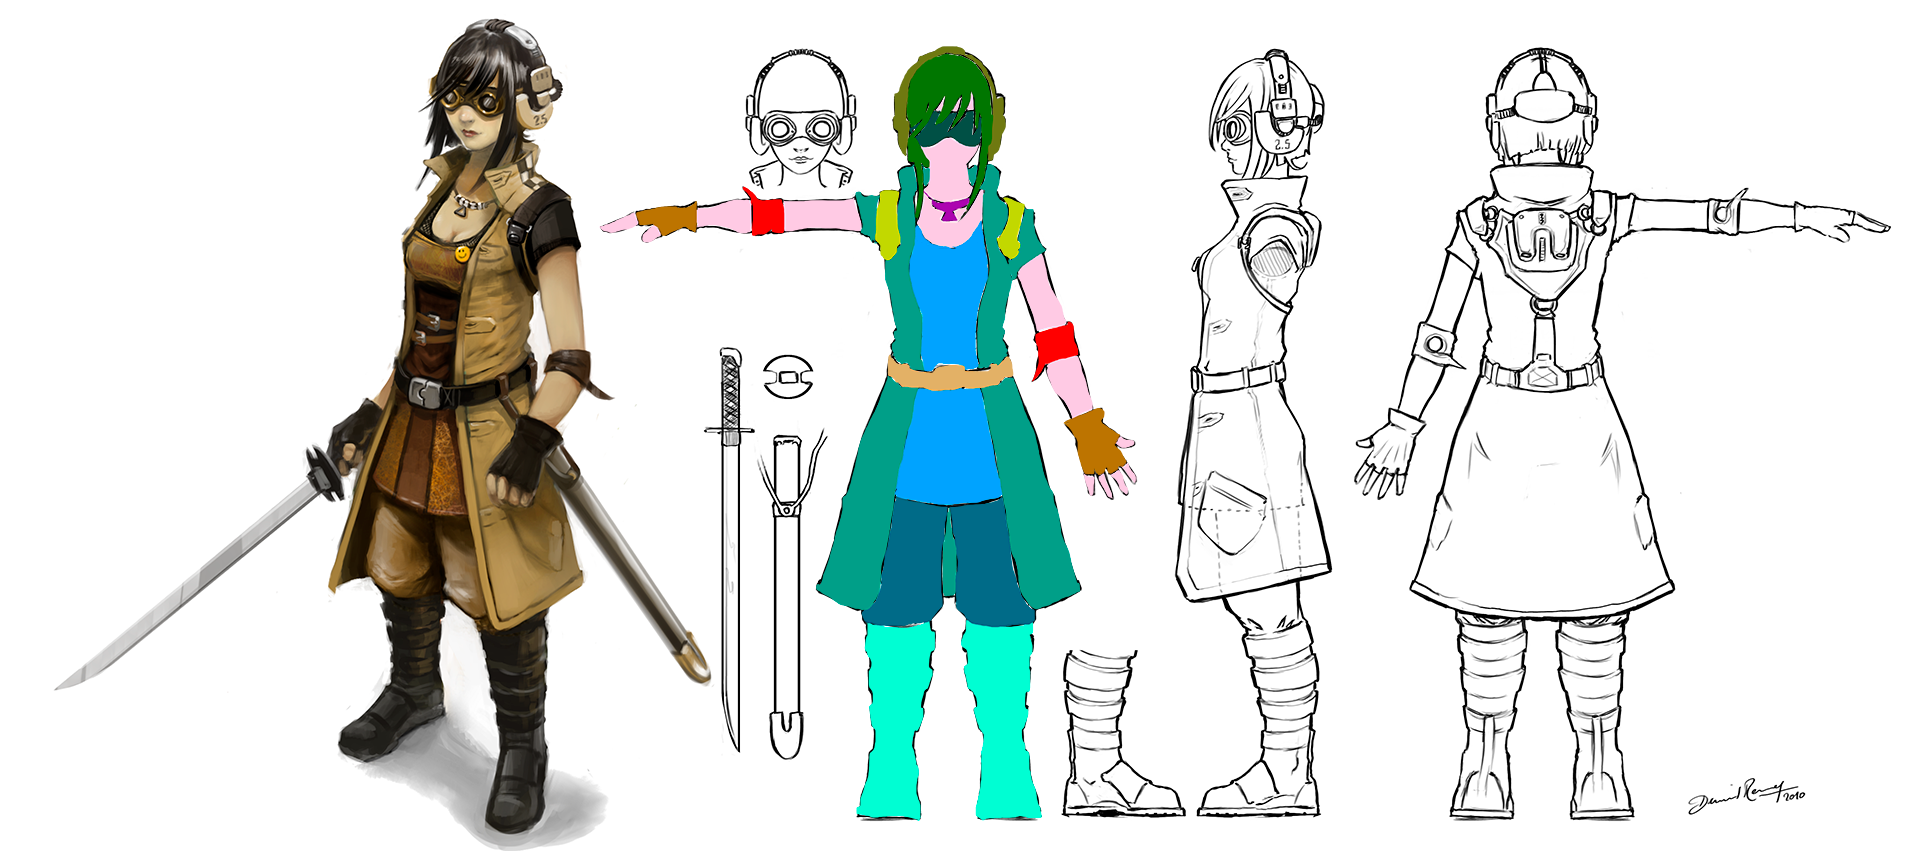
There are several options: you can draw a concept yourself, in order to see what the result will be, or you can use a ready-made model sheet , of which there are a lot on the Internet (just do not forget to get permission from the author, or do it for yourself, do not publish it anywhere).
Basically, a model sheet is a concept of characters (both people and animals), but I even met a model sheet of stone (suddenly). It almost always looks like this:
Character model sheet
Here you need to be careful, there are 2 types: for animators and for 3D-schnicks . We need the sheet where the figure is strictly in A or T - pose, or as shown in the example, there are several sides (rear, front, side) and each side coincides with the other along the lines as in the picture below:
His Majesty Modeling
And about this stage, the differences begin. Each artist has his own approach to work and depends on the type of modeling, the ultimate goal.
Types of modeling
Since polygonal modeling is most often used in harsh game production, we will consider it. There are low- / mid- and high-poly models.
From left to right: low-poly, mid-poly, high-poly
The difference, I think, is understandable - the number of polygons and the level of detail. Now that we understand what model we have to do and what polygonage to work with, we decide which type it belongs to - hard surface or organic ?
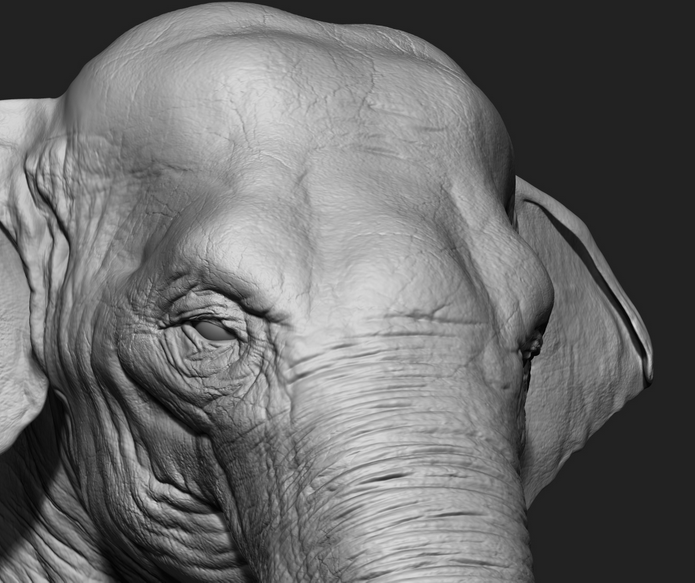
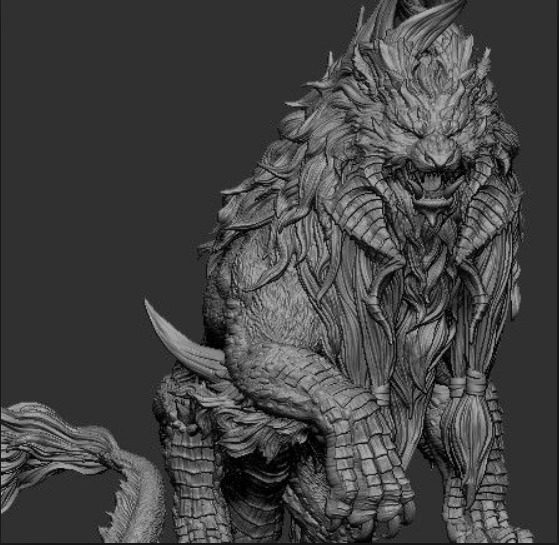
Hard surface
example: Organic example:
Based on this, we choose the approach, because for hard surfaces it is more convenient to use Subdivision modeling , and for organics - sculpting . But, like in any rule, there are exceptions here too: in ZBrush you can study the ZModeler tool and make a Subdiv or vice versa make organic models without using sculpting (the latter seems to me impractical).
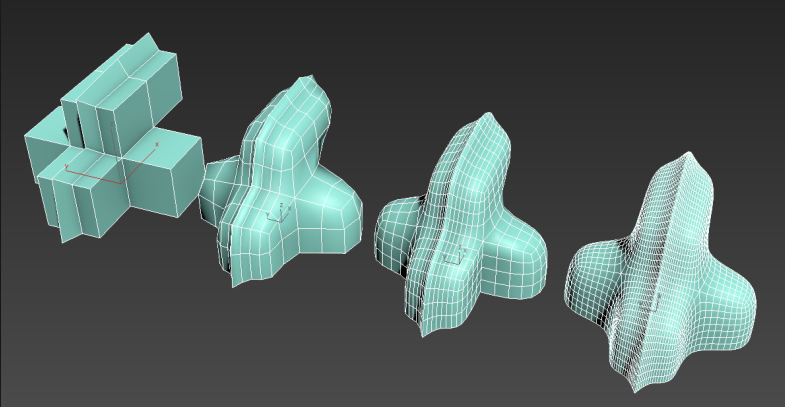
What is subdivision modeling?
Subdivision modeling is a method of representing a smooth surface by smoothing a coarser polygon mesh.
In fact, you build a grid for smoothing, and then apply the Turbosmooth modifier, which splits one polygon into four, goes from a primitive to a smooth and complex shape. Here's what it looks like:
Gradual smoothing by stages
What is sculpting?
Everyone knows how the sculptor works. Here the principle is the same, only you need to work in a digital environment.
And if we compare sculpting and Subdiv, the main advantage is that with its help highly detailed objects are created consisting of millions of polygons, due to which the photo-realistic quality of the model is achieved, and the main area of its application is, of course, the creation of organic models having a complex shape and texture , copying real ones, creating fantastic or fairy-tale characters, animals, plants, landscapes and even furniture.
Example:
Creating such detail with Subdiv is very difficult, almost impossible.
The steps for sculpting and subdiv are different:
Subdiv:
- building a common form for a low poly model;
- at the stage of constructing high-poly smoothing;
- adding small details.
Sculpting (for ZBrush):
- blocking in dynamesh
- retopology (at this stage we get low-poly, save separately)
- refinement of parts by winding up Subdivision levels (works the same as Turbosmooth).
Note: the details are best worked out gradually at each level.
Software: 3ds max, Maya, ZBrush, Blender.
Retopology
The most difficult step for a beginner is retopology . This is a whole science, which has its own rules for animation, cinema, games.
At first, at the current stage, it would be nice to arrange parts of the model, perhaps some to merge, and others to leave. For game retopology, such elements are usually merged according to the principle "all that can be separated is separate."
Consider a more obvious example:
A character divided into subtools (highlighted in color)
Everything that is indicated by one color is one subtool.
There are several rules that should be followed when creating a retopology:
- in those places where the model will move, you should make the grid more dense and anatomically correct (build for a natural anatomy);
- no n-gons, only squares, rectangles and triangles, although the latter are best avoided;
- use the minimum number of polygons to describe the shape;
- if the square polygon is deformed, it is better to divide it into triangles, draw a diagonal;
- you need to maintain a balance in the size of the polygons, they should be approximately the same and look harmonious;
- it is better to create a symmetrical grid, and then edit if the model is asymmetric.
At the moment, there are 2 types of retopology: manual and automatic . It’s quite convenient to first make an automatic one and then fix the machine’s errors, but the pros still prefer to do it manually.
If the model originally had a Low-Poly version, then the whole retopology is to find a way to make a mesh from an existing mesh with an even smaller number of polygons. It may be worth removing those parts that are not visible, for example, the body under clothing.
This operation can be performed both in the software in which you modeled, and in specialized programs, such as Topogun 2 .
UV mapping
UV is made so that the texture fits correctly, and not like this:
This is how the stretched texture
“UVW scan” or just “scan” looks like - this operation got its name by the usual translation from English Unwrap UVW.
Quality Scan Requirements:
- when creating a reamer, it is necessary to create seams along which it will unfold;
- it is advisable to hide the seams where the curious player does not get;
- scan elements must be distributed within the area given to you (chess square);
- the square space should be filled as much as possible (the larger the size of the scan part, the better the texture will be);
- it is desirable to decompose all the elements uniquely, but there are times when some of them can be superimposed on each other (usually called “overlap”) if they are not visible to the player and do not necessarily require uniqueness, for example, the legs of a chair;
- leave some space between the elements to avoid “leakage” to other parts of the map.
You need to do UV on a low-poly model, then to bake on it details with a high-poly and, in fact, texture. At the same time, the low-poly model looks like a high-poly, but the number of polygons remains the same.
“Bake” means transferring some characteristics of the material or mesh of the model to the map image. The artist uses the same principle when depicting volume, color and light on a flat sheet of paper.
After the scan is done, we can look at the results of our work:
On the left is a scan of the presented model. The
green stripes on the human model are the very seams along which it is deployed.
Now every self-respecting program has the opportunity to perform such an operation, there are also specialized ones, such as UVlayout , RizomUV . I always used the capabilities of 3ds max, it was enough.
Before moving on to baking textures, it would be nice to do the following:
1. Triangulate the low-poly model , that is, split the polygons into triangles, because if the automatic partition is incorrect, problems with normals (polygon directions) can occur, which will lead to unnecessary artifacts. But I do not do this, because modern algorithms in my opinion deal well with this and, if such problems happen, I return from this step and correct it;
2. Create Cage. Cage, in simple terms, is a version of a low-poly model that is tailored to completely overlap the high-poly. When building it, the models should have the same coordinates;
It looks like this: The
blue lattice around the model is cage, the space that will capture parts from the high-poly model
3. Assign each part of the model (in ZBrush - subtools) its material so that when imported into Substance Painter they are also divided, not merged together.
We turn to texturing.
Texturing and baking textures
You can bake the necessary textures in the same program in which you modeled, but I use Substance Painter for these purposes - clearly, conveniently, what else is needed.
Baking occurs automatically; all you need to do is import a low-poly model into the program (required!), Then select the appropriate option, load the high-poly model, select the resolution of the maps, load Cage or select the indent from the model and click the Bike All button Texture sets.
PBR texturing
The most common texturing technology in PBR games , Physically-Based Rendering , allows you to create photo-realistic textures using a set of maps.
Commonly used cards:
- Ambient Occlusion - shows the interaction between the elements of the model. This map creates a soft shade, as if the model was lit without direct light;
- Diffuse - defines the color and pattern of the object;
- Metallic - shows how metallic the material is;
- Roughness - controls the clarity of light reflections, shows the roughness of the object;
- Normal - responsible for the relief of the model, each color shows a different direction axis.
Here's what it looks like in the most primitive example:
On the left there is a square without normal maps, on the right there is a normal map.
Substance Painter has a very wide functionality that makes texturing much easier: you can draw immediately on the model, use a variety of alpha, ready-made hard surface stamps, procedural maps, filters, masks - in general, complete expanse for imagination.
After you get cards that can be exported and sent immediately to any game engine, there are many templates here: for Unity 4/5, Unreal Engine, Dota 2, V-ray, Corona, etc.
Actually, this is where the work on the environment ends, the subsequent stages, which will be described in the next article, are used mainly when creating characters.
Thank you for reading, may the force be with you!