Authentication Settings in Veeam Backup for Microsoft Office 365 v3
- Transfer
- Tutorial
In the recently released version 3.0 of Veeam Backup for Microsoft Office 365 , among other innovations, it supports a modern authentication method for working with cloud data. It uses authentication using the Azure application and a service account that is configured with multi-factor authentication (MFA).
In this article, we will briefly discuss how to create the entities necessary for such authentication and configure their parameters in Microsoft Office 365.
For authentication with the Office 365 cloud, Veeam uses the Azure Active Directory app and a service account that is configured with multi-factor authentication (MFA).
Accordingly, when you add an organization to the Veeam Backup for Microsoft Office 365 infrastructure , you will need to do the following:
Where to get these same certificate, secret and password of the application? - some users ask us. This is what we will explain below.
Veeam Backup for Microsoft Office 365 v3 fully supports modern authentication methods, but along with this, it also uses a number of basic protocols to be able to work with the Office 365 API.
For them, you need to check the following settings:
All this should be obtained on the Office 365 Azure Active Directory portal when registering a new application in Azure Active Directory.
To register an application, you need to go through these steps:
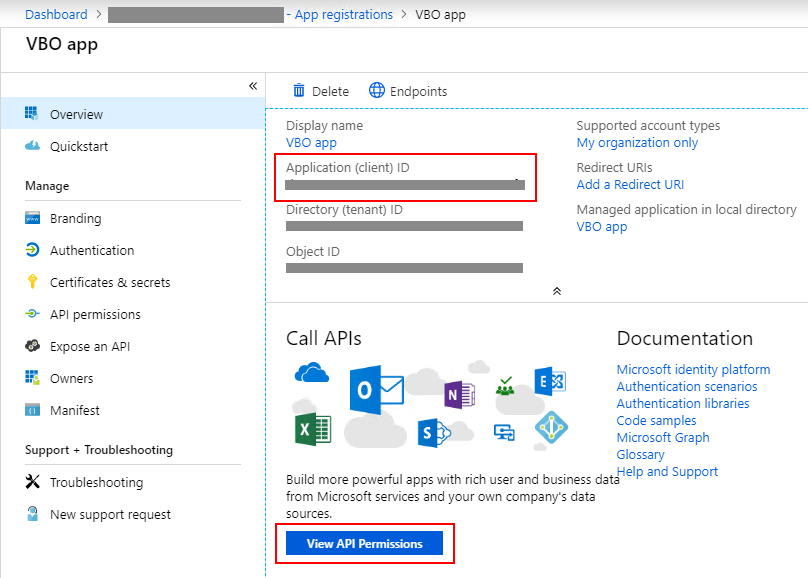
Now the application ID will appear in the settings that are visible in the Overview window .
But that's not all - to complete the configuration process, you need to perform a few more steps. The application needs to provide the permissions necessary to work with the API.
In this article, we will briefly discuss how to create the entities necessary for such authentication and configure their parameters in Microsoft Office 365.
How it works
For authentication with the Office 365 cloud, Veeam uses the Azure Active Directory app and a service account that is configured with multi-factor authentication (MFA).
- The application allows Veeam Backup for Microsoft Office 365 to use the Microsoft Graph API to retrieve Microsoft Office 365 organization data. This application must be pre-registered on the Azure Active Directory portal, as described below.
- The service account will be used to connect to the EWS and PowerShell services.
Accordingly, when you add an organization to the Veeam Backup for Microsoft Office 365 infrastructure , you will need to do the following:
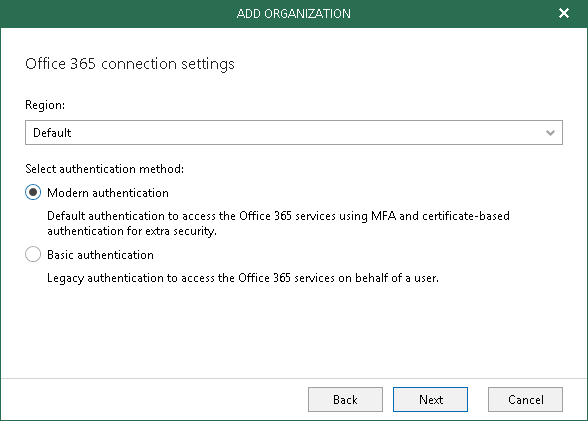
- In step Office 365 connection settings wizard Add Organization Wizard must choose Modern authentication .
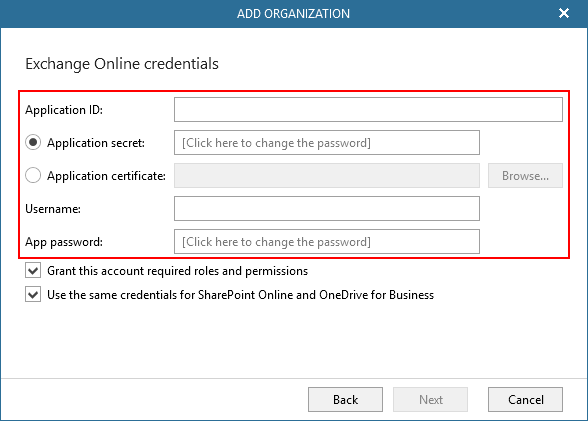
- At the Exchange Online credentials step, you need to specify both the Azure Active Directory application ID (as well as its certificate or secret ) and the username and password for the application account ( app password ):
Where to get these same certificate, secret and password of the application? - some users ask us. This is what we will explain below.
By the way, if Modern authentication is selected , does this mean that the basic authentication protocols will be completely turned off from the process?
Veeam Backup for Microsoft Office 365 v3 fully supports modern authentication methods, but along with this, it also uses a number of basic protocols to be able to work with the Office 365 API.
For them, you need to check the following settings:
- To work with Exchange Online PowerShell, you need to enable the AllowBasicAuthPowershell parameter for the Veeam service account - this is required to obtain information about the number of licensed users, mailboxes, etc. For greater security, you can enable it for a single account, and not for the entire organization, as explained here - in particular, this can be done only for Veeam accounting.
- Exchange Online PowerShell also works with the Exchange Web Services (EWS) web service — to do this, enable the AllowBasicAuthWebServices parameter . In principle, this option is optional, that is, it is not necessary to enable it for an Office 365 organization - Veeam Backup for Microsoft Office 365 can do without it, but in this case, when you add an organization, you will need to use an application certificate, not a secret.
- To protect text files, images, videos, dynamic content, and other content that is uploaded to pages on SharePoint Online sites, you must enable the LegacyAuthProtocolsEnabled parameter , setting it to $ True . This setting will apply to the organization as a whole; it is required for the operation of individual services, for example, for ASMX.
So, we get the ID, secret and certificate of the application
All this should be obtained on the Office 365 Azure Active Directory portal when registering a new application in Azure Active Directory.
To register an application, you need to go through these steps:
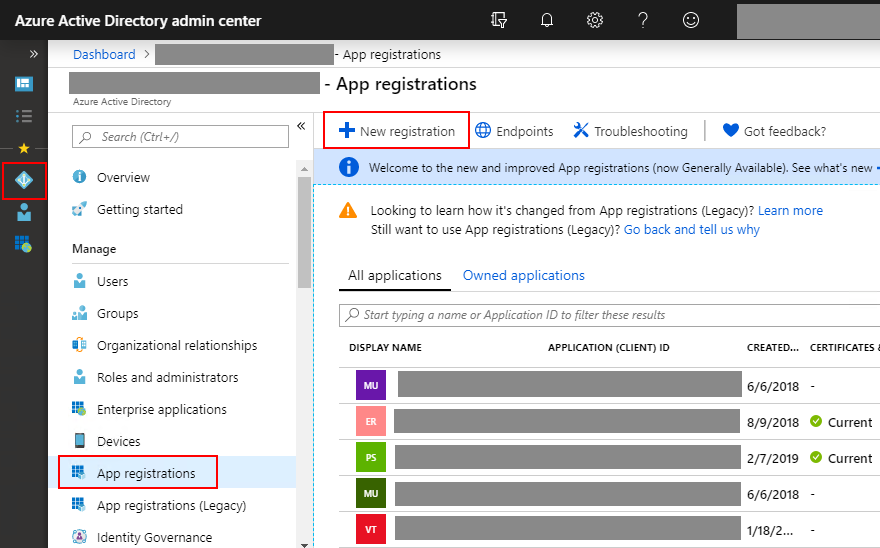
- Log in to the Microsoft Office 365 Admin Center with a Global Administrator , Application Administrator or Cloud Application Administrator account and go to the Azure Active Directory admin center .
- In the App registrations section, click on New registration :
- Enter the name of the application, specify Supported account types (types of accounts that will work with the application - we have “Accounts in this organizational directory only”, that is, accounts only from the directory of this organization), and click Register :
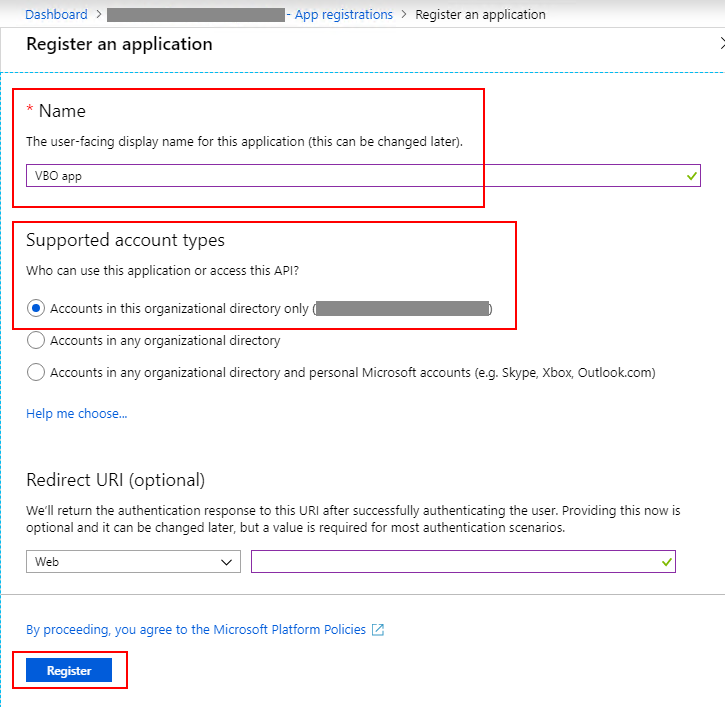
Now the application ID will appear in the settings that are visible in the Overview window .
But that's not all - to complete the configuration process, you need to perform a few more steps. The application needs to provide the permissions necessary to work with the API.
- In the Call APIs section, click View API permissions :
- In the window that opens, we will see the permissions provided to our application. By default, only one permissions for accessing Microsoft Graph is configured for it - this is User.Read . It can be safely removed, because It is not required for our application. Then click Add a permission :
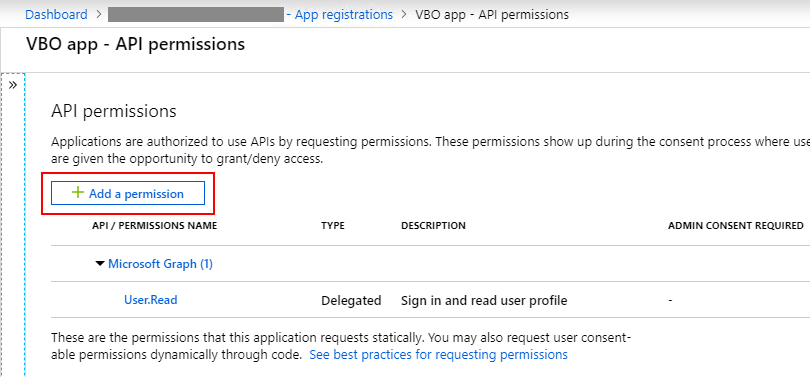
- Next, in the Select an API section, select Microsoft Graph :

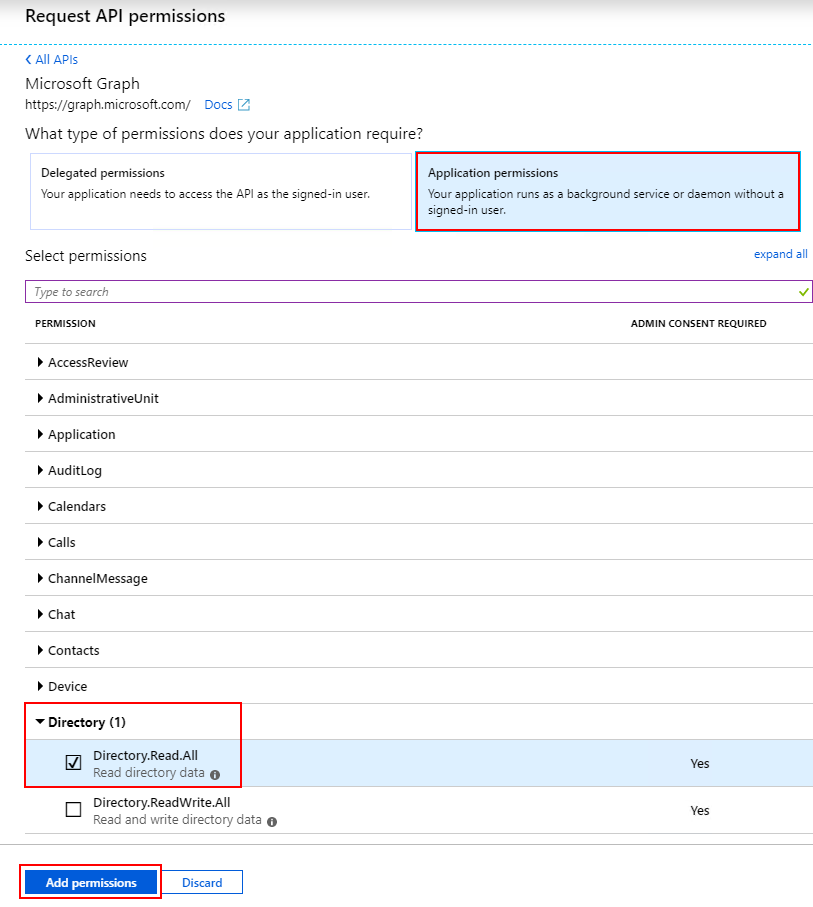
- There can be two types of permissions for Azure AD applications - these are Delegated or Application permissions (assigned to the application). The first option ( Delegated permissions ) requires a logged-in user who will provide the necessary permissions every time an API call is made. In the version with Application permissions, they are granted by the administrator once (consent is given - admin consent). Veeam Backup for Microsoft Office 365 requires assignment of Application permissions : select Directory.Read.All (for reading data in a directory) and Group.Read.All (for reading group data) from the list of permissions , then clickAdd permissions :
Note: If you want to use the application certificate instead of a secret, you also need to select a few more APIs and corresponding permissions:- Microsoft Exchange Online API access and Permission Use Exchange Web Services with full access to all mailboxes
- Microsoft SharePoint Online API access and Permission Have full control of all site collections
At the end of the setup, you need to issue administrator consent ( admin consent ) for the entire client, that is, for the entire client organization with whose data the application will work. Read more about this mechanism in a Microsoft article .
In the API Permissions section, click Grant admin consent for <tenant name> . To confirm, click Yes :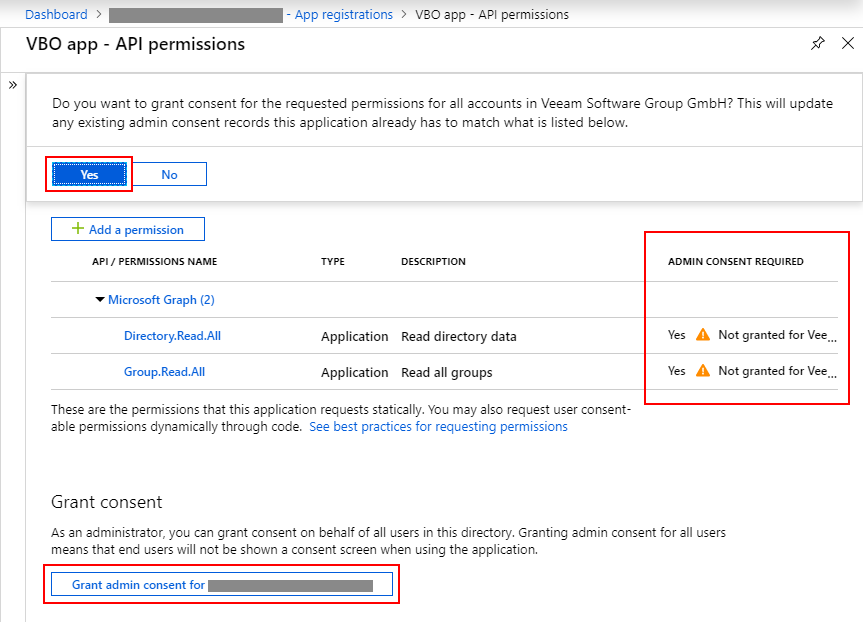
Now you can begin to configure the secret or certificate of the application.- All the same, in the App registrations section, select the newly created application, then click Certificates & secrets and select New client secret or Upload certificate .
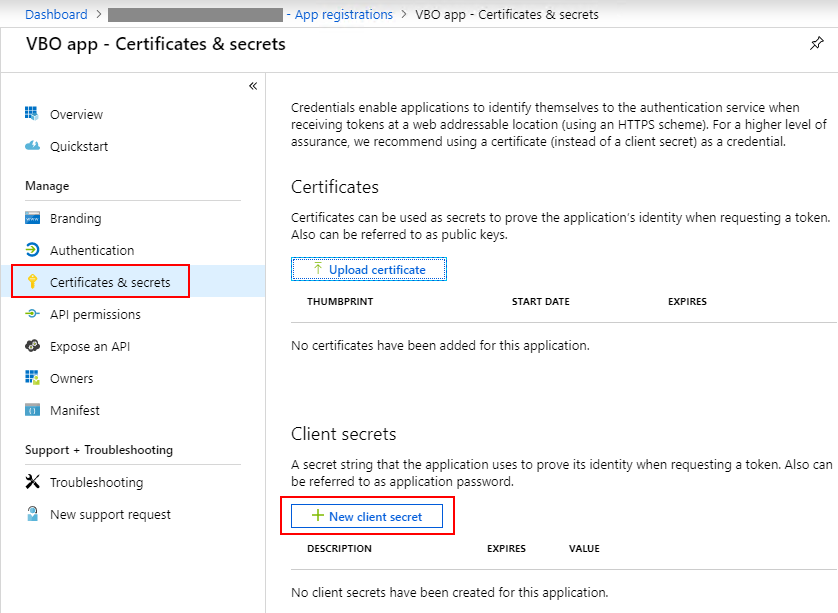
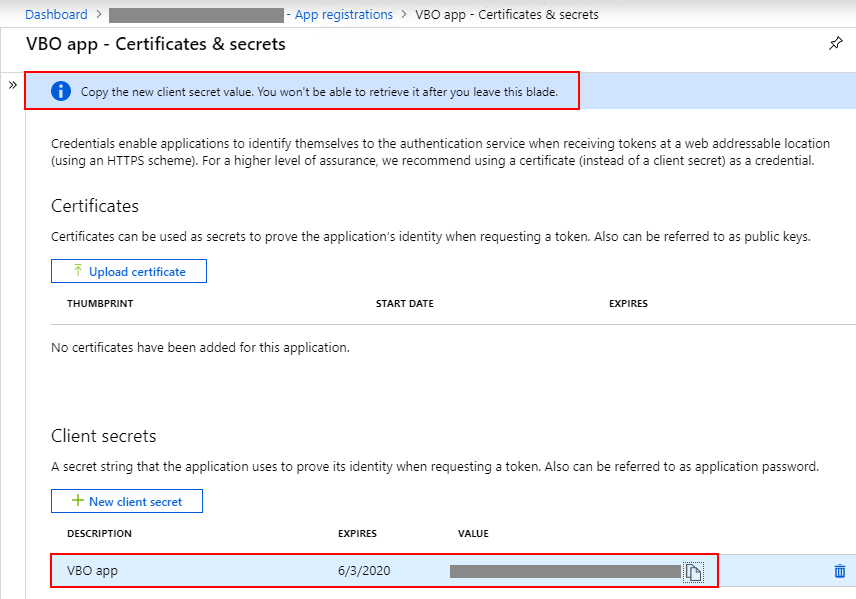
- For a secret you need to enter a description and expiration date. Please note that the secret code must be copied right away, because it won’t be shown again - and you will need to specify it in the Add Organization wizard (which is where we started this explanation):
Hurray, this part of the extraction of the necessary parameters is completed! Move on.Get the application password
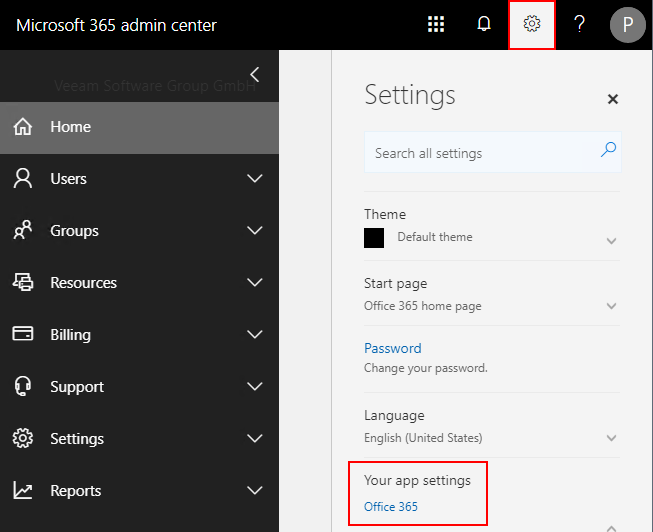
If you already have an account to use MFA when working with Office 365, and it has all the roles and permissions that are required for Veeam Backup for Microsoft Office 365 , you can create a new application password:- You need to log in to Office 365 with this account and pass an additional security check. Go to user settings and click Your app settings :
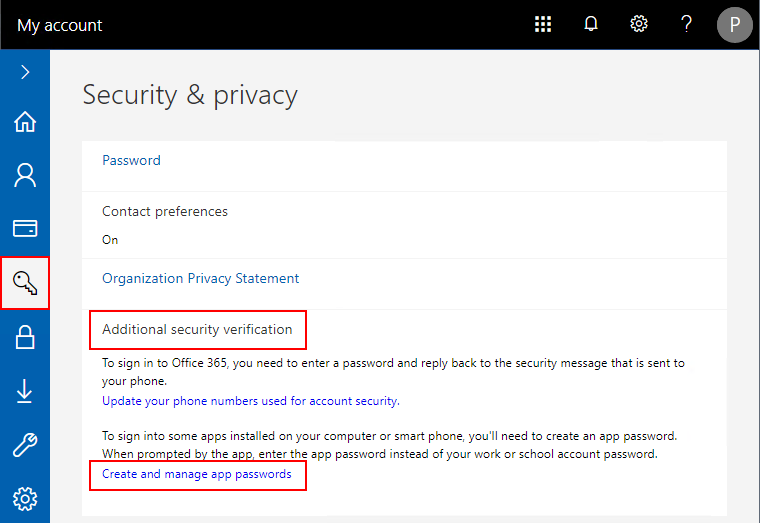
- You will be redirected to the page https://portal.office.com/account , where you will need to go to the Security & privacy section and select Create and manage app passwords there :
- Create a new application password, copy it to the clipboard, and when you go through the Add Organization wizard, enter it.
Note: It is recommended to use the application password only once, and if necessary, you can simply generate a new password as described above.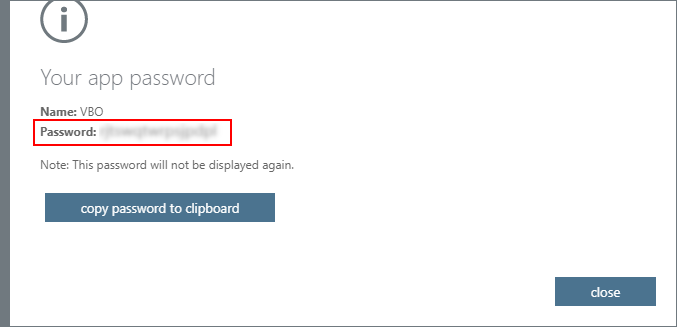
You now have a complete set of options that you can specify when adding an Office 365 organization to Veeam Backup for Microsoft Office 365 . Do not forget to make sure that you specified the correct deployment option ( Microsoft Office 365 ) and the correct authentication method (in our case, Modern authentication ).
Note: Keep in mind that you can use different or identical accounts to access Exchange Online and SharePoint Online (along with OneDrive for Business).
If you plan to use multiple applications to run Exchange Online and SharePoint Online, be sure to pre-register these applications by following the procedure in this article.Sitelinks
- Article on Habré about the decision of Veeam Backup for Microsoft Office 365
- You can download a trial version of the commercial edition of the solution from here.
- You can download the free edition of Community Edition from here.
- User Manual (in English)
- New features of version 3.0 (video in Russian)
- Microsoft article on disabling basic authentication in Office 365