Software Defined Radio - how does it work? Part 5
- Tutorial
Hi, Habr.
In the previous part , signal reception using GNU Radio was discussed. Now we will consider the inverse problem - the transmission of signals of various types of modulation.
As with reception, with GNU Radio you can create a sophisticated software system for transmitting signals without writing a single line of code. But first, let's look at SDR devices that can work not only on reception but also on transmission, ranging from megahertz to gigahertz.
Continued under the cut.
Unlike the cheap RTL SDR V3 receiver, which you can buy for $ 30, you need more serious and expensive hardware to work on transmission. However, the choice is now quite large. I do not consider here purely "amateur" SDR transceivers (Flex / Icom / Yaesu, etc.), because there is little left of SDR in them and they will not work for us, we will consider full-fledged SDRs designed for experiments with DSPs that allow you to transfer anything in the format we need.
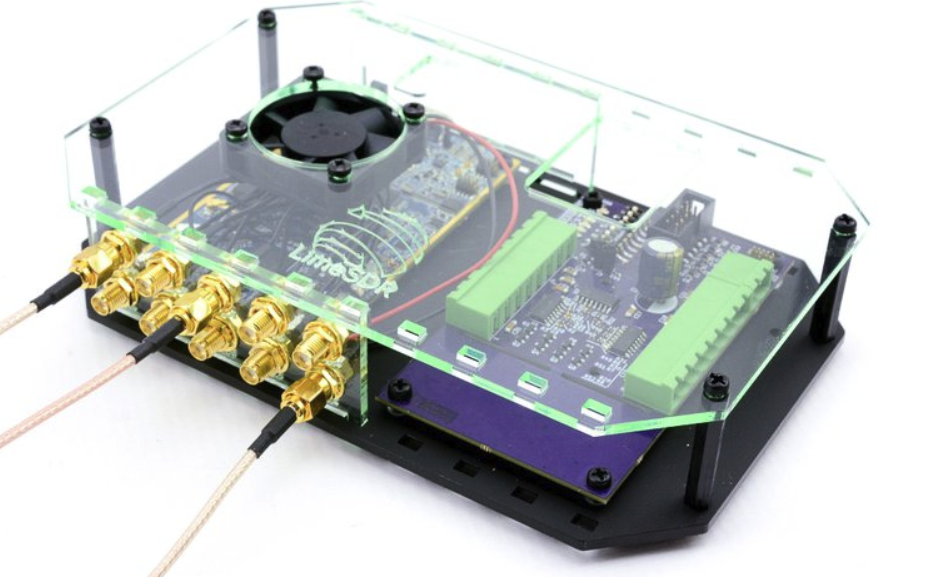
LimeSDR and LimeSDR Mini
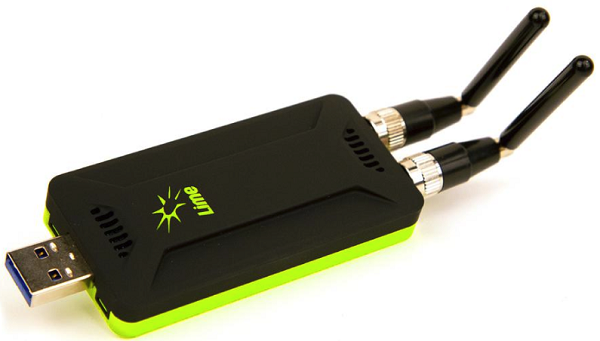
An interesting series of devices that cover the range of reception / transmission from about 10 MHz to 3.5 GHz. LimeSDR formally operates from 100KHz, but the sensitivity there according to reviews, none.
The issue price is about $ 200, but it can be problematic to buy a board, because they are sold exclusively through crowdsupply and are not always available. The authors raised money for $ 2 million but did not get their own web server and a full-fledged store. However, to their credit, all orders were sent.
Adalm Pluto SDR

Analog Devices board designed primarily for students. The cheap “SDR for the poor” option is around $ 120, the transmit / receive range is from 300MHz to 3.8GHz.
HackRF

One of the first motherboards of this kind, which appeared about 5-6 years ago, has a frequency range from 1 MHz to 6 GHz. The board is quite old, and for its parameters, expensive ($ 300-400), it does not know how to work in full duplex and has an 8-bit DAC / ADC. Now there are Chinese clones, but I can not say anything about their quality.
There are other models (Ettus Research, BladeRF, Red Pitaya), they are interesting, but not cheap and most are unlikely to take them. For a beginner, LimeSDR would probably be the best choice. But it must be emphasized that all these boards are designed for experiments with digital signal processing - they are not transceivers in the amateur radio sense, their output power is about 50 mW, the device does not have attenuators, amplifiers, filters, and for CQ DX they are not optimized at all (yes and even r / l software for them is usually not). Although I transmitted a HSRR wspr signal at 7 and 14 MHz, and it was received at 1000 km, which is quite a good result for 50 mW and a room antenna.
Of course, this list does not claim to be a complete review, but for a general understanding, I hope, is enough. There is a useful tablet, although a bit outdated, but you can roughly understand the parameters of different devices:

To begin with, an important note: all experiments when working on transmission should be carried out with minimal power and in the allowed ranges, so as not to interfere with other services. In principle, it’s difficult to prevent someone from 10mW, but the radio must also be kept clean;)
So, we launch GNU Radio and proceed (if anyone missed the previous part , it is advisable to read it in order to better understand how to use this program).
It is important to understand the general principle - since we have Software Defined radio, we can transmit anything within the device’s bandwidth. We only need to create the necessary digital stream, and the DAC will broadcast everything “as is” on the air. As it was written in the previous part, the output to GNU Radio is called Sink, the specific name will depend on the model of the device.
Simple tone.
Simple test: just connect the source of the sine wave to the transmitter.

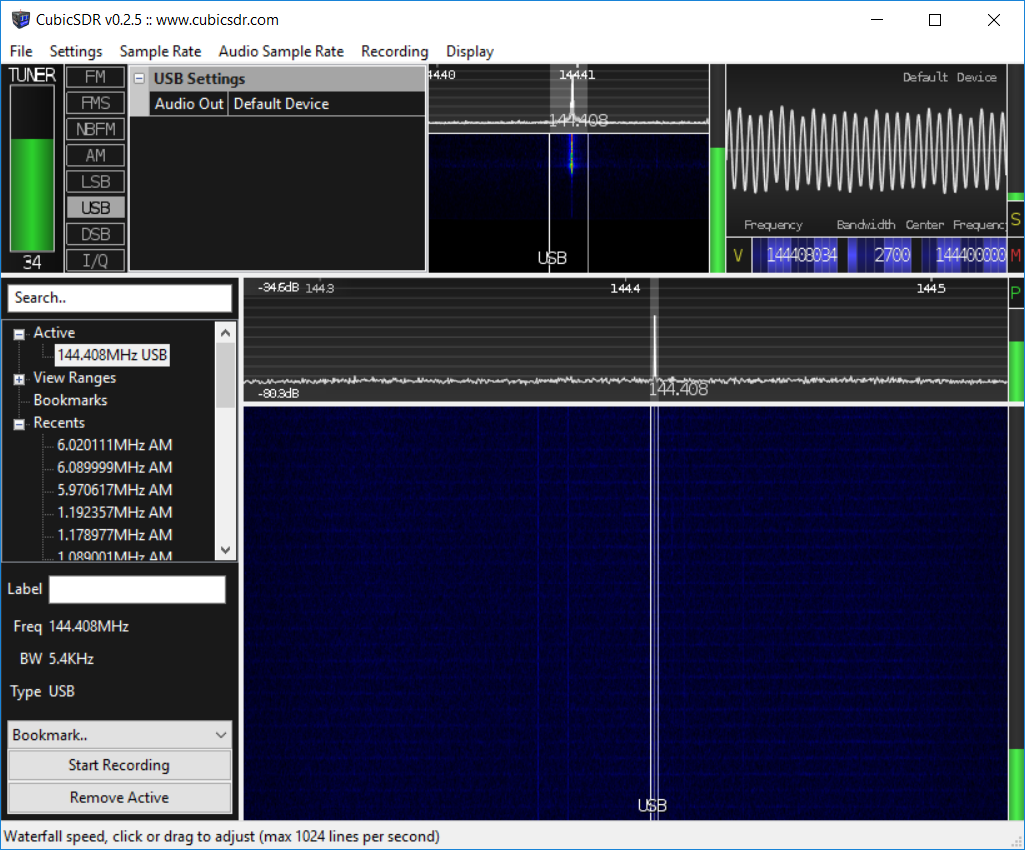
Not very interesting, but for some verification, or as a simple signal generator, it can be useful. We start as the control receiver RTL SDR, and we see our signal.
NFM
Let's go further - consider how to transfer something more useful, such as sound from a WAV file or microphone. GNU Radio has a ready-made NBFM Transmit unit for this. He does all the necessary work - converts our audio stream into a complex IQ-signal with frequency modulation, which "understands" the SDR.

The result in the screenshot is the sound is transmitted, and you can hear it if you select FM. You can also receive such a signal on portable radios.
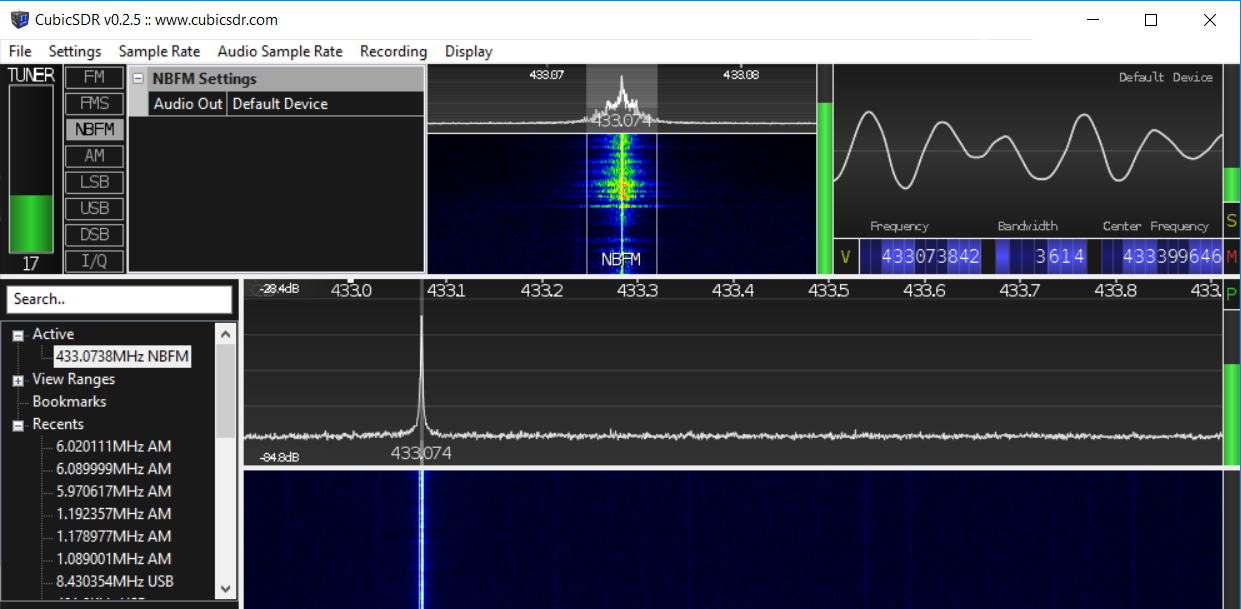
As you can see, the frequency of reception and transmission was changed to 433 MHz - an unlicensed LPD range.
Controlling a wireless switch
Now let's look at something more interesting. Since we are talking about the 433 MHz band, we can demonstrate one “dirty hack” - playing back a pre-recorded signal. This will allow us not to understand the encoding of the signal, but simply to record and transmit it, without understanding what is inside. The hack is "dirty" almost literally, because we will play the signal recorded from the air, which is far from ideal.
For example, take a cheap 434MHz wireless switch. I used something like this, bought at Mediamarkt.
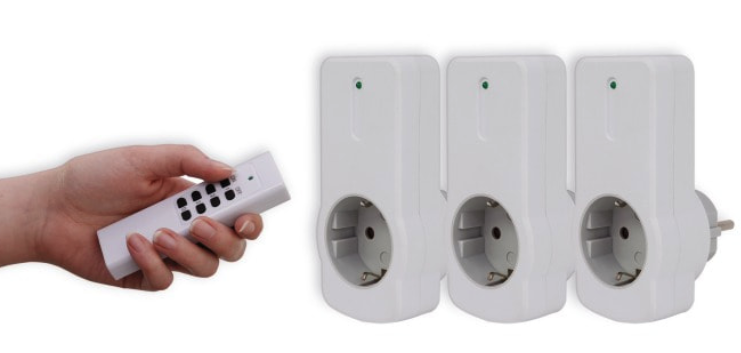
We will not deal with its format, but simply record the signal “as is”. To do this, put together a simple circuit in GNU Radio.

The sampling rate was chosen small so as not to write too wide a band - the file will take up a lot of space, and the excess will be broadcast.
FFT Sink is needed for visualization to make sure that the signal really is:

Turn on the recording, press the button on the remote control, turn off the recording. By the way, you can open the recorded file in Cool Edit and make sure that the signal is recorded normally:
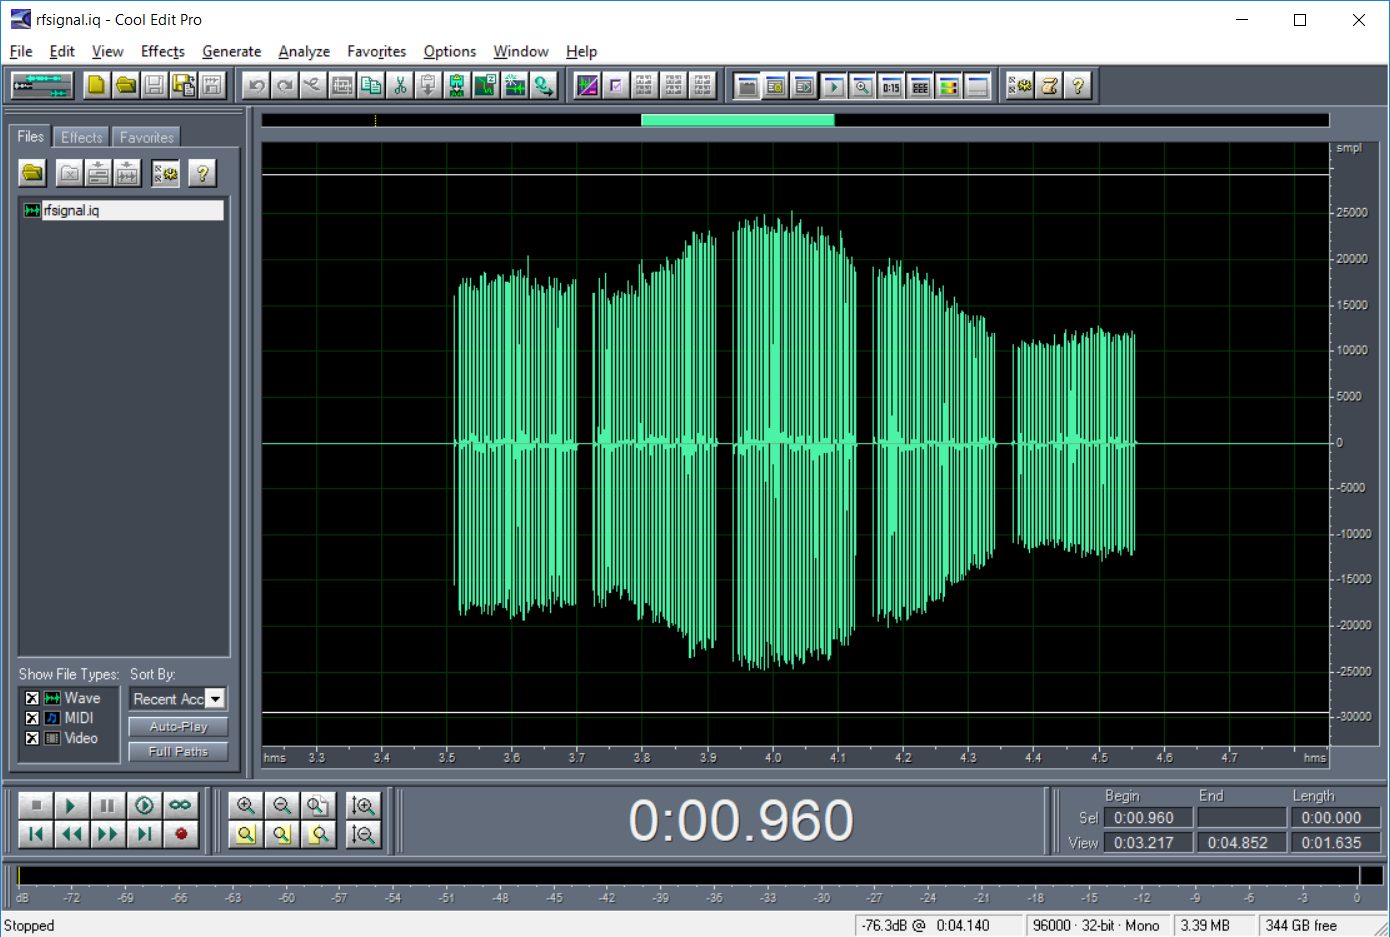
Now we “collect” the transmitting part of the circuit: we load the signal from the file and simply send it for transmission.

We should also mention the Throttle block, which indicates at what sampling rate to read data from a file (this information is not in the file itself). The Multiply Const block amplifies the signal in case its level in the recording was insufficient.
Then everything is simple - we start the transmitter, make sure that the desk lamp lights up :) At full transmission power, we managed to light the lamp from the other end of the apartment. However, the method, as already mentioned, is quite “dirty” - the signal itself is not perfect, and all that is on the air is transmitted, including recorded noise and possibly signals from other devices that accidentally fell into the recording. But for tests or controlling a radio-controlled machine within a room, it’s fine.
As you can see, the SDR provides a fairly large field for experiments with different signals, and this is quite simple.
Everything conceived again did not fit into one part. In the next part, more complex types of modulation will be considered.
In the previous part , signal reception using GNU Radio was discussed. Now we will consider the inverse problem - the transmission of signals of various types of modulation.

As with reception, with GNU Radio you can create a sophisticated software system for transmitting signals without writing a single line of code. But first, let's look at SDR devices that can work not only on reception but also on transmission, ranging from megahertz to gigahertz.
Continued under the cut.
Iron
Unlike the cheap RTL SDR V3 receiver, which you can buy for $ 30, you need more serious and expensive hardware to work on transmission. However, the choice is now quite large. I do not consider here purely "amateur" SDR transceivers (Flex / Icom / Yaesu, etc.), because there is little left of SDR in them and they will not work for us, we will consider full-fledged SDRs designed for experiments with DSPs that allow you to transfer anything in the format we need.
LimeSDR and LimeSDR Mini

An interesting series of devices that cover the range of reception / transmission from about 10 MHz to 3.5 GHz. LimeSDR formally operates from 100KHz, but the sensitivity there according to reviews, none.
The issue price is about $ 200, but it can be problematic to buy a board, because they are sold exclusively through crowdsupply and are not always available. The authors raised money for $ 2 million but did not get their own web server and a full-fledged store. However, to their credit, all orders were sent.
Adalm Pluto SDR

Analog Devices board designed primarily for students. The cheap “SDR for the poor” option is around $ 120, the transmit / receive range is from 300MHz to 3.8GHz.
HackRF

One of the first motherboards of this kind, which appeared about 5-6 years ago, has a frequency range from 1 MHz to 6 GHz. The board is quite old, and for its parameters, expensive ($ 300-400), it does not know how to work in full duplex and has an 8-bit DAC / ADC. Now there are Chinese clones, but I can not say anything about their quality.
There are other models (Ettus Research, BladeRF, Red Pitaya), they are interesting, but not cheap and most are unlikely to take them. For a beginner, LimeSDR would probably be the best choice. But it must be emphasized that all these boards are designed for experiments with digital signal processing - they are not transceivers in the amateur radio sense, their output power is about 50 mW, the device does not have attenuators, amplifiers, filters, and for CQ DX they are not optimized at all (yes and even r / l software for them is usually not). Although I transmitted a HSRR wspr signal at 7 and 14 MHz, and it was received at 1000 km, which is quite a good result for 50 mW and a room antenna.
Of course, this list does not claim to be a complete review, but for a general understanding, I hope, is enough. There is a useful tablet, although a bit outdated, but you can roughly understand the parameters of different devices:

Software
To begin with, an important note: all experiments when working on transmission should be carried out with minimal power and in the allowed ranges, so as not to interfere with other services. In principle, it’s difficult to prevent someone from 10mW, but the radio must also be kept clean;)
So, we launch GNU Radio and proceed (if anyone missed the previous part , it is advisable to read it in order to better understand how to use this program).
It is important to understand the general principle - since we have Software Defined radio, we can transmit anything within the device’s bandwidth. We only need to create the necessary digital stream, and the DAC will broadcast everything “as is” on the air. As it was written in the previous part, the output to GNU Radio is called Sink, the specific name will depend on the model of the device.
Simple tone.
Simple test: just connect the source of the sine wave to the transmitter.

Not very interesting, but for some verification, or as a simple signal generator, it can be useful. We start as the control receiver RTL SDR, and we see our signal.

NFM
Let's go further - consider how to transfer something more useful, such as sound from a WAV file or microphone. GNU Radio has a ready-made NBFM Transmit unit for this. He does all the necessary work - converts our audio stream into a complex IQ-signal with frequency modulation, which "understands" the SDR.

The result in the screenshot is the sound is transmitted, and you can hear it if you select FM. You can also receive such a signal on portable radios.

As you can see, the frequency of reception and transmission was changed to 433 MHz - an unlicensed LPD range.
Controlling a wireless switch
Now let's look at something more interesting. Since we are talking about the 433 MHz band, we can demonstrate one “dirty hack” - playing back a pre-recorded signal. This will allow us not to understand the encoding of the signal, but simply to record and transmit it, without understanding what is inside. The hack is "dirty" almost literally, because we will play the signal recorded from the air, which is far from ideal.
For example, take a cheap 434MHz wireless switch. I used something like this, bought at Mediamarkt.

We will not deal with its format, but simply record the signal “as is”. To do this, put together a simple circuit in GNU Radio.

The sampling rate was chosen small so as not to write too wide a band - the file will take up a lot of space, and the excess will be broadcast.
FFT Sink is needed for visualization to make sure that the signal really is:

Turn on the recording, press the button on the remote control, turn off the recording. By the way, you can open the recorded file in Cool Edit and make sure that the signal is recorded normally:

Now we “collect” the transmitting part of the circuit: we load the signal from the file and simply send it for transmission.

We should also mention the Throttle block, which indicates at what sampling rate to read data from a file (this information is not in the file itself). The Multiply Const block amplifies the signal in case its level in the recording was insufficient.
Then everything is simple - we start the transmitter, make sure that the desk lamp lights up :) At full transmission power, we managed to light the lamp from the other end of the apartment. However, the method, as already mentioned, is quite “dirty” - the signal itself is not perfect, and all that is on the air is transmitted, including recorded noise and possibly signals from other devices that accidentally fell into the recording. But for tests or controlling a radio-controlled machine within a room, it’s fine.
Conclusion
As you can see, the SDR provides a fairly large field for experiments with different signals, and this is quite simple.
Everything conceived again did not fit into one part. In the next part, more complex types of modulation will be considered.
