Particle systems: a Christmas story

Christmas has always been one of my favourite times of the year. For me, Christmas is a season that brings so much love, laughter, happiness, and other magical things into our lives.
I was born and raised in Spain, more specifically in Tenerife, a sunny subtropical island in the middle of the Atlantic Ocean just off the African coast. I have to say that Christmas in Tenerife is very different to my the last two Christmases I’ve spent in London since joining Badoo.
One amazing plus of living in London is that I have got to see snow for the first time in my life, real snowflakes falling from the sky. Just incredible!
Talking of snowflakes, I have an interesting story to tell you about something that happened to me one day in the office the last Christmas. It was right before I was heading home to Tenerife to spend a few days with my family.
It just so happened that last December I’d been assigned a very interesting ticket with the following description
Uhmm, very interesting. Badoo wanted to create a Christmas animation for our iOS application that included snowflakes and I was the lucky guy to get the job,, I loved the idea! But I didn’t know where to start.
As usual there was a Sketch file linked to my ticket and luckily there was a design as well that looked like this:
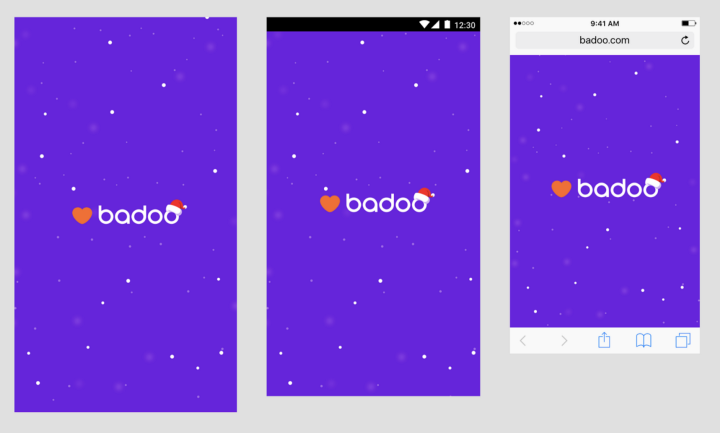
So, at least I knew what we wanted but I wasn’t sure exactly what was expected of these snowflakes. I went to find out more from the design team.
As I suspected, they had already built an amazing version of the animation using ‘After Effects’.
Basically, they told me that the idea was to add animated snowflakes which would fall from the top of the screen during the existing app startup animation (they also wanted to see a Santa’s hat added to the logo but being a simple asset replacement it won’t figure in this article).
I knew that the startup animation in iOS used Lottie because I had been there some time before when it was implemented (for more details on that check out this article by Radek Cieciwa. However, I told the designers that I will think about some ideas because maybe there was a simpler way to add the snowflakes without needing to use Lottie. I started researching various different approaches.
This is the splash animation in Badoo as Radek implemented it. Neat!
And here’s the snowflakes animation that I built on top. Want to know how I did it? Keep reading.
Particle Systems
After reading some interesting documentation about animations I was reminded that ‘particle systems’ is a common technique for achieving this kind of animation in movies and video games.
Wikipedia describes this perfectly:
«A particle system is a technique in game physics, motion graphics, and computer graphics that uses a large number of very small sprites, 3D models, or other graphic objects to simulate certain kinds of „fuzzy“ phenomena, which are otherwise very hard to reproduce with conventional rendering techniques — usually highly chaotic systems, natural phenomena, or processes caused by chemical reactions.»
This technique was introduced in 1982, in the film Star Trek II: The Wrath of Khan to create the fictional Genesis effect.
A particle system is composed of one or more individual graphical primitives such as points, lines or images called particles. These particles are displayed/emitted by a particle system.
Each of these particles has attributes that directly or indirectly affect the behavior of the particle, and define how and where the particle is rendered. They can be moved in big numbers and in different directions to create fluid effects.
The animation takes effect when the particles are generated or emitted by its particle system. The system emits particles at random positions within its own region. This region can have different shapes such as a circle, cuboid, line, point, rectangle, sphere, etc.
The system also defines some properties that affects its geometry, generate velocity, and other aspects. For every API for particle emitter systems there are different property names for similar behaviours.
When all these images are emitted simultaneously by the particle system, it creates stunning animations that looks like rain, fire or even snow!
Hands-On
I guessed that Apple probably offered support for particle systems in some of their APIs. I checked and, yes, I was right!
The particle system is part of Core Animation in iOS and I found good documentation about it in CAEmitterLayer and CAEmitterCell.
Once I had all the information about the particles systems and supported API in iOS, I got started on my favourite part, actually implementing the code for my snowflakes animation.
Sadly, Christmas wasn’t going to last forever, of course, so its appearance needed to be controlled remotely so that it could be removed it after 25th December.
As I described earlier, the app startup animation was implemented in Lottie. Then I had to work out how to add the snowflakes to the existing animation without disrupting the existing code because it was going to have to be removed a short time after release.
I found a very simple way to do it. I would inject a new transparent UIView that to display the snowflakes animation between the logo animation and the background, and then I would control the appearance of this view using a remote flag.
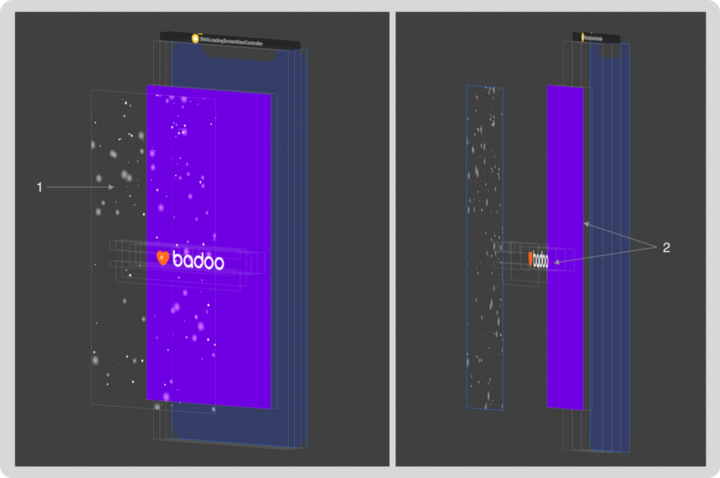
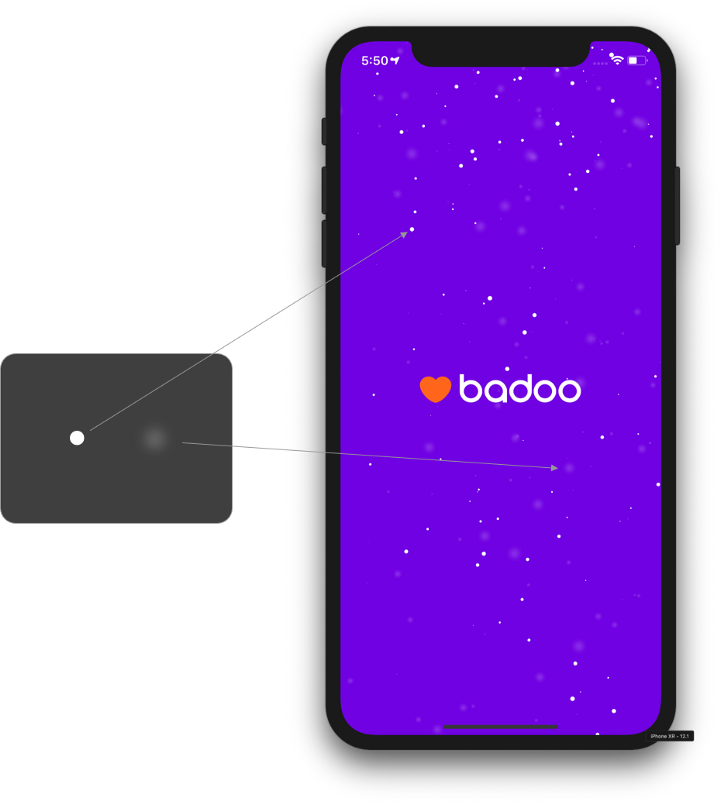
The images above show the views that were used in the final animation.
- The view containing the particle system animation; basically, the snowflakes
- The views used to animate the logo: those animated using Lottie.
Once this problem was solved, I just needed to create a reusable UIView class containing the logic for the particle emitters in order to generate incredible, animated snowflakes.
The first thing I was going to need were image assets for the content of the cell emitters that would represent the actual snowflakes. But they are pretty simple, right?
Each snowflake is just a big, white circle coupled with another big, blurry white circle. I created them myself using Sketch.
Some implementation details
The CAEmitterLayer is a special CALayer that emits, animates, and renders a particle system. It has some properties that allow customisation of the layer’s geometry, positioning and rendering mode, and more.
I started my animation by creating the emitter layer:
let snowEmitterLayer.emitterShape = CAEmitterLayerEmitterShape.line
snowEmitterLayer.beginTime = CACurrentMediaTime()
snowEmitterLayer.timeOffset = 10.0
I only needed three properties to setup my layer:
- emitterShape: This defines the shape of the layer. In my case, I used linear shape because it would allow the snowflakes to move right across all the screen
- beginTime: this property is part of the CAMediaTiming protocol and represents the time when the layer would visually appear after the animation was added to the layer
- timeOffset: the desired effect was to see snowflakes over the whole screen right from the start of the animation. This property is part of the CAMediaTiming protocol and basically functions like a fast forward for the animation. I set a value of 10.0 seconds wich could effectively fast forward the animation and cover the screen with snowflakes (had I set a value of 0.0 seconds, then the snowflakes would started falling slowly from the top and would have taken some time to cover the whole screen.
Having prepared the emitter layer, I then created 2 different emitter cells. The first one for the circular, «heavier» snowflakes and the other one representing the «lighter» snowflakes.
For the «heavier» snowflake effect I used this emitter cell:
let flakeEmitterCell = CAEmitterCell()
flakeEmitterCell.contents = UIImage(named: "snowflake_dot")!.cgImage
flakeEmitterCell.emissionRange = .pi
flakeEmitterCell.lifetime = 20.0
flakeEmitterCell.birthRate = 30
flakeEmitterCell.scale = 0.15
flakeEmitterCell.scaleRange = 0.6
flakeEmitterCell.velocity = 30.0
flakeEmitterCell.velocityRange = 20
flakeEmitterCell.spin = -0.5
flakeEmitterCell.spinRange = 1.0
flakeEmitterCell.yAcceleration = 30.0
flakeEmitterCell.xAcceleration = 5.0
As you can see, I had to setup a number of properties for the cell, all of them important in order to achieve the desired visual effect.
- contents: the CGImage used to represent the snowflake. In this case it is just one of the assets described in the ‘Hands-on’ section above
- emissionRange: defines the angle, in radians, defining a cone around the emission angle. I set PI to allow the particle to be visible with the screen at any angle
- lifetime: defines how many seconds the cell/particle should live
- birthRate: defines the number of this specific particles type to be generated by the emitter layer per second
- scale and scaleRange: sets how large particles should be, 1.0 being the maximum size. The range defines the variation in size between particles created at the same time by the emitter cell, allowing for random cells of different sizes
- velocity and velocityRange: defines the initial velocity of the cell. This varies randomly within the range specified by the velocityRange property
- spin and spinRange: these define the rotational velocity, measured in radians per second, and vary by a random amount within the range specified by the spinRange property
- yAcceleration and xAcceleration: the components of an acceleration vector applied to cell
I also needed a second emitter to create the soft snowflake. For this emitter, all I had to do was to set the same values for all the properties, except two:
- contents: in this case it would be a big, blurry circular image asset
- velocity: in order to simulate a lighter snowflake, I slowed down the ‘falling' speed
let blurryFlakeEmitterCell = CAEmitterCell()
blurryFlakeEmitterCell.contents = UIImage(named: "snowflake_blurry_dot")?.cgImage
blurryFlakeEmitterCell.velocity = 40
...
// the rest of the properties has the same values as "flakeEmitterCell"
The rest was pretty simple, I just needed to link the layer and the cells together. Result!
snowEmitterLayer.emitterCells = [flakeEmitterCell, blurryFlakeEmitterCell]
self.layer.addSublayer(snowEmitterLayer)
Conclusions
It didn’t take me long to have a working Badoo solution for the snowflakes animation and the final result looked really nice. I went back to the designers with my simple and clean implementation and they loved it.
Animations created using particle systems can turn out to be pretty impressive and are relatively easy to implement, providing you’ve got the right tools.