Weapons for VR - [RAILGUN TUTORIAL]
- Tutorial
Introduction
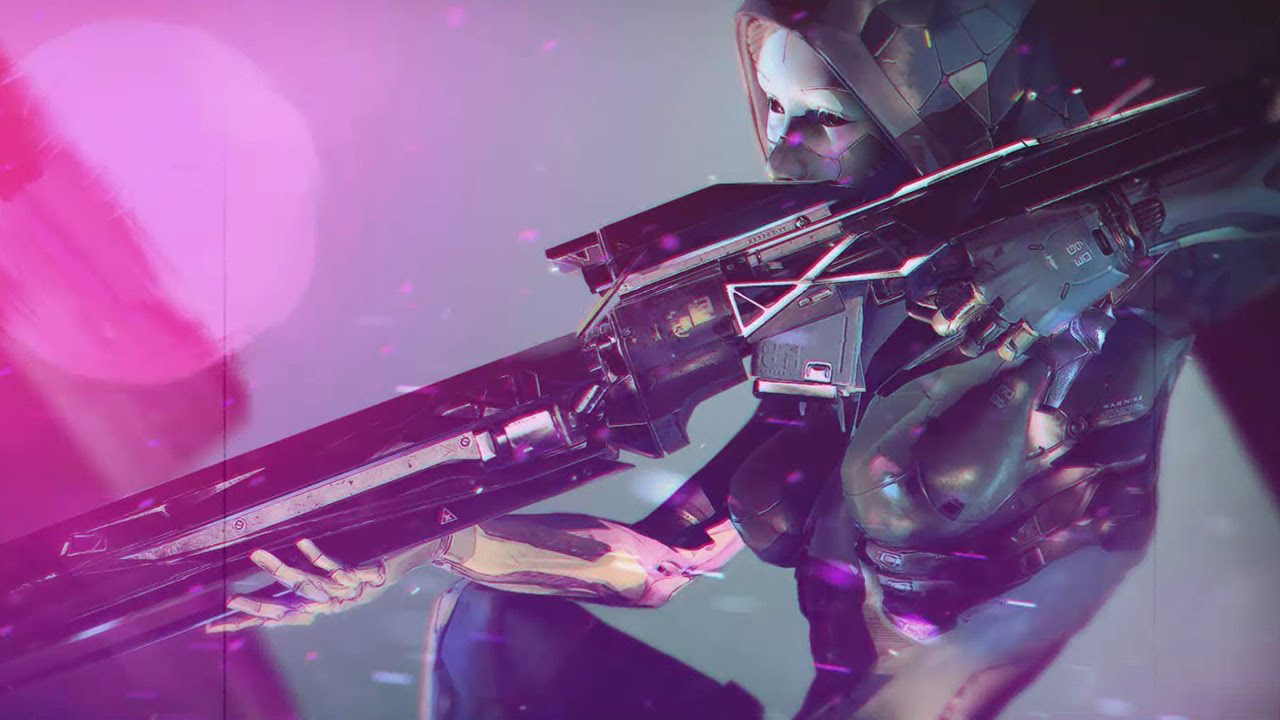
The task for the weapon was formulated simultaneously with the task of the characters. The weapon is made for a sci-fi network shooter for a VR platform. The style of the weapon was chosen under the influence of the design of the 90s, with a slight bias in Retro design. The project is a VR experiment and is under development.
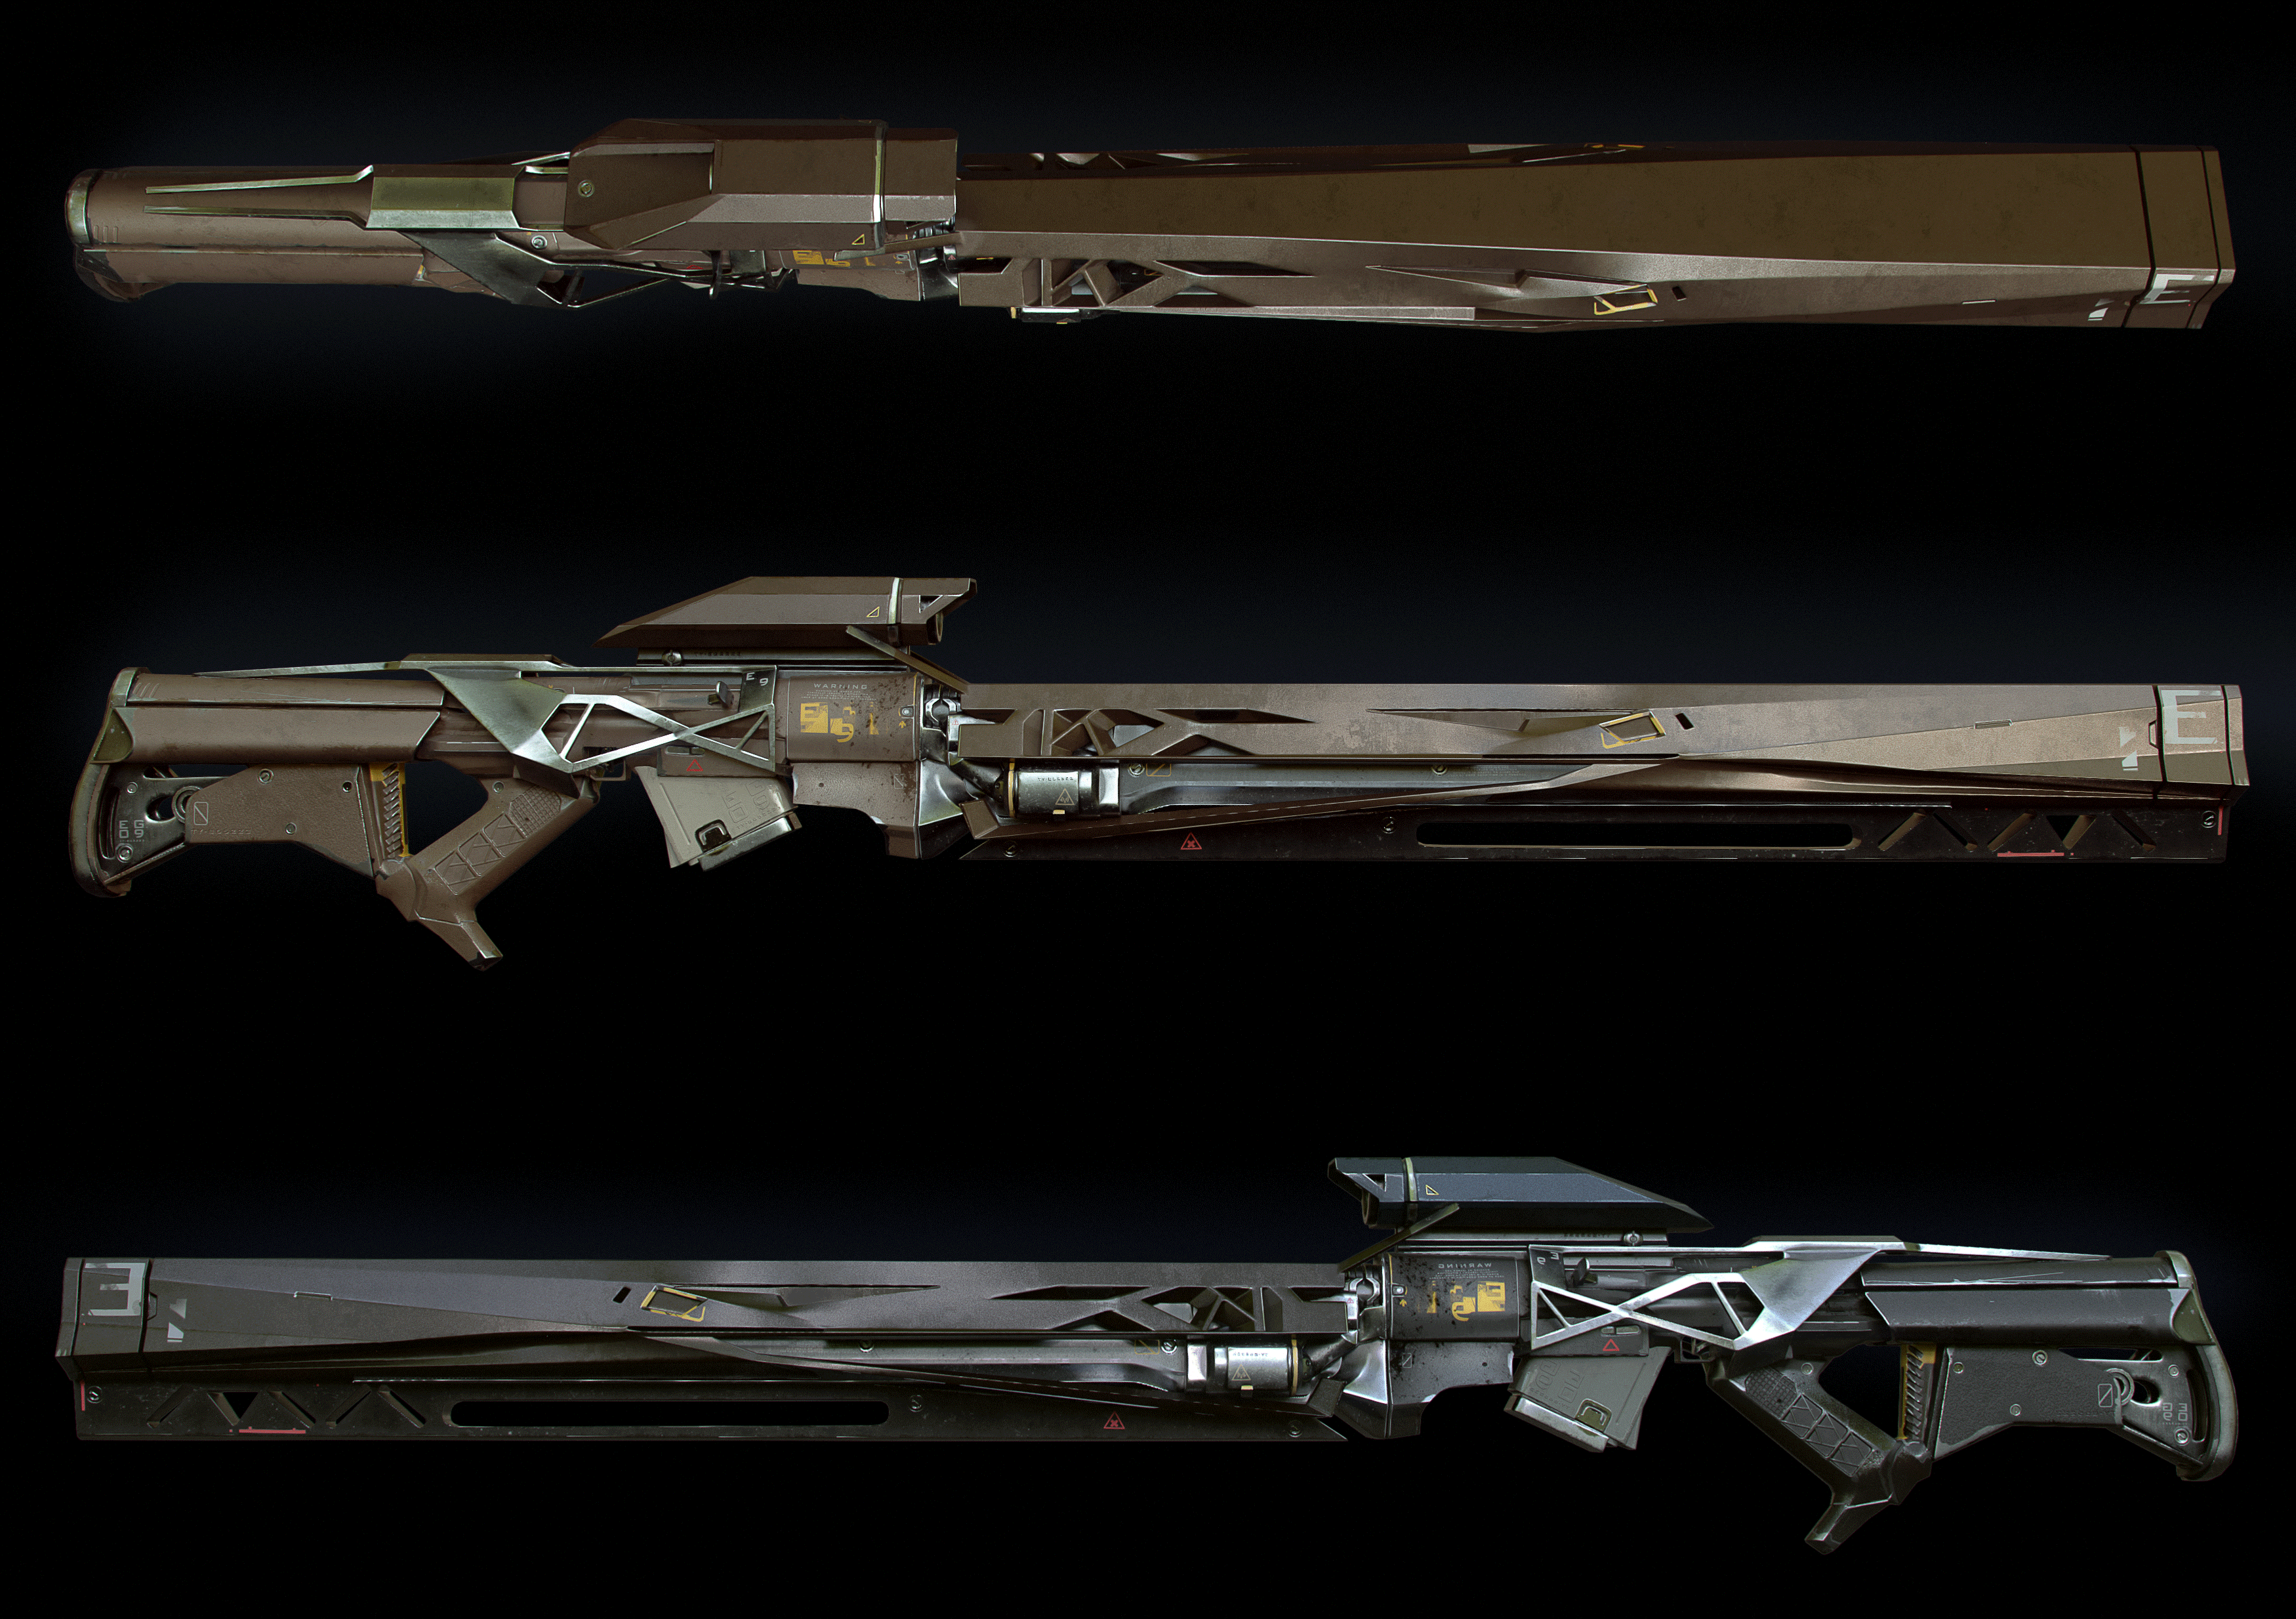
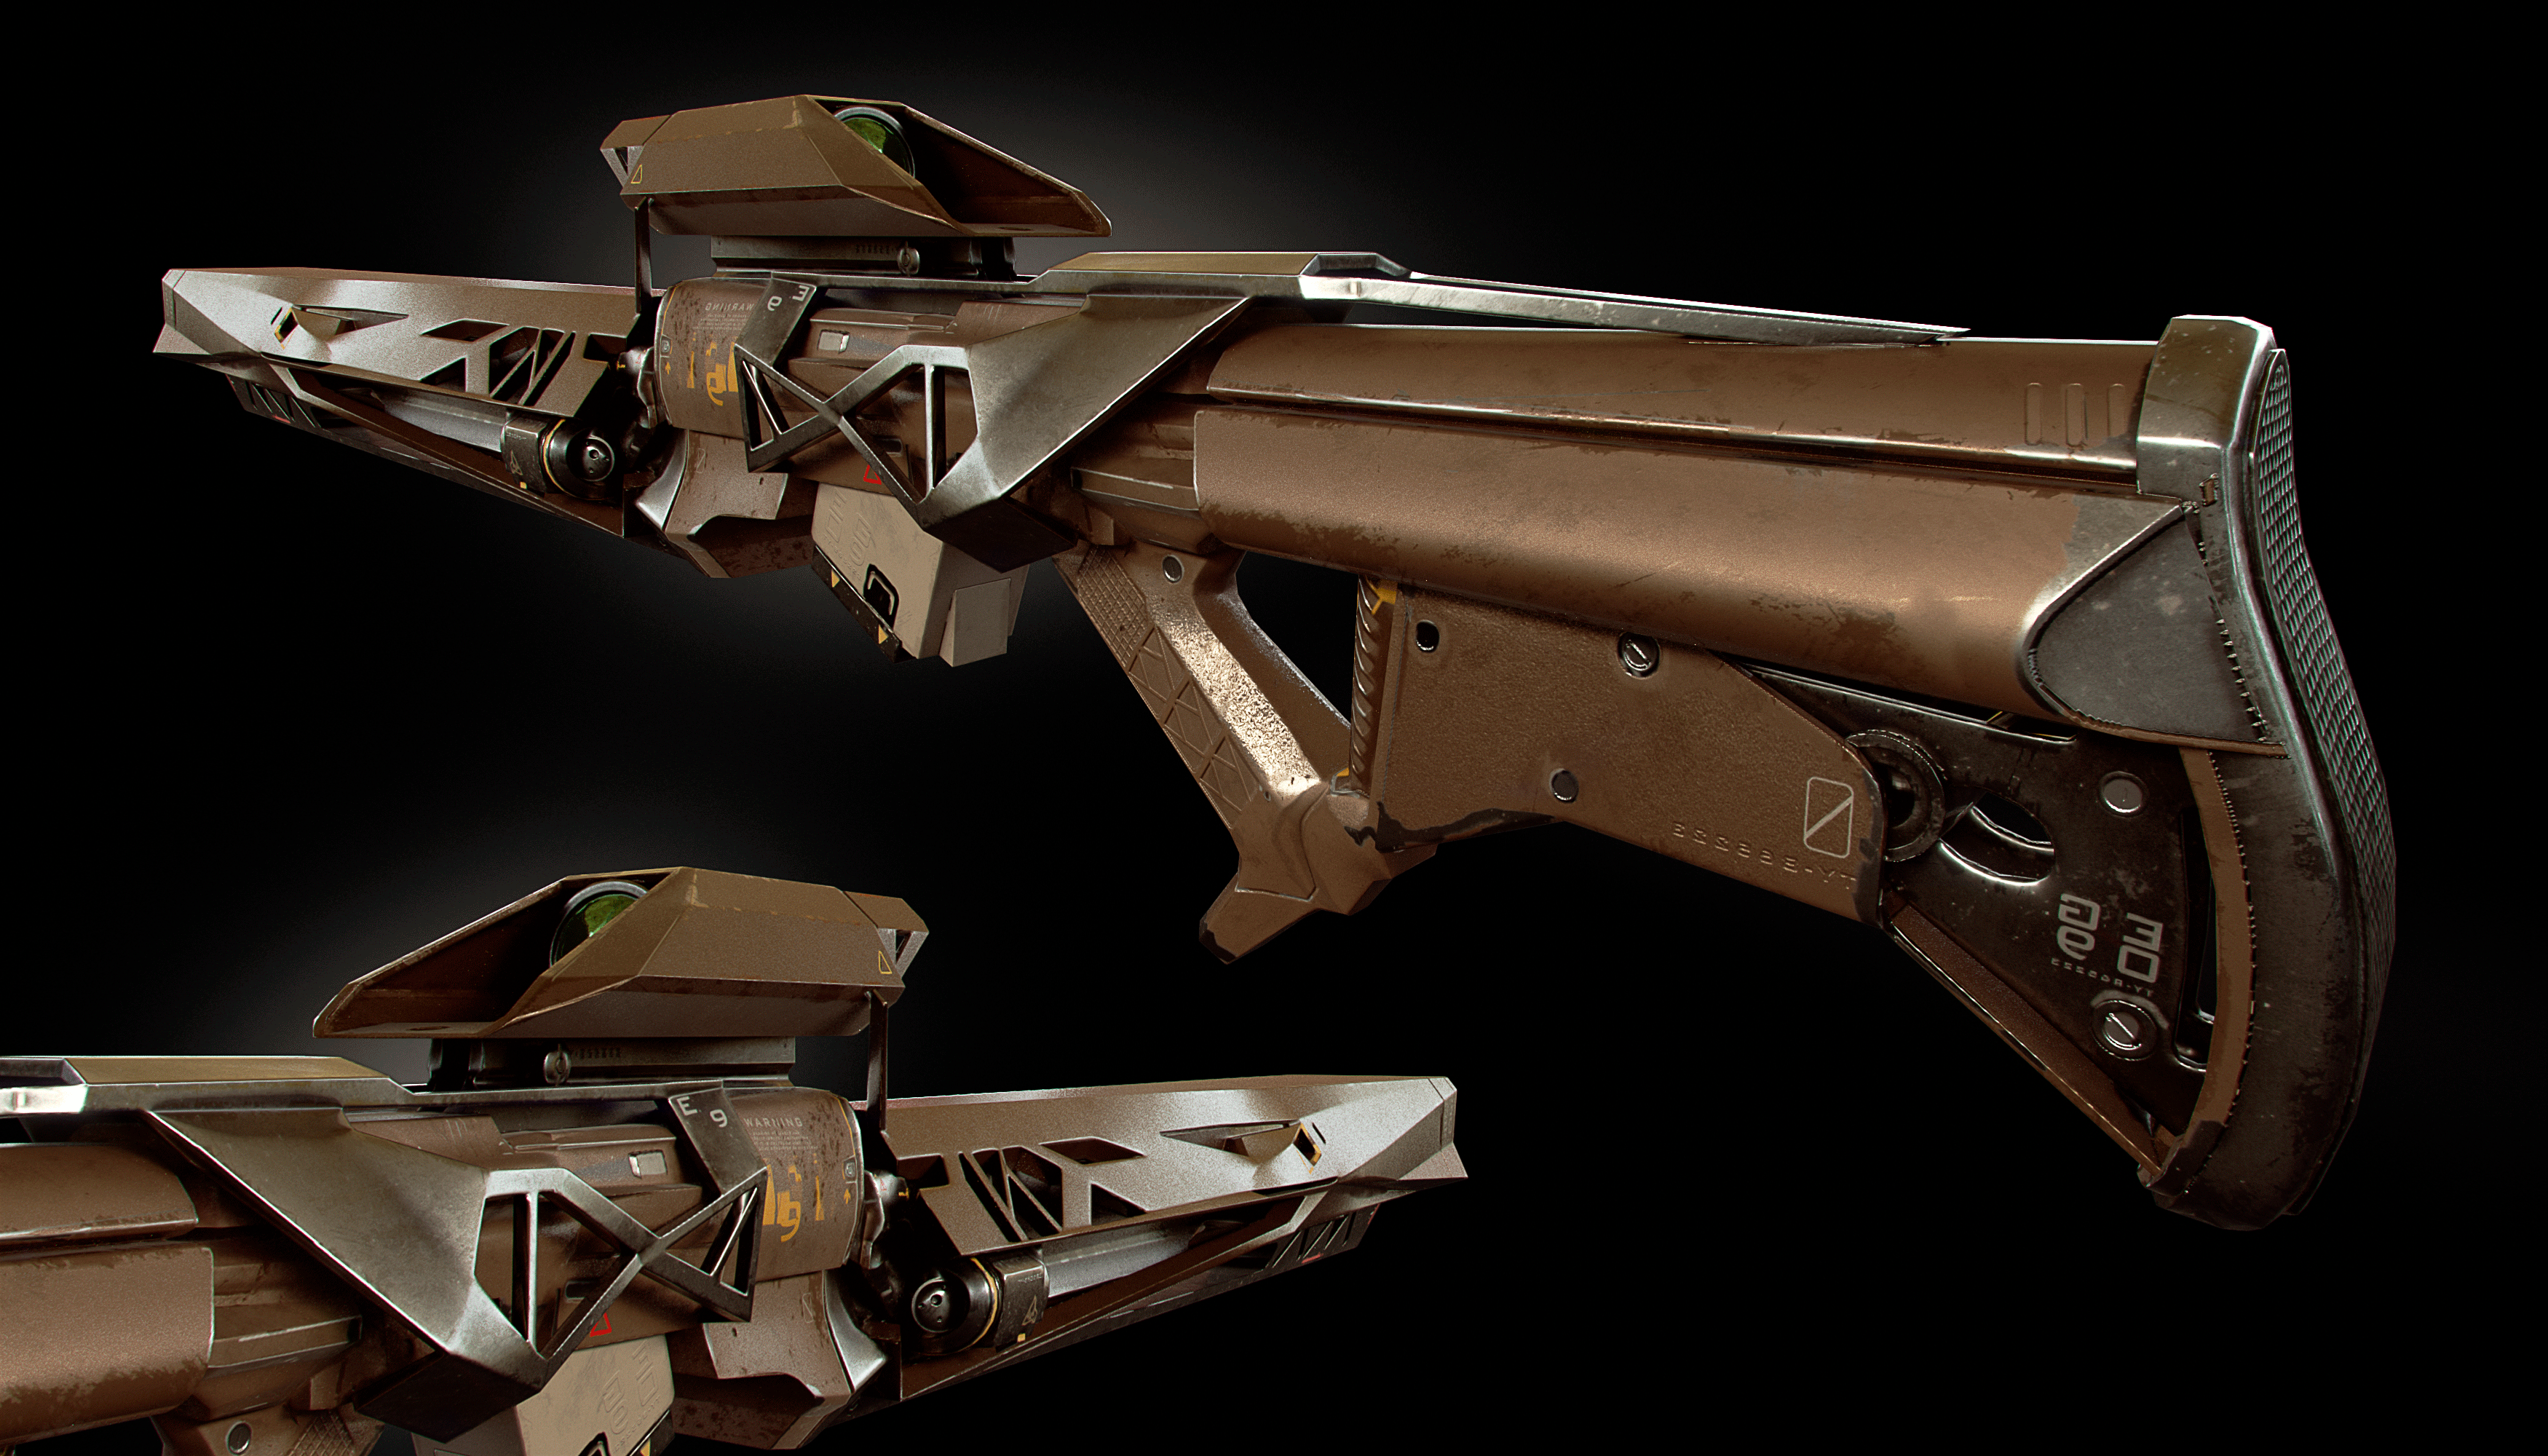
The idea of a linear sniper weapon
The project allowed me to create weapons from the distant 2000. At that time, my soul was owned by games like Unreal tournament and Quake. The goal was to convey the feeling of the good old Railgun. Using sharp angles, triangles and bruises, he created a visual tension in the central part of the weapon, similar to a compressed spring, and this is where the energy generator is located. Sharp angles and chopped lines visually indicate that the shot is fast and the weapon is aggressive. If you look along the barrel towards the muzzle, then the details become smaller, the surface is cleaner and smoother. Visual tension towards the muzzle weakens and a charge functionally breaks out here. I advise the book .
Sketch and High Poly Model
For commercial orders, I try to do all the concepts and drafts in 3D, because in the first days this allows me to give out a result with which you can interact in the future. Rotate and place in editors for tests. Do not make a detailed 2D sketch, this is not my feature.

As my experience has shown, a good idea does not appear immediately. Personally, I only get a good idea after the second draft. This approach to work did not take root right away. This happened after I began to calmly accept the result of my work and indifferently.
Sketch correction
Today, this approach looks like a standard for game projects. The only thing I allow myself is to adjust the design in Photoshop in a similar way. At the last iterations of the model, many unnecessary lines and details are missing.
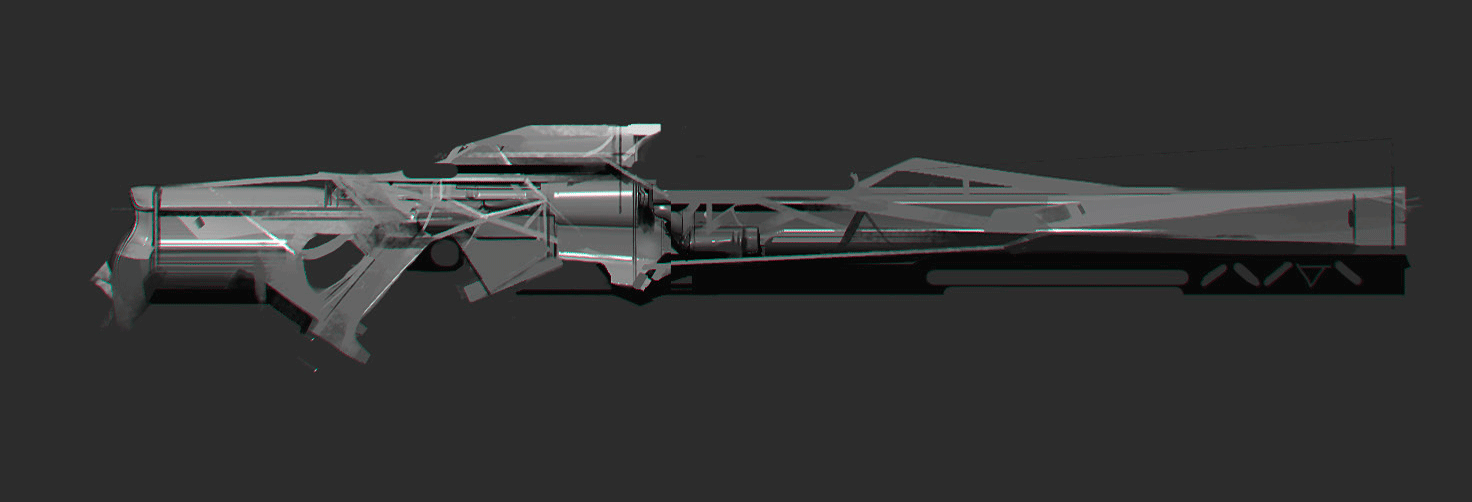
The first 3d sketch I do very quickly. A flat grid topology is not in the first place, since I pay special attention only to forms and design, I spend no more than 2-3 hours on a sketch. In one working day, I sort through 4-5 different options.
To play with real-time materials, I use the Marmoset toolbag visualization. It gives an idea of what textures can be. The render quality from Marmoset is sufficient for presentation to the customer with minimal overpaint.

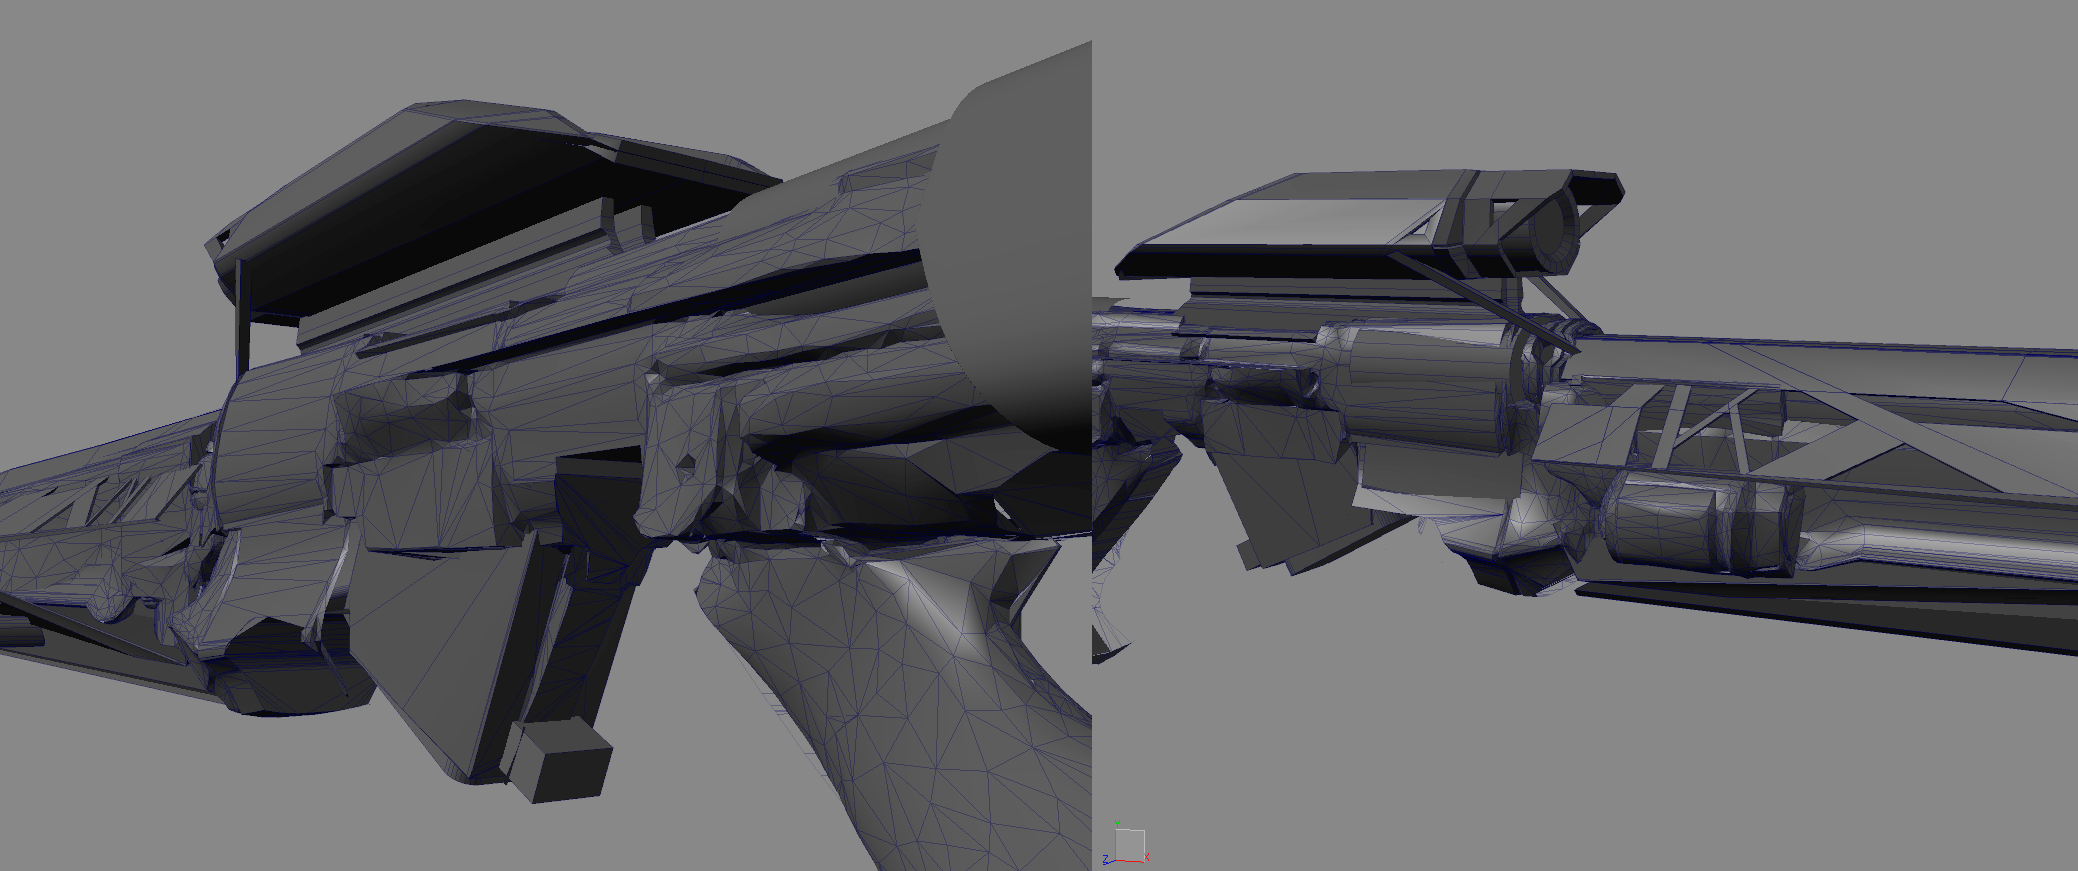
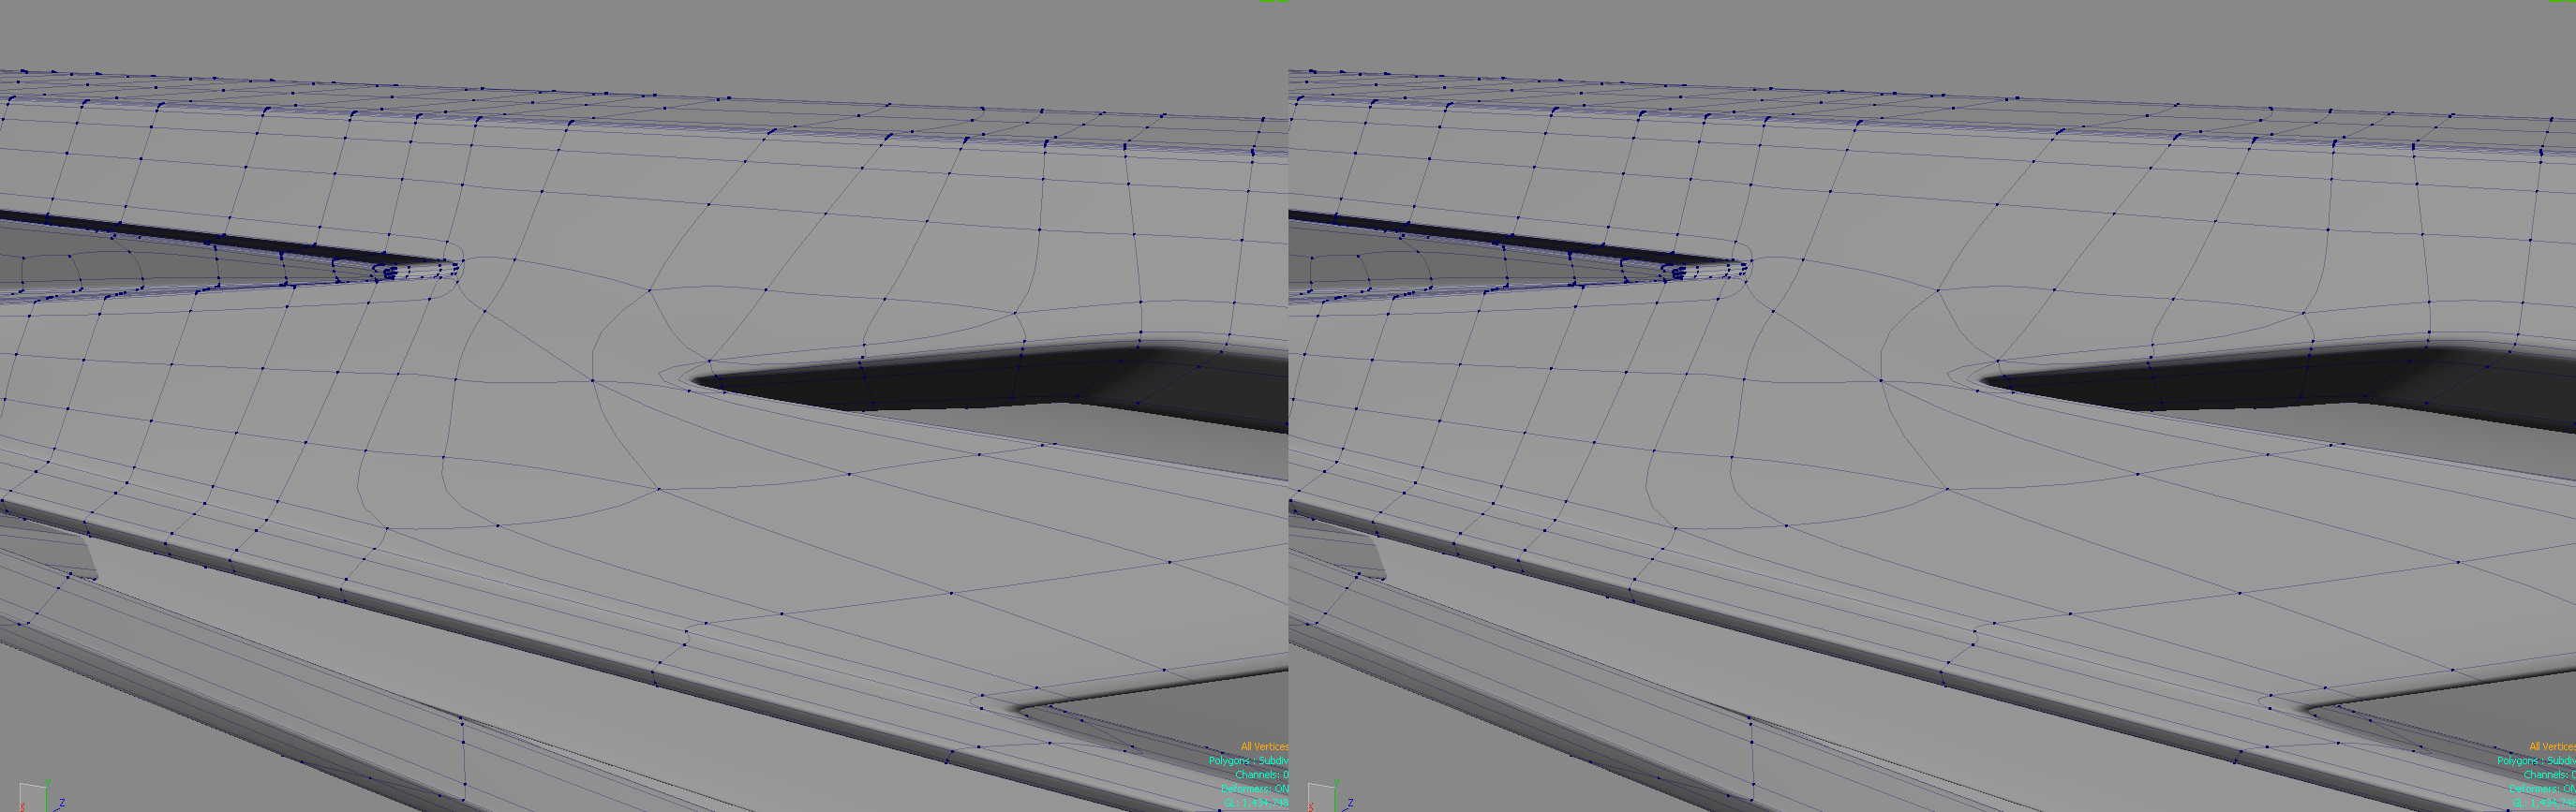
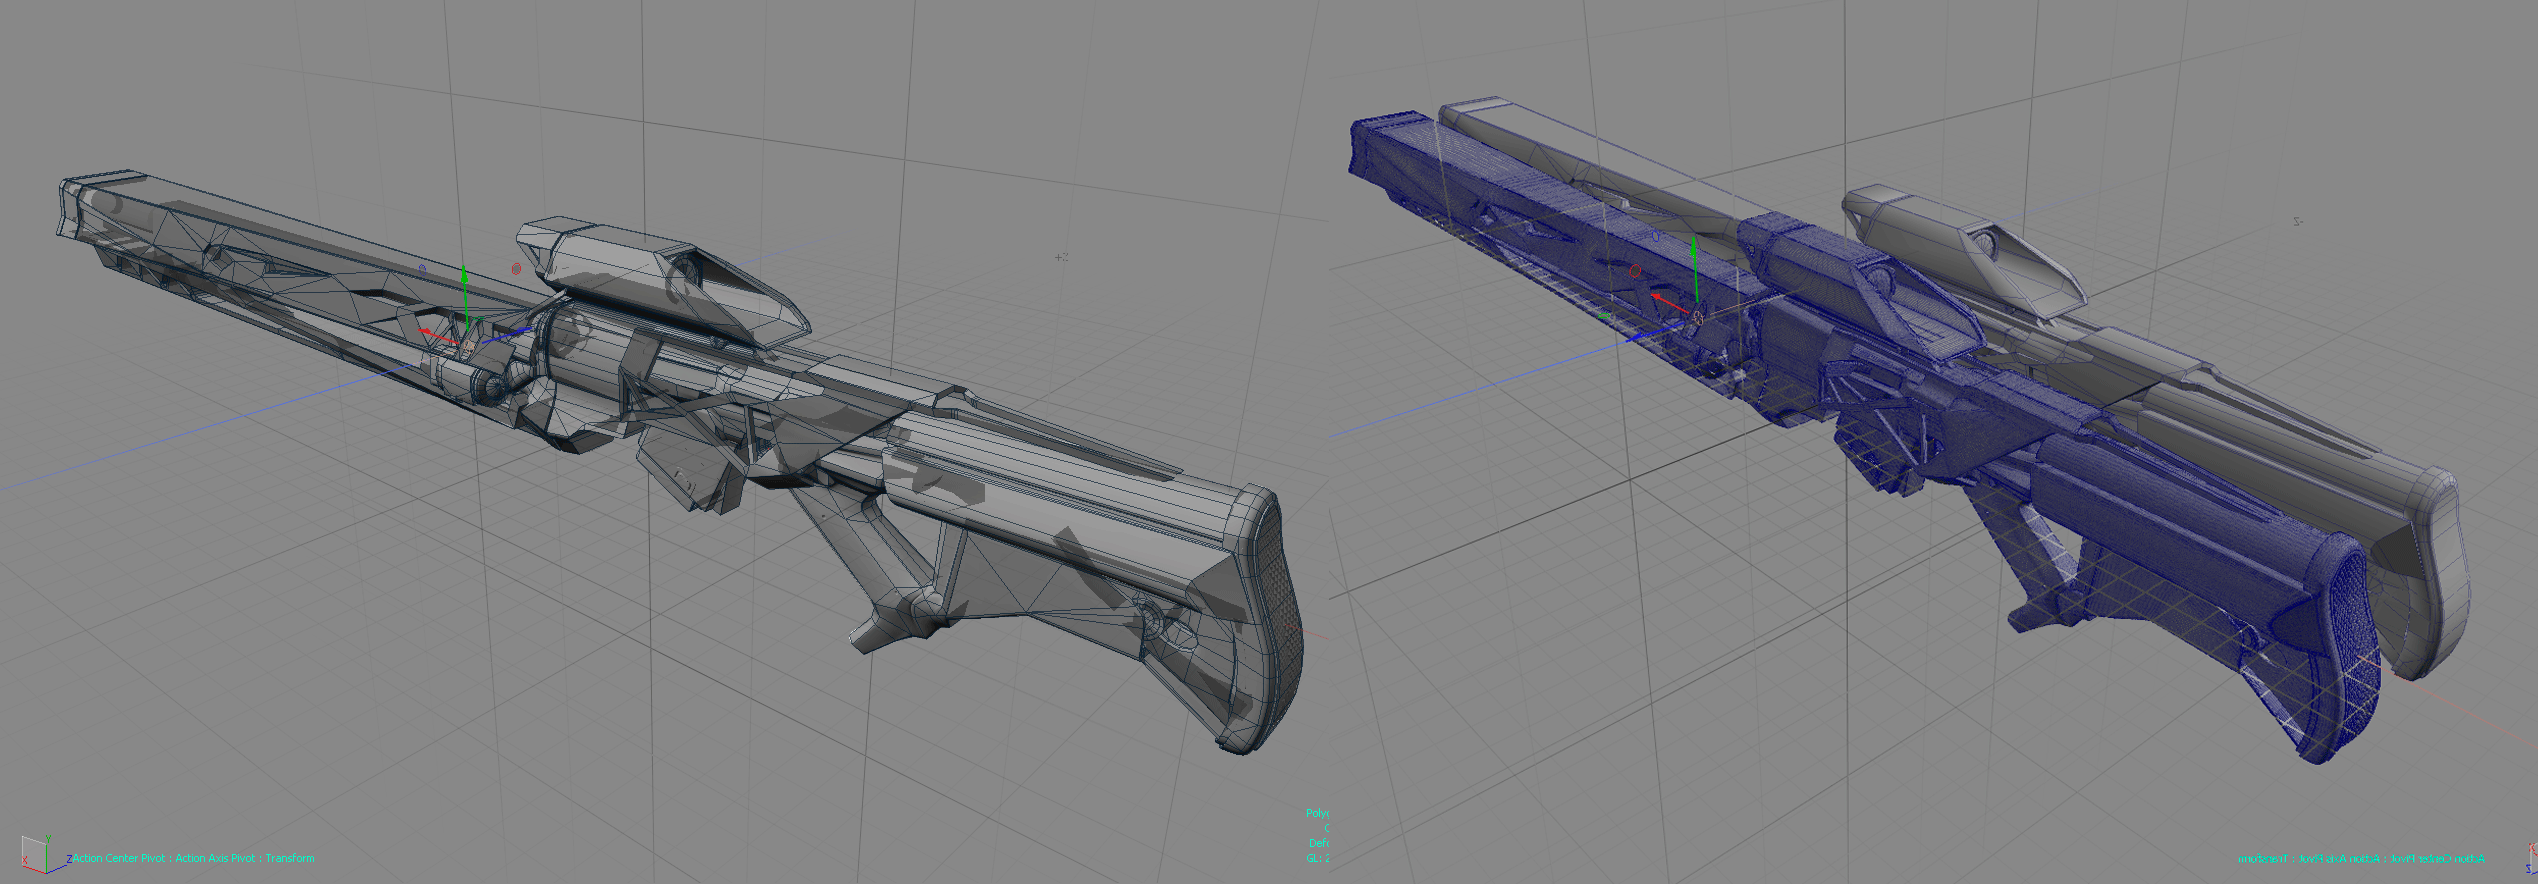
Grid for a highly polygonal model
In order to meet deadlines, I had to sacrifice the quality of the subdivision mesh and not waste time wiring all the stars. Not for all projects, this approach is the norm, but he made an exception.
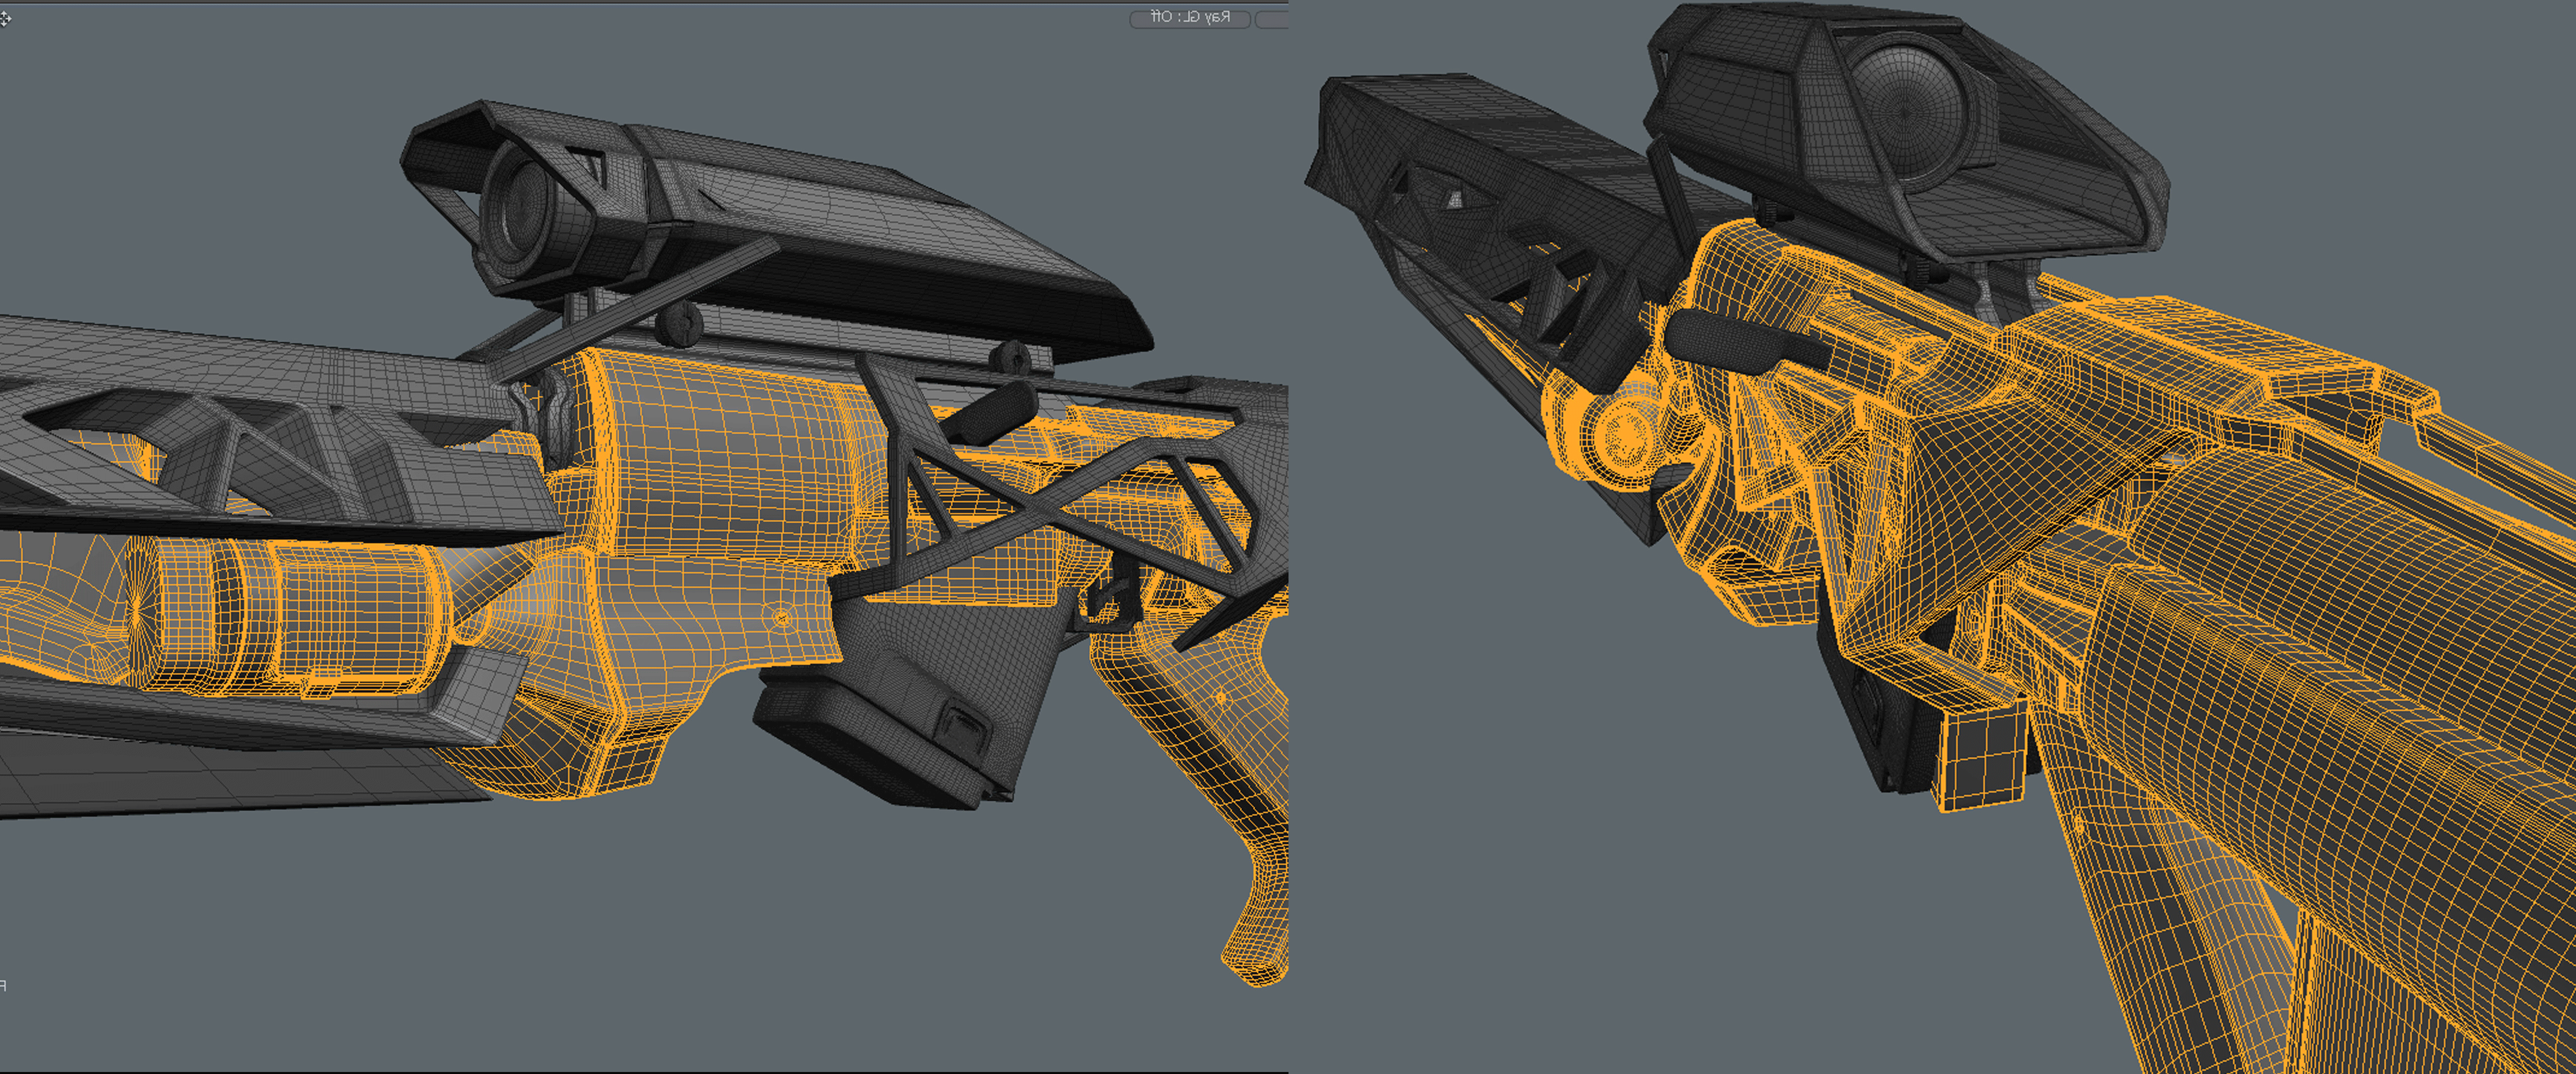
In general, a grid with non-divorced stars may not look bad, and this is usually enough. But for attentive customers this will not be acceptable.
The result is a good hard surface. The project also had analogues of hi_poly quality, and they gave a good guide on where you can not spend time on the grid. (keyshot Rendering)
The main modeling tools in Modo
There are not so many tools. The speed of using several tools is important. It is advisable to use tools with eyes closed. To do this, all the basic tools should be on hot keys and located on the keyboard like in a shooter.
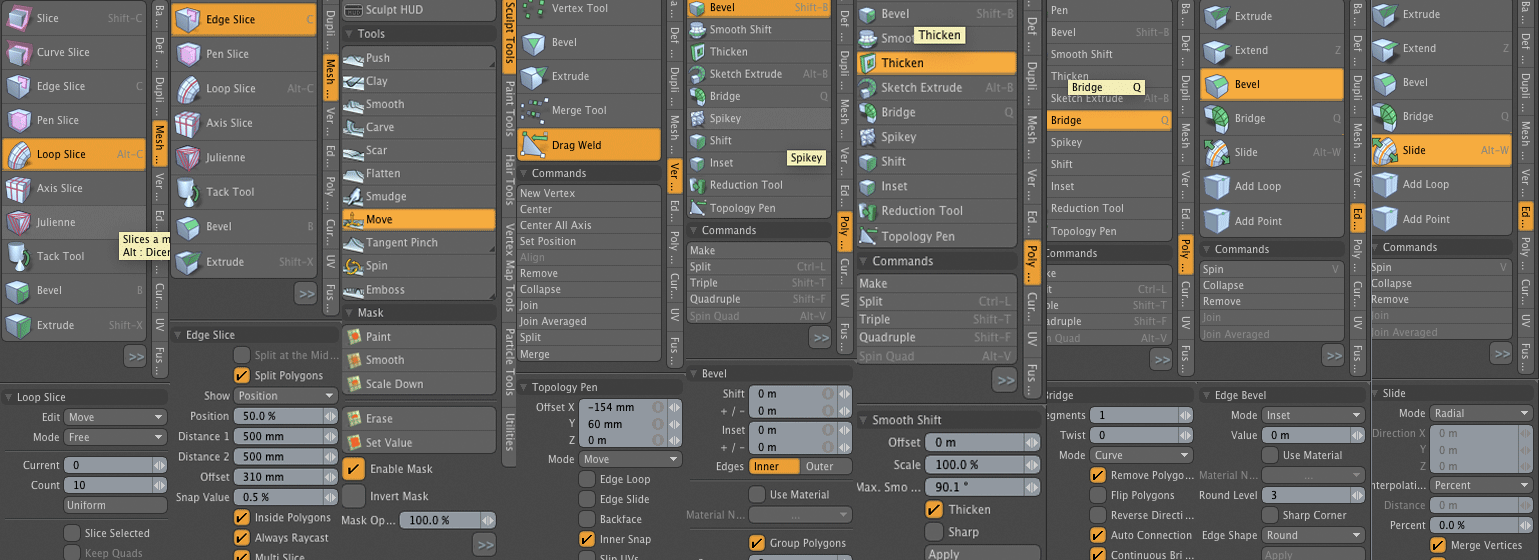
Only nine or ten basic tools, but this amount is enough to make almost any object.

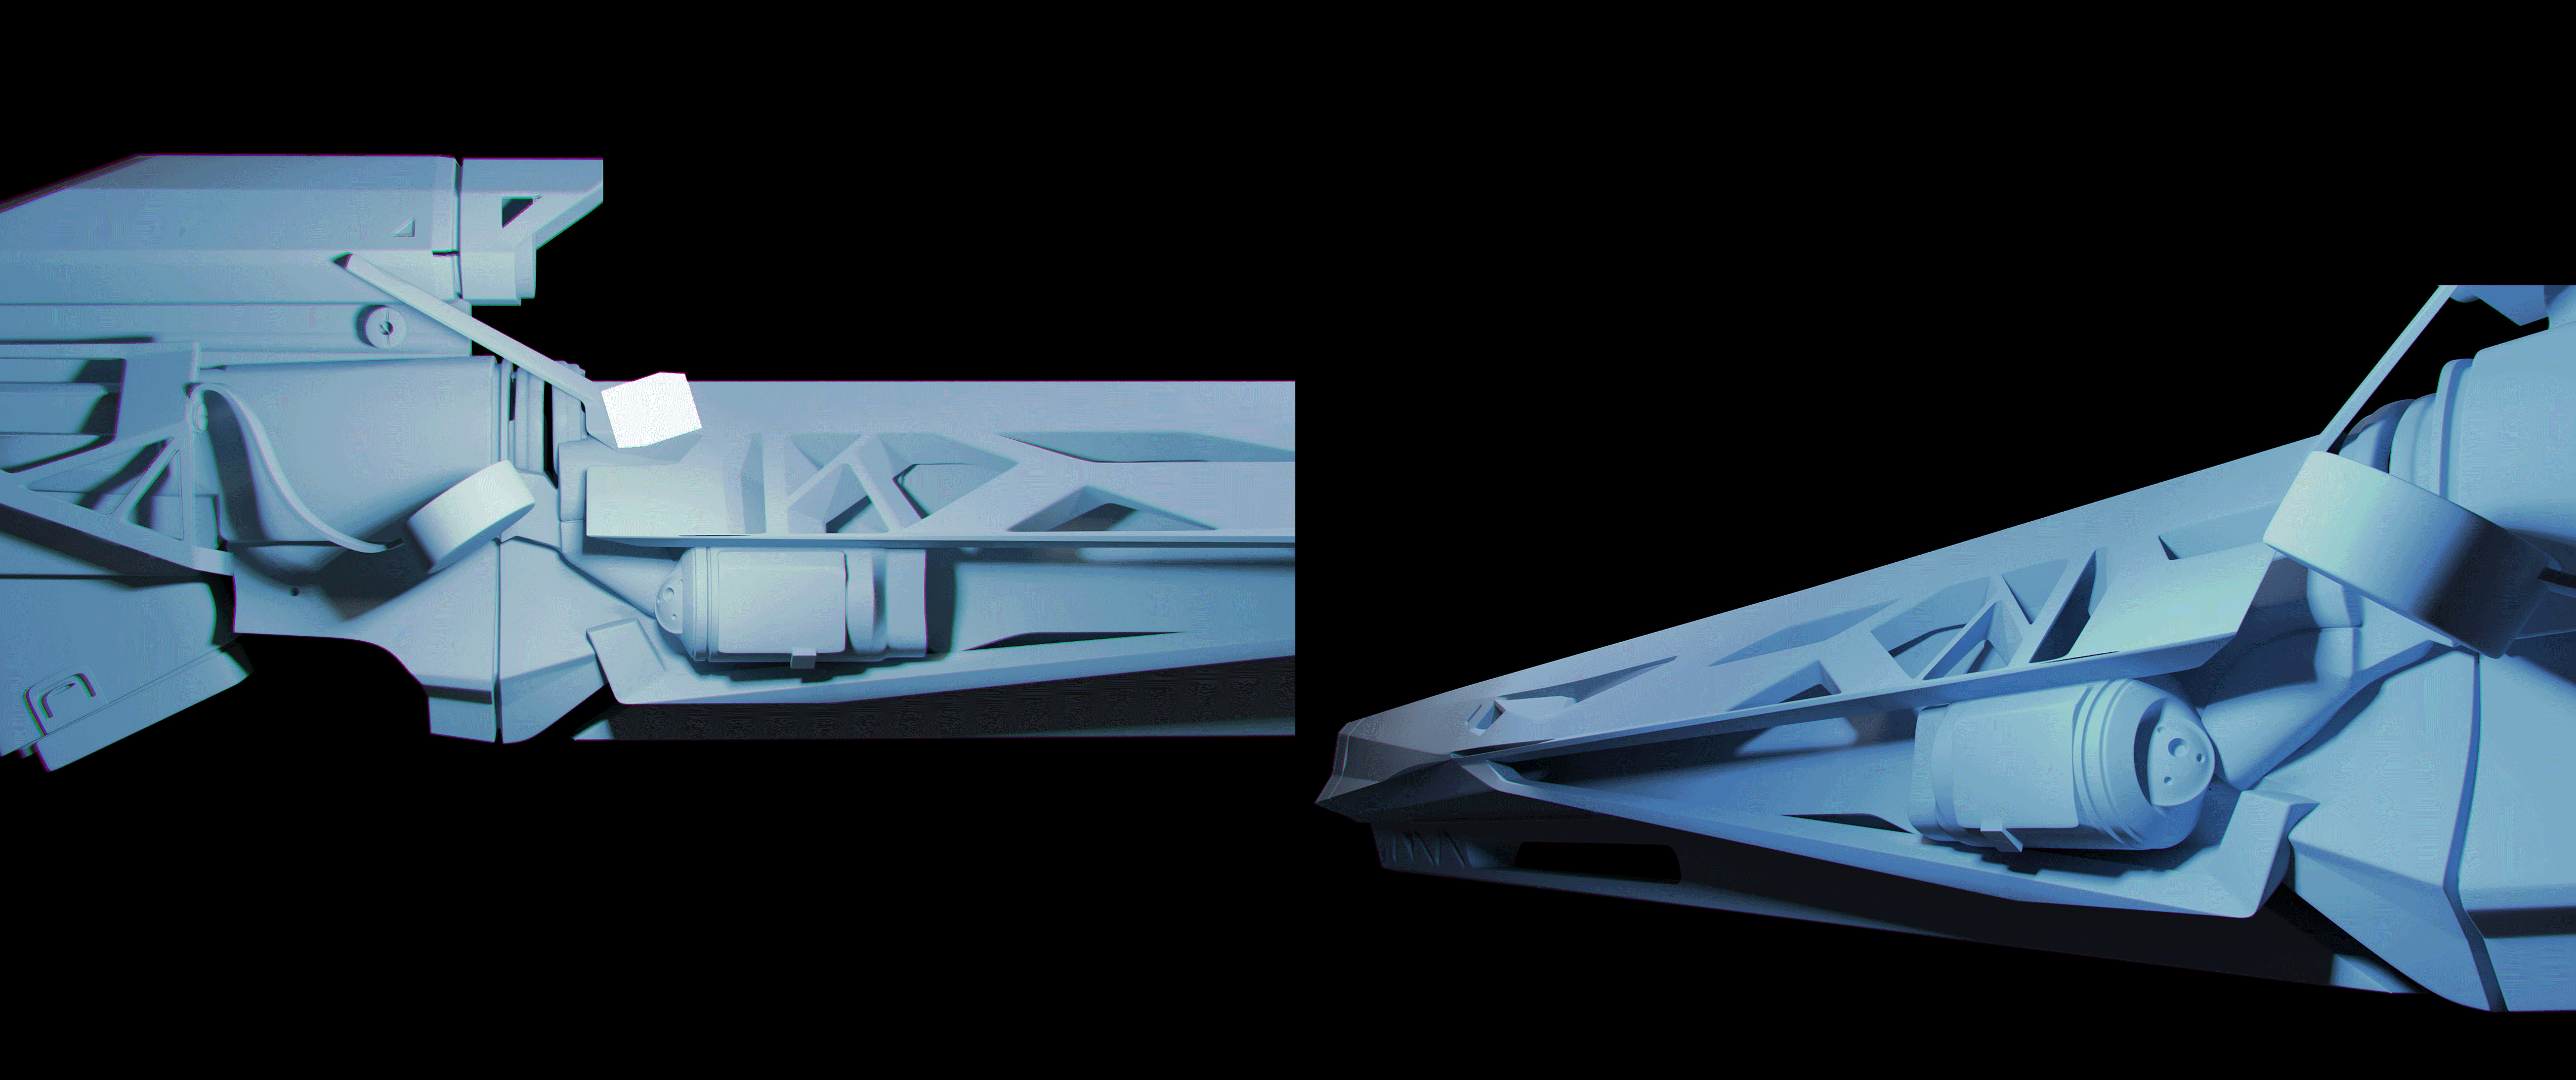
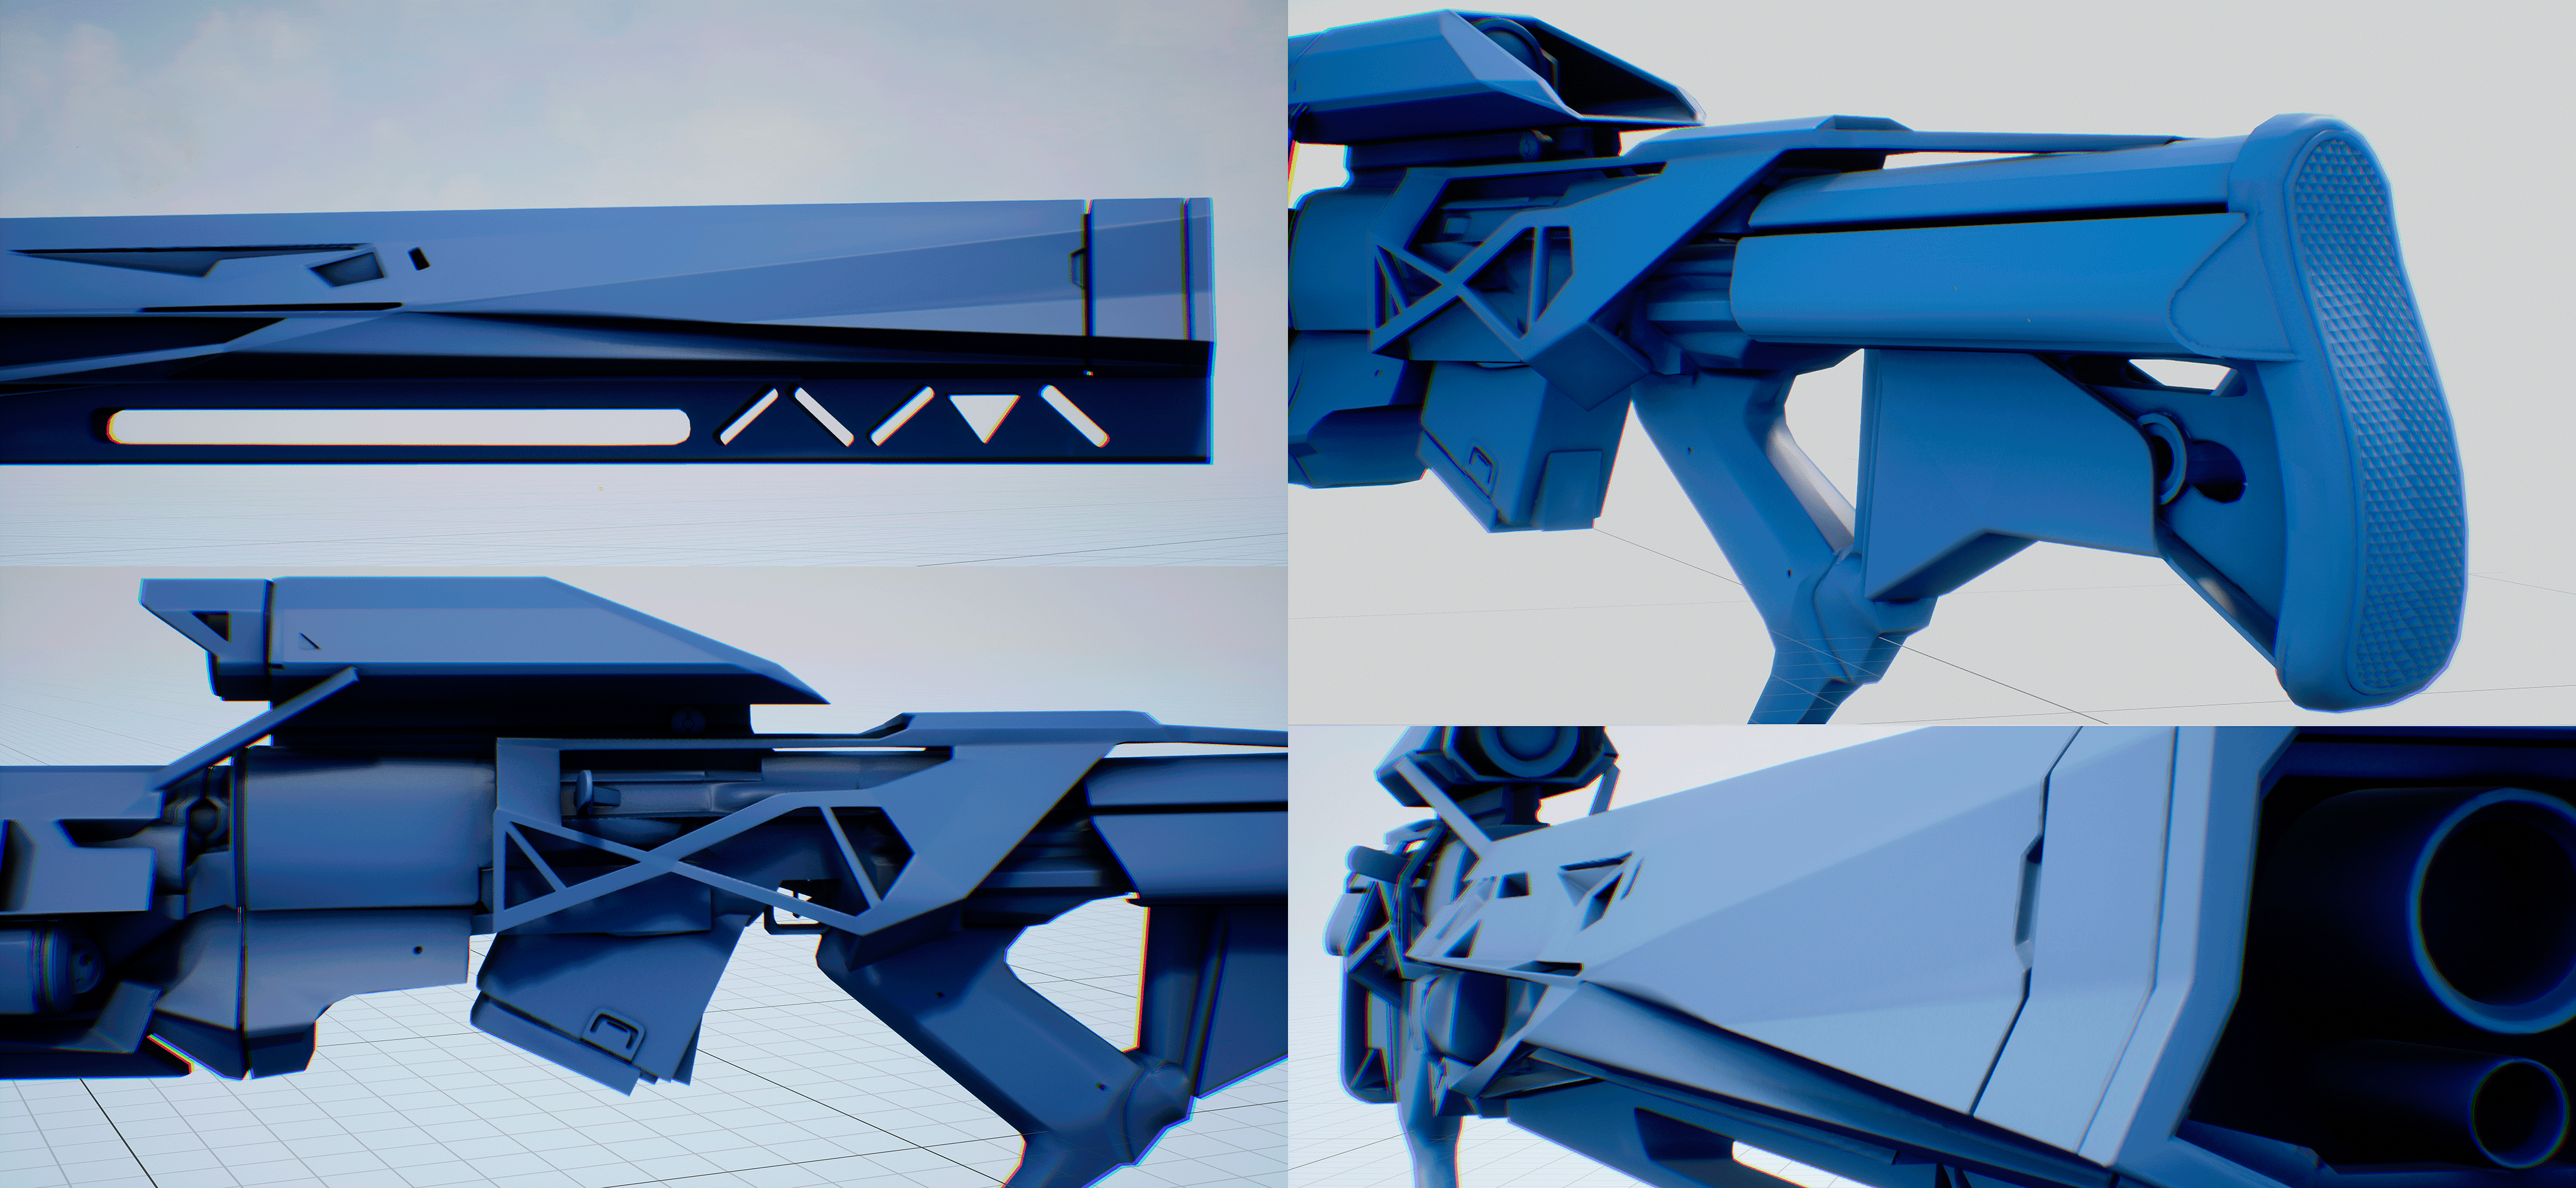
Low-poly model
For the re-topology model, the grid was rebuilt according to the polygon, by hand. The project had strict requirements for the number of polygons, the number of triangles ... ... Where, within the framework of these requirements, I could only get in when I control the grid with my hands, that is, to each triangle.
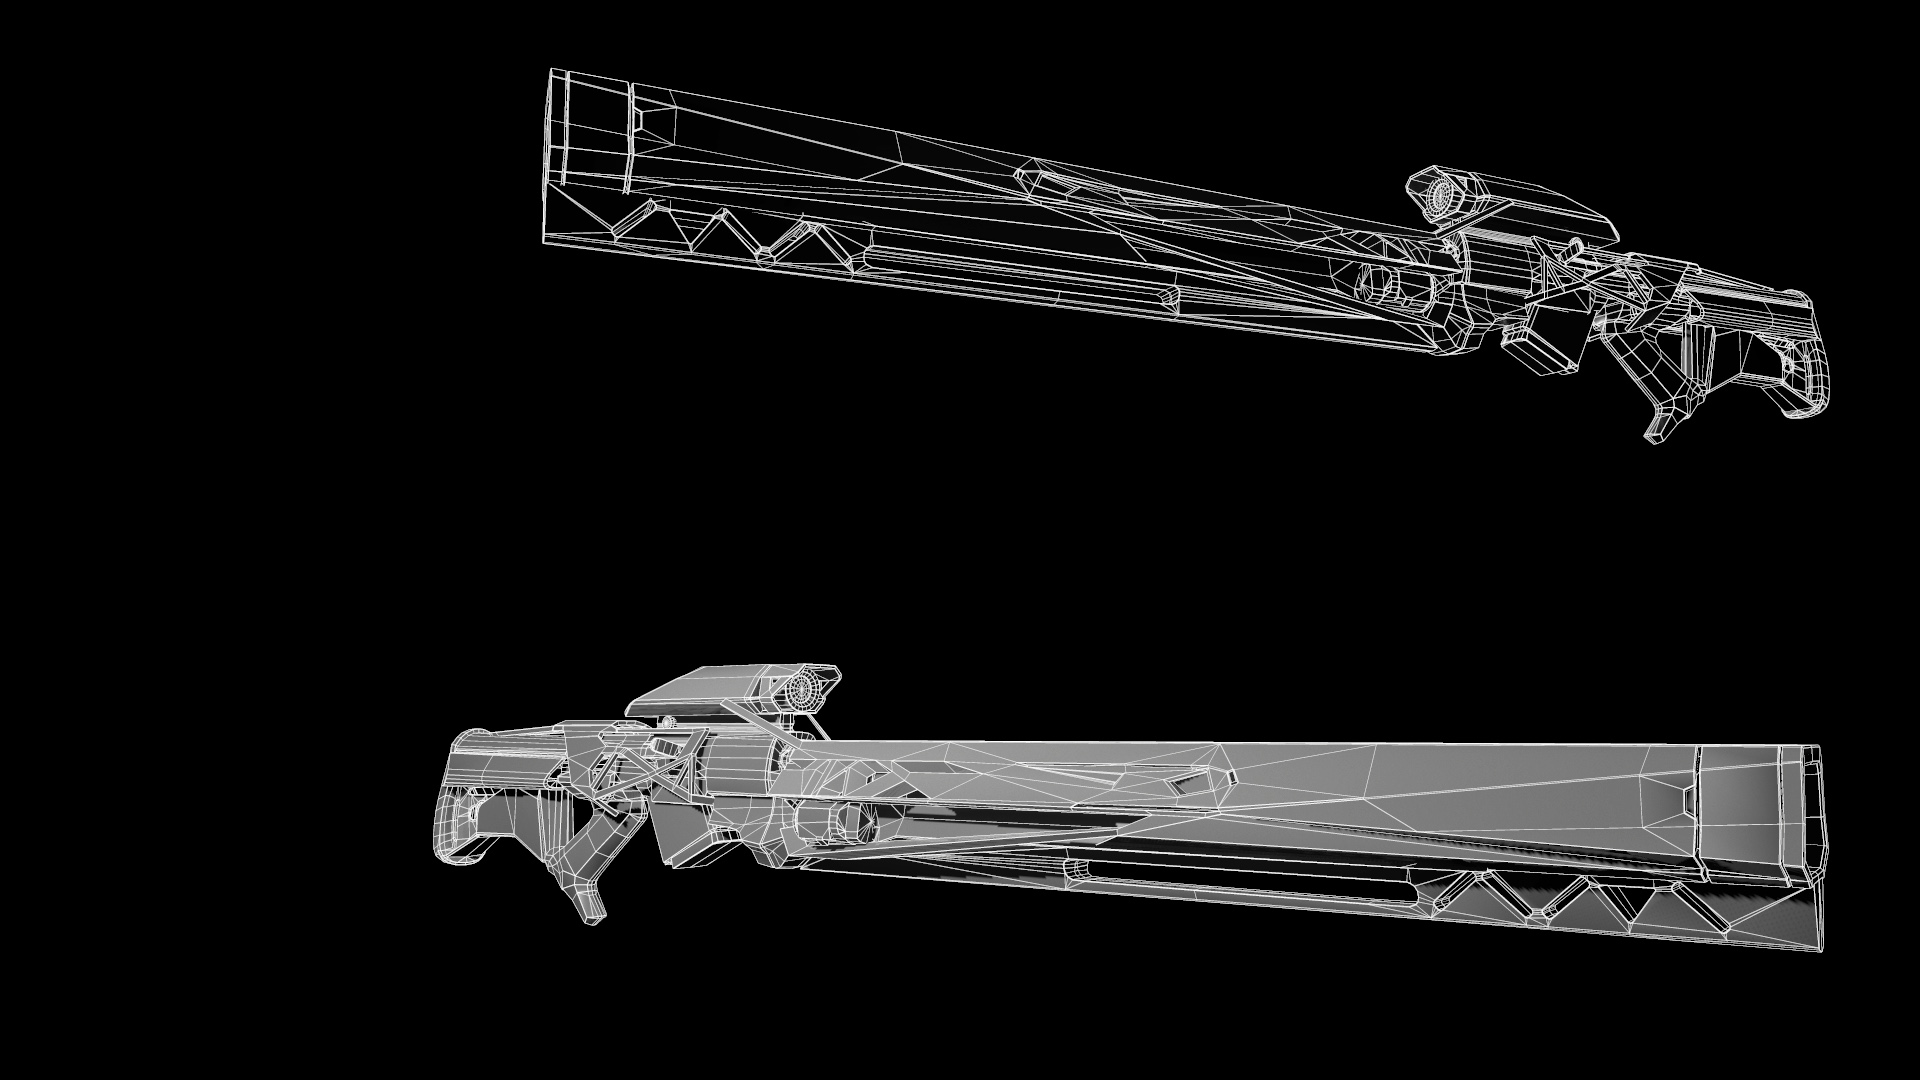
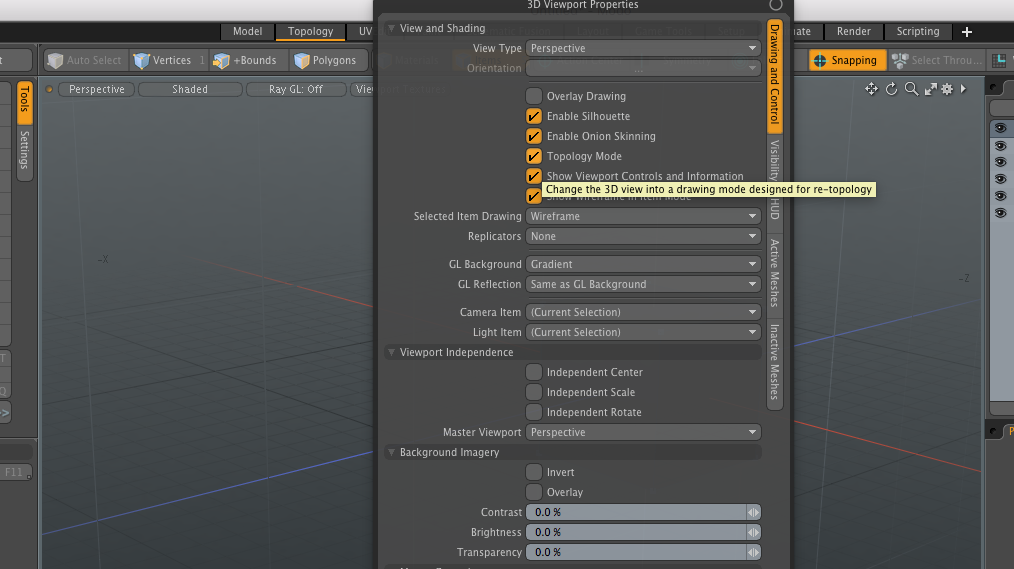
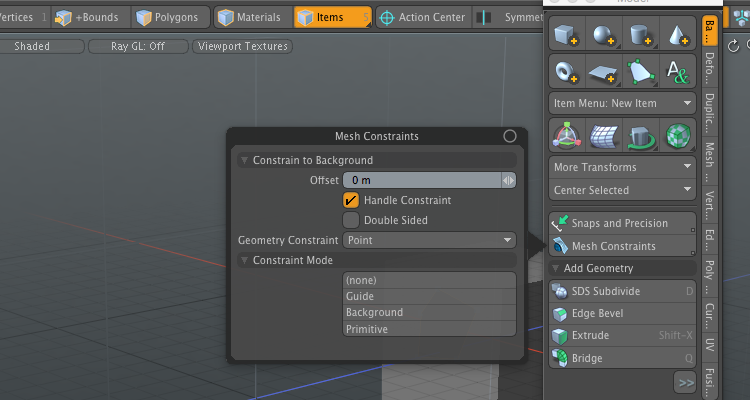
Any Re-topology of the last 5-6 years I do in modo. For re-topology I use the following tools: Topology mode (hot key 'O') - this checkbox enables the transparent grid mode for the top item (layers) in the item window.
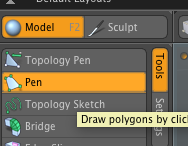
Pen (hot key) is a quick tool for creating polygons on surfaces.
To snapping polygons to the bottom layer, activate the tab in the settings Mesh constraints -> Background.
Checking Normal Map and Low poly in Unreal Engine
Normal Map checked directly in the editor. This is what the low_poly model looks like in the UE4 editor. The model has only Normal map and AO map.
UV scan
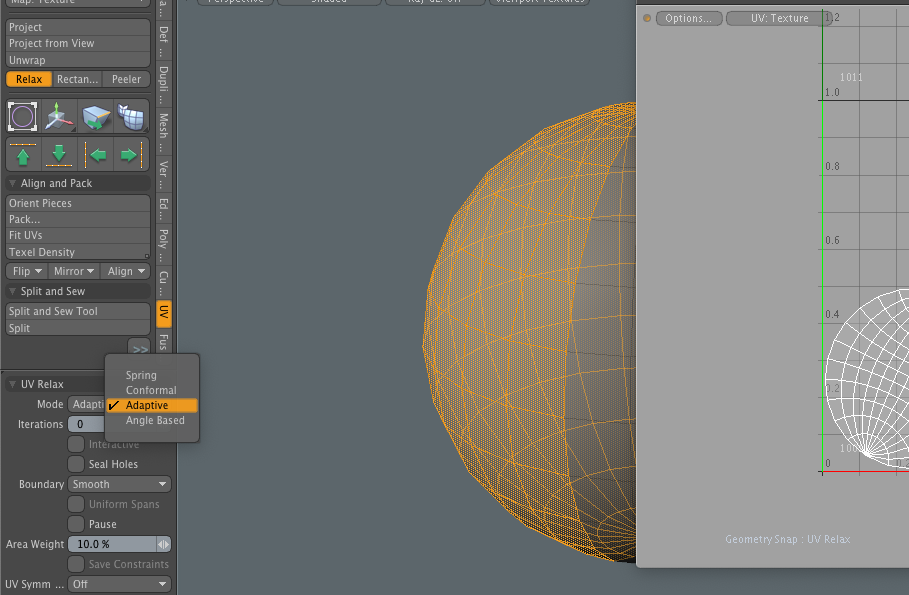
Every element I try to expand as square as possible. This is important if you want to occupy the entire area of the texture. This method has its own peculiarity, where the repeating texture will be distorted at the edges of the square and the mirror reflection of the texture will have a seam. This feature can be corrected by making square only those sides that are not at the junction of the specular reflection. To align one side of the uv piece, you need to select a line of points or faces. Then click on the Align UV arrow with the desired orientation in the UV tab.
Model Deployment Process
For uv chunks with an equal number of polygons, the UV Rectangle tool works well. He converts such a uv piece independently into a square.
The whole development process looks like this: Selecting a piece of polygons, masking all that is superfluous, or highlighting a closed face line along the body of the model. The resulting pieces must be aligned and UV Relgx applied. The Relax tool has settings. I'm only interested in one setting Mode -> Adaptive. This method is smoothing the mesh. It smooths the uv piece, given the shape and geometry of the model. It must be remembered, not for all pieces, this is a good decision to use Adaptive.
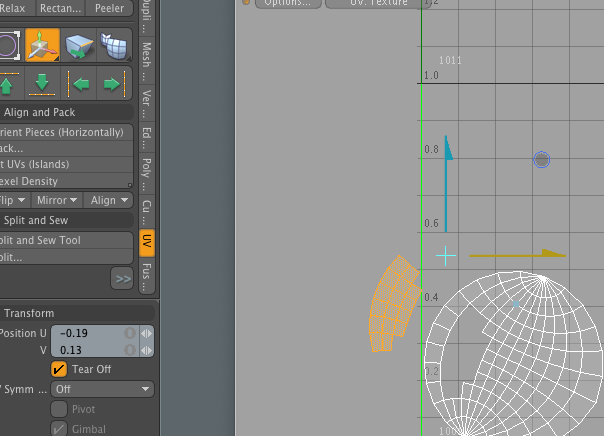
Another important tool, the usual Transform with the active checkbox Tear off. Use it to disconnect selected pieces of polygons from UV.
For convenience, I place the elements of one object next to each other. The texturing process becomes more comfortable and there is no confusion in the search for the desired element. I form small conditional squares from small parts of the scan. So it is more convenient and tight to fit the uv map into a square of all parts of the scan.
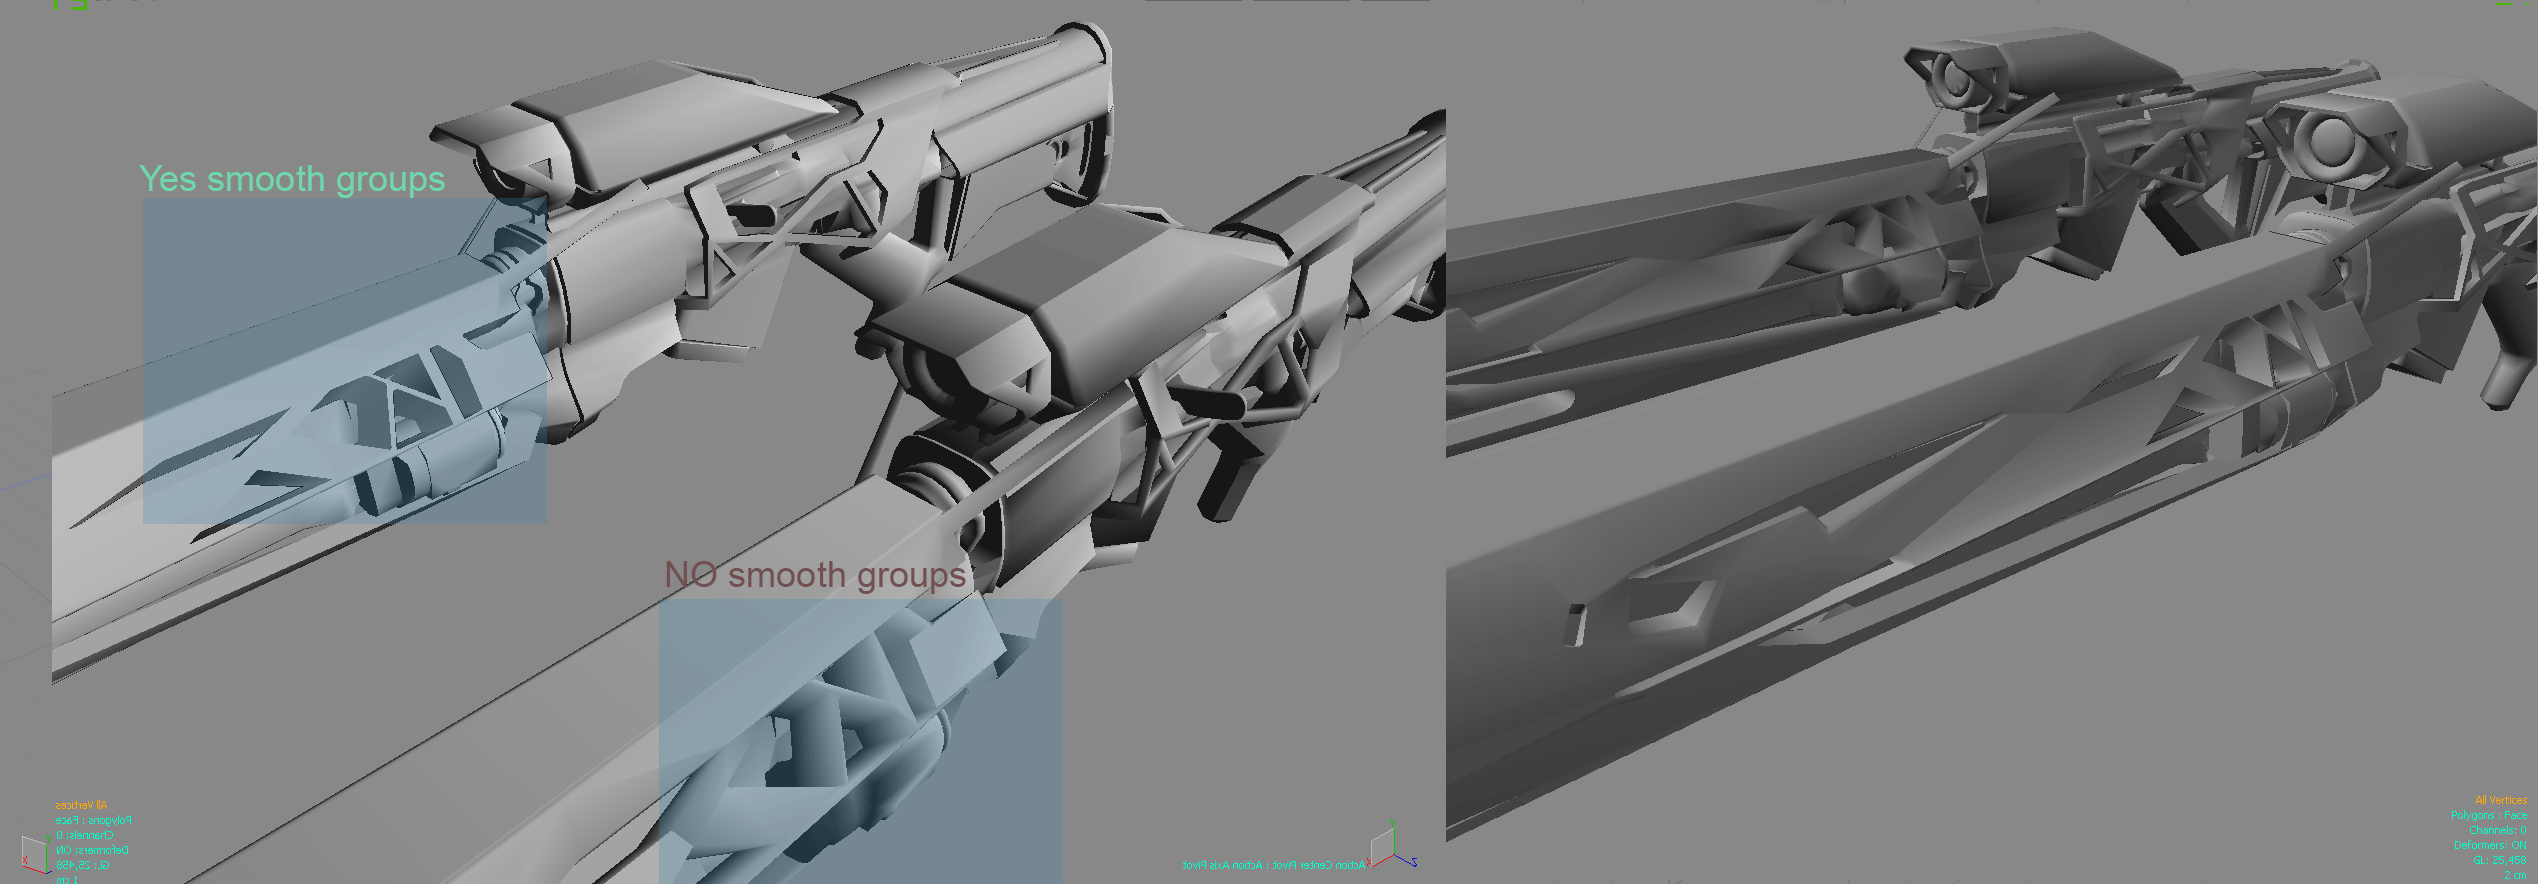
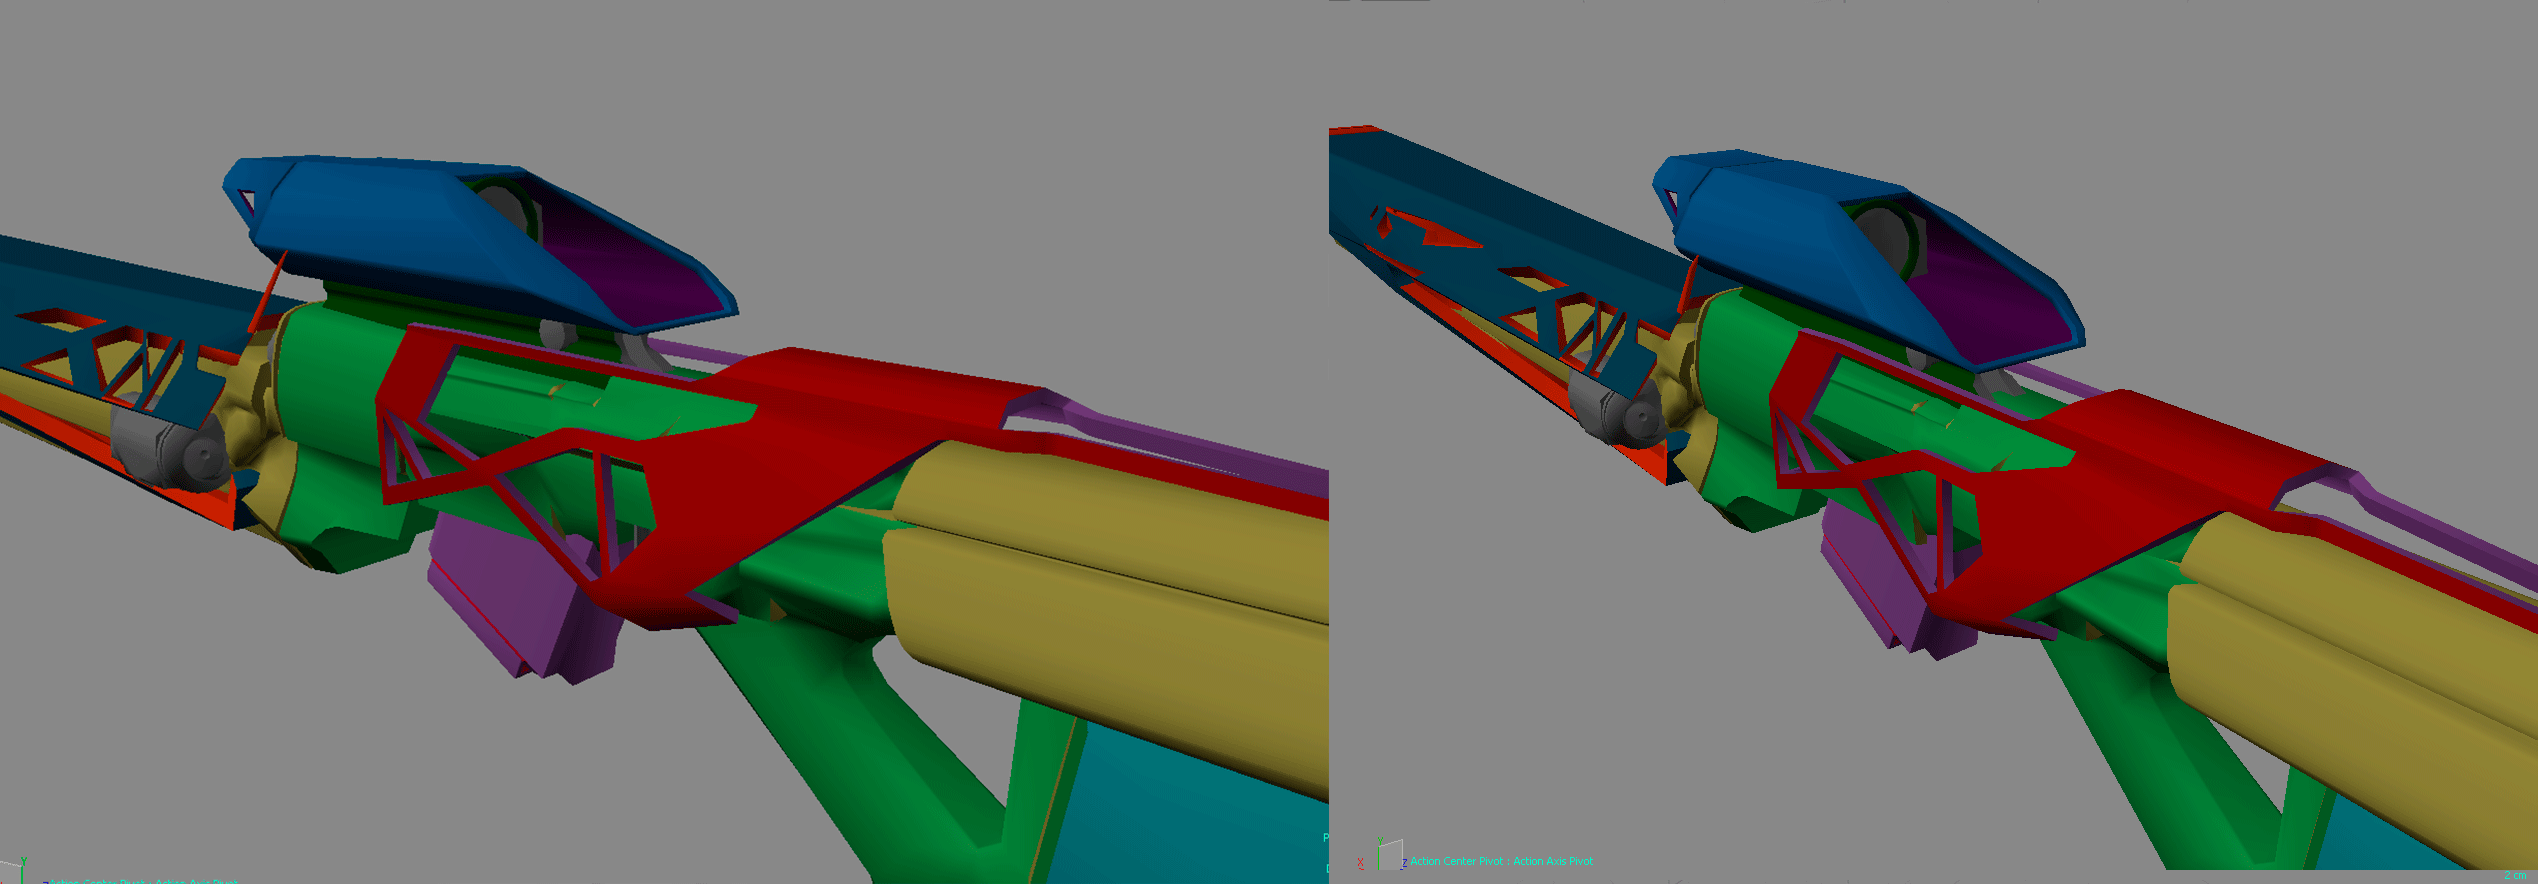
Smoothing groups The
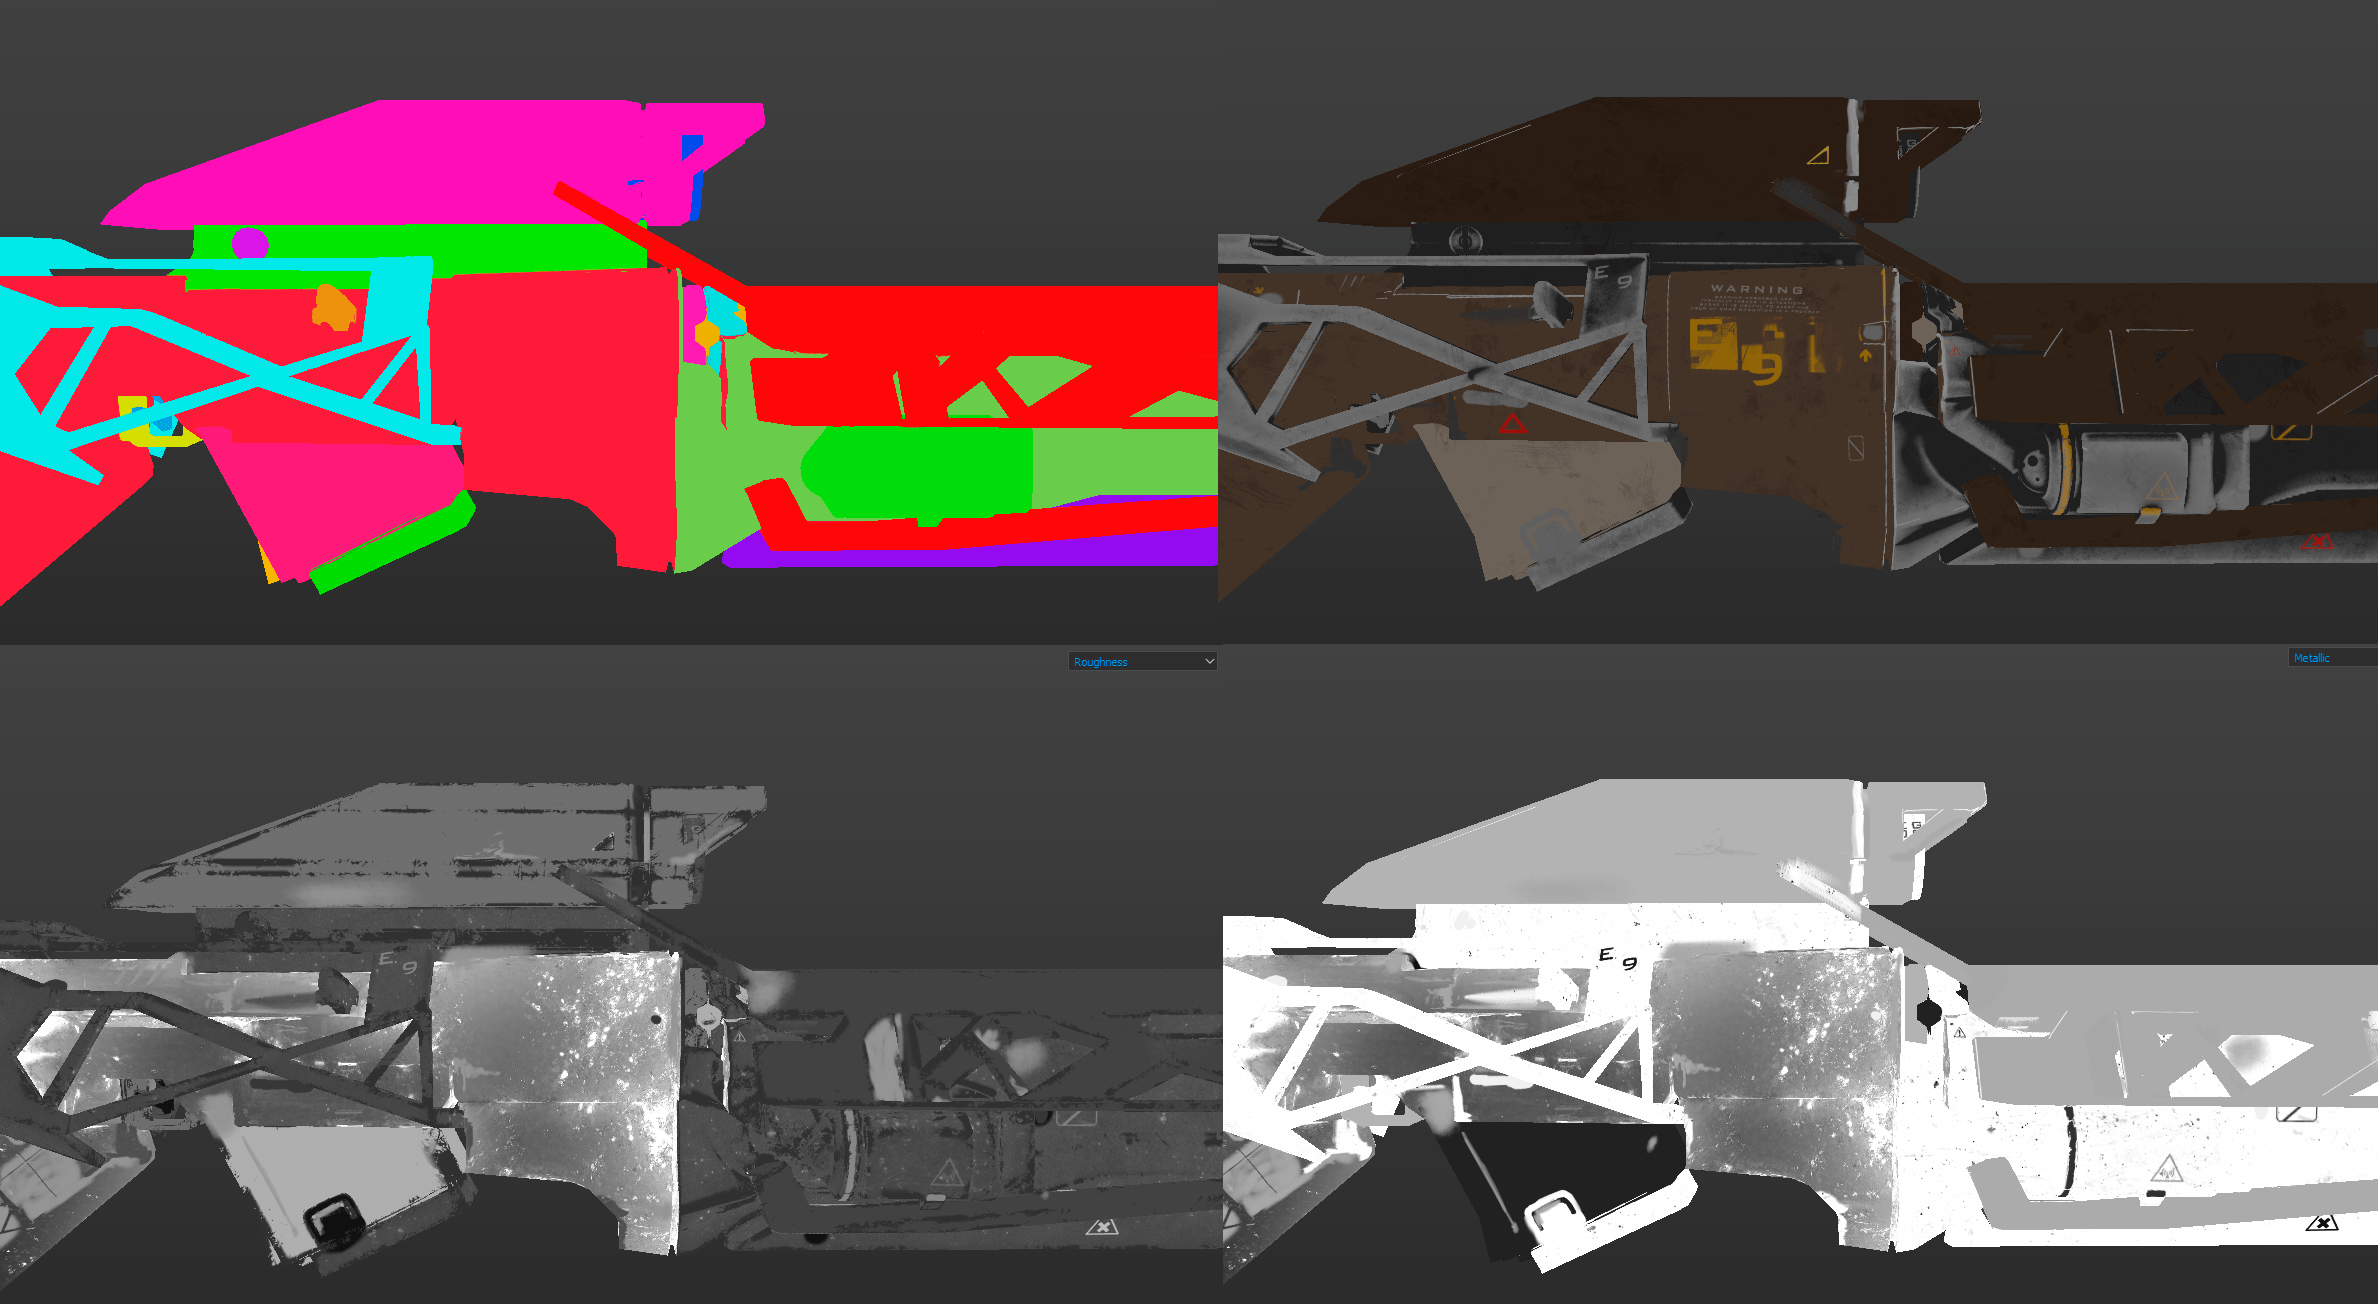
Low Poly model is divided into smoothing groups only after the uv map. In the future, this does not allow confusion and it becomes easier for me to separate the UV part for hard edges. Then it’s more difficult to collect not logical small pieces in a heap.
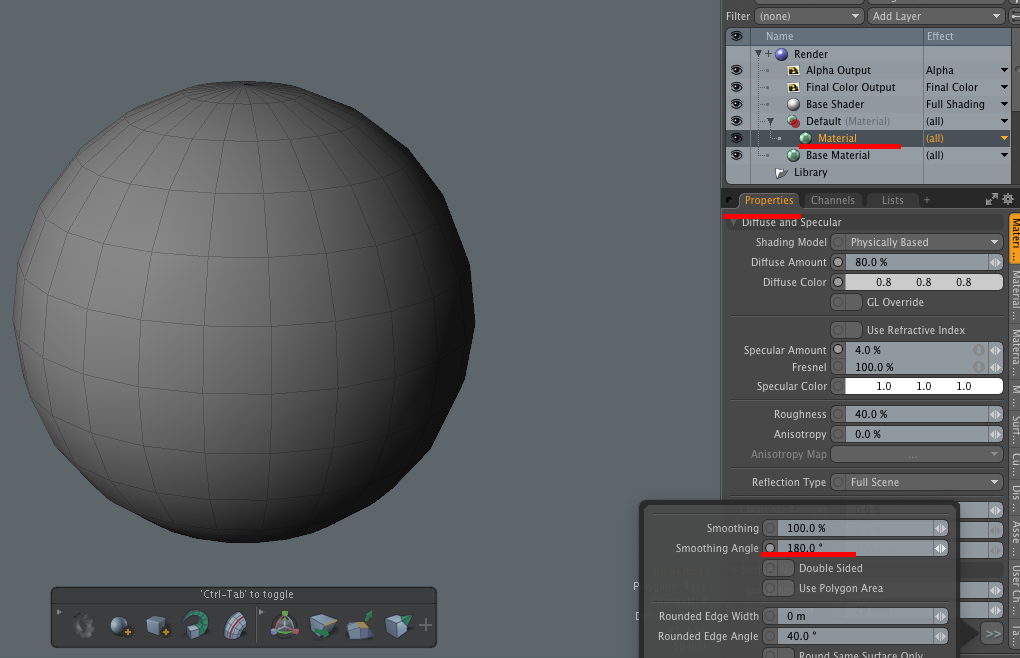
Work with smooth group in modo. The first thing I do is set the correct smoothing angle under gamedev. Go to the properties of the material, set the smoothing angle of 180 degrees. By default, the angle is set to 40 degrees. Below the colors are marked different smoothing groups on the weapon model.
Tools for Smoothing Groups
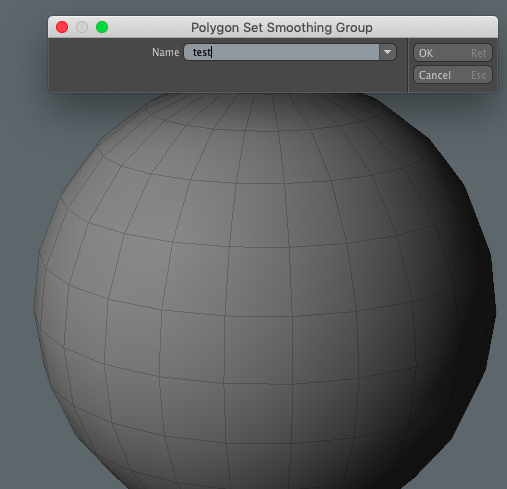
After that, I can select the polygons or pieces of the UV map and assign the opposite smooth group.
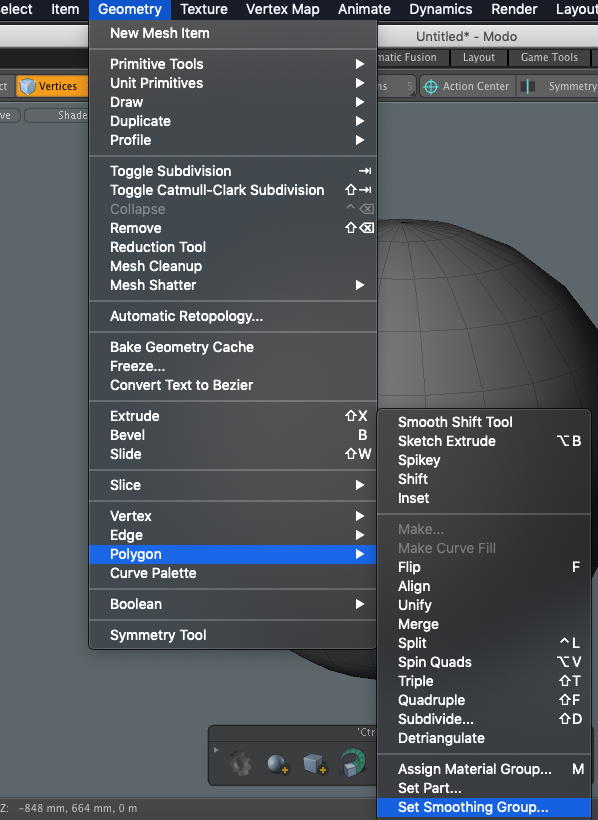
To do this, go to Geometry -> Polygon -> Set Smoothing Group. The window requires the name of the new Smoothing Group. ! Sure! I assign a hotkey for this tool, for example: shift + G.
In any case, I try to hide all the seams and hard edges and not apply to the visible and front places of the model.
Texture in Substance paint
The baking process begins by checking the model for its position in the coordinate system. All models must have the same “0” position. The best solution is when I expose the model at the concept stage and from that moment I do not change it at all. In this case, no revisions and returns are scary.
The low_poly model for baking and texturing is mostly always slightly different. This is due to the symmetry of the object and some details. Basic texture resolution for 4096x4096.
Texturing is divided into conditional subgroups: Color / Dirt / Infographics / Handwork. I rarely use prepared materials, I like to customize them myself.
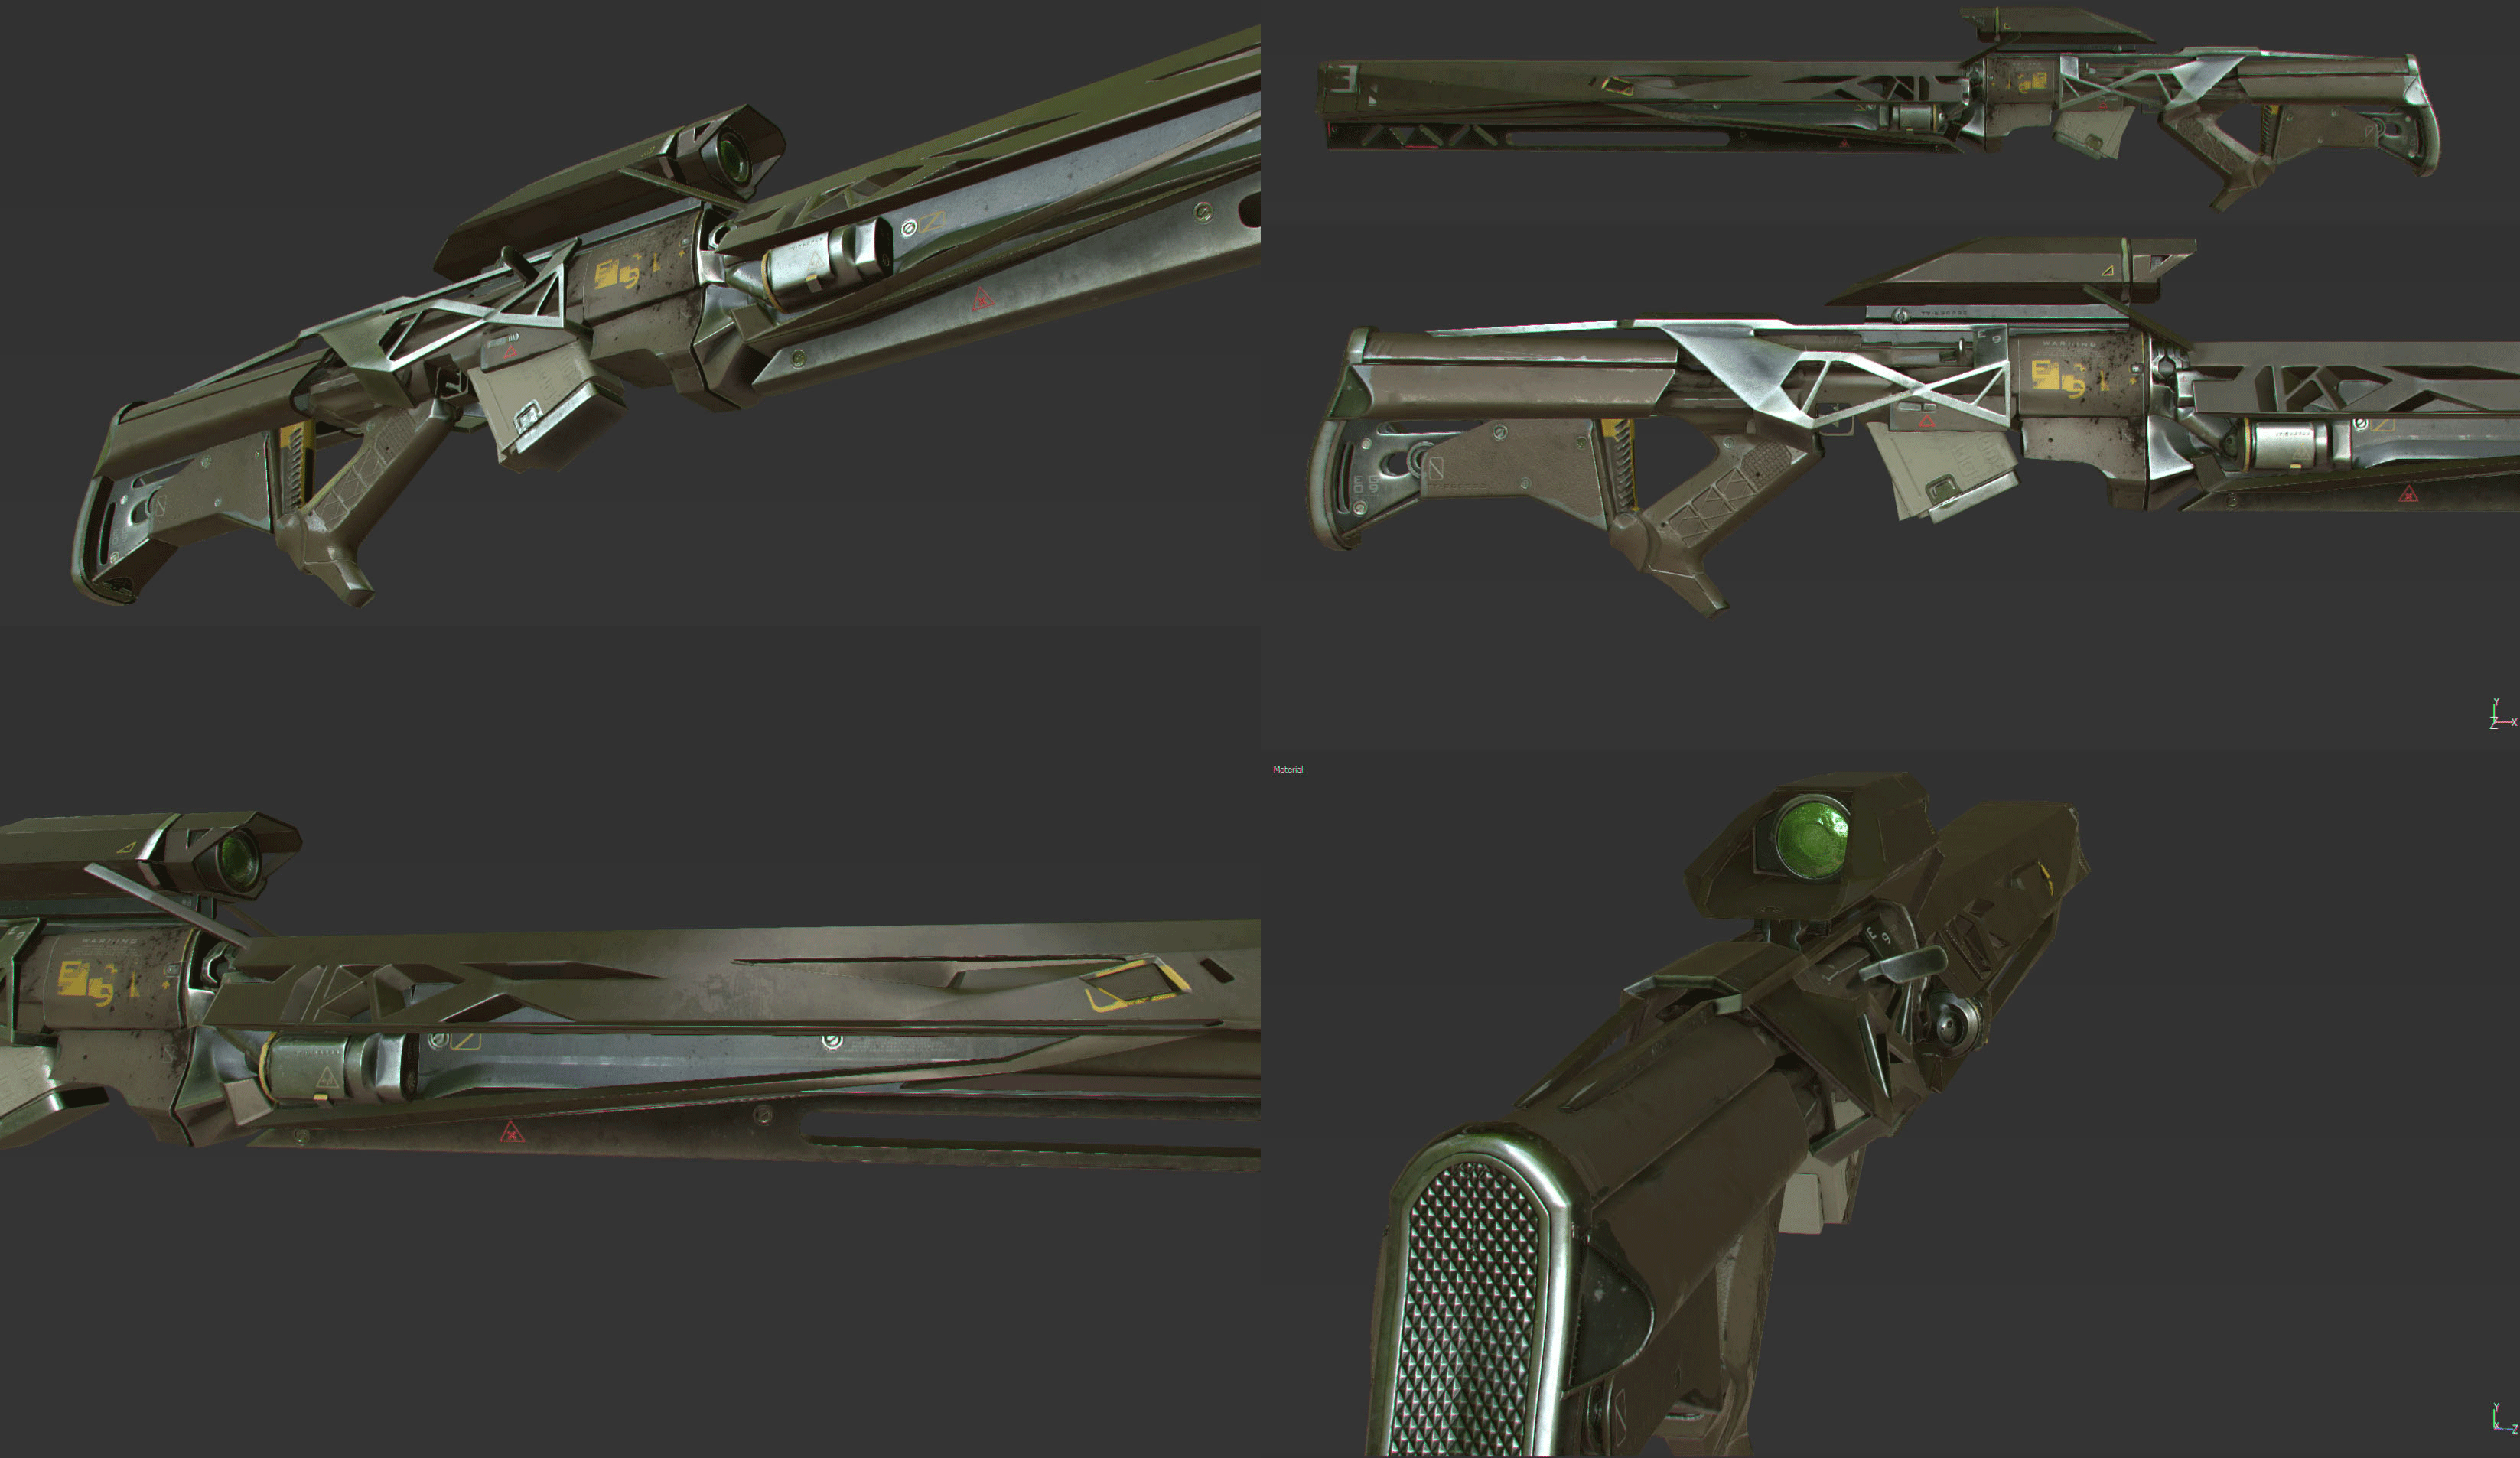
After working with color and materials. A sheet with various infographics. Preparing for all types of weapons.
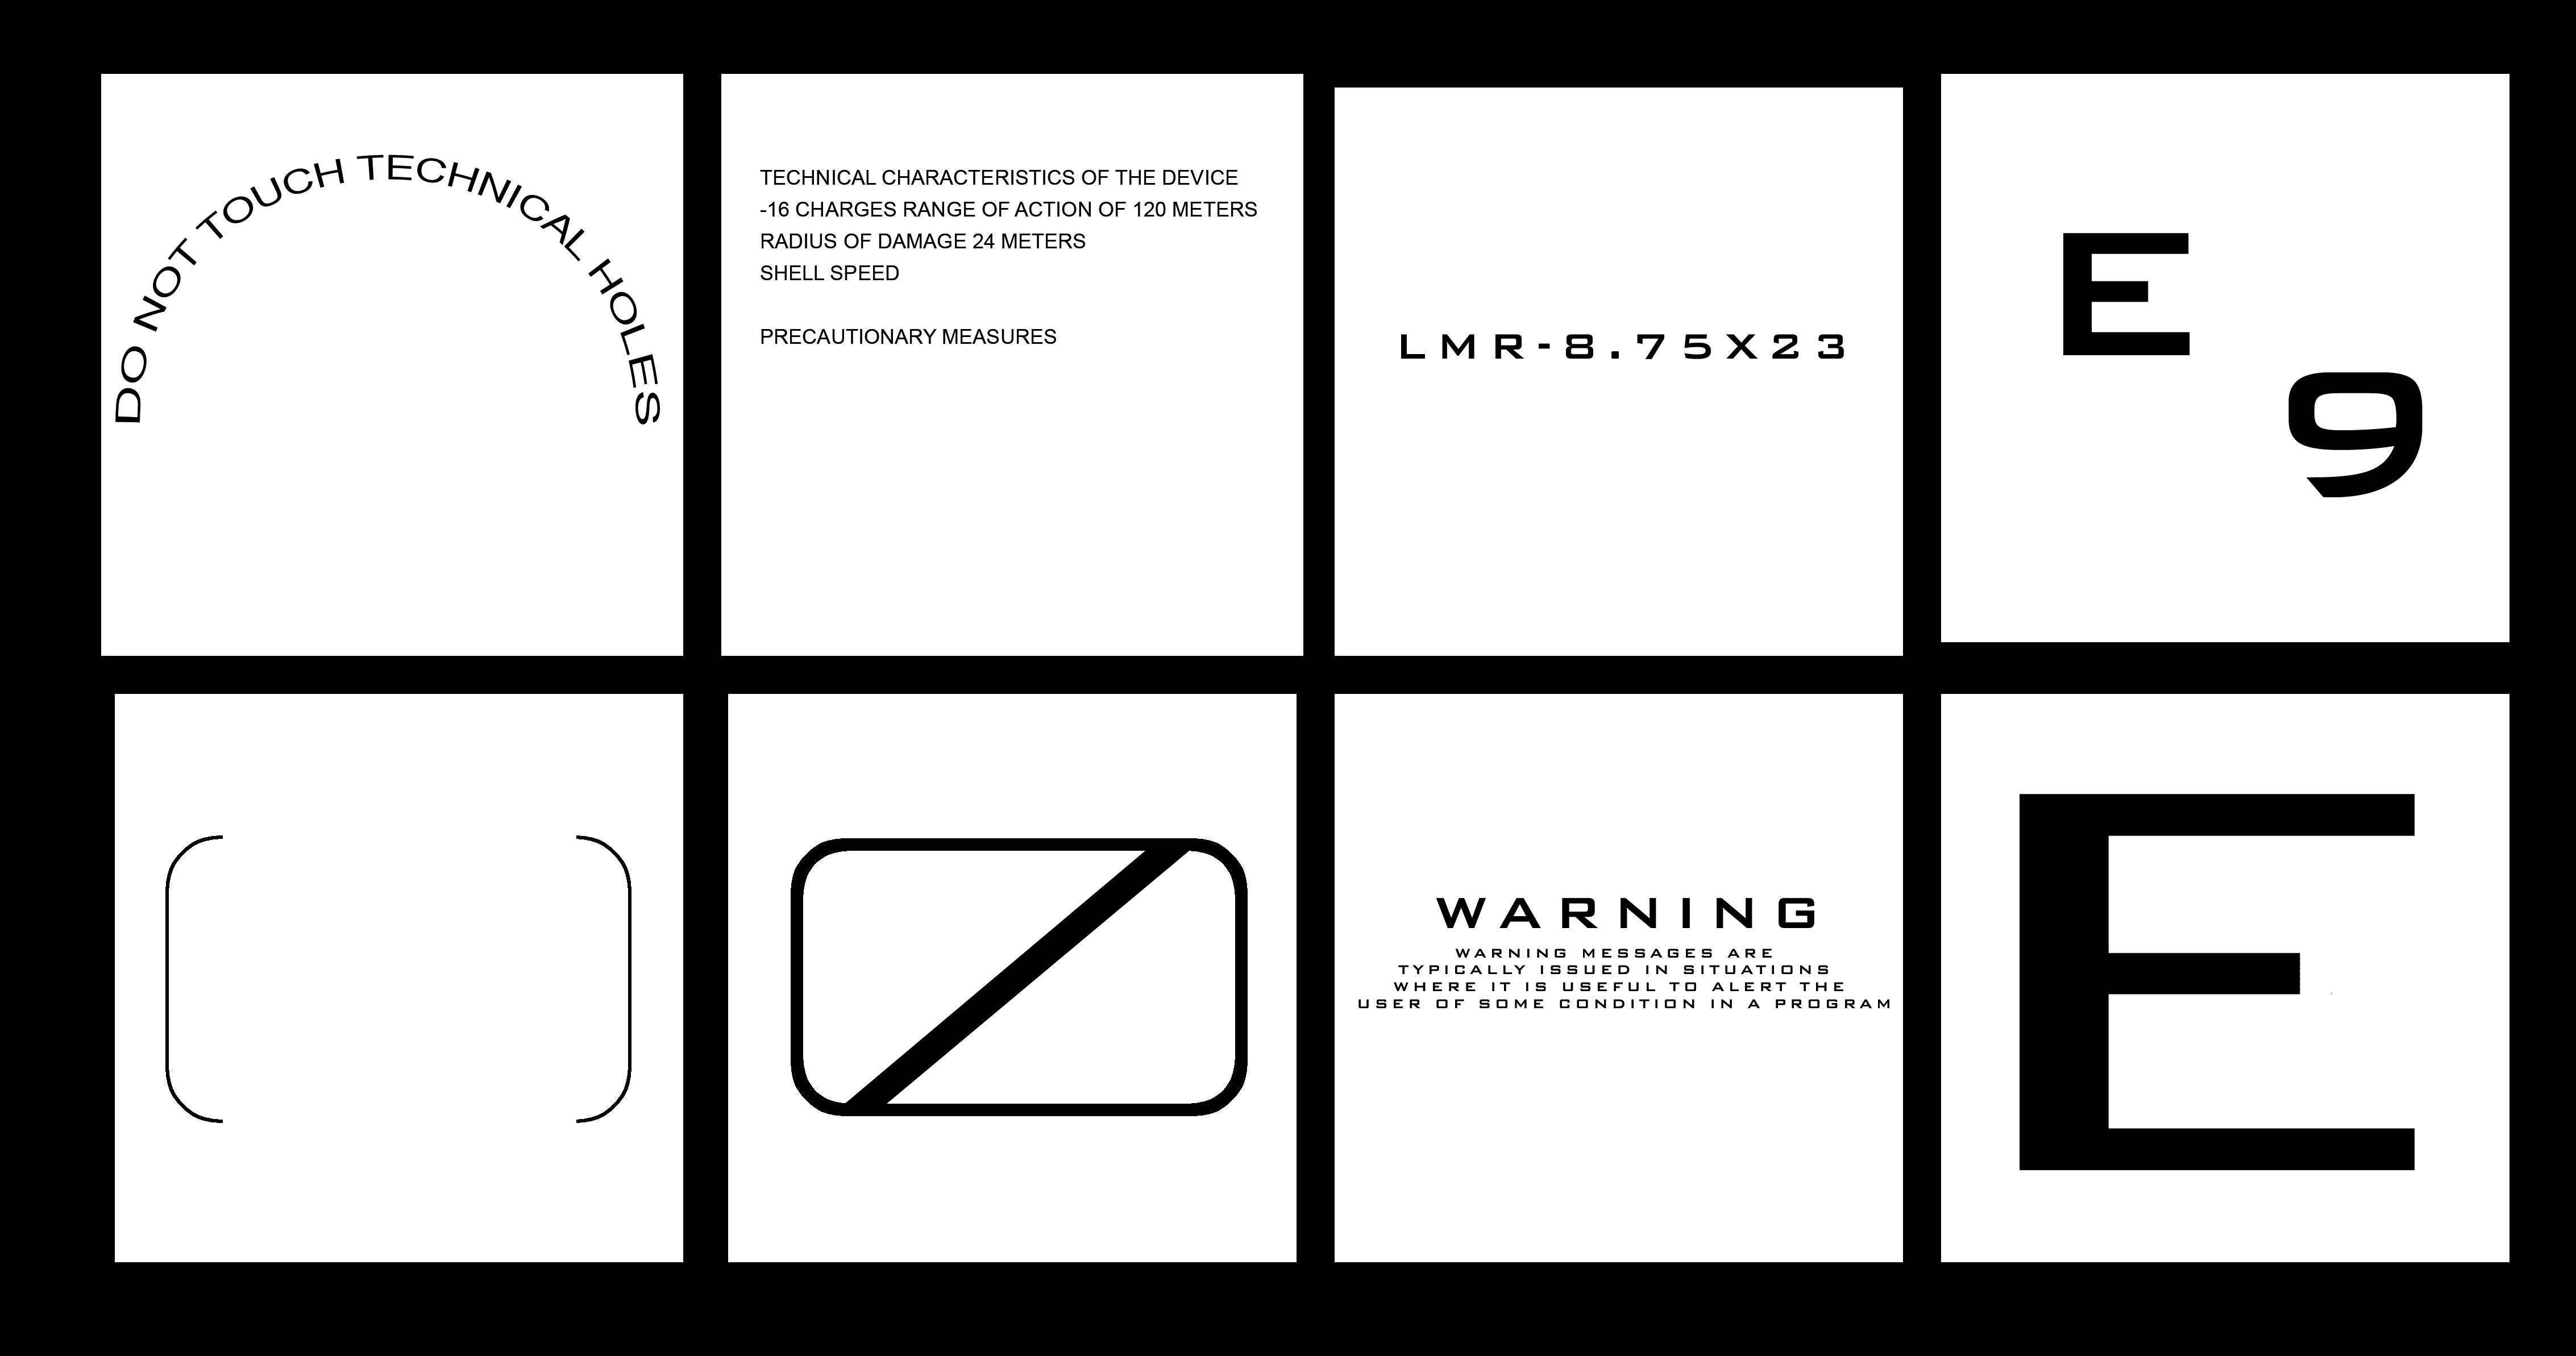
This is mainly technical information, conditional marking, warning labels and symbols. The set is quite typical for any technique.! Each project has its own unique info list, it is required to collect similar information from all projects and store in one place. For most projects, small inscriptions are not important, but for me, using such sets from my other projects saves a lot of effort.
The
rsheno sight was separated from the model. And prepare as a separate asset, in the future, for the ability to rearrange it to another weapon. I needed to fix the sweep and re-texture with a lower resolution of 512x512.

The model has been approved and uploaded to the project. After a few days, she was returned to add transformation. Scope had to hide inside the weapon. To do this, I cut a low_poly model with minimal distortion for the texture. And added morph transformations.
I hid all the distortions on the uv map, put new pieces of uv on dark places in the texture.
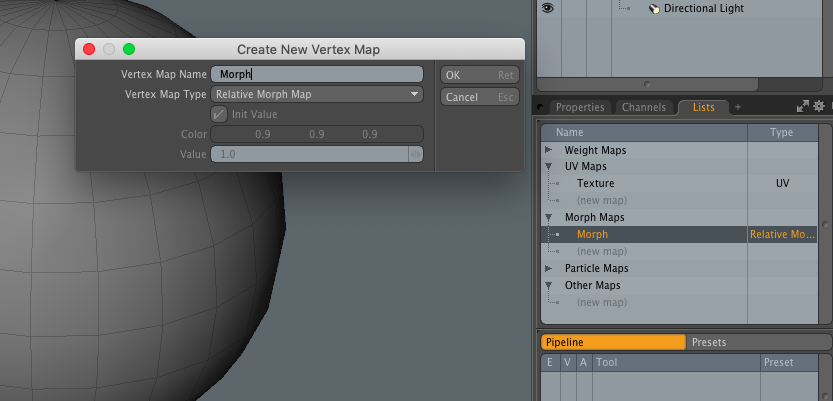
Morphing in Modo
To create morphing on a model. Just go to the tab Lists -> Morph Maps and double-click on the line (new map). In the window, enter the name of the new Morph map. After that, any movement of the polygons and the object will be saved in morph distortion.
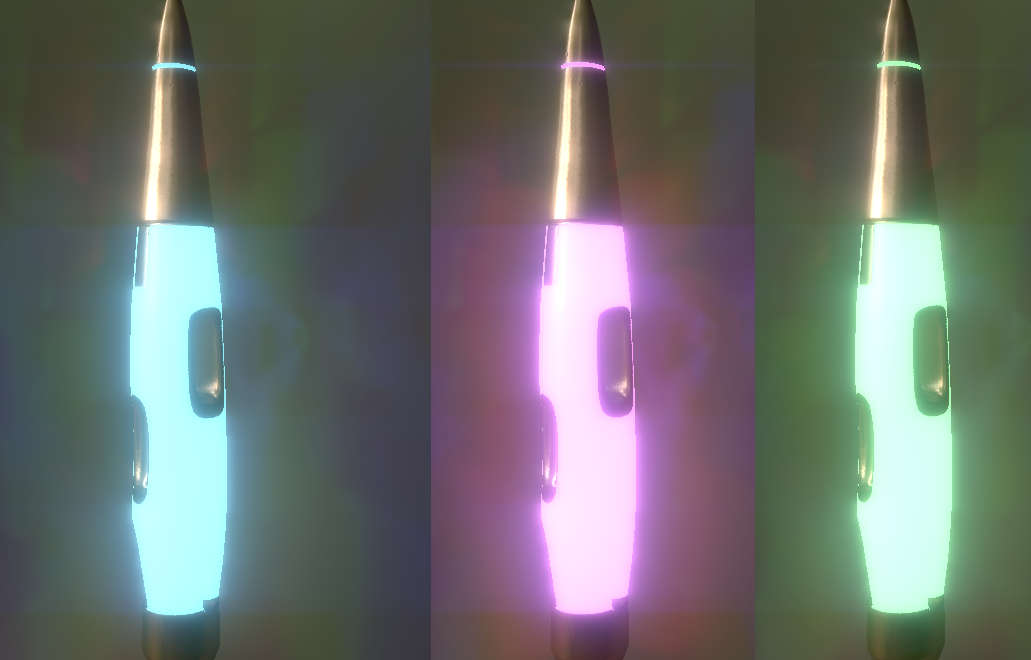
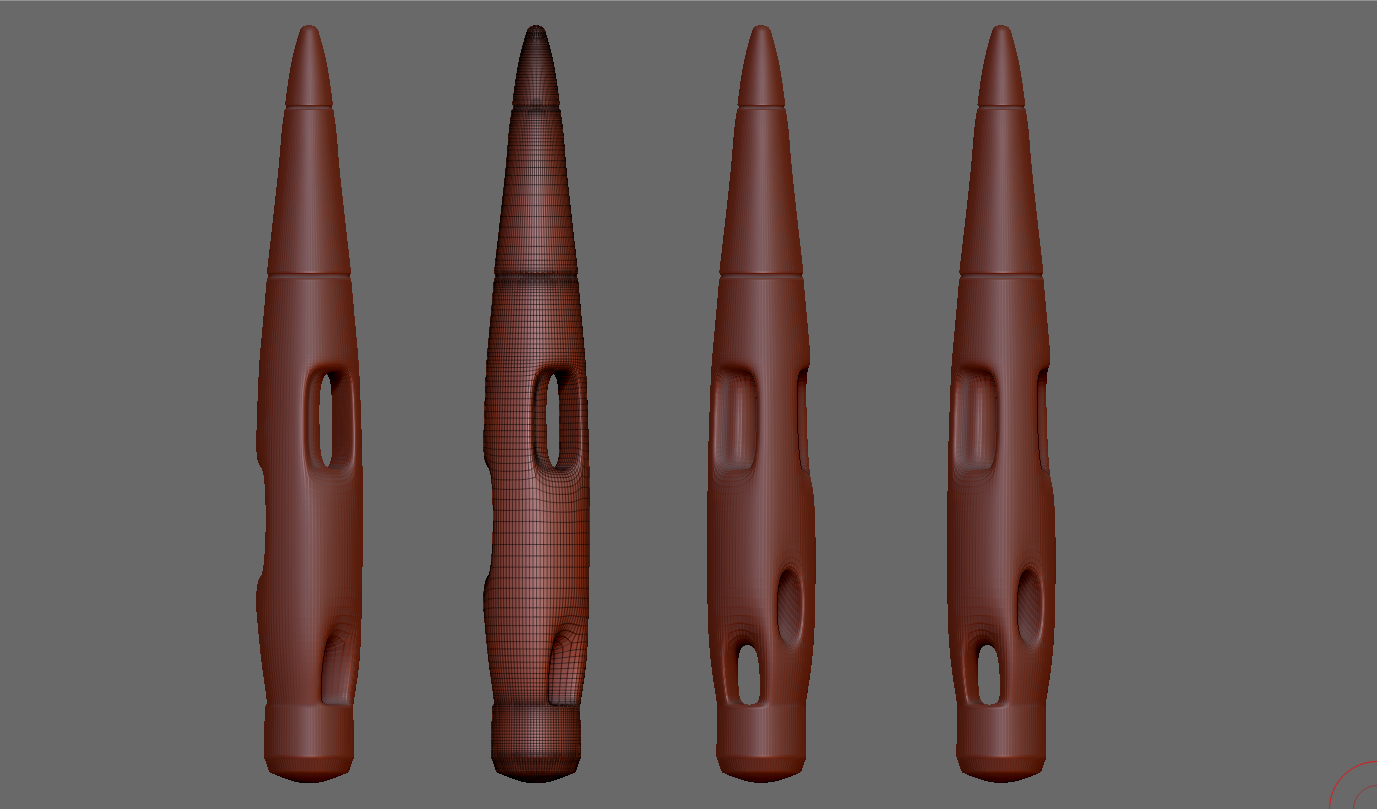
Shell
A shell model is needed for decals when hit in a wall or obstacle. And sometimes shells can fall to the floor. We experimented a bit with color and glow on the project. We wanted to understand how it will be more effective, because in VR games, various special effects look extremely good.
CONCLUSION
Be sure to finish the first geometric sketch. It does not matter what quality it will be. Upload it to the UE or Marmoset toolbag, turn on the shadows to assign materials and see in general. This will help you see the 3D model from a different angle and not dig into the details, understand why the details will be needed and where. At this moment in my experiments with render, I have a lot of new ideas.
This is due to the basic non-effective lighting in the 3D editor which you quickly get used to.
We spent a couple of bottom-hole evenings with my brother, testing various new features with weapons. We managed to evaluate all the work done on weapons. After the experience of development under vr, I believe that a citizen could not yet have a better device that he could afford. But this is still not the final product and not the final quality. You quickly get tired of vr devices, especially if the games are made poorly or without taking into account all the manufacturer's recommendations.
Work from small studios is relaxing.
When a serious customer came, I was tense and wanted to show my maximum level, but such an overstrain fetters my hands and head. As a result, I don’t get better than a project of satisfactory quality. Another thing, when a customer comes with an Indie project or from an unknown company, such a project provides freedom in the work process and there is no pressure of responsibility to it. The result is perfect. it’s not scary to fall face down into the mud, which in turn relaxes and helps in the work. And between the major Indie projects, tasks provide a respite and an opportunity for experimentation.

Mode of operation
You can not neglect the regime of day and night for a long time, after 16 days, digestion is disturbed and health is worsened. Since the scope of work on this project was large, I wanted to process it as soon as possible, working until the next morning for a month. In this connection, my health worsened greatly and it took me several months to recover.

Contacts and links
website: www.romanyukart.com
Youtube: www.youtube.com/channel/UCE90bVW7C9aOL8s0wXD0eMw
Models and kits: romanyukart.com/store
Instagram: www.instagram.com/romanyukart

Youtube: www.youtube.com/channel/UCE90bVW7C9aOL8s0wXD0eMw
Models and kits: romanyukart.com/store
Instagram: www.instagram.com/romanyukart