We control the Android device
This is the third attempt to make a smart home friends with android, let me remind you that the first attempt to control android devices via HTTP was using the Paw Server application. This application allowed using BeanShell language to embed your code in an xhtml page and interact with it, receive data or manage it. To integrate with the smart home server ( ioBroker ), a driver was written, but for its first configuration, it was necessary to manually load scripts. Further, through the driver, scripts were updated, which allowed adding new functions and fixing errors, but also imposed a number of restrictions in attempts to move away from the methods laid down in Paw Server for implementing new functions.
The second attempt was to build your application based on the source from the Paw server. The main goal was to simplify the configuration process for the user, as well as add new features that could not be implemented in the previous version.
In the same version, it was decided to completely abandon the Paw server and rewrite the application and driver for ioBroker. Add new connection methods, besides the existing HTTP, also MQTT. Add more settings for choosing events, both from the system itself and from built-in sensors. Of course, the first thing the application will be optimized for ioBroker, but without much difficulty can be integrated into other systems.
The Google Play
app allows you to:
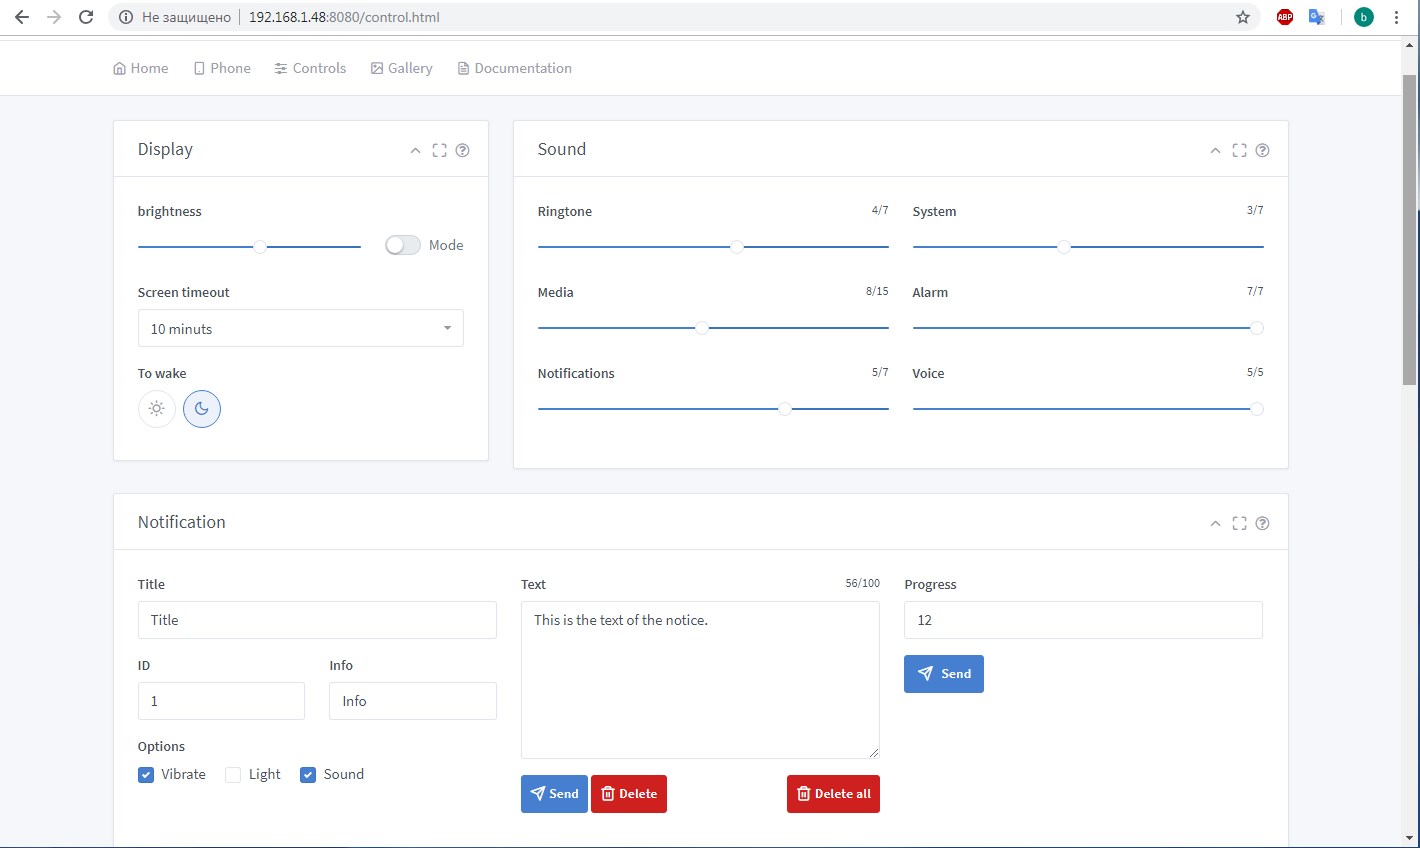
- Get the status of system settings (backlight brightness, screen status, volume, battery, etc.)
- Receive data from incoming calls, speech recognition
- Receive data from built-in sensors.
- Get location coordinates.
- Get a list of installed applications and launch them.
- Manage system settings (backlight brightness, volume level, etc.)
- Make calls.
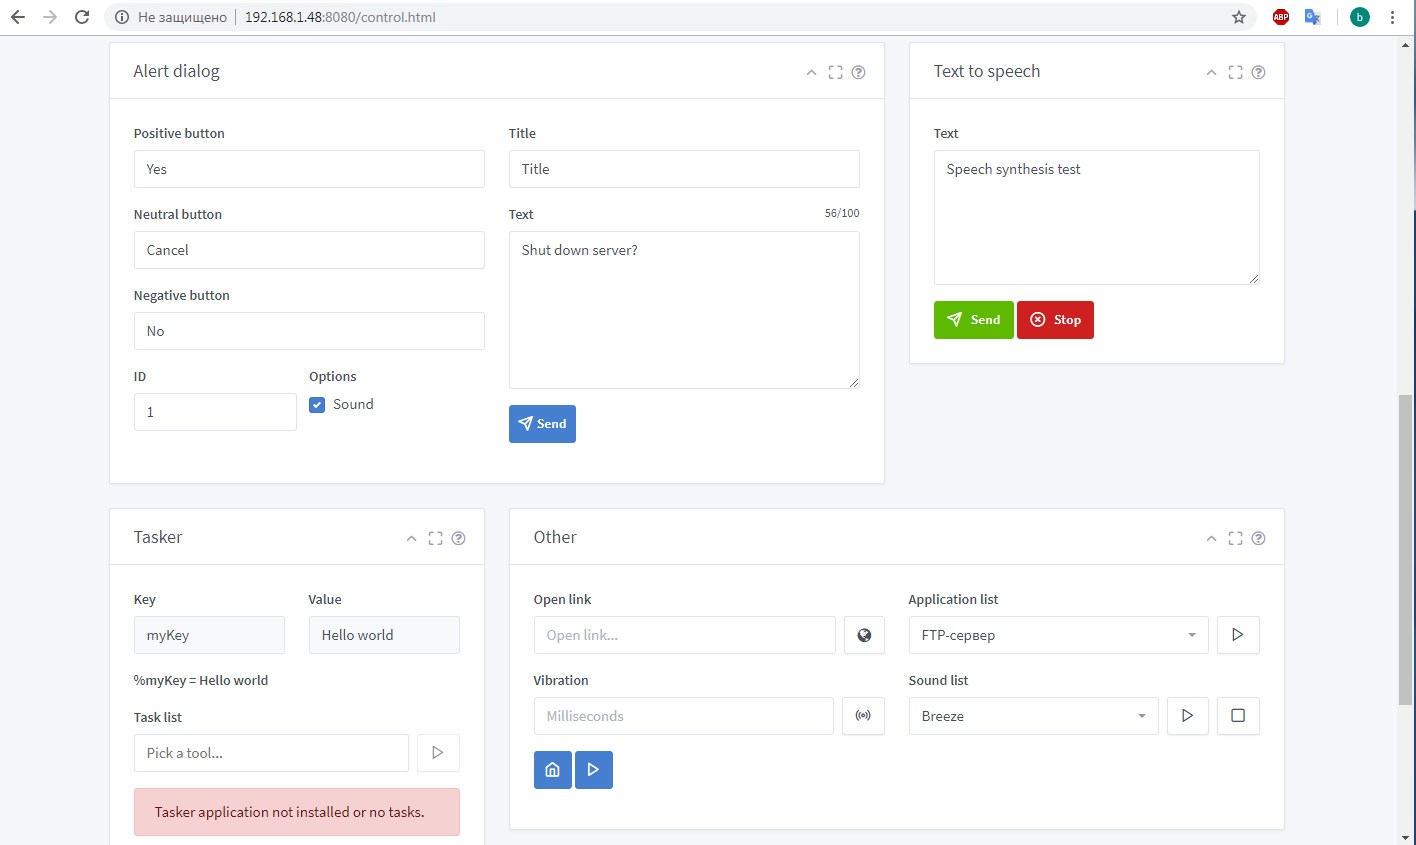
- Create notifications and dialog boxes.
- Send text to speech synthesis.
- Interact with Tasker.
- Send files to devices (HTTP only).
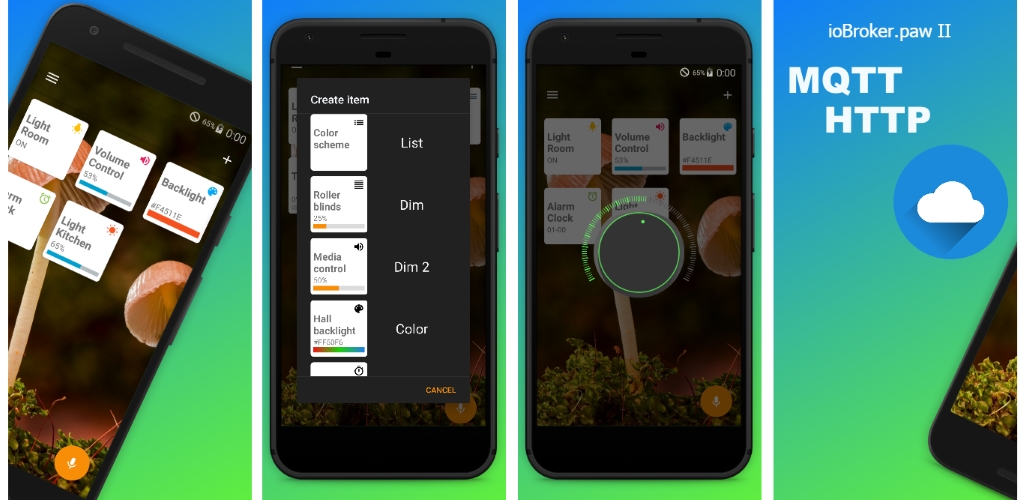
Appearance
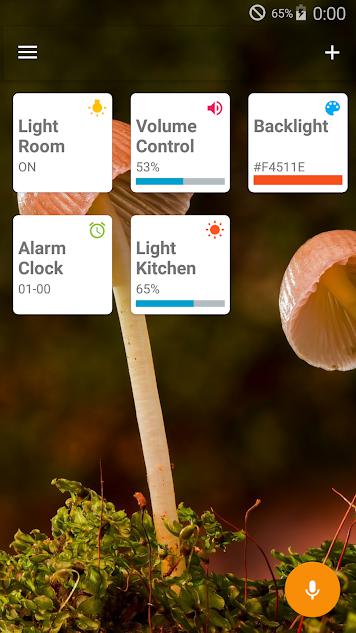
The appearance of the application is not final and may vary. I would like to change or add a lot, but that's all with time.
With the navigation through the application, I think, there should be no difficulties. At the first launch, the application briefly informs about the current changes in the new version and suggests using the “assistant”. By going to the application settings, you can change the basic operation parameters, select the type of connection, select the events that will be transmitted to the server, and also allow or deny access to some data (phone book, messages, call list and photos).
On the main screen you can see the "tiles", while this is a trial version, but over time I plan to expand their capabilities. Of the available "tiles", at the moment, there is: button, dimmer, time, list, color, information. The main task of the tiles is to send or receive data (commands) from the server or manage other devices. While there is no overall picture of how everything should work, I will not now describe all the nuances.
Connections
Now about connections and control commands, the application has two connection options via HTTP and MQTT. Each method has its advantages and disadvantages, which method of connection you choose.
HTTP
This method involves connecting via Wi-Fi to a local network. The application "raises" its web server (the IP address and port can be seen in the notification when connecting) and gives access to manage it. This can be done either directly (via a browser), or in integration with the UD server, through POST or GET requests. Responses from requests will be returned in JSON format, the device name, ip address and command status are transmitted in the response body. Some requests call an additional “callback”, for example, when sending text to speech synthesis, the application will send a request to the server about the beginning of speaking the text and its completion. In the same way, the application transmits data about events and readings of built-in sensors to the server. Therefore, for full-fledged work, it is required that the UD server be able to process them.
MQTT
The MQTT protocol is quite popular and is supported by various DD systems, this makes it easy to integrate the application into them. When choosing this connection method, you can use both local and external MQTT brokers.
When connecting to the MQTT broker, the main branch / PAW / is created , followed by the name of the devices (each device must have its own), which in turn are divided into two branches of the topic / info / and / comm / , you can guess from the name that The info (information) branch publishes all incoming information from the device, and the comm (command) branch contains topics for managing it. This is done for clarity, in order to better understand which topic is responsible for what.

Also in the main branch there is / all_devices /In this branch there are topics that all devices subscribe to, which allows you to manage all devices at once.
For universality, in those topics the values of which can be true (true) or false (false), they can take different values, that is, 1, on, auto, true is the true value, and 0, off, false, manual- this is false. Another feature of the application is that to check the execution of the command, in case of successful execution, an empty value is published in the same topic. And if the value after publication has not disappeared, this indicates that an error occurred while executing the command or the value does not match the correct one for this topic. For example, when changing the volume level, if the value does not correspond to the number or goes beyond the maximum, for a given type of volume level, it will return an error.
Also in this version, the set of commands for notifications and “dialogs” was expanded, they allow you to display more detailed information, as well as interact with the user if the device is used as an informer. When constructing them, a large number of parameters are required, therefore, it is necessary to publish the value in JSON format in the appropriate topic.
For notifications topic / comm / notification / create (below is an example of the value)
{
 "noti":"Any text",
 "title":"Title 2",
 "info":"Any text",
 "vibrate":true,
 "sound":true,
 "light":true,
 "id":2
}
For "dialogs" topic / comm / notification / alert . The response from the "dialogs" comes in JSON format and is published in the topic / info / alert / response
{
 "alert":"Turn the lights off?",
 "title":"Light",
 "negative":"No",
 "positive":"Yes",
 "neutral":"Neutral",
 "sound":true,
 "id":2
}
IoBroker integration

Embedding the ability to work through the MQTT protocol in applications, I just wanted to simplify the integration with the system and get rid of writing a separate driver. But some functions cannot be implemented through the MQTT protocol, and for this reason a driver cannot be dispensed with.
The structure of driver objects is similar to the structure of MQTT, and is also divided into two branches / info / and / comm / , it has similar commands for managing and the same reaction to incorrect data. I will not describe the driver settings and operation here; all current information will be updated on GitHub .
Notes
As for managing system settings (controlling the brightness of the backlight, waking up from sleep, etc.), different devices will react differently, or not, to commands. Due to the wide variety of devices, SDK versions, firmware, it is difficult to set one behavior model per command. Here you need to select an action according to your device, for example, for most devices to turn off the screen (send it to sleep) it is enough to change the backlight timeout time, but on some devices this will not work. The same situation with other system settings, for most devices, changes will immediately occur, but for others it is necessary to send the device to sleep and then wake it up so that the changes take effect. The smallest problems of this kind arise with SDK 19 (Android 4.4), but that’s not accurate.) Also, don’t forget