Wireless switches in wooden houses
Recently, there has been a tendency to increase the number of country houses from glued beams. This is not surprising, because such houses have a number of advantages: environmental friendliness, durability, thermal insulation, ease of installation and speed of construction. However, there are also disadvantages. These include fire hazard, which makes it difficult to lay electrical networks inside the house.
In this article I will talk about a new way to simplify the wiring in such houses. And also, I will compare the cost of wiring in the usual way and using wireless switches (radio wiring).
Interested, welcome to cat.
First, let's look at how an electrician is made in a wooden house. All methods are divided into two main categories: hidden and open wiring.
Doing hidden wiring is not recommended by most competent sources in this area. However, such wiring can still be done if all the fire safety requirements specified in PES-6 are observed.
That is, there are two ways to make hidden wiring:
As for open wiring, in two of three cases it looks unaesthetic:
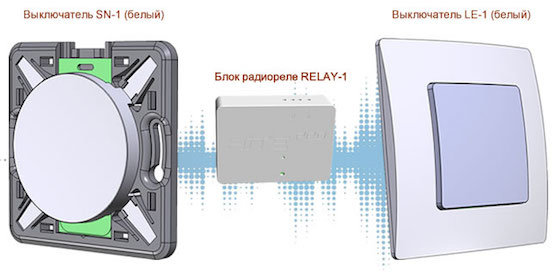
At Habré and Giktayms much was said about home automation, and in this context the Nootehnika company with its nooLite line of devices was mentioned. As a rule, these articles came down to precisely automating home lighting, that is, adding control from the phone or implementing some scripts called by the central server at a certain time. But no one paid attention to the fact that the use of radio switches significantly reduces the time for wiring.
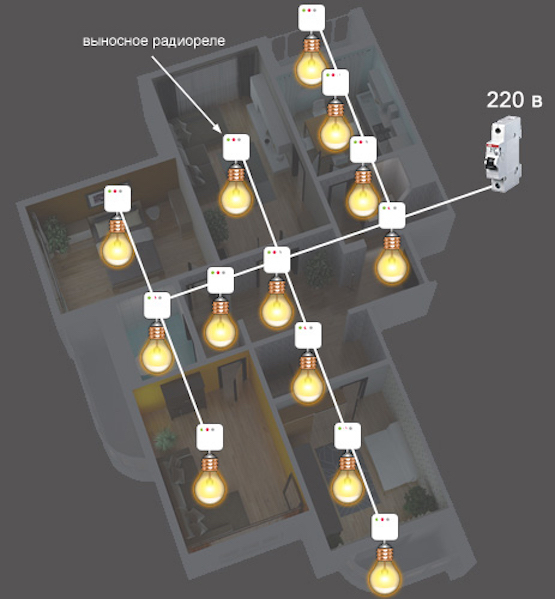
Reduced installation time is achieved due to the absence of the need to lay cables to the switches. And this is a rather long and laborious operation. It is labor-intensive not only in terms of physical work, but also mental. You need to consider in advance the location of each switch in each room. If you use radio switches, then you just need to lay the wires to the lamps, and the location of the switches can be thought out after finishing work.
Also, the use of radio switches of all companies makes it very simple to realize the function of walk-through switches, which is often used in bedrooms. Moreover, in the case of conventional wiring, you can control the light from only two points. Wireless switches of Nootechnika, Delumo, Hite Pro, Glanzen companies allow you to control each lighting zone from more than 5 different places.
Of the methods of laying electricians that I talked about, you can choose the 3 most interesting, that is, looking as aesthetically pleasing as possible. A field of bringing this type to perfection by removing the wires to the switches.
We calculate how much you can save when using wireless switches in each of the options.
We will consider an average two-story house with an area of 200 square meters. m and a ceiling height of 3 m, the switches are located at a height of 1200 mm from the floor. Typically, in such houses the following set of rooms:
Total 15 rooms in which it is necessary to make lighting. We will divide the rooms into groups depending on how many points you need to be able to control the light. For simplicity, we assume that in each room there is only one lighting zone.
Total we need to install 26 switches. Suppose that the switches are single and each needs its own wiring, which goes through a separate cable channel, pipe or wall mounting. In fact, there are usually more switches, as in half of the rooms more than one lighting zone is usually used. But for our calculations, these numbers are enough.
What will be the total cost of installing one switch in each of 4 cases?
From this comparison it follows that radio wiring is almost the cheapest way to organize lighting control. But you need to make one more important note: the radio switch does not directly control the lamp, it is connected to the power unit - a box the size of a matchbox, which is installed in the ceiling of the chandelier. Each such box costs another 1200 rubles. Now we can calculate the cost of each of these methods of laying electricians for the whole house.
That is, radio - electrical installation is almost 2 times cheaper than flush mounting in metal pipes. And commensurate in value with a retro electrician. But at the same time he has a number of advantages. Since Nootechnika products were chosen for the calculation, it is worth considering that in addition to the on / off function, there is the possibility of controlling the brightness of each lamp, the implementation of scripted lighting and even lighting control throughout the house from the phone when you purchase an additional controller, the cost of which is also low.
To complete the picture, in the near future I will write an article comparing equipment from other manufacturers on which you can implement lighting control in a wooden house.
In this article I will talk about a new way to simplify the wiring in such houses. And also, I will compare the cost of wiring in the usual way and using wireless switches (radio wiring).
Interested, welcome to cat.
First, let's look at how an electrician is made in a wooden house. All methods are divided into two main categories: hidden and open wiring.
Doing hidden wiring is not recommended by most competent sources in this area. However, such wiring can still be done if all the fire safety requirements specified in PES-6 are observed.
Excerpt from PES-6 on requirements for hidden wiring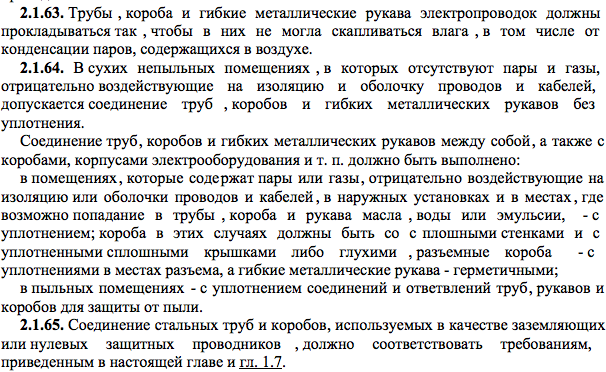

That is, there are two ways to make hidden wiring:
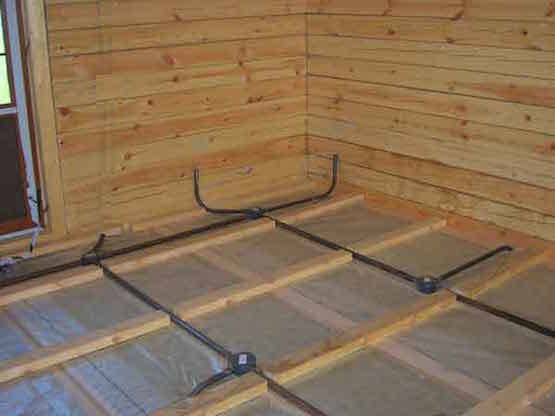
- Stretch the cables in metal pipes - it will be necessary to drill seals in the walls in the form of channels into which pipes will later be laid. The best option for this method is copper pipes, since they bend quite easily and can be laid without special tools.
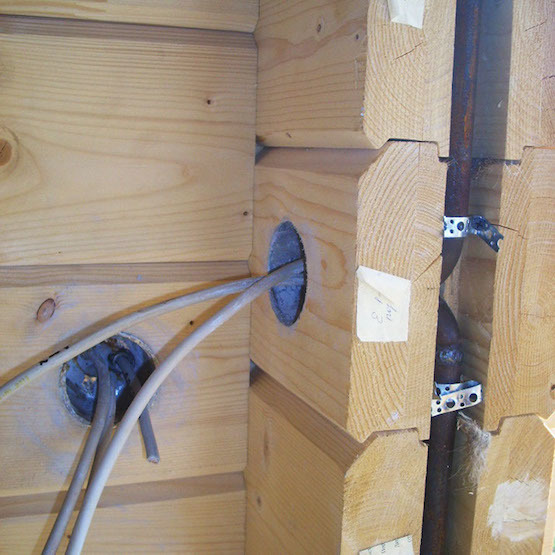
- Lay the cables in a layer of plaster with a thickness of at least 1 cm on each side. But in this case there is no guarantee that there will be no cracks on it. And what's the point in a wooden house if inside it is still covered with artificial material?
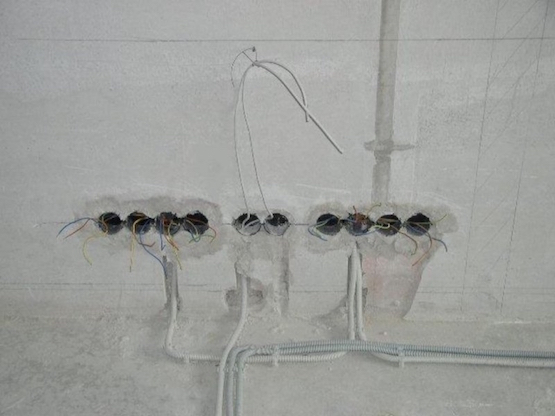
As for open wiring, in two of three cases it looks unaesthetic:
- In the electrical corrugation. Immediately worth noting, this does not fit into the style of the house.
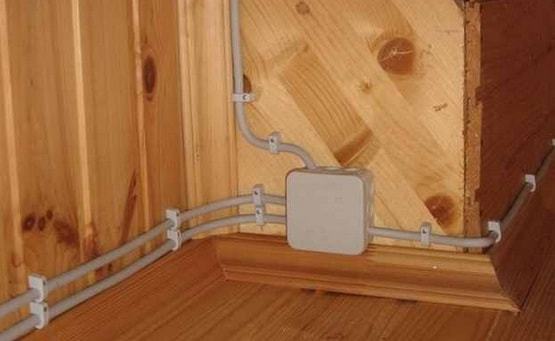
- In cable channels. The main drawback is the fact that the house shrinks about 1 cm per 1 m of height, which means that for a typical two-story house, the shrinkage will be about 3 centimeters, the covers will fly off all the boxes, and the boxes themselves will crack. As a result, you have to redo the wiring.
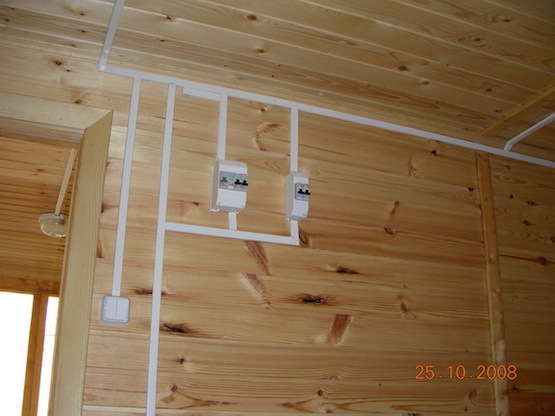
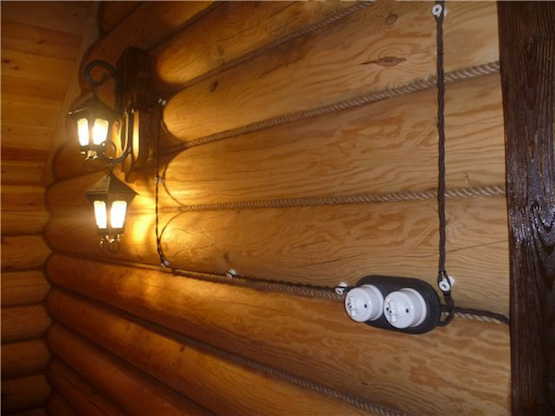
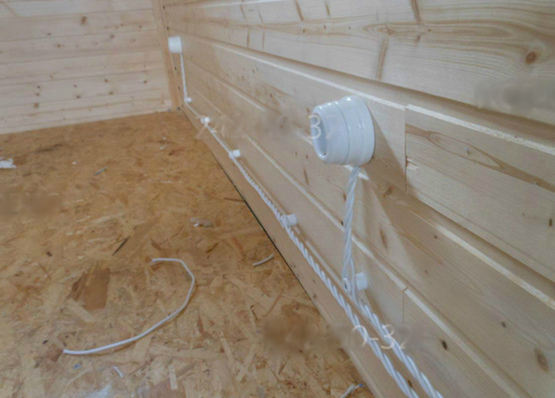
- Open cable. This option is the best of all open wiring methods. It is clear that if you use a conventional cable, it will look no better than the two previous options. But there is the so-called retro wiring, which allows you to perform installation in accordance with all fire safety rules and give the house an original retro look.
What are wireless switches and radio wiring?

At Habré and Giktayms much was said about home automation, and in this context the Nootehnika company with its nooLite line of devices was mentioned. As a rule, these articles came down to precisely automating home lighting, that is, adding control from the phone or implementing some scripts called by the central server at a certain time. But no one paid attention to the fact that the use of radio switches significantly reduces the time for wiring.

Reduced installation time is achieved due to the absence of the need to lay cables to the switches. And this is a rather long and laborious operation. It is labor-intensive not only in terms of physical work, but also mental. You need to consider in advance the location of each switch in each room. If you use radio switches, then you just need to lay the wires to the lamps, and the location of the switches can be thought out after finishing work.
Also, the use of radio switches of all companies makes it very simple to realize the function of walk-through switches, which is often used in bedrooms. Moreover, in the case of conventional wiring, you can control the light from only two points. Wireless switches of Nootechnika, Delumo, Hite Pro, Glanzen companies allow you to control each lighting zone from more than 5 different places.
Why is it especially beneficial for wooden houses?
Of the methods of laying electricians that I talked about, you can choose the 3 most interesting, that is, looking as aesthetically pleasing as possible. A field of bringing this type to perfection by removing the wires to the switches.
- Concealed installation in metal pipes
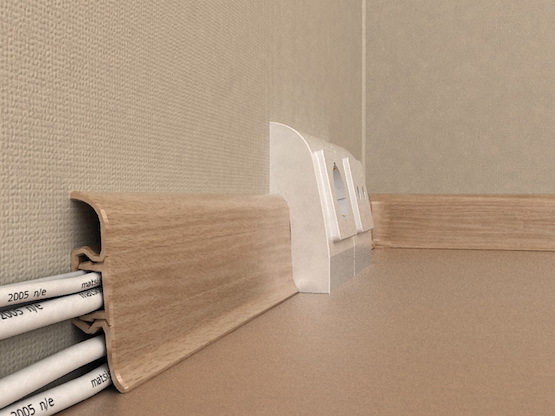
- External installation in baseboards (cable channels inside the baseboard)
- Retro electrician without wires to the switches
We calculate how much you can save when using wireless switches in each of the options.
We will consider an average two-story house with an area of 200 square meters. m and a ceiling height of 3 m, the switches are located at a height of 1200 mm from the floor. Typically, in such houses the following set of rooms:
- Ground floor
- Hallway
- Corridor
- Restroom
- Kitchen
- Living room
- Guest
- Utility room
- Staircase between floors
- Second floor
- Corridor
- Linen
- Restroom
- Bathroom
- Bedroom 1
- Bedroom 2
- Bedroom 3
Total 15 rooms in which it is necessary to make lighting. We will divide the rooms into groups depending on how many points you need to be able to control the light. For simplicity, we assume that in each room there is only one lighting zone.
- From one place it’s enough to manage in:
- Living room
- The kitchen
- Technical room
- Linen
- 1st toilet
- 2nd toilet
- Bathroom
- From two places I would like to manage in:
- Hallway
- Corridor on the ground floor
- Guest
- 1st bedroom (let's say this is a children's bedroom and the child sleeps alone)
- 2nd bedroom (let's say this is a children's bedroom and the child sleeps alone)
- Also, staircase lighting should be controlled from two places, but it is even better that it is switched on by a motion sensor
- From three places it makes sense to do control in the parent bedroom (switch at the entrance and from each spouse)
- Of the four points, you only need to control the light in the corridor of the second floor (from each bedroom + switch at the entrance to the floor)
Total we need to install 26 switches. Suppose that the switches are single and each needs its own wiring, which goes through a separate cable channel, pipe or wall mounting. In fact, there are usually more switches, as in half of the rooms more than one lighting zone is usually used. But for our calculations, these numbers are enough.
What will be the total cost of installing one switch in each of 4 cases?
- Flush mounting in metal pipes = 4133 rubles.
- A copper pipe with a length of 1800 mm and a width of 25 mm - the price is 600 rubles per linear meter => 1080 rubles.
- Copper cable 3 x 1.5 mm - the price is 60 rubles per linear meter => 108 rubles.
- Metal mounting box for installing a switch => 230 rubles.
- Switch 250 rub.
- Pipe installation, taking into account the cost of fastenings - 1000 rubles per meter => 1800 rubles.
- Cable pulling into a pipe 200 rubles per meter => 360 rubles.
- Installation of the switch, taking into account the cost of drilling a hole for the mounting box and installing the box => 530 rubles.
- Outdoor installation in skirting boards and cable channels = 962 rubles.
- Cable channel color under the tree - 50 rubles per linear meter => 90 rubles.
- Copper cable 3 x 1.5 mm - the price is 60 rubles per linear meter => 108 rubles.
- Switch 470 rub.
- Installation of the channel cable, taking into account the cost of fastenings - 60 rubles per meter => 108 rubles.
- Laying the cable into the cable channel 20 rubles per meter => 36 rubles.
- Installation of the switch => 150 rub.
- Retro electrician = 2515 rub.
- Ceramic cable passage - 79 rubles per piece, 5 pieces are needed => 395 rubles.
- Twisted copper cable 3 x1.5 mm - price 150 rubles per linear meter => 270 rubles.
- Switch 1080 rub.
- Cable installation per meter 150 rubles => 270 rubles.
- Installation of the switch => 500 rub.
- Radio - electrical installation = 1700 rubles.
- Radio switch => 1200 rub.
- Installation of the switch => 500 rub.
From this comparison it follows that radio wiring is almost the cheapest way to organize lighting control. But you need to make one more important note: the radio switch does not directly control the lamp, it is connected to the power unit - a box the size of a matchbox, which is installed in the ceiling of the chandelier. Each such box costs another 1200 rubles. Now we can calculate the cost of each of these methods of laying electricians for the whole house.
- Flush mounting in metal pipes = 4133 rubles * 26 = 107 458 rubles.
- External installation in baseboards and cable channels = 962 rubles * 26 = 25 012 rubles.
- Retro electrician = 2515 rub * 26 = 65 390
- Radio - electrical installation = 1700 * 26 + 1200 * 15 = 62 200
That is, radio - electrical installation is almost 2 times cheaper than flush mounting in metal pipes. And commensurate in value with a retro electrician. But at the same time he has a number of advantages. Since Nootechnika products were chosen for the calculation, it is worth considering that in addition to the on / off function, there is the possibility of controlling the brightness of each lamp, the implementation of scripted lighting and even lighting control throughout the house from the phone when you purchase an additional controller, the cost of which is also low.
To complete the picture, in the near future I will write an article comparing equipment from other manufacturers on which you can implement lighting control in a wooden house.
