Capturing video from USB cameras on Linux devices

Background
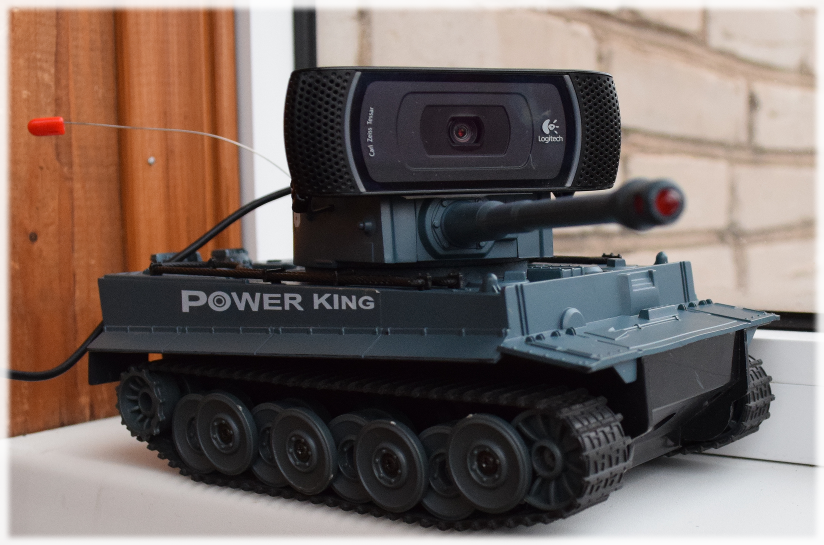
Some time ago, I was tempted to “improve” a tank from the well-known set “Tank battle”, adding the ability to play as if I were a tank driver. The idea appeared after reading several articles on Habré (for example, here: geektimes.ru/post/257528), in them I found how this can be done with a small WiFi router and a USB camera. The solution looked captivatingly simple: the router is flashed with special firmware, the camera is connected to it, the tank is controlled by the native remote control, and the video looks in the browser. Having quickly assembled the prototype, I found that the video was captured in disgusting quality. It was either 320x440x30 or 640x480x30. When the 1280x720 mode was turned on, at best there was a torn video with artifacts, at worst it was not at all. The 1920x1080 mode did not work in principle. This greatly upset me, since on a PC the camera supported modes up to 1920x1080x30 and had hardware MJPG compression. My intuition suggested that the implementation is far from perfect.
Goals
- Video in FullHD (1920 × 1080) or HD (1280 × 720) resolution and normal frame rate (so that you can play).
- I planned to give the toy to the children, so I needed an auto start and support for connecting / disconnecting the camera.
In general, I wanted something like this:

Limitations
I was not going to look for a solution that works always and everywhere. The following restrictions suited me perfectly:
- Good wifi signal.
- A limited number of connections, priority was given to the case when there is only one client.
- The camera supports MJPG mode.
HW and SW
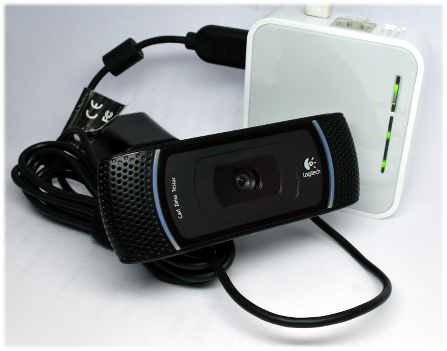
- Logitech B910 HD camcorder ( http://www.logitech.com/en-us/product/b910-hd-webcam ).
- Router TP-LINK TL-MR3020. This baby has the following hardware: CPU MIPS 24K 400MHz, RAM 32 MiB, Flash 4 MiB, Ethernet 100 Mbit, USB 2.0 ( http://wiki.openwrt.org/en/toh/tp-link/tl-mr3020 ).
- Firmware for the router. I started with OR-WRT ( http://roboforum.ru/wiki/OR-WRT ), but ended up with OpenWRT ( http://openwrt.org/ , versions 12.07 and 15.05).
- Browser. Of course, this is not the best option, but it is very convenient for a start.
- Set "Tank battle".
Preliminary analysis
In general, this is a really weak configuration, especially if you recall that a frame in the YUV420 format of size 1920X1080 takes 4 MiB (2 bytes per pixel). I was encouraged that the camera supports hardware MJPG compression. Experiments have shown that a compressed FullHD frame is typically <500 KiB. So I decided to continue the research. It turned out that mjpg-streamer (http://sourceforge.net/projects/mjpg-streamer/) is used to capture video and stream it via HTTP. An analysis of his code showed that he uses 1 stream to capture video + a separate stream for each client. This is not the best solution for a single-core system, as it requires thread synchronization and memory for the stack for each thread. He also copied captured frames. In general, mjpg-streamer became suspect # 1.
Interesting find
Studying mjpg-streamer, I found out that video capture on Linux is done using the v4l2 library and a buffer queue is used to capture it. While debugging the initialization of these buffers in mjpg-streamer, I found that even for MJPG mode their size is very large and unexpectedly coincides with the size of the uncompressed frame. So I began to suspect that I would have to get into the UVC driver code, which is responsible for supporting the cameras.
Driver Code Analysis and First Success
Studying the code, I came to the conclusion that the size of the buffer is asked by the camera and my camera returned the size of the uncompressed frame. This is probably the safest solution from the point of view of camera developers. But it is also not optimal. I decided that for my case, you can adjust the required buffer size using the experimental minimum compression ratio. I chose k = 5. With this value, I had a margin of about 20%.
A small digression.
Strictly speaking, there are cameras that allow you to set the compression level of JPG. Perhaps this is a more correct way to determine the minimum compression ratio. But my camera did not support this option, and I was forced to rely on experimental values.
The UVC driver code was ready to add various kinds of “special” solutions, and I easily found a place where you need to adjust the buffer size (function uvc_fixup_video_ctrl ()). Moreover, the driver supports a set of quirks that allow you to support cameras with various deviations from the UVC standard. In general, the developers of the driver have done the best that is possible to support the zoo cameras.
Adding buffer size correction, I got stable operation in 1280x720 mode and even in 1920x1080 mode. Hurrah! Half the problem is solved!
Looking for new adventures
A little happy with the first luck, I remembered that mjpg-streamer is far from perfect. Surely you can do something simple, not as universal as mjpg-streamer, but more suitable for my conditions. So I decided to make uvc2http.
In mjpg-streamer, I did not like using multiple streams and copying buffers. This determined the solution architecture: 1 stream and no copy. Using non-blocking IO, this is done quite simply: capture the frame and send it to the client without copying. There is a small problem: while we are sending data from the buffer, we cannot return the buffer back to the queue. And while the buffer is not in the queue, the driver cannot put a new frame into it. But if the queue size is> 1, then this becomes possible. The number of buffers determines the maximum number of connections that can be guaranteed to serve. That is, if I want to guaranteedly support 1 client, then 3 buffers are enough (the driver writes to one buffer, we send data from the second, the third in stock to avoid competition with the driver for the buffer when trying to get a new frame).
Uvc2http
Uvc2http consists of two components: UvcGrabber and HttpStreamer. The first is responsible for receiving buffers (frames) from the queue and returning them back to the queue. The second is responsible for serving clients over HTTP. There is some more code that links these components. Details can be found in the source.
Unexpected problem
Everything was wonderful: the application worked and in the resolution of 1280x720 produced 20+ frames / sec. I made cosmetic changes to the code. After the next batch of changes, I measured the frame rate. The result was depressing - less than 15 frames. I rushed to look for what led to degradation. I probably spent 2 hours during which the frequency decreased with each measurement to a value of 7 frames / sec. Different thoughts entered into my head about degradation due to the long work of the router, due to its overheating. It was something incomprehensible. At some point I turned off streaming and saw that just one capture (without streaming) gave the same 7 frames. I even began to suspect problems with the camera. In general, some nonsense. It was in the evening and the camera, turned out of the window, showed something gray. In order to change the gloomy image, I turned the camera inside the room. And lo! The frame rate increased to 15 and I understood everything. The camera automatically adjusted the exposure time and at some point this time became longer than the frame duration at a given frequency. During these two hours the following happened: at first it was gradually getting dark (it was evening), and then I turned the camera inside the lighted room. Pointing the camera at the chandelier, I got 20+ frames / sec. Hurrah.
Other problems and nuances of use
- Autofocus can be annoying. I set a fixed focus and selected the value so that it was clearly visible in the range of 1-1.5 meters.
- Different cameras support different options. To understand what your camera supports, you can use the qv4l2 utility, select the parameters you need and then add the setting to the utility. But there are surprises: the same settings can work differently on different platforms. In my case, I came across different behaviors with the same exposure time.
- Nutrition. The camera is powered via the USB port of the router and if the voltage is not stable (for example, when powered by batteries), the camera may turn off (especially if autofocus is on). A simple USB hub (without external power) helped me.
- The router has very little memory and disk space. For this reason, I abandoned OR-WRT and compiled my OpenWRT image, removing everything superfluous from it.
results
Below is a plate with the results of comparing mjpg-streamer and uvc2http. In short, there is a significant gain in memory consumption and a small gain in frame rate and CPU utilization.
| 1280x720 | 1920x1080 | |||||||||||
| VSZ, KB, 1 client | VSZ, KB, 2 clients | CPU,%, 1 client | CPU,%, 2 clients | FPS, f / s, 1 client | FPS, f / s, 2 clients | VSZ, KB, 1 client | VSZ, KB, 2 clients | CPU,%, 1 client | CPU,%, 2 clients | FPS, f / s, 1 client | FPS, f / s, 2 clients | |
| Mjpg-streamer | 16860 | 19040 | 26 | 43 | 17.6 | fifteen | 25456 | 25812 | 28 | fifty | 13.8 | 10 |
| uvc2http | 3960 | 3960 | 26 | 43 | 22 | 19.6 | 7576 | 7576 | 28 | 43 | 15.5 | 12.2 |
And of course the video that I made with the children:
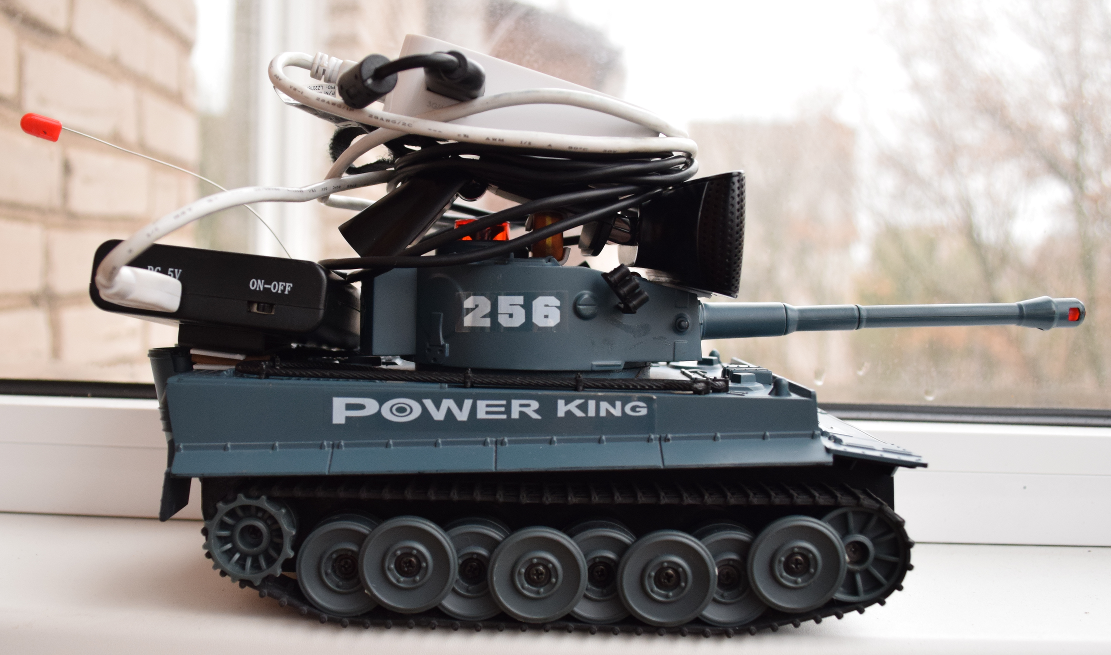
Photo of the resulting tank (it turned out something like a gypsy cart):

Using
Sources are here . For use on PC Linux, you just need to compile (provided that you do not want to patch the UVC driver). The utility is built using CMake in the standard way. If you need to use it in OpenWRT, then you need to take additional steps:
- Copy the contents of the OpenWrt-15.05 directory to the root of the OpenWRT repository. These files are for OpenWRT 15.05 only. They describe a new package for OpenWRT and a patch for the UVC driver.
- If your camera also returns an overestimated size of the required buffer, then you must add the use of quirk UVC_QUIRK_COMPRESSION_RATE for your camera in the uvc_driver.c file. To do this, you need to make your own patch for the UVC driver. How to do this is described here wiki.openwrt.org/doc/devel/patches . You need to add a description of your camera to the uvc_ids array. As an example, you can look at the description of my camera:
/* Logitech B910 HD Webcam */ { .match_flags = USB_DEVICE_ID_MATCH_DEVICE | USB_DEVICE_ID_MATCH_INT_INFO, .idVendor = 0x046d, .idProduct = 0x0823, .bInterfaceClass = USB_CLASS_VIDEO, .bInterfaceSubClass = 1, .bInterfaceProtocol = 0, .driver_info = UVC_QUIRK_RESTORE_CTRLS_ON_INIT | UVC_QUIRK_COMPRESSION_RATE }, // Enable buffer correction for compressed modes - Set up the OpenWRT build using the standard method ( http://wiki.openwrt.org/doc/howto/build ). When setting up, you must select the uvc2http package in the Multimedia menu.
- Build the uvc2http package or the full image (required if you need a driver patch) for your target platform. If you install the utility as a package, it will start at startup.
- Install the package on the device / update the system
What's next
The solution consists of two parts: a driver patch and another streaming algorithm. The driver patch could be included in the new version of the Linux kernel, but this is a controversial decision, since it is based on the assumption of a minimum compression ratio. The utility, in my opinion, is well suited for use on weak systems (toys, home video surveillance systems), and it can be slightly improved by adding the ability to specify camera settings through the parameters.
The streaming algorithm can be improved since there is a margin for CPU load and channel width (I easily received 50+ MBit from the router connecting ten clients). You can also add sound support.
