 September 6, 2017 at 23:53
Overview of SLAM Algorithms for Depth Cameras in ROS
Good afternoon, dear readers! In the last article, I already wrote about the rtabmap SLAM algorithm in the context of visual odometry methods. In this article I will talk about this SLAM algorithm in more detail, and also provide an overview of another well-known SLAM algorithm designed for depth cameras - RGBDSLAM. Who are interested, please, under the cat.
You can read about the project in detail on the official page .
I described the rtabmap installation procedure in detail in a previous article . For example, on an Ubuntu 14.04 system, the installation would look like this:
However, on Raspberry Pi 3 with ROS Kinetic installed, this method will not work, because the rtabmap build is disabled in the Kinetic release for ARM due to a problem with libpcl-dev (more about the problem can be found here ). Therefore, we compile it from the source following the instructions on the rtabmap page:
If swap is not available on the Raspberry Pi, then there may not be enough virtual memory during compilation:
You need to add swap memory according to the instructions from here and restart the compilation.
Compilation should take about an hour. After that, we perform the installation:
Install the rtabmap_ros package in our catkin working directory:
When catkin_make is executed, an error may occur due to the absence of the image_transportConfig.cmake file. In this case, you need to compile the image_transport package in the working directory catkin_ws:
In order to prevent errors when loading dynamic libraries when starting rtabmap_ros nodes, it is recommended to add the following line to ~ / .bashrc:
Run rtabmap:
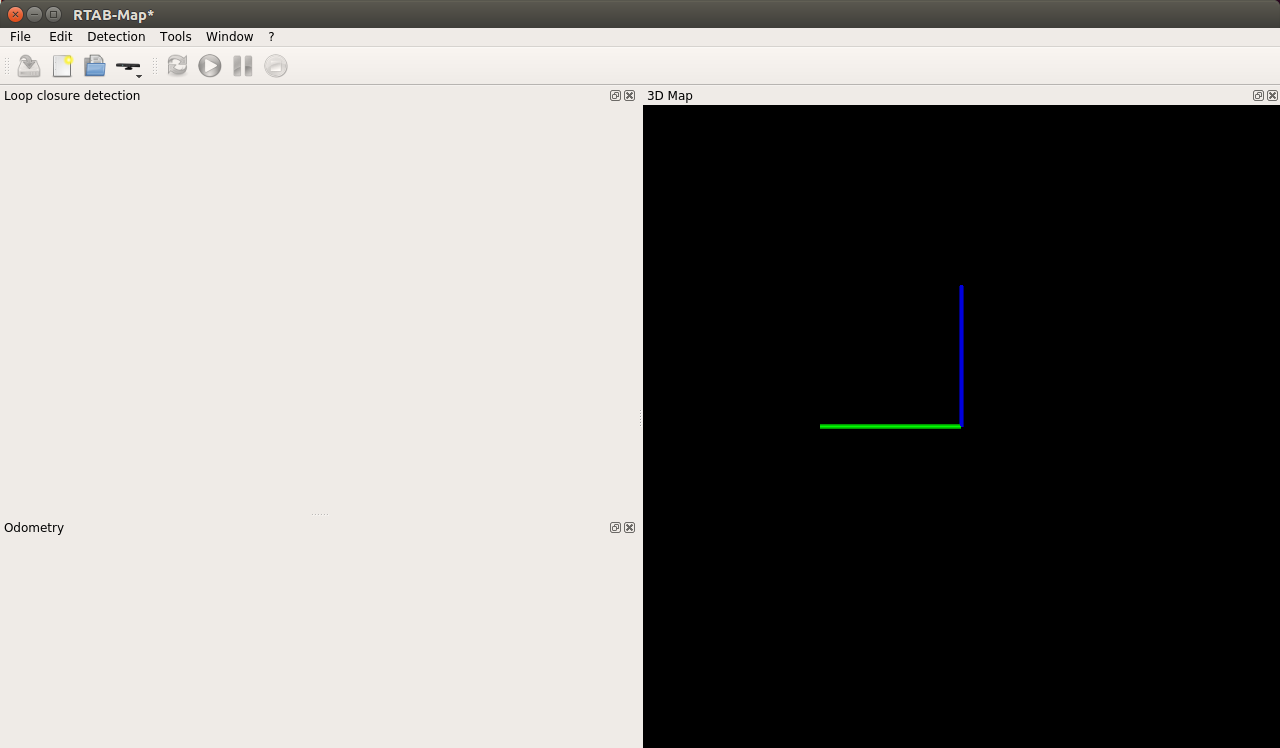
Let's create a new database: File → New database:
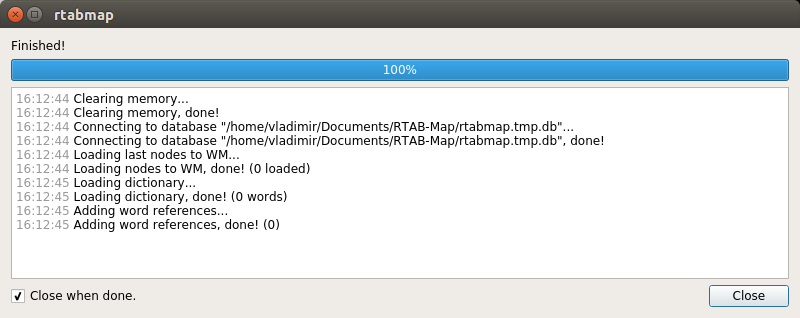
The OpenNI-PCL driver is used for the Kinect camera by default:

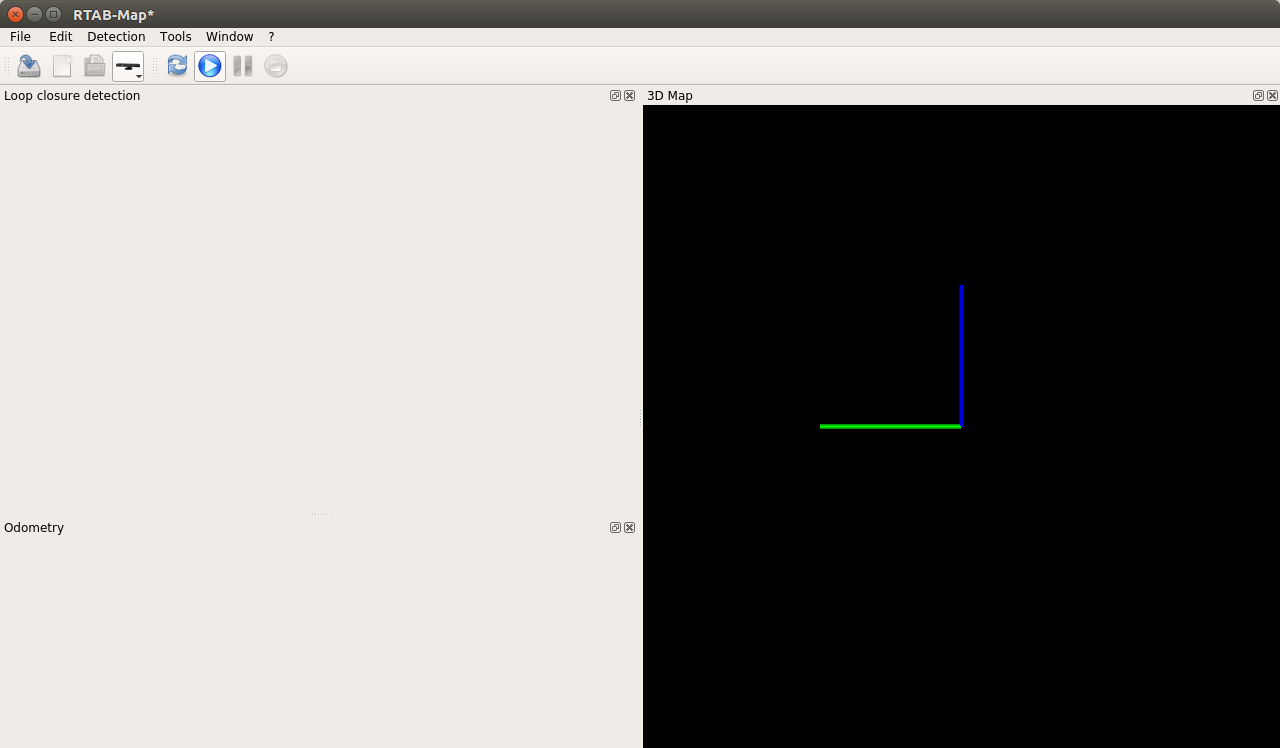
Run the map building procedure by clicking on the “Start” button:
rtabmap can also be used with rviz:
The rviz window opens:
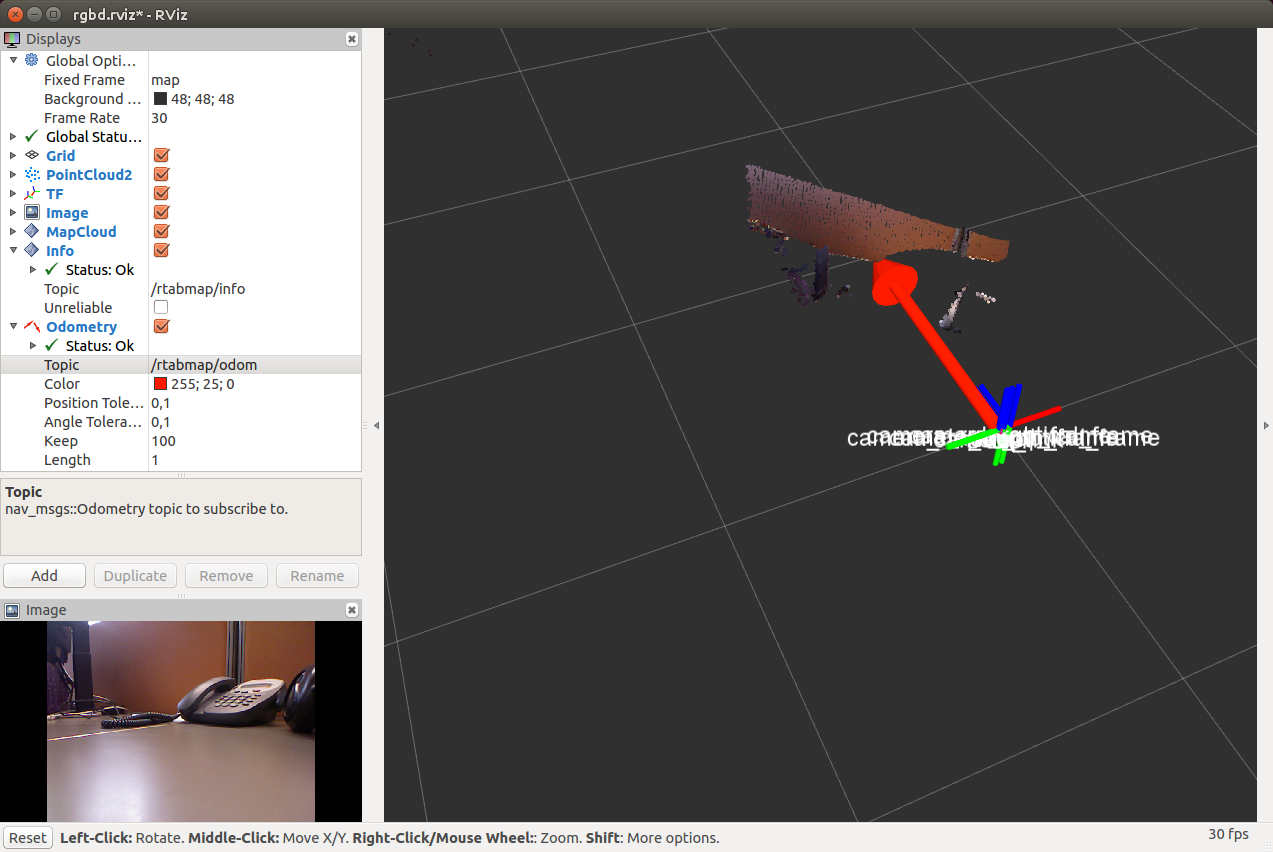
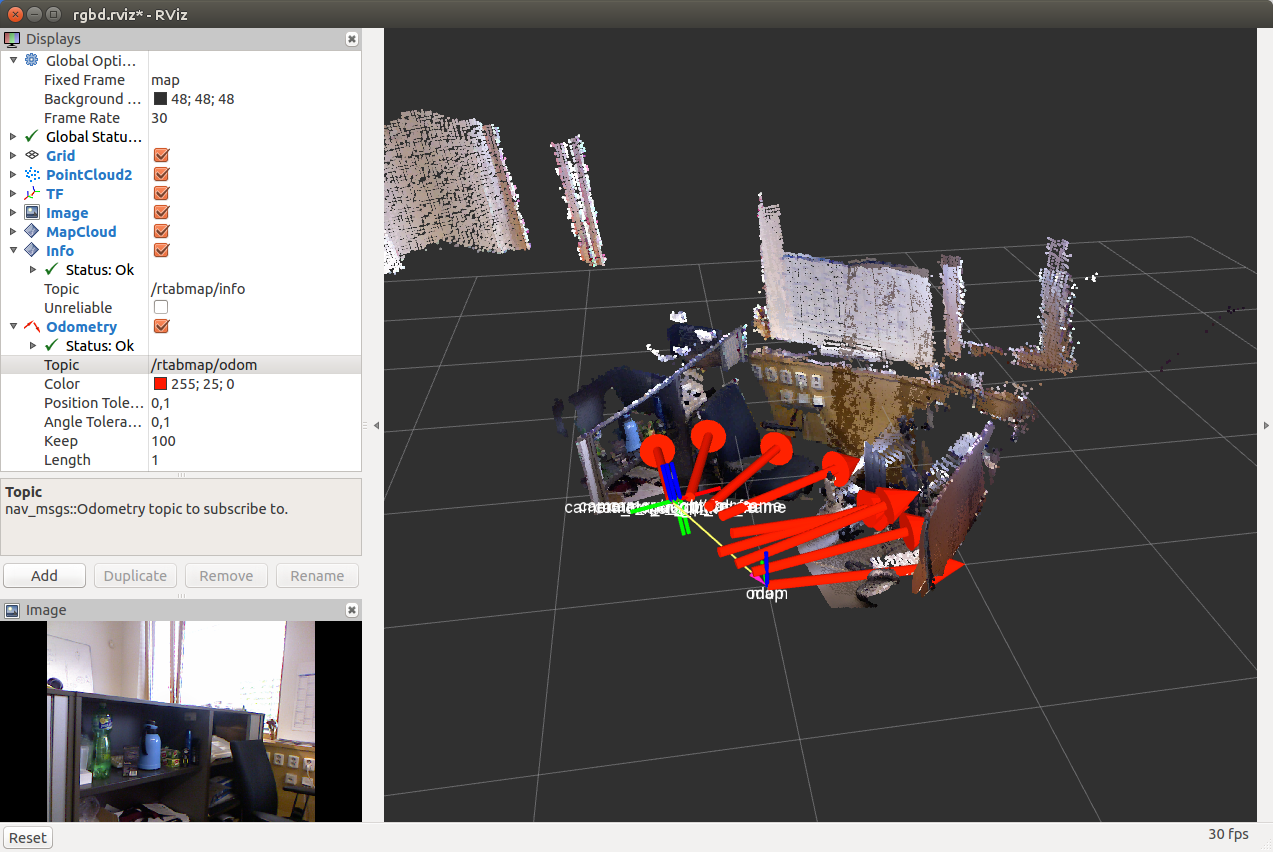
Add the Odometry display and select the topic “/ rtabmap / odom”. After some movement of the camera in space, we get a similar picture in rviz:
After we completely go through the room with the camera, we get:
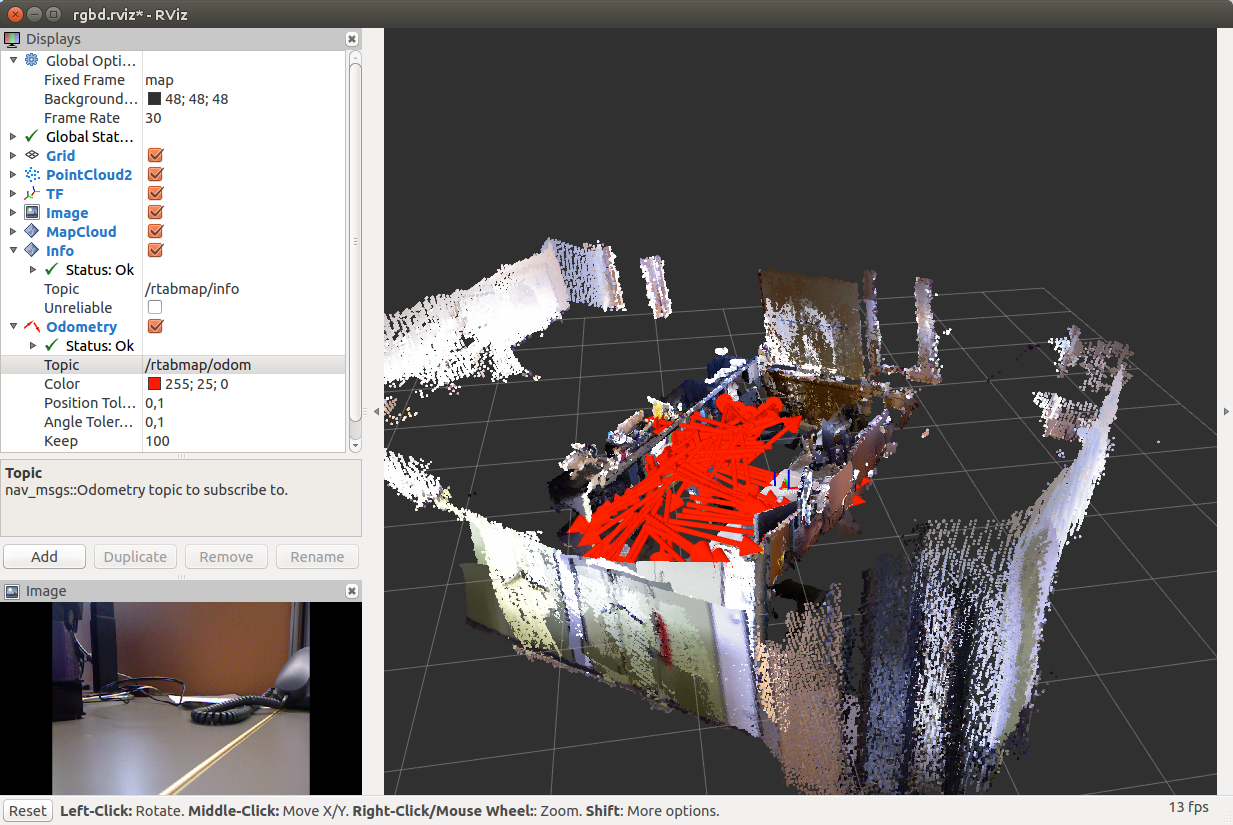
If we move around the room slowly, smoothly moving the camera without sudden movements, we can get a fairly accurate map:

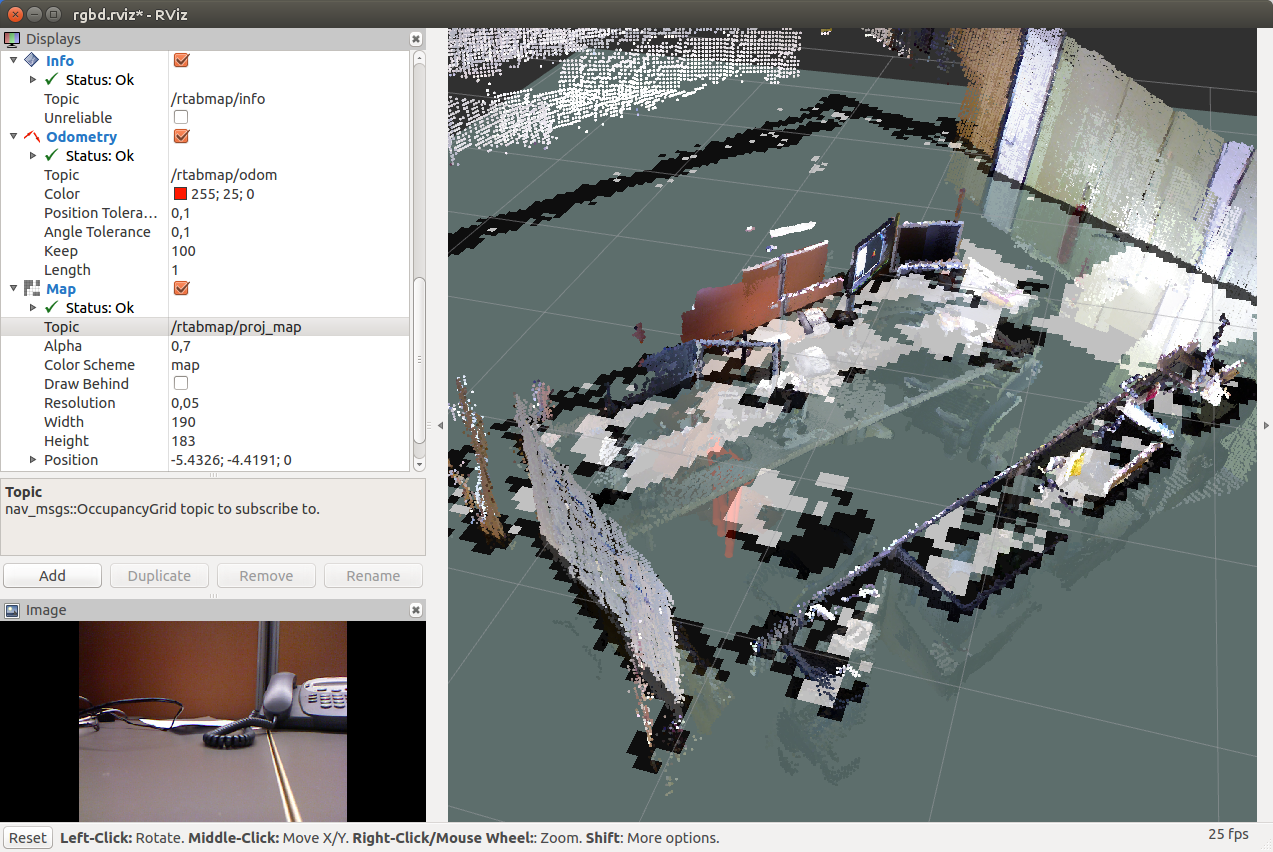
We can add a Map display of type OccupancyGrid and select the topic “/ rtabmap / proj_map” to visualize a flat map (as if we were using gmapping):
When closing the rviz window, the database and map are automatically saved to disk (the path is displayed in a line in the terminal).
Run rtabmap:
A window already familiar to us will open. Create a database: File -> New database:
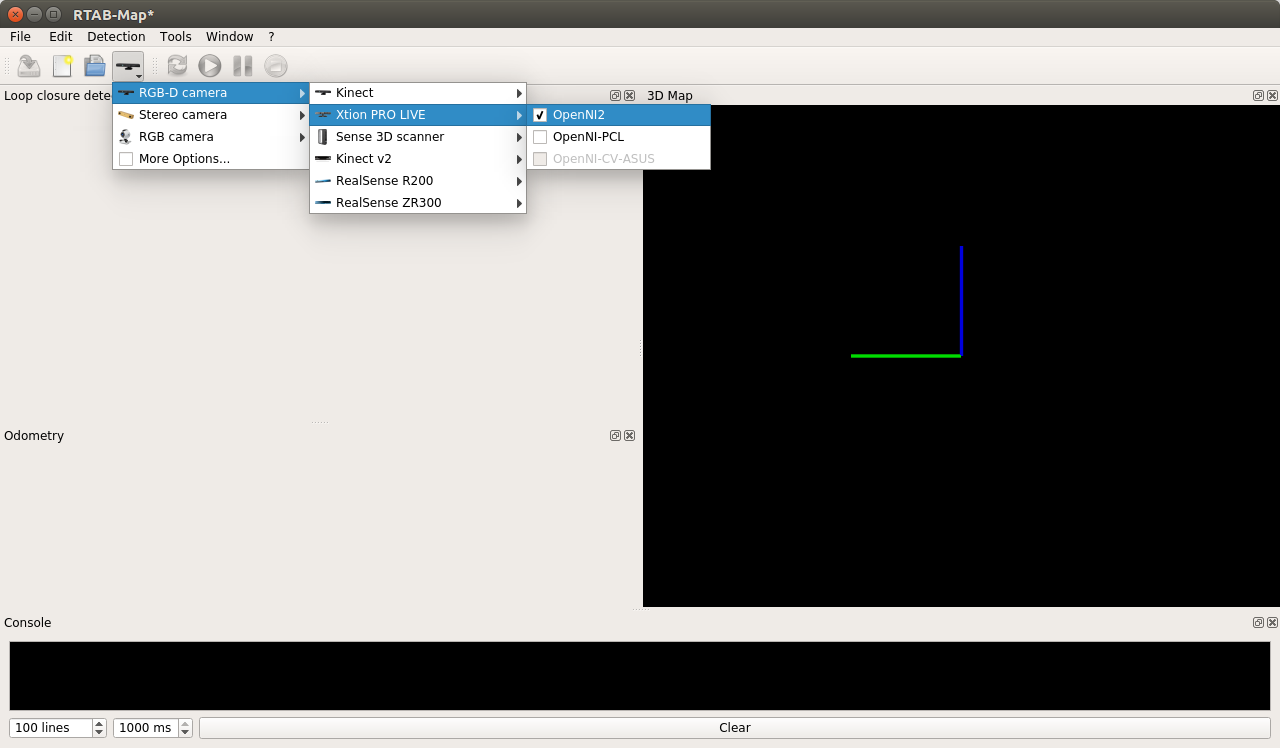
Select the OpenNI2 driver for the Xtion Pro Live camera:
Run the map building procedure with the Start button:
We get:

After some time during the process of moving with the camera:

On the Raspberry Pi, the rtabmap process turned out to be quite resource-intensive for me (used 250 - 300% CPU). Sometimes the window darkened, once rtabmap crashed with a Segmentation fault.
When using the default settings, rtabmap runs extremely slowly on the Raspberry Pi, the frame rate is very low. For effective work, you need to configure the input frame rate. To do this, open Window → Preferences → General settings (GUI) in the top menu and press the “Load settings ...” button. Set the value to 30 Hz for the "input rate":
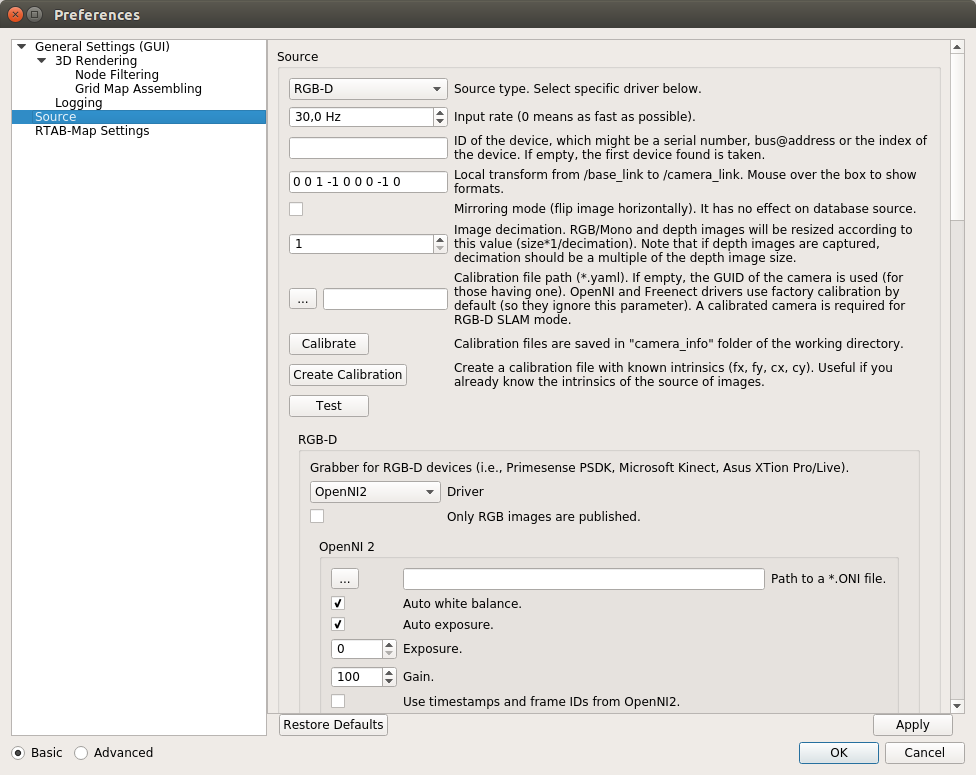
You can read more about setting parameters in rtabmap here .
Now the map building procedure is much faster:
The video shows how odometry data is lost once (a red background appears around the Loop closure detection candidate found) and I do odometer reset through Detection -> Reset odometry. Loss of odometry is often associated with an insufficient number of signs found (for example, poorly textured surfaces) and too fast camera movement. Our map is completely cleared and everything starts anew.
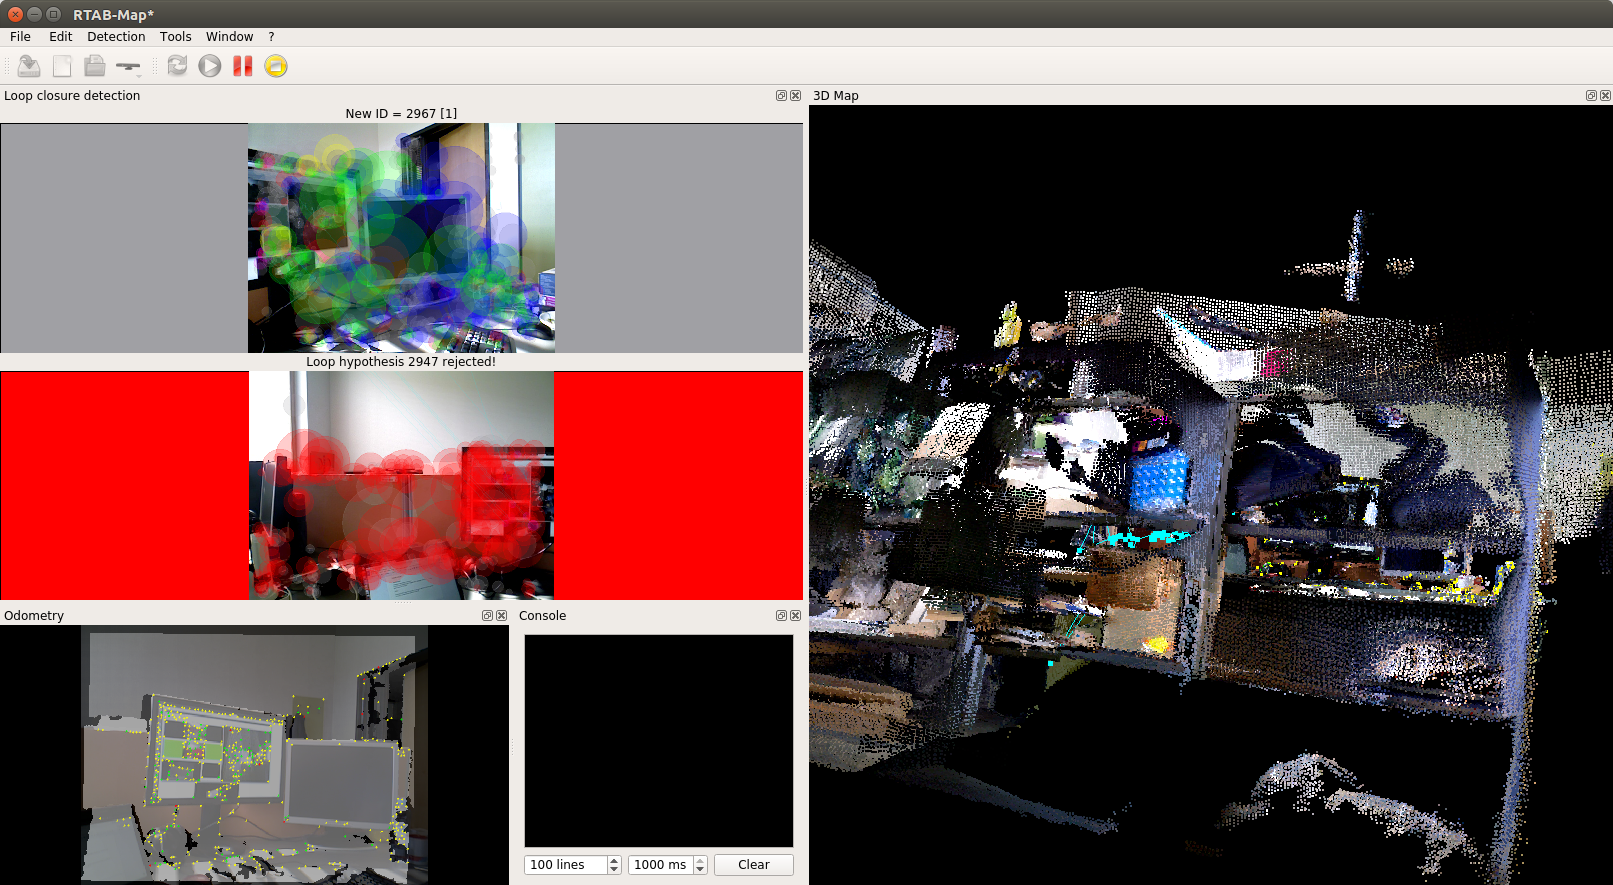
The map is almost ready:
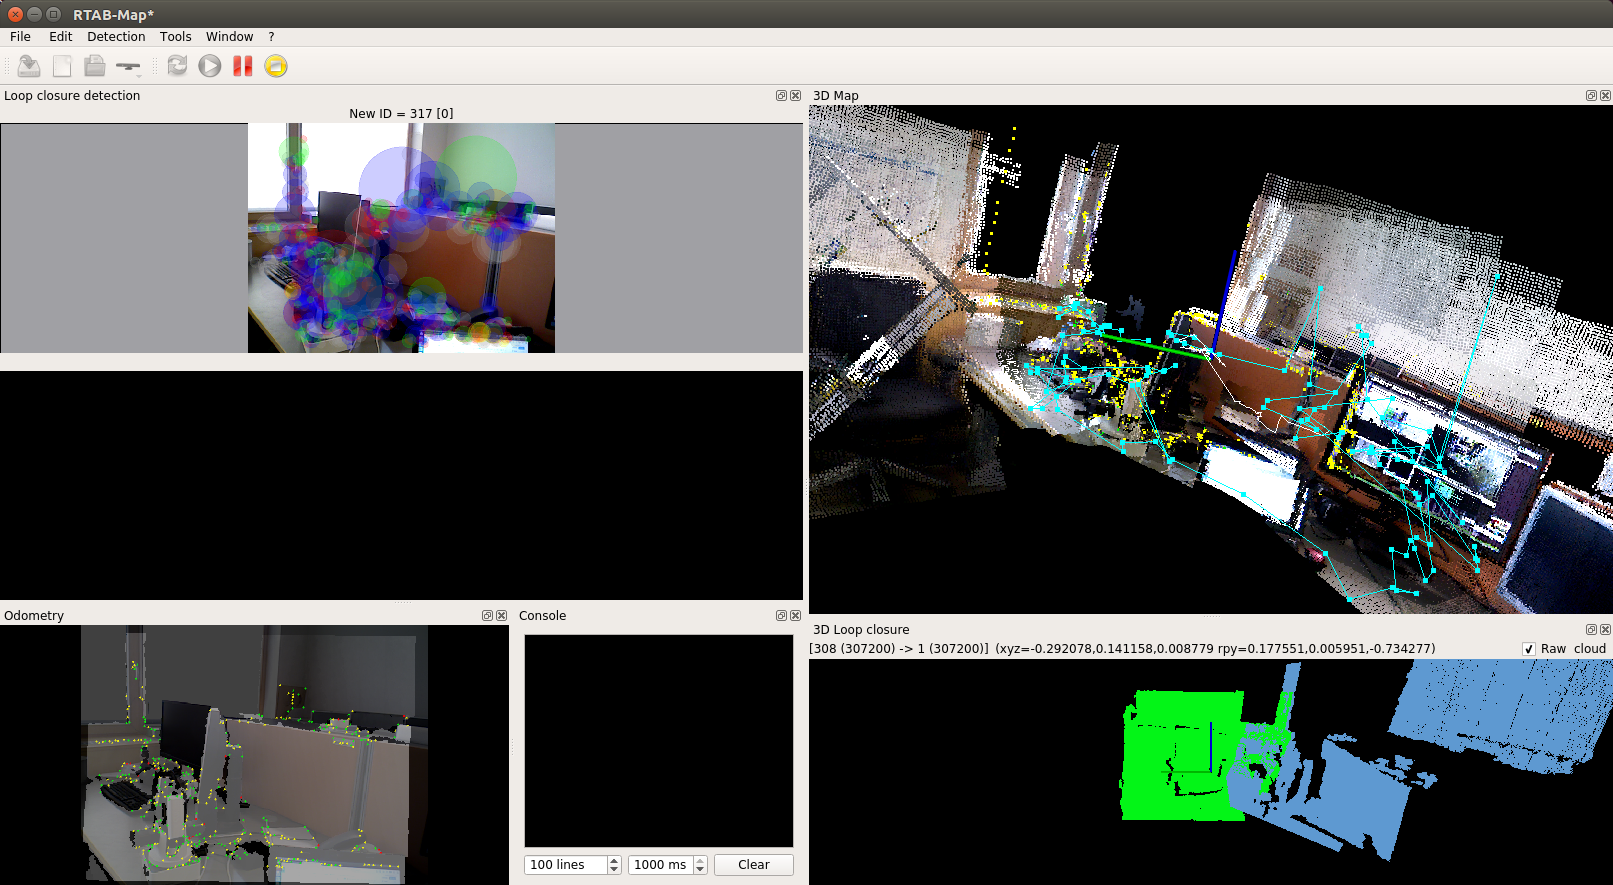
Our task here is to obtain successful loop closure detection. In case of successful detection of cycles, the candidate is highlighted in green.
You can also show the result of loop detection in the 3D loop closure panel. To do this, in the upper menu, select: Window → Show view → 3D Loop closure. Using buttons with numbers from 1 to 5, we can change the format for representing point clouds (arbitrary colors, axis oriented colors or RGB):
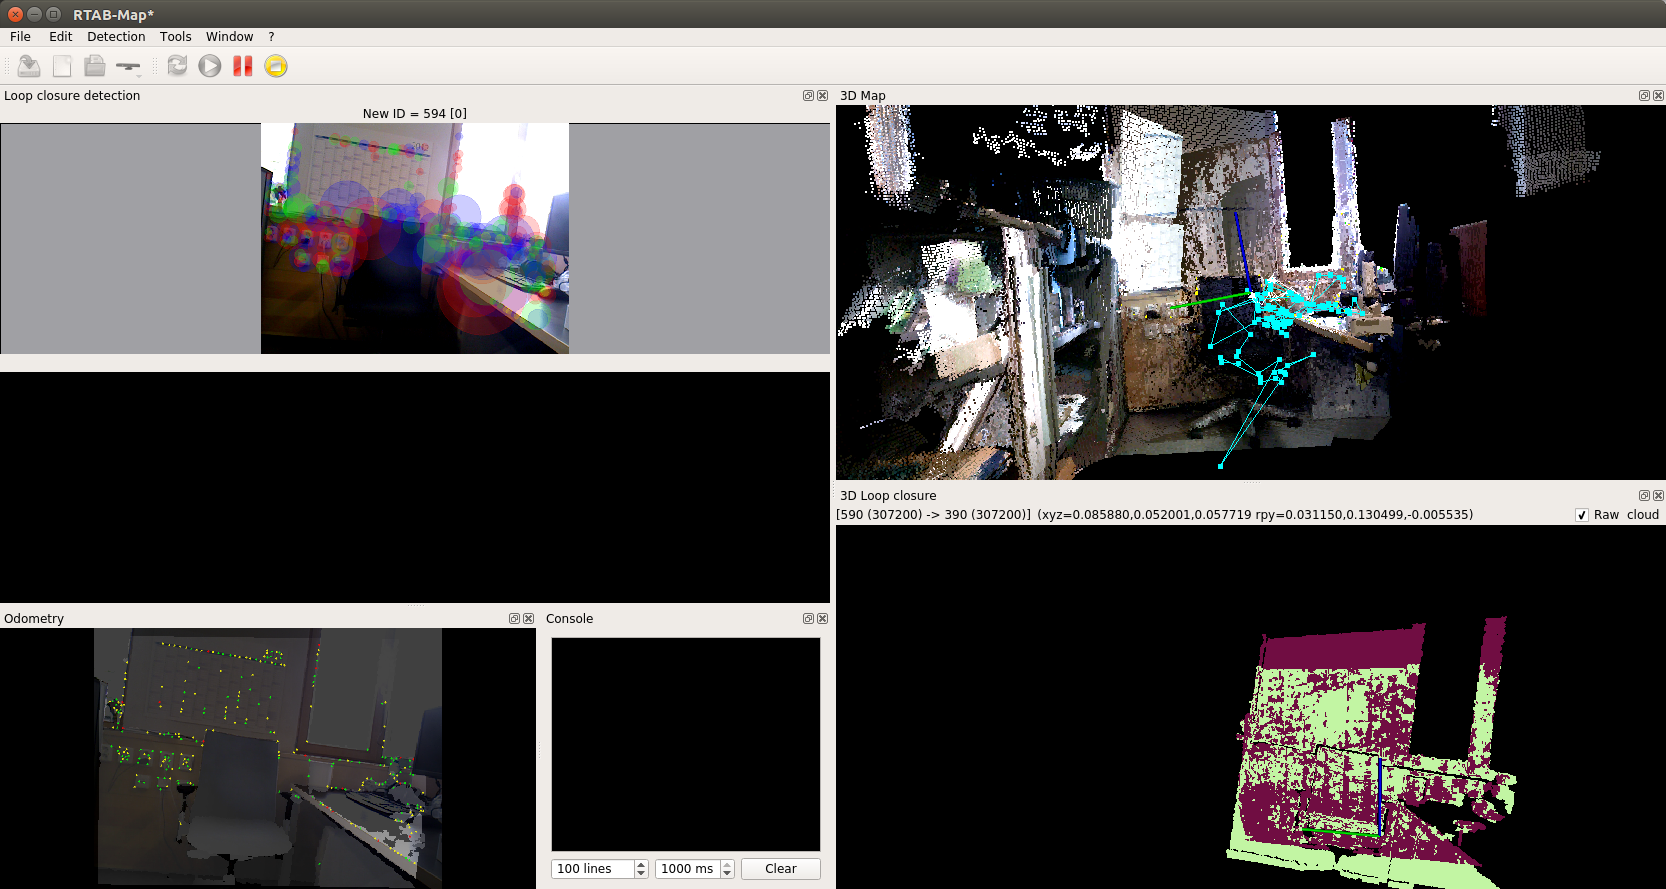
We can press the Pause button to pause and the Stop button to complete the process. We can also exit the program and save our progress in the database. When you close the program will show a popup window asking you to save the changes. In the future, we can resume the process by running the program and selecting an existing database.
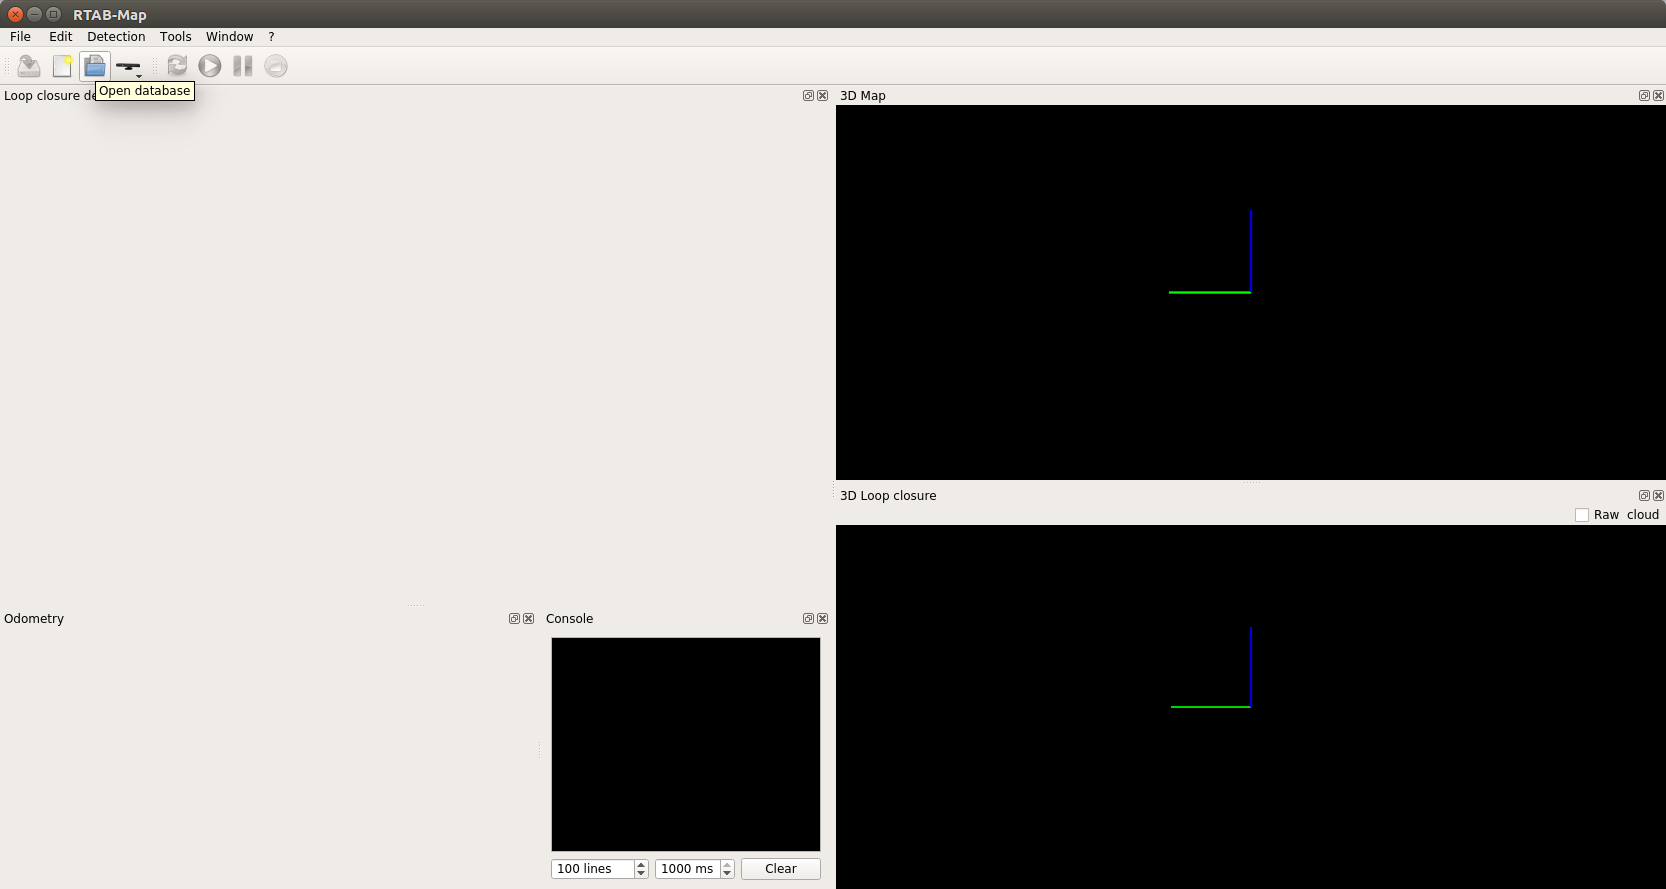
We will be asked to download a map for the database.
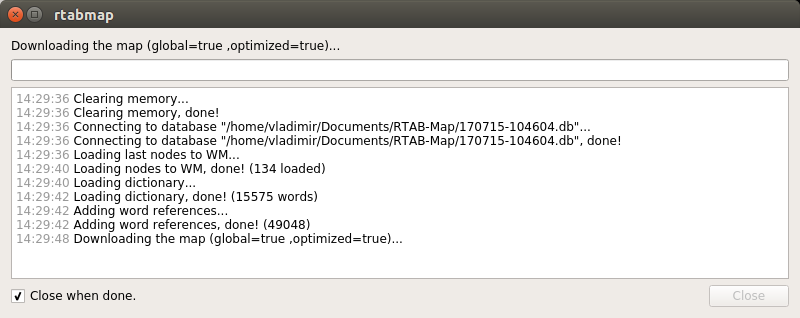
I got such a map (I rented part of the room):
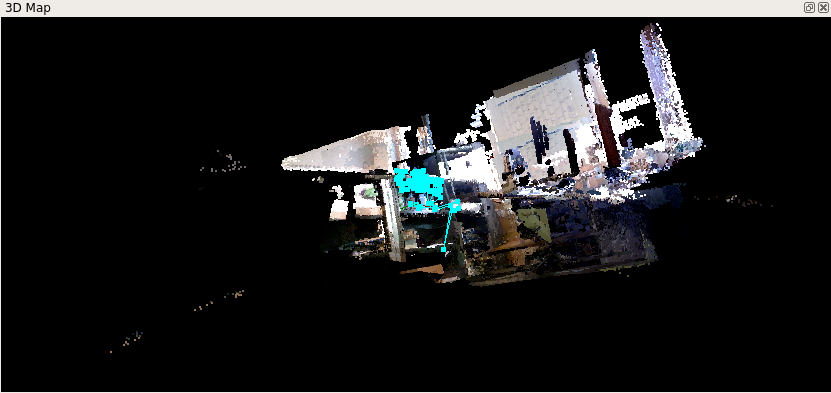
In the rtabmap settings (in the upper menu Window → Preferences), you can select the algorithm for calculating odometry (the used descriptor of visual signs). To do this, in the settings, select: RTAB-Map Settings → Memory → Vocabulary near the Feature selection item and select an algorithm from the Visual word type drop-down list:
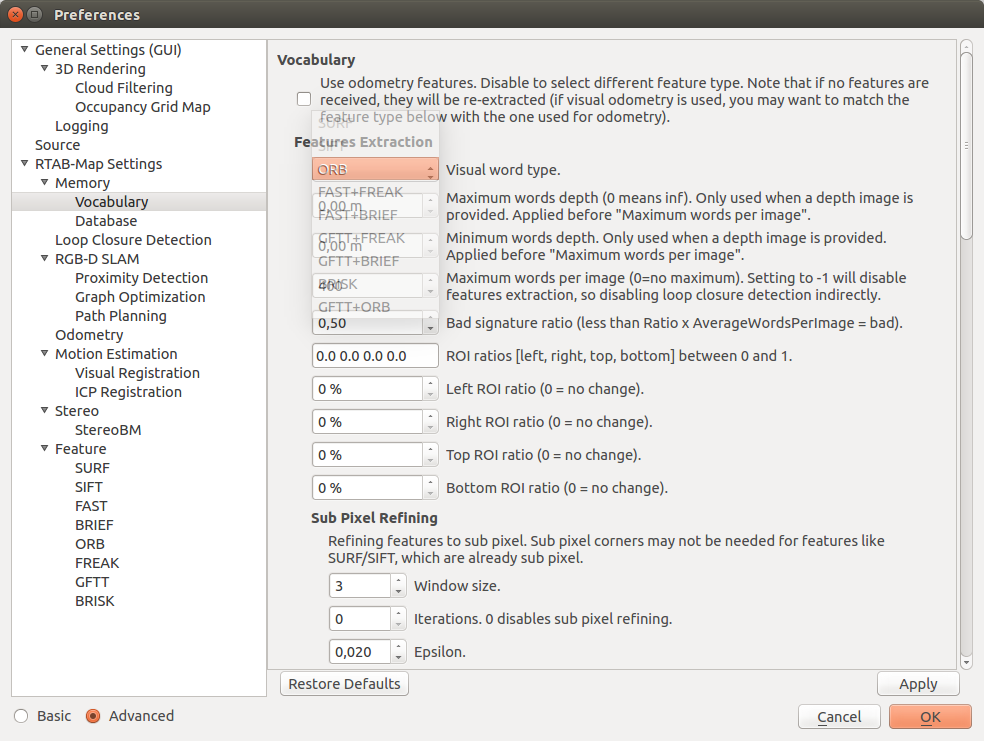
In my experiments, odometry with the GFTT + BRIEF visual dictionary works best, BRISK showed the worst result (failed to get loop detection at all). When using GFTT + BRIEF, loop detection was obtained immediately after a full revolution with the camera around the room. The ORB algorithm is used by default and gives not very good results.
rtabmap supports a fairly wide selection of cameras (RGB-D cameras Intel RealSense, ASUS Xtion, Kinect v1 and v2, as well as stereo cameras Bumblebee2 and ZED camera) and several possible scenarios for building a map using various combinations of camera, lidar and IMU sensor (tutorials you can look here ).
You can read more about RGBDSLAM on the official ROS page and on the github page .
Install RGBDSLAM from source:
Install the libg2o library:
where ros_version is the version of ROS (hydro, indigo or kinetic).
Compile RGBDSLAM in the catkin working directory:
I was not able to install RGBDSLAM on the Raspberry Pi due to a Qt problem, so here I only consider the algorithm on ROS Indigo with the Microsoft Kinect camera.
Launch rosmaster:
RGBDSLAMv2 can be launched in two ways. Firstly, using the launch file:
Or, run openni_launch and the RGBDSLAMv2 node separately:
We will see a similar screen:
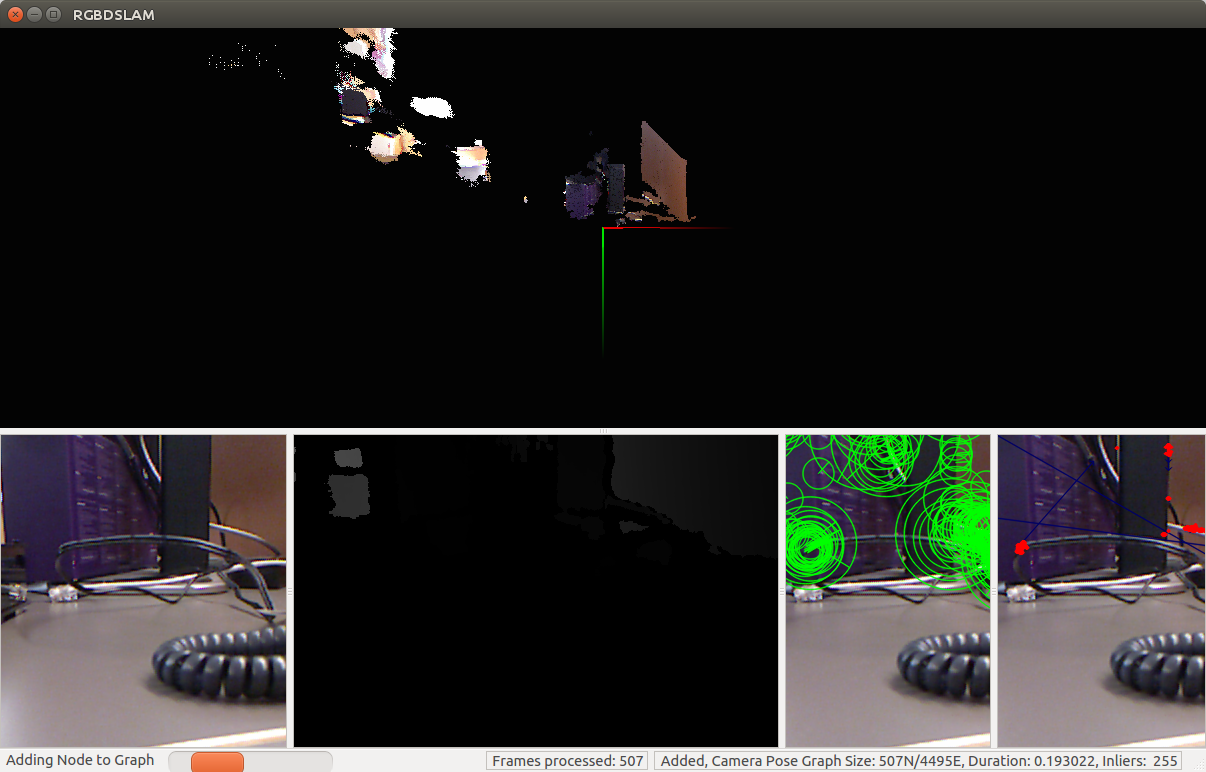
Map building will begin immediately after starting the program. RGBDSLAM is quite resource-intensive, my top command showed 155% of the processor load for the rgbdslam process.
When the construction of the map is completed, it is necessary to stop processing the stream from the camera by unchecking the Processing checkmark in the Processing menu:
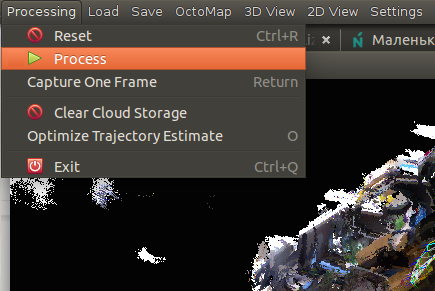
Building the map is completed:

We can save the map. You can also reset the current progress in the map building procedure by selecting Reset in the Processing menu:
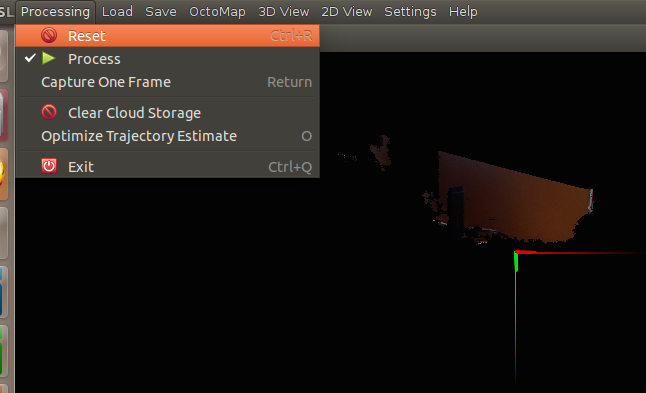
Detailed instructions for using RGBDSLAM can be found on the official page .
As experiments have shown, these SLAM algorithms are quite suitable for use in ROS-based robotic projects in the presence of Microsoft Kinect RGBD cameras and give a good terrain map as a result. Unfortunately, not all methods work on ARM platforms (at least on the Raspberry Pi). The advantage of the rtabmap tool is the ability to flexibly configure various parameters as desired.
Thus, we examined the two most famous SLAM algorithms for RGBD cameras, which have their own implementation in ROS. Those who wish can get acquainted with different scenarios of using these algorithms on the official pages (unfortunately, only in English) and apply them in their projects. I wish everyone good luck in the experiments and will be happy to answer any of your questions in the comments. See you soon!
rtabmap
You can read about the project in detail on the official page .
I described the rtabmap installation procedure in detail in a previous article . For example, on an Ubuntu 14.04 system, the installation would look like this:
sudo apt-get install ros-indigo-rtabmap ros-indigo-rtabmap-ros
However, on Raspberry Pi 3 with ROS Kinetic installed, this method will not work, because the rtabmap build is disabled in the Kinetic release for ARM due to a problem with libpcl-dev (more about the problem can be found here ). Therefore, we compile it from the source following the instructions on the rtabmap page:
source /opt/ros/kinetic/setup.bash
cd ~
git clone https://github.com/introlab/rtabmap.git rtabmap
cd rtabmap/build
cmake ..  [<---double dots included]
make
If swap is not available on the Raspberry Pi, then there may not be enough virtual memory during compilation:
virtual memory exhausted: Cannot allocate memory
You need to add swap memory according to the instructions from here and restart the compilation.
Compilation should take about an hour. After that, we perform the installation:
sudo make install
Install the rtabmap_ros package in our catkin working directory:
cd ~/catkin_ws
git clone https://github.com/introlab/rtabmap_ros.git src/rtabmap_ros
catkin_make -j1
source devel/setup.bash
When catkin_make is executed, an error may occur due to the absence of the image_transportConfig.cmake file. In this case, you need to compile the image_transport package in the working directory catkin_ws:
cd src
git clone https://github.com/ros-perception/image_common.git
cd ~/catkin_ws
catkin_make -j1
source devel/setup.bash
In order to prevent errors when loading dynamic libraries when starting rtabmap_ros nodes, it is recommended to add the following line to ~ / .bashrc:
echo 'export LD_LIBRARY_PATH=$LD_LIBRARY_PATH:/usr/local/lib' >> ~/.bashrc
Using rtabmap to build a map
Run rtabmap:
rtabmap
Let's create a new database: File → New database:
The OpenNI-PCL driver is used for the Kinect camera by default:
Run the map building procedure by clicking on the “Start” button:
rtabmap can also be used with rviz:
roslaunch openni_launch openni.launch depth_registration:=true
roslaunch rtabmap_ros rtabmap.launch rtabmapviz:=false rviz:=false rtabmap_args:="--delete_db_on_start"
The rviz window opens:
Add the Odometry display and select the topic “/ rtabmap / odom”. After some movement of the camera in space, we get a similar picture in rviz:
After we completely go through the room with the camera, we get:
If we move around the room slowly, smoothly moving the camera without sudden movements, we can get a fairly accurate map:
We can add a Map display of type OccupancyGrid and select the topic “/ rtabmap / proj_map” to visualize a flat map (as if we were using gmapping):
When closing the rviz window, the database and map are automatically saved to disk (the path is displayed in a line in the terminal).
Using rtabmap on Raspberry Pi 3 with ASUS Xtion Pro Live
Run rtabmap:
rtabmap
A window already familiar to us will open. Create a database: File -> New database:
Select the OpenNI2 driver for the Xtion Pro Live camera:
Run the map building procedure with the Start button:
We get:
After some time during the process of moving with the camera:
On the Raspberry Pi, the rtabmap process turned out to be quite resource-intensive for me (used 250 - 300% CPU). Sometimes the window darkened, once rtabmap crashed with a Segmentation fault.
When using the default settings, rtabmap runs extremely slowly on the Raspberry Pi, the frame rate is very low. For effective work, you need to configure the input frame rate. To do this, open Window → Preferences → General settings (GUI) in the top menu and press the “Load settings ...” button. Set the value to 30 Hz for the "input rate":
You can read more about setting parameters in rtabmap here .
Now the map building procedure is much faster:
The video shows how odometry data is lost once (a red background appears around the Loop closure detection candidate found) and I do odometer reset through Detection -> Reset odometry. Loss of odometry is often associated with an insufficient number of signs found (for example, poorly textured surfaces) and too fast camera movement. Our map is completely cleared and everything starts anew.
The map is almost ready:
Our task here is to obtain successful loop closure detection. In case of successful detection of cycles, the candidate is highlighted in green.
You can also show the result of loop detection in the 3D loop closure panel. To do this, in the upper menu, select: Window → Show view → 3D Loop closure. Using buttons with numbers from 1 to 5, we can change the format for representing point clouds (arbitrary colors, axis oriented colors or RGB):
We can press the Pause button to pause and the Stop button to complete the process. We can also exit the program and save our progress in the database. When you close the program will show a popup window asking you to save the changes. In the future, we can resume the process by running the program and selecting an existing database.
We will be asked to download a map for the database.
I got such a map (I rented part of the room):
In the rtabmap settings (in the upper menu Window → Preferences), you can select the algorithm for calculating odometry (the used descriptor of visual signs). To do this, in the settings, select: RTAB-Map Settings → Memory → Vocabulary near the Feature selection item and select an algorithm from the Visual word type drop-down list:
In my experiments, odometry with the GFTT + BRIEF visual dictionary works best, BRISK showed the worst result (failed to get loop detection at all). When using GFTT + BRIEF, loop detection was obtained immediately after a full revolution with the camera around the room. The ORB algorithm is used by default and gives not very good results.
rtabmap supports a fairly wide selection of cameras (RGB-D cameras Intel RealSense, ASUS Xtion, Kinect v1 and v2, as well as stereo cameras Bumblebee2 and ZED camera) and several possible scenarios for building a map using various combinations of camera, lidar and IMU sensor (tutorials you can look here ).
RGBDSLAM
Install RGBDSLAMv2
You can read more about RGBDSLAM on the official ROS page and on the github page .
Install RGBDSLAM from source:
cd ~/catkin_ws/src
git clone https://github.com/felixendres/rgbdslam_v2.git
Install the libg2o library:
sudo apt-get install ros--libg2o
where ros_version is the version of ROS (hydro, indigo or kinetic).
Compile RGBDSLAM in the catkin working directory:
cd ~/catkin_ws
catkin_make
source devel/setup.bash
rosdep install rgbdslam
I was not able to install RGBDSLAM on the Raspberry Pi due to a Qt problem, so here I only consider the algorithm on ROS Indigo with the Microsoft Kinect camera.
Using RGBDSLAMv2
Launch rosmaster:
roscore
RGBDSLAMv2 can be launched in two ways. Firstly, using the launch file:
roslaunch rgbdslam openni+rgbdslam.launch
Or, run openni_launch and the RGBDSLAMv2 node separately:
roslaunch openni_launch openni.launch
roslaunch rgbdslam rgbdslam.launch
We will see a similar screen:
Map building will begin immediately after starting the program. RGBDSLAM is quite resource-intensive, my top command showed 155% of the processor load for the rgbdslam process.
When the construction of the map is completed, it is necessary to stop processing the stream from the camera by unchecking the Processing checkmark in the Processing menu:
Building the map is completed:
We can save the map. You can also reset the current progress in the map building procedure by selecting Reset in the Processing menu:
Detailed instructions for using RGBDSLAM can be found on the official page .
As experiments have shown, these SLAM algorithms are quite suitable for use in ROS-based robotic projects in the presence of Microsoft Kinect RGBD cameras and give a good terrain map as a result. Unfortunately, not all methods work on ARM platforms (at least on the Raspberry Pi). The advantage of the rtabmap tool is the ability to flexibly configure various parameters as desired.
Thus, we examined the two most famous SLAM algorithms for RGBD cameras, which have their own implementation in ROS. Those who wish can get acquainted with different scenarios of using these algorithms on the official pages (unfortunately, only in English) and apply them in their projects. I wish everyone good luck in the experiments and will be happy to answer any of your questions in the comments. See you soon!









