Linux AVR programming in assembler language on Linux
- Tutorial
Introduction
It's no secret that the microcontrollers of the AVR family have firmly entered the practice of home crafts. In addition, for several years now there has been a massive (
Sooner or later, for any “arduino player” (provided that he wants to reach a higher professional level), the moment comes when he becomes cramped within the Arduino platform and begins to think about what is really happening under the hood. And the answers to all his questions are already there, for example in the form of a wonderful course“AVR. Training Course " from the esteemed DIHALT . If you are a Windows OS user, then you will not have a shortage of development tools, Atmel Studio is free enough to cover all issues of software development for MK AVR.
Although I am a team leader in application-level software developers, the issues of hardware that is being made in our office on the basis of AVR have recently become very interesting to me. There was a desire to understand well all aspects of software development for MK. And since I am a staunch supporter of using an OS based on the Linux kernel in development, I was interested in the question, what about Linux: is it possible / impossible to write and debug software, sew it into a crystal with the same (or about the same) level of convenience , which is available to us on Windows. Those who are also interested in this issue, and especially those to whom the topic of the post seems far-fetched, I invite you to cat.
As for the development in C / C ++, in the Linux environment there are no special problems with this, in view of the general orientation of this system to the use of this language and the availability of a decent set of tools. However, the same DIHALT , for example, claims that programming for MK is inseparable from assembler knowledge, which I agree with, in view of the consistency of its theses presented in the "Training Course" and its own (albeit small) x86 system development experience.
Guided by the thesis that we don’t get anywhere from ASM AVR and we are sitting under Linux, try to look at how you can write and debug programs. I use the Arch Linux distribution, so I will rely on its ecosystem in my narrative.
1. Choose a compiler
I must say right away that I will not offer a bunch of Atmel Studio + wine. I do not like wine (although I use it as needed). Let us dwell on native tools, primarily compilers, a review of which on the network and personal pickers gave access to the triumvirate of gavrasm , avra and avr-as. The choice was made according to two conflicting criteria: syntax support for the proposed Atmel and the ability to debug firmware in steps in the emulator. The latter is more important for me, but in the plane of the course @DIHAL is so directly necessary to understand the microcontroller operation process. The generality of syntax with Atmel compilers gives, again from my point of view, only the ability to easily adapt Atmel Studio projects to work in Linux, which is a very dubious advantage, since the same avr-as exists under Windows. I offer the reader an overview of the listed trinity.
gavrasm and avra
Support Atmel syntax. The first was found in AUR and is installed by the team
$ yaourt -S gavrasm
The second is also available in AUR
$ yaourt -S avra
A program of the form
test.S
;---- Определяем целевое устройство
        .device atmega16
;---- Сегмент данных
        .dseg
;---- Сегмент кода
        .cseg
        .org 0x0000
        ldi r16, 10
M1:
        inc r16
        rjmp M1
;---- Сегмент EEPROM
        .eseg
It is compiled by both compilers immediately in * .hex and the result of the work looks approximately the same. In order not to outrage the noble dons with long footcloths, I put the compilation results under the spoilers
Exhaust gavrasm
The contents of the firmware hex file The contents of the listing file
$ gavrasm test.S
+------------------------------------------------------------+
| gavrasm gerd's AVR assembler Version 3.5 (C)2015 by DG4FAC |
+------------------------------------------------------------+
Compiling Source file: test.S
-------
Pass:        1
14 lines done.
Pass 1 ok.
-------
Pass:        2
14 lines done.
3 words code, 0 words constants, total=3 =  0.0%
No warnings!
Compilation completed, no errors. Bye, bye ...
$ ls -l
итого 12
-rw-rw----+ 1 maisvendoo users  52 июл 29 15:46 test.hex
-rw-rw----+ 1 maisvendoo users 741 июл 29 15:46 test.lst
-rw-rw----+ 1 maisvendoo users  92 июл 29 15:46 test.S
The contents of the firmware hex file The contents of the listing file
:020000020000FC

:060000000AE00395FECFAB

:00000001FF
gavrasm Gerd's AVR assembler version 3.5 (C)2015 by DG4FAC

----------------------------------------------------------

Source file: test.S

Hex file: test.hex

Eeprom file: test.eep

Compiled: 29.07.2017, 15:46:38

Pass: 2

 1: .device atmega16

 2:

 3: .dseg

 4:

 5: .cseg

 6: .org 0x0000

 7:

 8: 000000 E00A ldi r16, 10

 9: M1:

 10: 000001 9503 inc r16

 11: 000002 CFFE rjmp M1

 12:

 13: .eseg

 14:


Program : 3 words.

Constants : 0 words.

Total program memory: 3 words.

Eeprom space : 0 bytes.

Data segment : 0 bytes.

Compilation completed, no errors.

Compilation endet 29.07.2017, 15:46:38
Exhaust avra
The contents of the hex-file Listing is generated by the additional -l switch during assembly
$ avra -l test.lst test.S
AVRA: advanced AVR macro assembler Version 1.3.0 Build 1 (8 May 2010)
Copyright (C) 1998-2010. Check out README file for more info
   AVRA is an open source assembler for Atmel AVR microcontroller family
   It can be used as a replacement of 'AVRASM32.EXE' the original assembler
   shipped with AVR Studio. We do not guarantee full compatibility for avra.
   AVRA comes with NO WARRANTY, to the extent permitted by law.
   You may redistribute copies of avra under the terms
   of the GNU General Public License.
   For more information about these matters, see the files named COPYING.
Pass 1...
Pass 2...
done
Used memory blocks:
   Code      :  Start = 0x0000, End = 0x0002, Length = 0x0003
Assembly complete with no errors.
Segment usage:
   Code      :         3 words (6 bytes)
   Data      :         0 bytes
   EEPROM    :         0 bytes
$ ls -l
итого 16
-rw-rw----+ 1 maisvendoo users 92 июл 29 15:46 test.S
-rw-rw----+ 1 maisvendoo users  0 июл 29 15:55 test.S.cof
-rw-rw----+ 1 maisvendoo users 13 июл 29 15:55 test.S.eep.hex
-rw-rw----+ 1 maisvendoo users 55 июл 29 15:55 test.S.hex
-rw-rw----+ 1 maisvendoo users 61 июл 29 15:55 test.S.obj
The contents of the hex-file Listing is generated by the additional -l switch during assembly
:020000020000FC

:060000000AE00395FECFAB

:00000001FF
$ cat test.lst


AVRA Ver. 1.3.0 test.S Sat Jul 29 16:02:05 2017


.device atmega16


 .dseg


 .cseg

 .org 0x0000


C:000000 e00a ldi r16, 10

 M1:

C:000001 9503 inc r16

C:000002 cffe rjmp M1


 .eseg


Segment usage:

 Code : 3 words (6 bytes)

 Data : 0 bytes

 EEPROM : 0 bytes


Assembly completed with no errors.
Analyzing the results, we can say that:
- Generated file in Intel HEX format, suitable immediately for firmware in MK
- Syntax compatible with Atmel
There are definitely differences in the avra syntax, e.g.
.device atmel16
gives an indication of MK, hiding from the programmer an explicit indication of links to the * .inc macro definition file. There are a number of other nuances that are easier to read in the documentation or in a good review article by Valber in Russian. You can read about gavrasm features here .
Both considered compilers have a significant
Debugging support AVRA creates a coff file everytime the assembly was sucessful. This file allows AVR Studio or any coff compatible debugger to simulate or emulate the program.
but the * .cof file in the exhaust is invariably empty. The lack of debugging information excludes adequate step-by-step debugging, urgently needed by beginners. So from these (by the way, rather old alternatives) we move on to another, more powerful compiler from the GNU family
avr-as
Installation of this toolkit is available from the official repositories of any fairly popular distribution. In the case of Arch Linux
$ sudo pacman -S avr-gcc avr-libc avr-binutils
GNU assembler (gas) is the backend to the gcc compiler and is usually not explicitly called. This is due to the ideology of * nix systems focused on C / C ++ development, in which assembler plays the role of the youngest unloved son. At the same time, it provides deep integration of assembler code into C / C ++ programs, which is rare, but it is necessary. Moreover, if we talk about x86 / x86_64 architectures, the syntax of the “bent” assembler (AT&T) is very different from the accepted Intel notation (although the intel syntax can also be used on gas, the compiler gives such an opportunity). What is the reverse order of operands with respect to intellect, for example, with
respect to AVR gas, it does not depart from Atmel's notation regarding command execution - the operand order is familiar here, for example, a command:
ldi r16, 10
in gas for AVR it looks familiar. Another thing is macros and compiler directives; they differ from Atmel. The above test program will look like this:
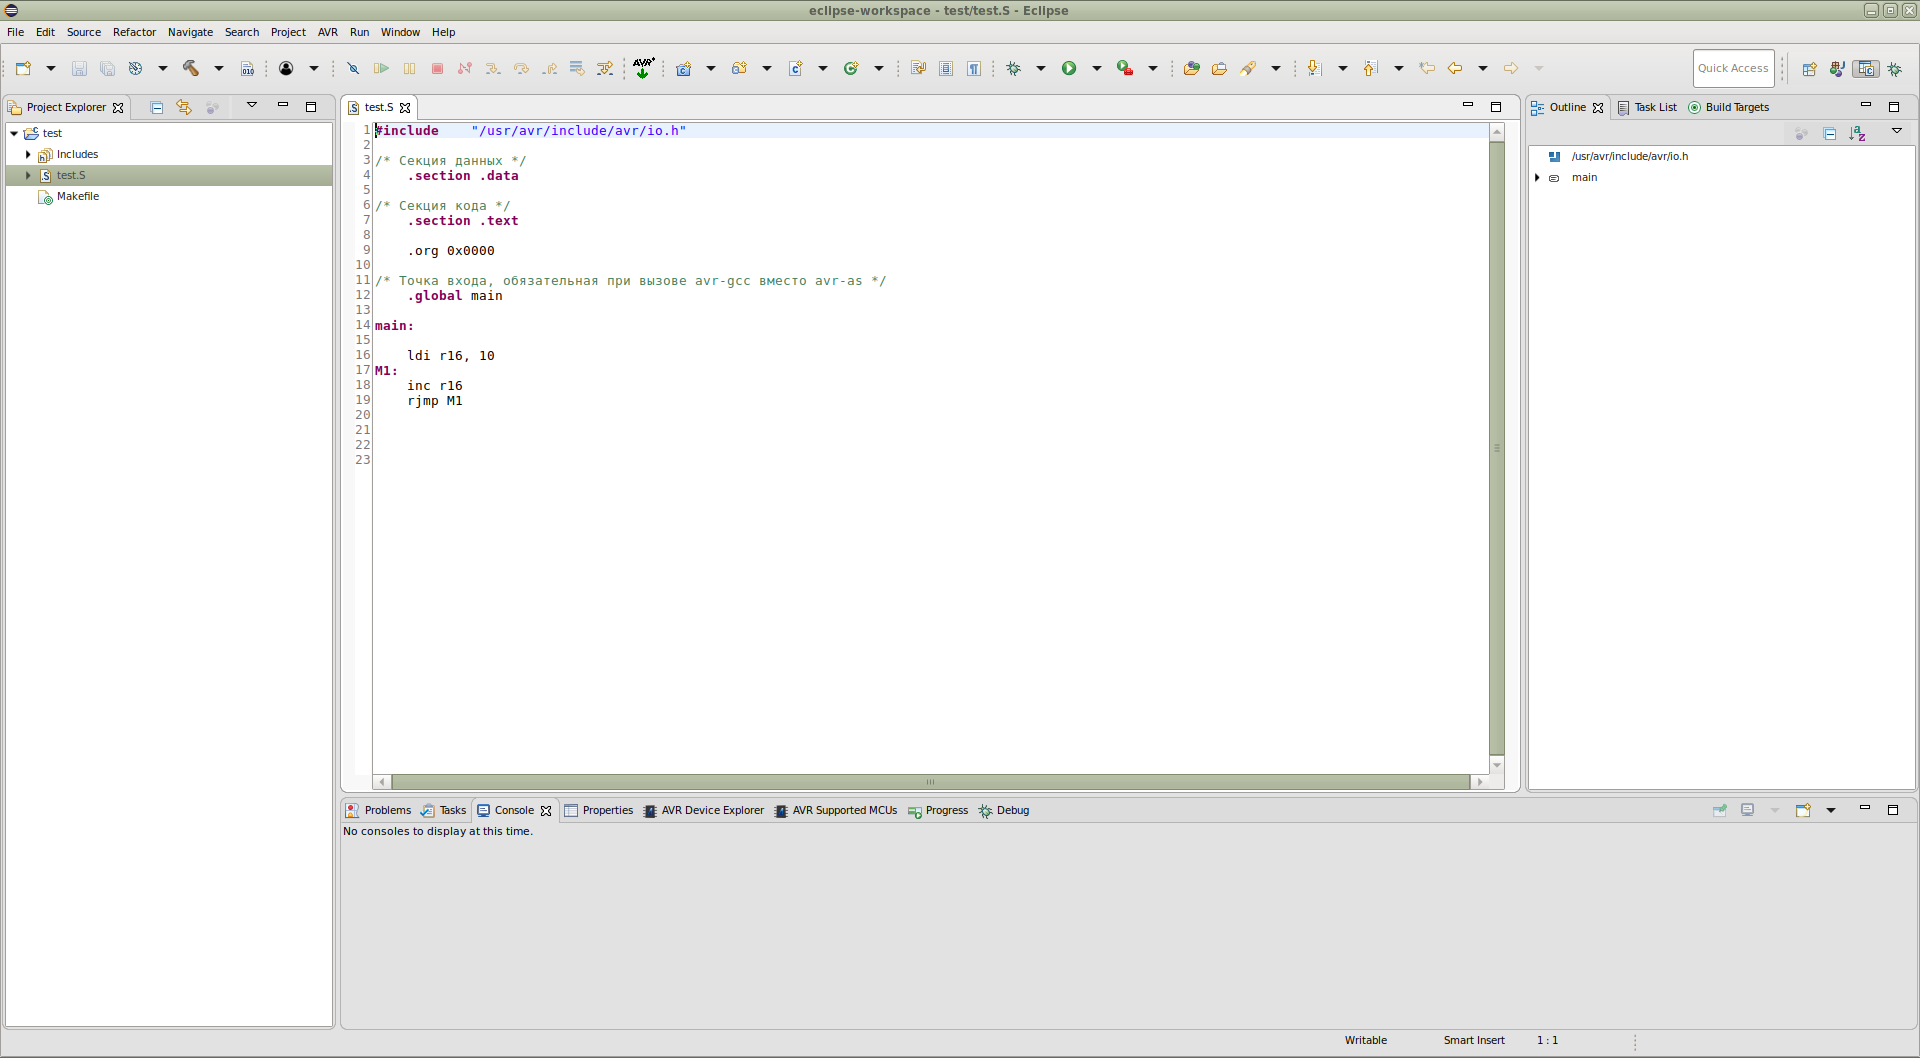
test.S
#include	"/usr/avr/include/avr/io.h"
/* Секция данных */
	.data
/* Секция кода */
	.section .text
	.org 0x0000
/* Точка входа, обязательная при вызове avr-gcc вместо avr-as */
	.global main
main:
	ldi r16, 10
M1:
	inc r16
	rjmp M1
As you can see from the source, the code section is determined by the preprocessor directive .section .text (analogue of .cseg). An analogue of .dseg is .data. The only thing that I have not yet understood and have not seen in the documentation is how the contents of the EEPROM are determined (similar to .eseg). I hope there is a kind guru among the readers who will prompt me to answer. For beginners like me, I advise you to smoke the documentation here and here to understand the specifics of using gas for AVR.
We will now collect a hex file suitable for MK firmware. Command:
$ avr-as -mmcu=atmega16 -o test.o test.S
generates an object file for the corresponding controller (in our case, ATMega 16). Next, this object file is converted to hex
$ avr-objcopy -O ihex test.o test.hex
Getting the hex-file of the form
test.hex as an output. Nevertheless, we did not answer the main question and did not indicate the advantage of gas in the possibility of organizing step-by-step debugging. For this, first of all
:060000000AE00395FECFAB

:00000001FF
2. Select a debugger
In Linux there is no worthy alternative to GDB. To use it in relation to MK AVR, we set the frontend
$ sudo pacman -S avr-gdb
This debugger has the whole complex of contradictions that frighten newcomers: with a fairly declared thermonuclear power, its entry threshold is quite high. To unlearn the fear of gdb and start working in it, I highly recommend the article of the greatest and most powerful and, unfortunately, the late (Nikolai Likhachev, rest in peace to you) aka Chris Kaspersky "Immersion in GDB technique and philosophy . "
The first thing you need to use gdb is to compile the code appropriately by generating an ELF image containing debugging symbols
$ avr-as -mmcu=atmega16 -g --gstabs -o test.o test.S
The -g and --gstabs switches respectively generate debugging symbols and add the ability to use the image for remote debugging in gdb. We compose the received object file in ELF We use the resulting image to debug our test. From it, you can also generate a hex file
$ avr-ld -m avr4 -o test.elf test.o
$ avr-objcopy -j .text -j .data -O ihex test.elf test.hex
explicitly specifying the sections included in the firmware with the -j switch, the -O ihex output format (intel HEX) with the -J switch. We get the same file as in the previous case:
test.hex It remains to load the resulting code into the emulator and check the available debugging capabilities.
:060000000AE00395FECFAB

:00000001FF
3. Linux AVR emulator
This question is more complicated than others. I found two worthy candidates: simavr , available in the official archives repositories and installed simply:
$ sudo pacman -S simavr
and the more popular simulavr simulator , which was not even found in AUR, despite the fact that the bulk of useful information on the network is about him. It did not work for me to compile from source with the goal of creating PKGBUILD for AUR, although I went through all the appropriate branches in the official repository . I had to kill a brutal crutch by downloading the DEB package for Debian , turning it into a package for archives using the debtap utility .
$ debtap simulavr_0.1.2.2-7+b2_amd64.deb
and then the resulting arch package is put into the system without any problems.
This version is quite old, and the current release (judging by the date of the last commit in the repository) has gone quite far.
As for simavr, it is installed without problems, supports a larger number of MKs, but when trying to connect to it with a debugger, it displays messages about the emulator crash in the console and I have not been able to figure it out yet. Here I again appeal to the reader who is knowledgeable in the question and count on a hint.
In the meantime, we use the crutch-supplied simulavr for debugging
4. Step-by-step debugging on a bunch of GDB + simulavr
So, first, we will debug the program hardcore - from the console, run the emulator
$ simulavr -d atmega16 -c 8000000 -g -P simulavr-disp
we run the ATMega 16 emulator (key -d) at a frequency of 8 MHz (key -c) with the option of remote debugging and the ability to beautifully view controller registers (option -P, which is removed from the network in the latest version of the emulator). We see a terminal window with the contents of registers and memory; we

observe a message in the launch console
Waiting on port 1212 for gdb client to connect...
informing us that the emulator is waiting for the debugger to connect on port 1212 (the port can be specified when starting with the -p switch). In the other console, start the debugger:
$ avr-gdb -q -tui
the first key will remove the pathos gdb exhaust at startup, the second group of keys activates the source scan during debugging in my application for clarity (in fact, this option is inconvenient for several reasons). In the console, we will see the following:

Connect to the emulator
(gdb) target remote:1212
We load the ELF image into the emulator (yes, it is him and not hex, which I burned at the very beginning) d 'vekznjh
(gdb) load test.elf
Loading debug symbols:
(gdb) file test.elf
answering “yes” to the asked question, getting the following picture:

Well, we see our source and debugger, ready to receive commands. We give the next command
(gdb) n
and we see how the debugger cheerfully moved around the code.

we can see the changed state of the controller registers both in the emulator console

and in the debugger window:
(gdb) info registers . . . r16 0xa 10 . . . SREG 0x0 0 SP 0x0 0x0PC2 0x2 2 pc 0x2 0x2
From this moment on, we have access to all the richest tools provided by the gdb debugger. However,
5. Step-by-step debugging in the Eclipse IDE
The Eclipse IDE has been known for a long time. During its existence, it has firmly established itself in various areas of software development and can "stupidly everything" thanks to an extensive set of plug-ins that expand its functionality. At one time I was enthusiastic about her, but the time has passed, since in her everyday work she has a lot of small nuances that are inflated into flaws (at work in production I preferred Ct Creator for the same C / C ++ due to the specifics of the activity, which I do not regret )
Nevertheless, from the point of view of the problem we are solving, it fully satisfies its requirements. To work with AVR in Eclipse, you will need to install the following plugins
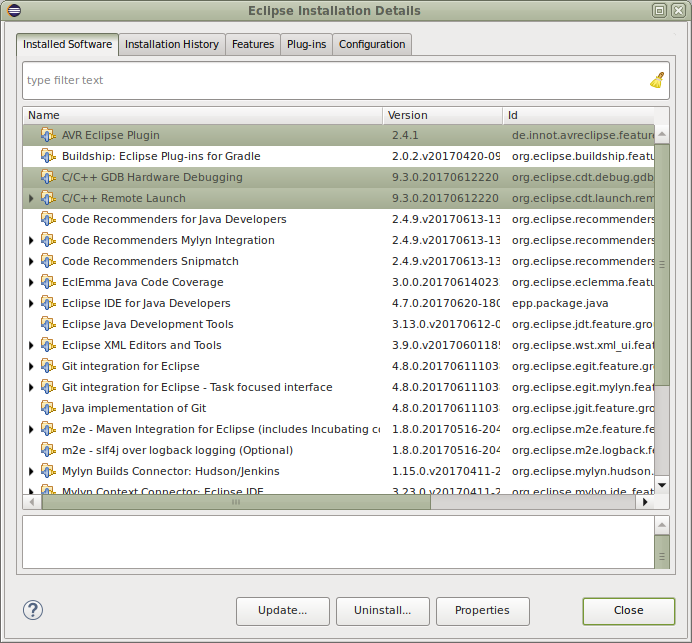
and, in order not to overload the article, I send the reader to a search in which the installation of plugins for Eclipse is described in great detail. The setup of the project seems important here, which I will discuss in detail.
Eclipse is essentially focused on C / C ++ development, so to create an assembler project we will use the project generation through the existing Makefile, which we will write for our test. Here it is
Makefile
# Декларируем необходимые переменные
DEVICE = atmega16
TARGET = test
OBJECTS = $(TARGET).o
ELF = $(TARGET).elf
HEX = $(TARGET).hex
# Задаем правила компиляции
COMPILE = avr-as -mmcu=$(DEVICE) -g --gstabs
# Главная цель - HEX-файл прошивки
all:	hex
# Правило сборки объекрных молулей: беруться все исходники
# с расширением *.S и компилятся в объектные модули *.o
.S.o:
           $(COMPILE) -c $< -o $@
# Правило очитски - удаляем все продукты сборки
clean:
           rm -f $(HEX) $(ELF) $(OBJECTS)
# Компоновка всех объектных модулей в ELF
elf:   $(OBJECTS)
        avr-ld -m avr4 -o $(ELF) $(OBJECTS)
# Преобразование ELF в HEX
hex: elf
        avr-objcopy -j .text -j .data -O ihex $(ELF) $(HEX)
After writing this opus, open Eclipse and create a new project File -> New -> Project,

click Next to make a project based on Makefile , select the location of the directory with the source and Makefile in the next window.

Slap Finish and see our project in all its glory.
Go to the Project menu - > Build all and get all the binaries we need:
19:34:51 **** Build of configuration Default for project test ****
make all
avr-as -mmcu=atmega16 -g --gstabs -c test.S -o test.o
avr-ld -m avr4 -o test.elf test.o
avr-objcopy -j .text -j .data -O ihex test.elf test.hex
19:34:51 Build Finished (took 128ms)
Now we will configure the emulator launch as an external project tool by going to Run -> External Tools, creating a new configuration with the settings corresponding to the screenshots shown here.


We tell the environment that we want to start the emulator with the command line parameters we need by placing the launch item in the menu Run → External Tools .
We apply the settings, go to the menu Run → External Tools → atmega16 and watch the emulator start:

Ok, now let's configure the debugging configuration of our project. Go to the menu Run → Debug Configuratuions and configure hardware debugging via GDB.
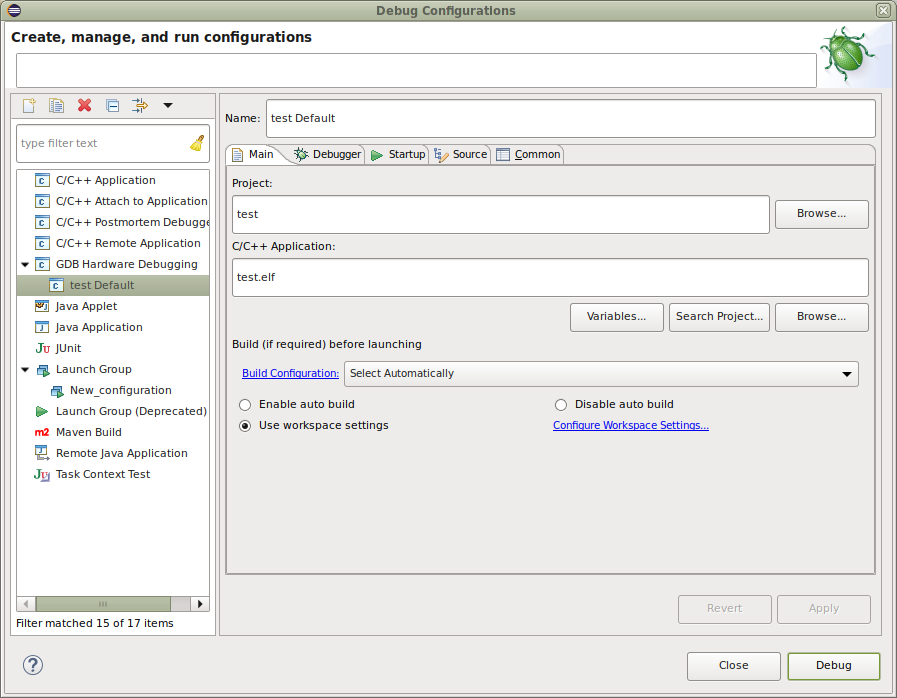
not forgetting to specify the type of connection to the simulation server:

and indicating what actions should be performed when starting debugging:

Be sure to put daws on the Load image and Load Symbols - this allows the debugger to load the firmware into the emulator and read the debugging symbols. Put a breakpoint on the label M1.
Click the Apply and Debug buttons and ... voila!

The debugger obediently became at the specified breakpoint. You can view the memory dump and the contents of the registers. Click F5 (or F6) and trace our code in steps.

Now you can trace the code even before turning blue, look at the values of the registers and variables, edit the code, trace again, generally deal with the usual development process.
Conclusion
What do I want to say in the finale? I have already said a thousand times that all my articles on the resources of Habr and Giktayms are a reflection of personal experience and a mouthpiece of subjective opinion. The problem is solved - the organization of software development for AVR controllers in the Linux environment. This article is a product of long googling and gathering information from disparate network sources. Its purpose is to prompt the beginner to search in the right direction. The article does not pretend to be academic, it is only a product of my own digging and an attempt to share the collected information, as well as attract interested people to an interesting topic.
There is not much to say here, for example, about firmware via avrdude, which (sic!) Is a cross-platform firmware utility for the AVR family. If readers have a desire, but I have an opportunity, we will consider it, blink with LEDs, send a word
In the meantime, thank my reader for your attention and hope for a new meeting!