Seek Thermal Pro vs Seek Thermal. Is it worth it?
In pursuit of the usual Seek Thermal, Dadget sent me a Pro version of it, so I could file a comparative review. What we
’ll do now: ▌Packaging
It is, surprisingly, different. And I liked the box from the regular version more. Although the strength and rigidity of both are not in doubt. For shipment you can not be afraid. Armor, not a box. True, it would be better for manufacturers not to show off and put it in the cover until the heap, and not to lay it out on the lodgements.
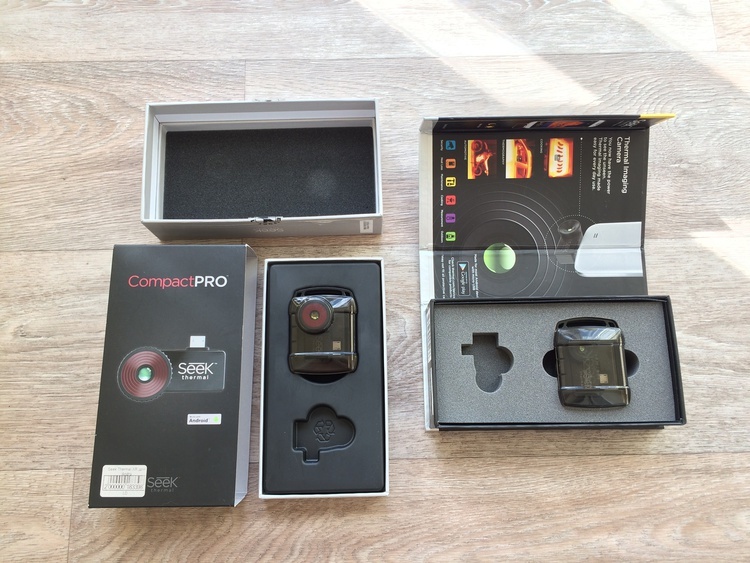
The case is the same, but there is a small protrusion under the larger lens of the Pro version. And the same thing - a solid waterproof box with reliable hinges and locks.
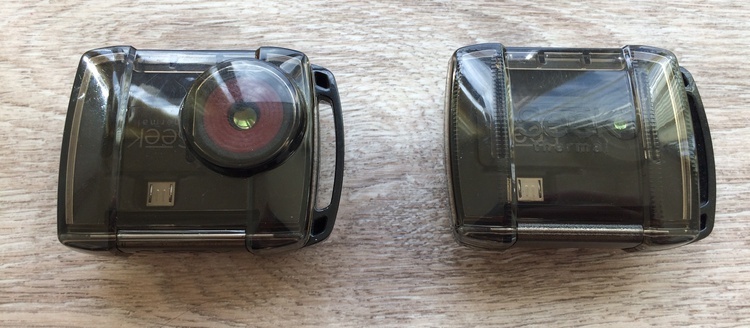
▌Exterior
Outwardly, they are almost the same. The case is so generally the same detail. Unless the Pro lens is longer and has a red bezel. Weight, workmanship, materials are the same.
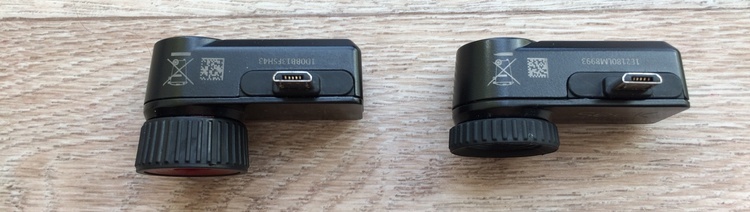
▌Optics
The Pro version has a significantly larger diameter lens than a simple one.

5mm vs 3mm. Which, in theory, should give a large aperture. The focus wheel of the Pro version spins much easier and more pleasant than the usual one. Although, perhaps, I just came across a pretty bad example tortured by testers and it was simply developed. Nevertheless, twisting by a long easily rotating lens is much more convenient. Especially when the thermal imager itself is small and dangles on a smartphone.
The viewing angles for thermal imagers are as follows:
And there is some confusion here that I would like to resolve. The fact is that I have two versions in my hands: Compact (not XR!) And Compact Pro. they are determined by software and the program says that they stuck it. But my Compact'a focus is adjustable! Although everywhere I met, it is written that the focus is fixed. Either there are two versions of Compact, or once upon a time there was a version with a fixed lens, and now they put focus everywhere. In general, there is some kind of misunderstanding.
▌Characteristics
Proshka costs twice as much as usual. For what? For the characteristics. They are twice as large in almost all directions. Judge for yourselves: The
resolution of the usual (and XR) 32,000 pixels collected in a 206x156 matrix , while the firmware has 76800 and a 320x240 matrix. And this is not a screen resolution, it is not here, it is a resolution of the thermal imaging bolometric matrix itself. Compared with manual thermal imagers, in the same price range (up to 50 thousand) there are still a lot of devices that have a physical resolution of the bolometric matrix of 80x60, and 320x240 is just the resolution of the external screen where the picture is drawn.
But, in justification of such devices, there the picture is made by combining the image from the camera and the thermal imager. At Seek Thermal, such a combination cannot be made and you have to be content only with a picture from the bolometer. And resolution here is vital because the higher it is, the more clearly you imagine what is happening in the frame.
The second important point, which for some reason is not in the characteristics of this device in the Dadget catalog, is the frame rate. The regular (and XR) version produces only 9 frames per second. I can not say that this is very small. No, that’s enough in most cases. After all, you usually have to consider static things. Houses, pipes, some details. But after 15 frames per second, which gives the Pro version, I don’t feel like going back to normal. It’s just a lot more comfortable to work. The camera is less lagging, you find the desired object faster and more accurately, it’s easier and more convenient to adjust the focus on small details, less visual disorientation and faster you understand what exactly you see in the frame. Their temperature range is the same -40 ° to 330 ° C.
I also noticed that the Pro version has “exposure expired”. Where the usualmore or less gray background, without much noise, the firmware brightness is lifted up, solid noises, but the details are better visible. In this case, the exposure is floating. Those. he clicks his calibrating curtain, the brightness rises sharply, and then gradually fades, then click, again to the maximum and again decreases. It is approximately similar to how a cheap soap box in auto mode tries to pick up an exposure. But not always, but only in difficult cases, when the frame has approximately uniform thermal coloration. No sharp gradients.
▌Direct comparison
And now the slides. The type of device is signed at the bottom of the frame.
Let's start with the seals. Where without them:
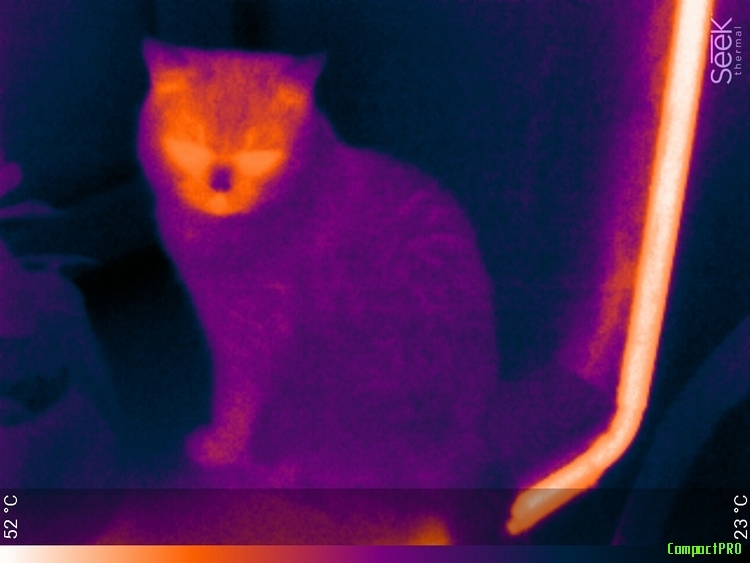
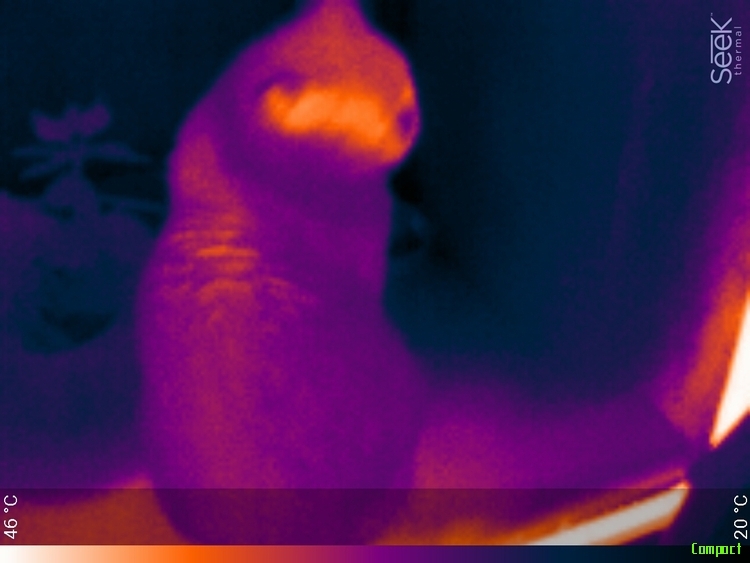
Red is thermally insulated.
Unlike bald.
By the way, here PRO correctly determined the temperature. In cats, the norm is about 39-40 degrees. Bald is no exception.
We look through the window of a neighboring factory.
Higher resolution gives slightly sharper contours. But, in general, it does not matter.
People on the street in the Pro version show the position of arms and legs much better. In general, for people, the difference between thermal imagers is very striking.
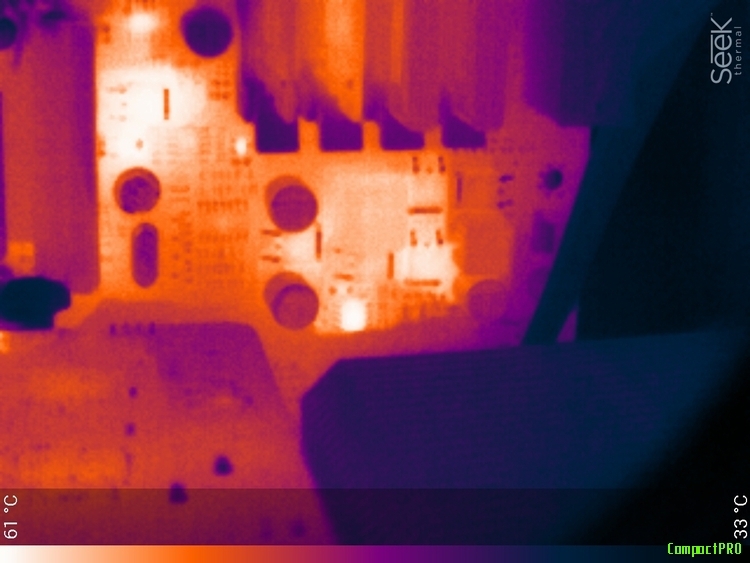
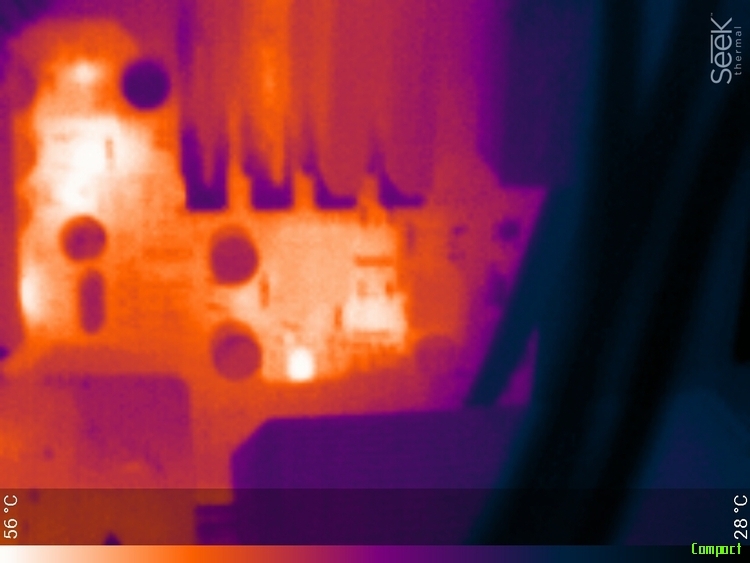
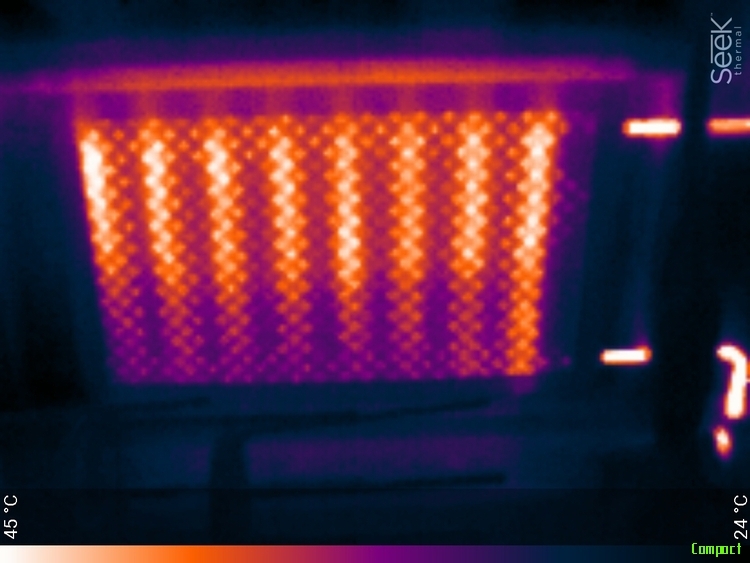
With printed circuit boards, things get more interesting. For example, a working video card.
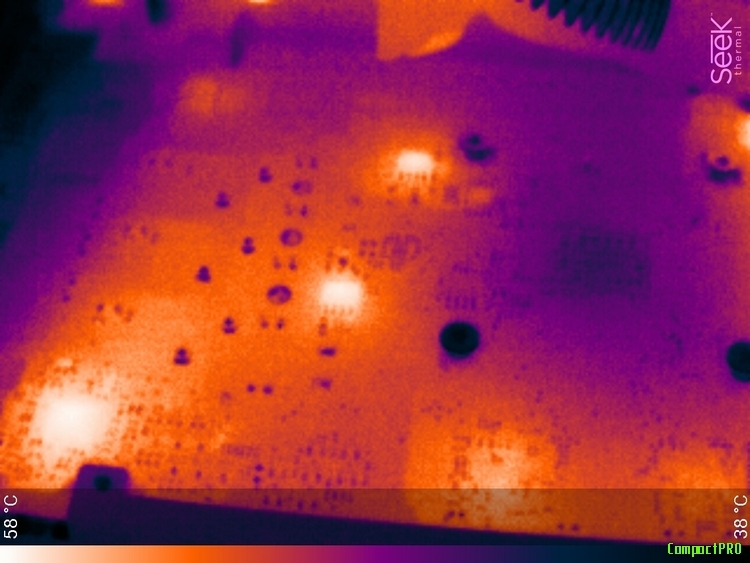

Both here and there you can see the warming power keys. Separate resistors are visible, but higher resolution gives clearer contours.
This is especially evident if you can’t crawl closer to the board.
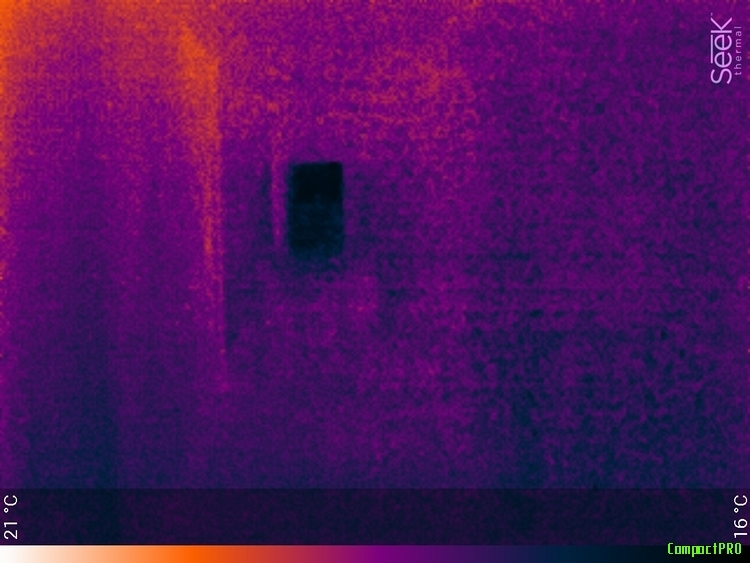
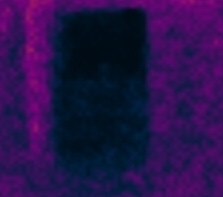
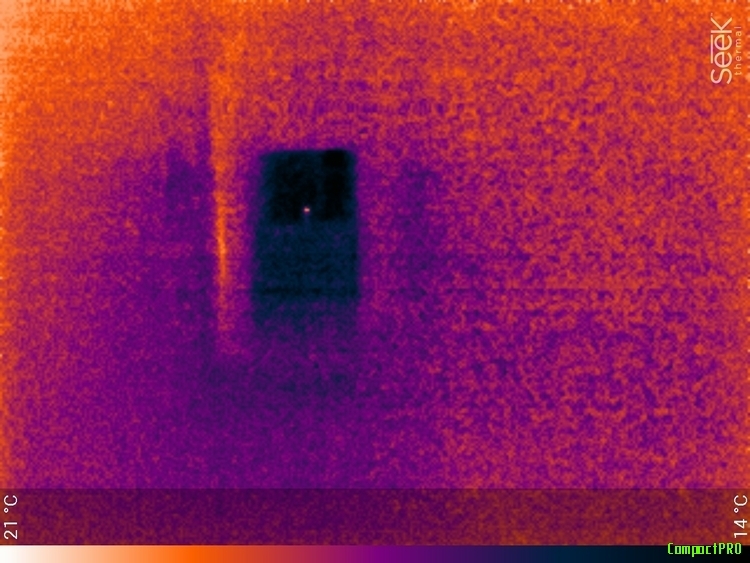
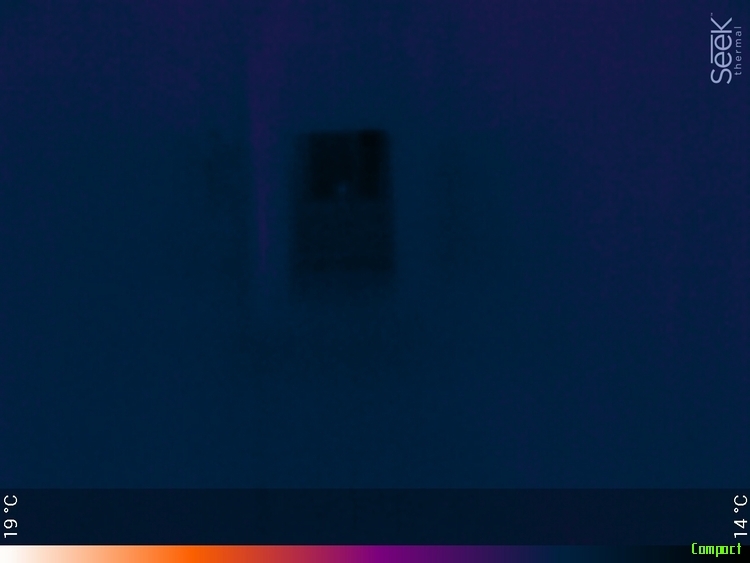
Heat source behind bars. The difference is small and not fundamental.
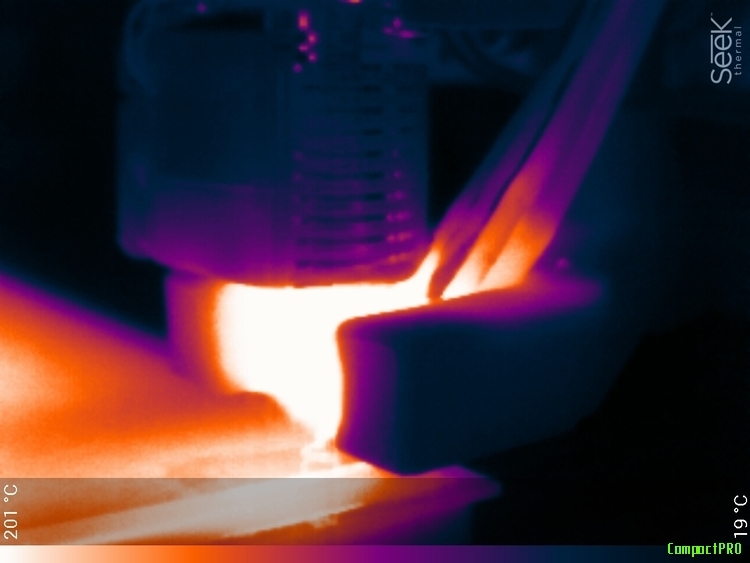
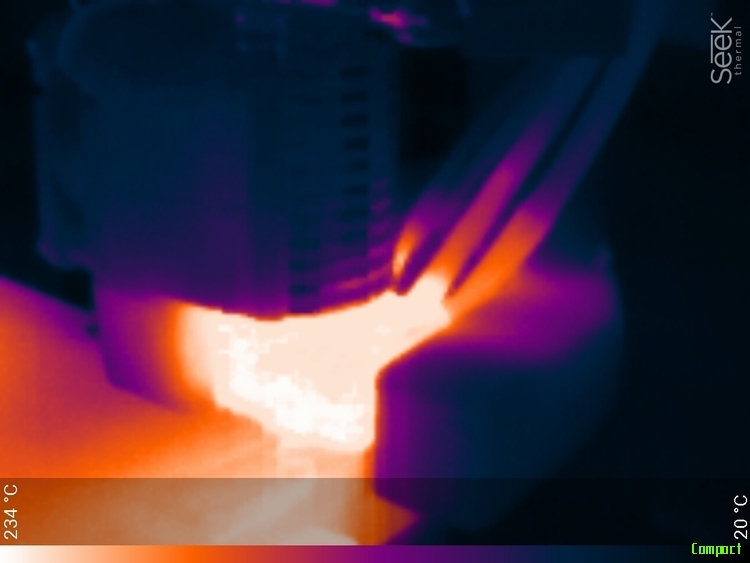
A device with a significant temperature difference. Printer extruder. Heated to 205 degrees. The pro version adequately determines the temperature.
I also decided to try to compare the sensitivity of the instruments. To do this, I put a gas soldering iron running on the smallest gas and issuing 300 degrees on the windowsill. And he ran away to the far end of the corridor for 30 meters. It looked something like this:
Both thermal imagers from 30 meters saw a hot spot up to 300s. If you know that she is there and watch carefully, then she was visible in both cases.
In the distance, the window itself and the barely noticeable candle of the soldering iron are clearly visible. The pro version is trying to draw out this darkness and lifts up the brightness.

Here are separately cut fragments of the original resolution.

We approach 15 meters
And 3 meters

Well, and at close range, from one distance. The pro version, as usual, lifts up the exposure.
▌Soft
In addition to greater resolution in the Pro version, a new option in software is available - forced range setting. Those. you can specify the boundaries of the color range at specific temperatures. Everything that is colder will be black, everything that is warmer - white, but all the color or brightness gradients between them. It works, I must say, so-so. Since the compression of the range does not add discreteness of measurement. After all, all this is done programmatically. It looks something like this:
Here is the original thermogram:

But I applied this option, compressing the range to the borders of 48 ... 19 degrees. A little bit of detail was added on the pipe itself. Apparently this is uneven color or some dirt.
The environment has disappeared. Selecting the hottest object. And the range of displayed temperatures from floating has become fixed. Moreover, the range can not be changed arbitrarily, but only from those temperatures that the thermal imager determined at the time before the inclusion of this mode. And to change the range you need to exit this mode and enter it again. In general, crookedly done. No matter how I tried, I did not find any practical application for this regime. Because sharp gradients can be seen. And they can’t pull out small differences anyway, the matrix accuracy is not enough.
▌Dependence of temperature on surface color
The thermal imager does not measure temperature, it sees the radiated heat and only on the basis of this draws indirect conclusions about body temperature. And the amount of radiated heat is highly dependent on the surface. The matte black surface has more radiation (and absorption) and the temperature of the black body determined by the thermal imager will be closest to the truth.
Metal and glass perfectly reflects infrared radiation and looking at some glitter on the table, it may seem that it is very hot, but in fact it simply reflects the heat from a table lamp. I decided to conduct a small experiment on this topic. He took and blackened the aluminum radiator in various ways, and then photographed it in a heated state.
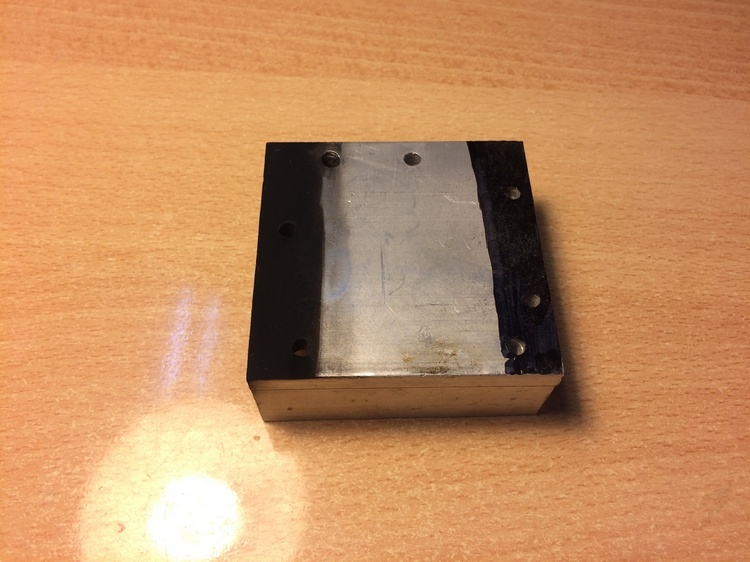
The first method of blackening is a regular permanent marker. He took and painted over the surface. From the other end, I covered the surface with soot. Ordinary soot - set fire to a piece of wood and smoked. The center remains as it is, smooth gray aluminum. Not polished in the mirror. Heated. Measured by a contact thermometer - about 40 degrees on the upper surface. We look!
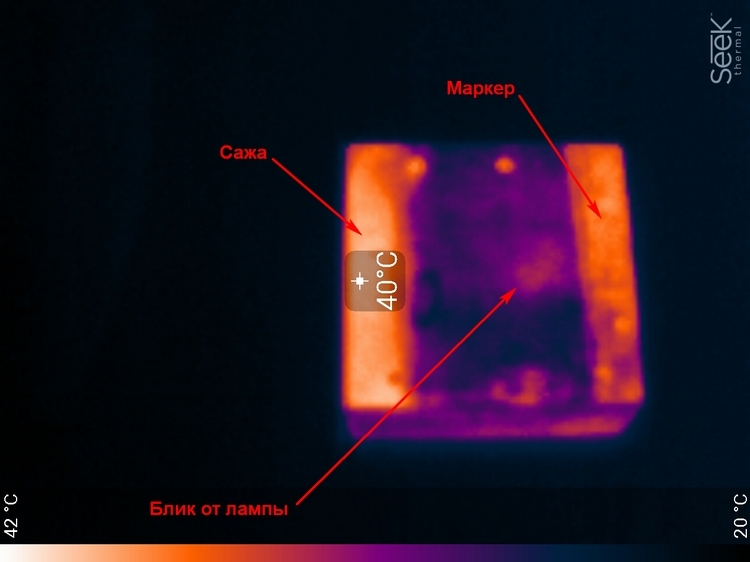
Soot gave the most accurate temperature transfer. Degree in degrees. The marker worked a little worse, but on the metal surface everything is clearly visible. Mirrored surfaces, glass, polished metal - look like very cold, but this is not so of course.
▌ Conclusion
Which device to choose ... a difficult question. In principle, they both do their job well. The usual cheaper . But with the Pro versiona little nicer to work, sharper picture and faster response.
And traditionally for those who want to buy with a 10% discount, the GT-ST promotional code is valid.
’ll do now: ▌Packaging
It is, surprisingly, different. And I liked the box from the regular version more. Although the strength and rigidity of both are not in doubt. For shipment you can not be afraid. Armor, not a box. True, it would be better for manufacturers not to show off and put it in the cover until the heap, and not to lay it out on the lodgements.
The case is the same, but there is a small protrusion under the larger lens of the Pro version. And the same thing - a solid waterproof box with reliable hinges and locks.
▌Exterior
Outwardly, they are almost the same. The case is so generally the same detail. Unless the Pro lens is longer and has a red bezel. Weight, workmanship, materials are the same.
▌Optics
The Pro version has a significantly larger diameter lens than a simple one.
5mm vs 3mm. Which, in theory, should give a large aperture. The focus wheel of the Pro version spins much easier and more pleasant than the usual one. Although, perhaps, I just came across a pretty bad example tortured by testers and it was simply developed. Nevertheless, twisting by a long easily rotating lens is much more convenient. Especially when the thermal imager itself is small and dangles on a smartphone.
The viewing angles for thermal imagers are as follows:
- Compact 36 ° focus fixed?
- CompactXR 20 ° focus adjustable
- Compact Pro 32 ° focus adjustable
And there is some confusion here that I would like to resolve. The fact is that I have two versions in my hands: Compact (not XR!) And Compact Pro. they are determined by software and the program says that they stuck it. But my Compact'a focus is adjustable! Although everywhere I met, it is written that the focus is fixed. Either there are two versions of Compact, or once upon a time there was a version with a fixed lens, and now they put focus everywhere. In general, there is some kind of misunderstanding.
▌Characteristics
Proshka costs twice as much as usual. For what? For the characteristics. They are twice as large in almost all directions. Judge for yourselves: The
resolution of the usual (and XR) 32,000 pixels collected in a 206x156 matrix , while the firmware has 76800 and a 320x240 matrix. And this is not a screen resolution, it is not here, it is a resolution of the thermal imaging bolometric matrix itself. Compared with manual thermal imagers, in the same price range (up to 50 thousand) there are still a lot of devices that have a physical resolution of the bolometric matrix of 80x60, and 320x240 is just the resolution of the external screen where the picture is drawn.
But, in justification of such devices, there the picture is made by combining the image from the camera and the thermal imager. At Seek Thermal, such a combination cannot be made and you have to be content only with a picture from the bolometer. And resolution here is vital because the higher it is, the more clearly you imagine what is happening in the frame.
The second important point, which for some reason is not in the characteristics of this device in the Dadget catalog, is the frame rate. The regular (and XR) version produces only 9 frames per second. I can not say that this is very small. No, that’s enough in most cases. After all, you usually have to consider static things. Houses, pipes, some details. But after 15 frames per second, which gives the Pro version, I don’t feel like going back to normal. It’s just a lot more comfortable to work. The camera is less lagging, you find the desired object faster and more accurately, it’s easier and more convenient to adjust the focus on small details, less visual disorientation and faster you understand what exactly you see in the frame. Their temperature range is the same -40 ° to 330 ° C.
I also noticed that the Pro version has “exposure expired”. Where the usualmore or less gray background, without much noise, the firmware brightness is lifted up, solid noises, but the details are better visible. In this case, the exposure is floating. Those. he clicks his calibrating curtain, the brightness rises sharply, and then gradually fades, then click, again to the maximum and again decreases. It is approximately similar to how a cheap soap box in auto mode tries to pick up an exposure. But not always, but only in difficult cases, when the frame has approximately uniform thermal coloration. No sharp gradients.
▌Direct comparison
And now the slides. The type of device is signed at the bottom of the frame.
Let's start with the seals. Where without them:
Red is thermally insulated.
Unlike bald.
By the way, here PRO correctly determined the temperature. In cats, the norm is about 39-40 degrees. Bald is no exception.
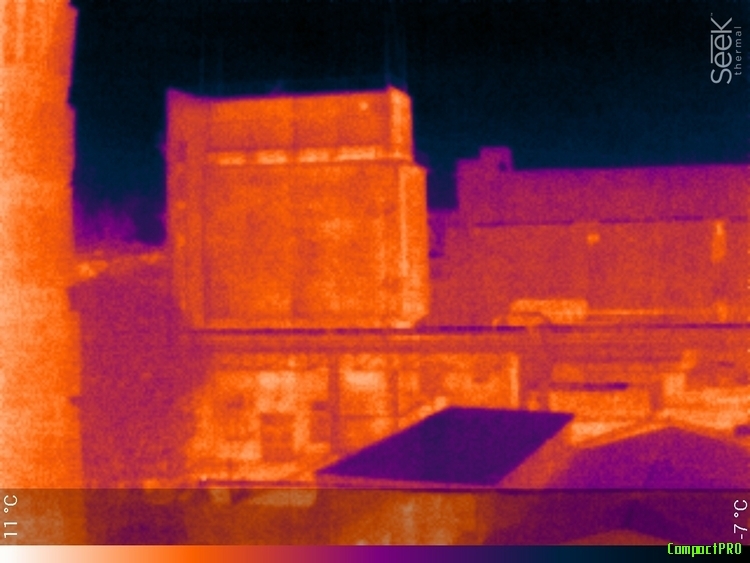
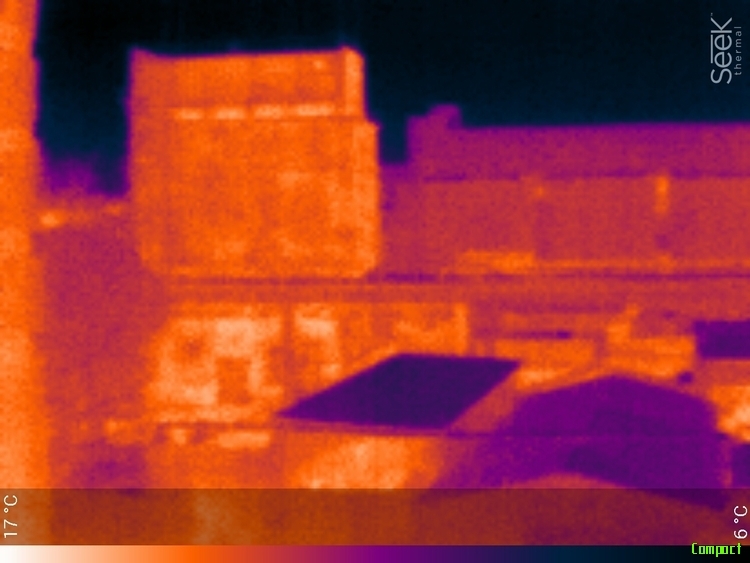
We look through the window of a neighboring factory.
Higher resolution gives slightly sharper contours. But, in general, it does not matter.
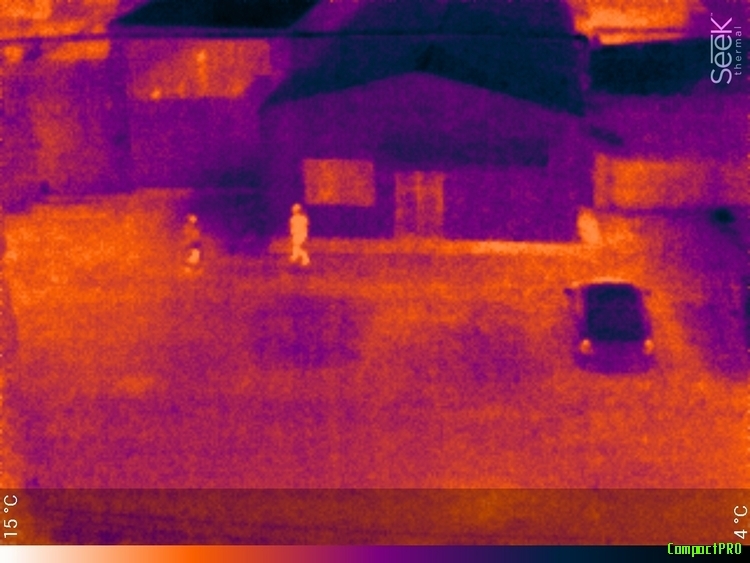
People on the street in the Pro version show the position of arms and legs much better. In general, for people, the difference between thermal imagers is very striking.
With printed circuit boards, things get more interesting. For example, a working video card.
Both here and there you can see the warming power keys. Separate resistors are visible, but higher resolution gives clearer contours.
This is especially evident if you can’t crawl closer to the board.
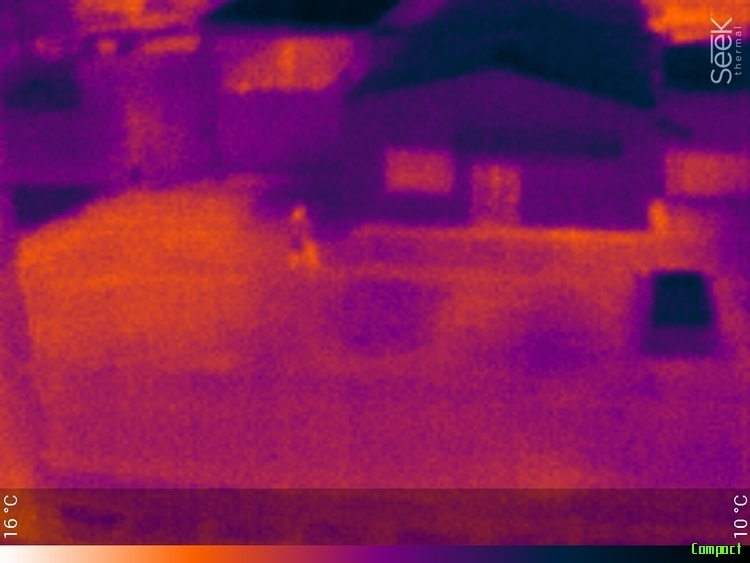
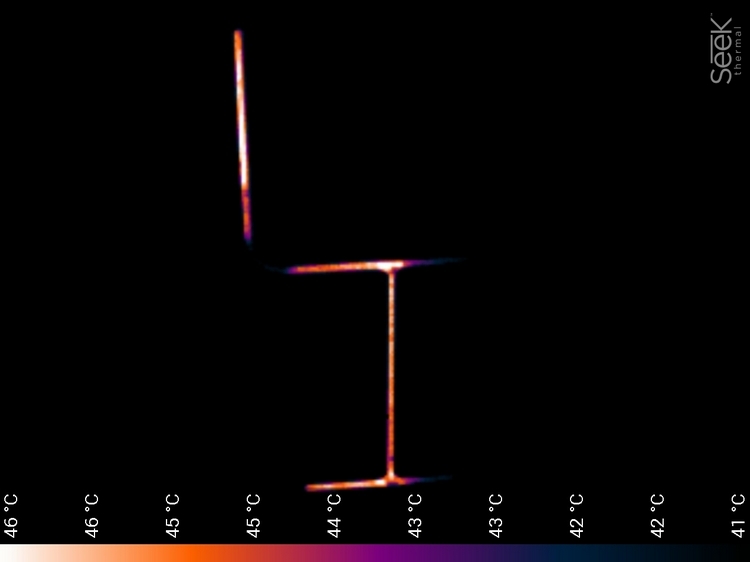
Heat source behind bars. The difference is small and not fundamental.
A device with a significant temperature difference. Printer extruder. Heated to 205 degrees. The pro version adequately determines the temperature.
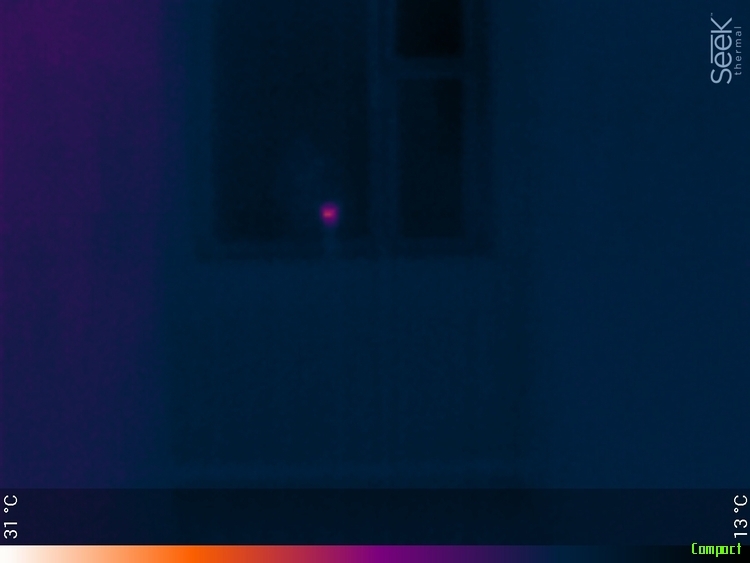
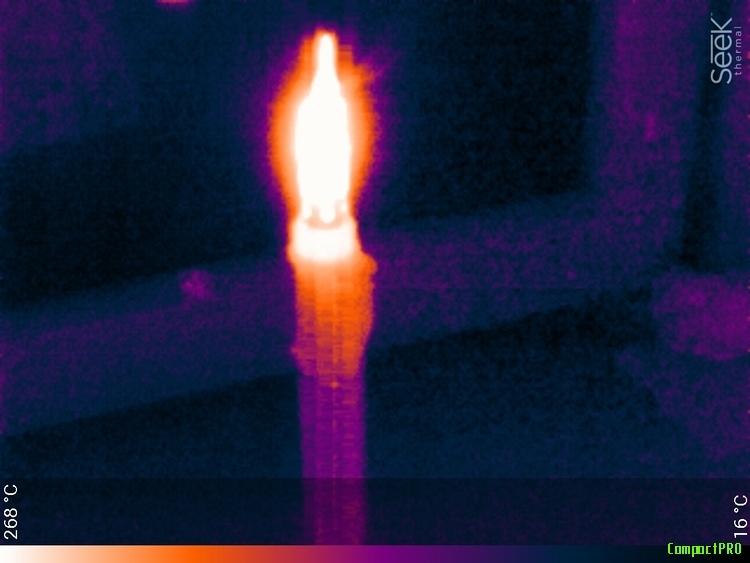
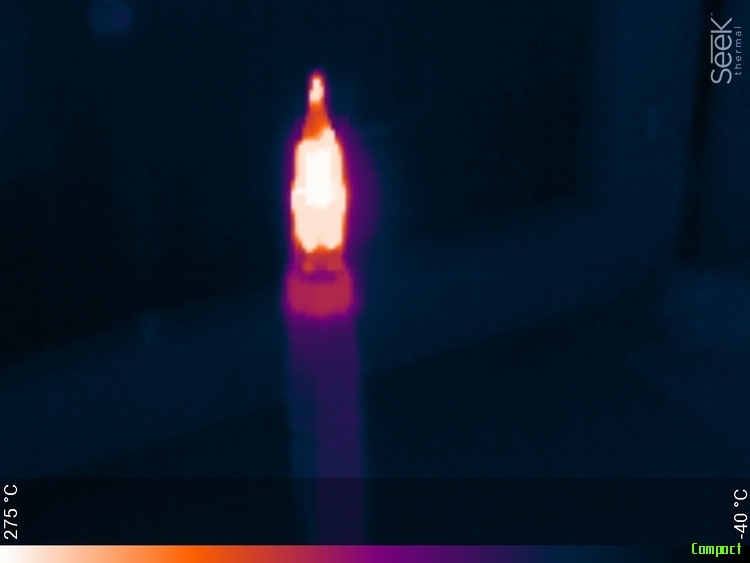
I also decided to try to compare the sensitivity of the instruments. To do this, I put a gas soldering iron running on the smallest gas and issuing 300 degrees on the windowsill. And he ran away to the far end of the corridor for 30 meters. It looked something like this:
Both thermal imagers from 30 meters saw a hot spot up to 300s. If you know that she is there and watch carefully, then she was visible in both cases.
In the distance, the window itself and the barely noticeable candle of the soldering iron are clearly visible. The pro version is trying to draw out this darkness and lifts up the brightness.
Here are separately cut fragments of the original resolution.
We approach 15 meters
And 3 meters
Well, and at close range, from one distance. The pro version, as usual, lifts up the exposure.
▌Soft
In addition to greater resolution in the Pro version, a new option in software is available - forced range setting. Those. you can specify the boundaries of the color range at specific temperatures. Everything that is colder will be black, everything that is warmer - white, but all the color or brightness gradients between them. It works, I must say, so-so. Since the compression of the range does not add discreteness of measurement. After all, all this is done programmatically. It looks something like this:
Here is the original thermogram:
But I applied this option, compressing the range to the borders of 48 ... 19 degrees. A little bit of detail was added on the pipe itself. Apparently this is uneven color or some dirt.
The environment has disappeared. Selecting the hottest object. And the range of displayed temperatures from floating has become fixed. Moreover, the range can not be changed arbitrarily, but only from those temperatures that the thermal imager determined at the time before the inclusion of this mode. And to change the range you need to exit this mode and enter it again. In general, crookedly done. No matter how I tried, I did not find any practical application for this regime. Because sharp gradients can be seen. And they can’t pull out small differences anyway, the matrix accuracy is not enough.
▌Dependence of temperature on surface color
The thermal imager does not measure temperature, it sees the radiated heat and only on the basis of this draws indirect conclusions about body temperature. And the amount of radiated heat is highly dependent on the surface. The matte black surface has more radiation (and absorption) and the temperature of the black body determined by the thermal imager will be closest to the truth.
Metal and glass perfectly reflects infrared radiation and looking at some glitter on the table, it may seem that it is very hot, but in fact it simply reflects the heat from a table lamp. I decided to conduct a small experiment on this topic. He took and blackened the aluminum radiator in various ways, and then photographed it in a heated state.
The first method of blackening is a regular permanent marker. He took and painted over the surface. From the other end, I covered the surface with soot. Ordinary soot - set fire to a piece of wood and smoked. The center remains as it is, smooth gray aluminum. Not polished in the mirror. Heated. Measured by a contact thermometer - about 40 degrees on the upper surface. We look!
Soot gave the most accurate temperature transfer. Degree in degrees. The marker worked a little worse, but on the metal surface everything is clearly visible. Mirrored surfaces, glass, polished metal - look like very cold, but this is not so of course.
▌ Conclusion
Which device to choose ... a difficult question. In principle, they both do their job well. The usual cheaper . But with the Pro versiona little nicer to work, sharper picture and faster response.
And traditionally for those who want to buy with a 10% discount, the GT-ST promotional code is valid.