Automatically build Unity projects for Android and iOS using Gitlab CI
In this article I want to talk about the approach to building Unity projects on android and ios via Gitlab on native builds with macOS.
I work in a small gamedev company, and the task of automating the assembly appeared due to the following problems:
- 5 distributed teams must collect projects from anywhere in the world
- different unit versions must be supported
- the assembler must provide at least 5 assemblies per week from each team
- certificates should be stored centrally, not by developers
- collected builds must be accessible by reference anywhere in the world
- projects should be checked for the presence of required libraries (advertising sdk and codes, localization, preservation)
- assembly configuration for commands should be done in one place
To solve these problems, ready-made solutions have already been created: Unity Cloud Build, TeamCity, Jenkins, Gitlab CI, Bitbucket Pipelines.
The first of them, although prepared for the assembly of Unity-projects, but does not allow automating the work with certificates, and for each project they have to be manually entered. TeamCity and Jenkins require setting up the project in the admin area (this complicates the configuration for developers a bit), installing additional software on a separate server and its support. As a result, two options remained the simplest and fastest in implementation - Gitlab and Bitbucket.
At the time the problem was solved, Bitbucket Pipelines had not yet been announced, so it was decided to use Gitlab.
To implement the approach, the following steps were taken:
- Project setup
- Runner Setting
- Creating build scripts
1. Project setup
Projects that are collected on the collector, we store on Gitlab. The free version of the service does not limit the repositories themselves and their number.
For each project, a runner is included (a service that executes commands from a gitlab server) running on a poppy.
The configuration for the collector lies at the root of the project in the form of a .gitlab-ci.yml file. It describes the application id, the required signing identity (keystore for android and account name for ios), the required version of Unity, branch, startup mode: manual or automatic and the command that starts the assembly (if necessary, gitlab supports much more parameters, documentation ) .
variables:
  BUNDLE: com.banana4apps.evolution
  SIGNING: banana4apps
  UNITY_VERSION: 2017.1
build:android:
  script:
    - buildAndroid.sh $BUNDLE $SIGNING $UNITY_VERSION
  only:
    - releaseAndroid
  when: manual
build:ios:
  script:
    - buildIOS.sh $BUNDLE $SIGNING $UNITY_VERSION
  only:
    - releaseIOS
  when: manual
2. Runner setup
Gitlab CI works with shared and own runners ( documentation ). The free version limits the number of hours of using shared runners, but allows you to unlimitedly use your own runners. Shared runners run on linux, so iOS applications cannot be collected on them (but Unity will succeed, there was an article about it on the hub). Because of this, I had to raise runners on my own poppies. In the above example, the runner runs the buildAndroid.sh or buildIOS.sh script (depending on the branch), which describes the preparatory steps, starting Unity, and notifying you of the build result.
The runner configuration process is well described in the documentation and comes down to launching gitlab-runner installand gitlab-runner start.
After that, the necessary Unity versions are installed on the poppy.
3. Creating build scripts
For each platform, due to differences in the build process, I had to write my own script. But the algorithm is the same:
- we verify the correctness of the project id, the availability of certificates for the desired signing identity
- Define paths to the SDK, Java
- create a class in the C # project with a method to start the assembly
- We check the availability of the necessary version of Unity and run the assembly. If not, then try to build on the default version
- We check the availability of apk or Xcode project, and if there are none, we signal an error in Slack
- for iOS: building an Xcode project
- upload artifacts (apk, ipa) to the server (e.g. Amazon S3)
- signal successful build in Slack and send a link to download artifacts
The peculiarity of assembling a Unity project is that Unity in batch mode allows you to execute only the static method of the class available in the project. Therefore, the build script “throws” a class into the project with methods for starting the assembly:
public class CustomBuild
{
    static string outputProjectsFolder = Environment.GetEnvironmentVariable("OutputDirectory");
    static string xcodeProjectsFolder = Environment.GetEnvironmentVariable("XcodeDirectory");
    static void BuildAndroid()
    {
        BuildTarget target = BuildTarget.Android;
        EditorUserBuildSettings.SwitchActiveBuildTarget(target);
        PlayerSettings.applicationIdentifier = Environment.GetEnvironmentVariable("AppBundle");
        PlayerSettings.Android.keystoreName = Environment.GetEnvironmentVariable("KeystoreName");
        PlayerSettings.Android.keystorePass = Environment.GetEnvironmentVariable("KeystorePassword");
        PlayerSettings.Android.keyaliasName = Environment.GetEnvironmentVariable("KeyAlias");
        PlayerSettings.Android.keyaliasPass = Environment.GetEnvironmentVariable("KeyPassword");
        BuildPipeline.BuildPlayer(GetScenes(), string.Format("{0}/{1}.apk" , outputProjectsFolder, PlayerSettings.applicationIdentifier), target, options);
    }
    static void BuildIOS()
    {
        BuildTarget target = BuildTarget.iOS;
        EditorUserBuildSettings.SwitchActiveBuildTarget(target);
        PlayerSettings.applicationIdentifier = Environment.GetEnvironmentVariable("AppBundle");
        PlayerSettings.iOS.appleDeveloperTeamID = Environment.GetEnvironmentVariable("GymTeamId");
        BuildPipeline.BuildPlayer(GetScenes(), xcodeProjectsFolder, target, options);
    }
    // Добавляем выбранные в настройках сцены в билд
    static string[] GetScenes()
    {
        var projectScenes = EditorBuildSettings.scenes;
        List scenesToBuild = new List();
        for (int i = 0; i < projectScenes.Length; i++)
        {
            if (projectScenes[i].enabled) {
                scenesToBuild.Add(projectScenes[i].path);
            }
        }
        return scenesToBuild.ToArray();
    }
}
The Environment.GetEnvironmentVariable method gets the value of environment variables that were previously specified in bash scripts.
Android build script example
GREEN='\033[0;32m'
RED='\033[0;33m'
NC='\033[0m' # No Color
export COMMIT=$(git log -1 --oneline —no-merges)
if [ "$1" = "" ]; then
echo -e "${RED}You must provide application Id${NC}"
exit 1
fi
export ANDROID_HOME=/Library/Android
export OutputDirectory=./
export AppBundle=$1
if [ "$2" = "account1" ]; then
export KeystoreName="$CI_DATA_PATH/keystores/account1.keystore"
export KeystorePassword="..."
export KeyAlias="..."
export KeyPassword="..."
elif [ "$2" = "account2" ]; then
export KeystoreName="$CI_DATA_PATH/keystores/account2.keystore"
export KeystorePassword="..."
export KeyAlias="..."
export KeyPassword="..."
else
echo "${RED}No keystore config found for $2${NC}"
exit 1
fi
echo -e "${GREEN}BundleId: ${AppBundle}${NC}"
echo -e "${GREEN}Signing: ${KeyAlias}${NC}"
# Копируем файл для запуска сборки
mkdir -p $CI_PROJECT_DIR/Assets/Editor && cp $CI_DATA_PATH/CustomBuild.cs "$_"
# Запускаем сборку Unity
if [ "$3" = "5.5" ]; then
/Applications/Unity5.5/Unity.app/Contents/MacOS/Unity -buildTarget android -projectPath $CI_PROJECT_DIR -batchmode -executeMethod CustomBuild.Android -quit -logFile /dev/stdout -username "..." -password "..."
elif [ "$3" = "2017.1" ]; then
/Applications/Unity2017.1/Unity.app/Contents/MacOS/Unity -buildTarget android -projectPath $CI_PROJECT_DIR -batchmode -executeMethod CustomBuild.Android -quit -logFile /dev/stdout -username "..." -password "..."
else
/Applications/Unity5.6.4/Unity.app/Contents/MacOS/Unity -buildTarget android -projectPath $CI_PROJECT_DIR -batchmode -executeMethod CustomBuild.Android -quit -logFile /dev/stdout -username "..." -password "..."
fi
# Сборка успешна, если имеем apk
export APK="${CI_PROJECT_DIR}/${OutputDirectory}/${AppBundle}.${CI_BUILD_ID}.apk"
echo "Testing apk exists: ${APK}..."
if [ -f ${APK} ]; then
echo -e "${GREEN}BUILD FOR ANDROID SUCCESS${NC}"
# Загрузить apk и дать разрешение на чтение
aws s3 cp ${APK} s3://ci-data/android/${AppBundle}.${CI_BUILD_ID}.apk --grants read=uri=http://acs.amazonaws.com/groups/global/AllUsers
echo "Download apk: ${AppBundle} Install
${AppBundle}
${COMMIT}
(build ${CI_BUILD_ID} - android)" >> ${CI_PROJECT_DIR}/download.html
# Загрузить html и дать разрешение на чтение
aws s3 cp ${CI_PROJECT_DIR}/download.html s3://ci-data/android/${AppBundle}.${CI_BUILD_ID}.html --grants read=uri=http://acs.amazonaws.com/groups/global/AllUsers
# Отправить ссылку в Slack
${CI_DATA_PATH}/notifySlack.sh android success "https://ci-data.s3.amazonaws.com/android/${AppBundle}.${CI_BUILD_ID}.html"
exit 0
else
echo -e "${RED}BUILD FOR ANDROID FAILED${NC}"
${CI_DATA_PATH}/notifySlack.sh android failure
exit 1
fiAn example build script for iOS
Assembling projects is carried out in two steps: generating an Xcode project from Unity and building an Xcode project. Developers cannot directly affect the Xcode project, which introduces limitations: you cannot directly change project settings, information about the assembly.
Also, the build feature on iOS is that test devices must be registered in the provisioning profile of the application. To build an Xcode project, you need to create a certificate, provisioning profile and application id in the developer console of Apple before building. Fastlane is
used to automate this process . This tool creates and synchronizes certificates, profiles and allows you to upload builds and meta information to itunes connect.
When building Unity projects without access to Xcode, there are nuances:
- in Unity, before building the project, you need to specify TeamId, which is in the developer's console - this is done through PlayerSettings.iOS.appleDeveloperTeamID
- in the project's postprocess script, you need to pre-process the Xcode of the project: configure info.plist, build settings
Release and Ad-Hoc builds also have different scripts that differ in the formation of the result: the release loads the archive in itunes connect, and ad-hoc loads ipa, creates a manifest and download page over the air, a link to which is sent to all interested parties.
GREEN='\033[0;32m'
RED='\033[0;33m'
NC='\033[0m' # No Color
export COMMIT=$(git log -1 --oneline --no-merges)
if [ "$1" = "" ]; then
echo -e "${RED}You must provide application Id${NC}"
exit 1
fi
if [ "$2" = "account1" ]; then
# Описываем аккаунт для fastlane утилит
export AccountName="account email"
export AccountDesc="account description"
export FastlanePassword="..."
export GymExportTeamId="..."
export FastlaneRepository="fastlane-keys.git"
export ProduceTeamName="team name"
else
echo "${RED}No keystore config found for $2${NC}"
exit 1
fi
echo -e "${GREEN}BundleId: ${AppBundle}${NC}"
echo -e "${GREEN}Account: ${AccountDesc} (${2})${NC}"
# Копируем файл для запуска сборки
mkdir -p $CI_PROJECT_DIR/Assets/Editor && cp $CI_DATA_PATH/CustomBuild.cs "$_"
# Запускаем сборку Unity
if [ "$3" = "5.5" ]; then
/Applications/Unity5.5/Unity.app/Contents/MacOS/Unity -buildTarget ios -projectPath $CI_PROJECT_DIR -batchmode -executeMethod CustomBuild.IOS -quit -logFile /dev/stdout -username "..." -password "..."
elif [ "$3" = "2017.1" ]; then
/Applications/Unity2017.1/Unity.app/Contents/MacOS/Unity -buildTarget ios -projectPath $CI_PROJECT_DIR -batchmode -executeMethod CustomBuild.IOS -quit -logFile /dev/stdout -username "..." -password "..."
else
/Applications/Unity5.6.4/Unity.app/Contents/MacOS/Unity -buildTarget ios -projectPath $CI_PROJECT_DIR -batchmode -executeMethod CustomBuild.IOS -quit -logFile /dev/stdout -username "..." -password "..."
fi
# Проверяем, что Unity создал XCode проект
XCODE_FILES="${CI_PROJECT_DIR}/${XcodeDirectory}"
if [ -d ${XCODE_FILES} ]; then
# Создаем приложение в Apple Developer Console
export PRODUCE_APP_IDENTIFIER=${AppBundle}
export PRODUCE_APP_NAME=${AppBundle}
export PRODUCE_USERNAME=${AccountName}
export PRODUCE_SKU=${AppBundle}
# skip_itc не создает приложение в itunes connect - для adhoc это необязательно
fastlane produce --app_version "1.0" --language "English" --skip_itc
# Скачиваем или создаем code signing keys and profiles
cd "${CI_PROJECT_DIR}/${XcodeDirectory}"
rm -f Matchfile
echo "git_url \"${FastlaneRepository}\"" >> Matchfile
echo "app_identifier [\"${AppBundle}\"]" >> Matchfile
echo "username \"${AccountName}\"" >> Matchfile
# Пароль, которым зашифрован репозиторий с ключами
export MATCH_PASSWORD='...'
# В зависимости от вида сборки, запрашиваем нужные сертификаты
# force_for_new_devices true добавляет все новые тестовые устройства, которые указаны в
developer console
fastlane match adhoc --force_for_new_devices true
# Создаем Gymfile и собираем XCode project и подписываем Ad-Hoc сертификатом
rm -f Gymfile
echo "export_options(" >> Gymfile
echo " manifest: {" >> Gymfile
echo " appURL: \"https://ci-data.s3.amazonaws.com/ios/${AppBundle}.${CI_BUILD_ID}.ipa\","
>> Gymfile
echo " displayImageURL: \"https://ci-data.s3.amazonaws.com/ios-icon.png\"," >> Gymfile
echo " fullSizeImageURL: \"https://ci-data.s3.amazonaws.com/ios-icon-big.png\"" >> Gymfile
echo " }," >> Gymfile
echo ")" >> Gymfile
fastlane gym --scheme "Unity-iPhone" --export_method ${GYM_EXPORT_METHOD} --xcargs "DEVELOPMENT_TEAM=\"${GYM_EXPORT_TEAM_ID}\" PROVISIONING_PROFILE_SPECIFIER=\"match AdHoc ${AppBundle}\" CODE_SIGN_IDENTITY=\"iPhone Distribution: ${AccountDesc}\"" -o "${CI_PROJECT_DIR}/" -n "${AppBundle}.${CI_BUILD_ID}.ipa"
# Создаем страницу для скачивания на S3
export IPA="${CI_PROJECT_DIR}/${AppBundle}.${CI_BUILD_ID}.ipa"
ls -l "${CI_PROJECT_DIR}/${XcodeDirectory}/*.ipa"
echo "Testing ipa exists: ${IPA}..."
if [ -f ${IPA} ]; then
echo -e "Begin uploading to S3..."
aws s3 cp ${CI_PROJECT_DIR}/${AppBundle}.${CI_BUILD_ID}.ipa s3://ci-data/ios/${AppBundle}.${CI_BUILD_ID}.ipa --grants read=uri=http://acs.amazonaws.com/groups/global/AllUsers
aws s3 cp ${CI_PROJECT_DIR}/manifest.plist s3://ci-data/ios/${AppBundle}.${CI_BUILD_ID}.plist --grants read=uri=http://acs.amazonaws.com/groups/global/AllUsers
echo "Download ipa: ${AppBundle} " >> ${CI_PROJECT_DIR}/download.html
echo "Install
${AppBundle}
${COMMIT}
(build ${CI_BUILD_ID} - iOS)" >> ${CI_PROJECT_DIR}/download.html
aws s3 cp ${CI_PROJECT_DIR}/download.html s3://ci-data/ios/${AppBundle}.${CI_BUILD_ID}.html --grants read=uri=http://acs.amazonaws.com/groups/global/AllUsers
${CI_DATA_PATH}/notifySlack.sh ios ad-hoc "https://ci-data.s3.amazonaws.com/ios/${AppBundle}.${CI_BUILD_ID}.html"
echo -e "${GREEN}BUILD AD-HOC FOR IOS SUCCESS${NC}"
exit 0
else
echo -e "${RED}BUILD AD-HOC FOR IOS FAILED${NC}"
${CI_DATA_PATH}/notifySlack.sh ios failure
exit 1
fi
else
echo -e "${RED}BUILD FOR IOS FAILED${NC}"
${CI_DATA_PATH}/notifySlack.sh ios failure
exit 1
fiGREEN='\033[0;32m'
RED='\033[0;33m'
NC='\033[0m' # No Color
export COMMIT=$(git log -1 --oneline --no-merges)
if [ "$1" = "" ]; then
echo -e "${RED}You must provide application Id${NC}"
exit 1
fi
if [ "$2" = "account1" ]; then
# Описываем аккаунт для fastlane утилит
export AccountName="account email"
export AccountDesc="account description"
export FastlanePassword="..."
export GymExportTeamId="..."
export FastlaneRepository="fastlane-keys.git"
export ProduceTeamName="team name"
else
echo "${RED}No keystore config found for $2${NC}"
exit 1
fi
echo -e "${GREEN}BundleId: ${AppBundle}${NC}"
echo -e "${GREEN}Account: ${AccountDesc} (${2})${NC}"
# Копируем файл для запуска сборки
mkdir -p $CI_PROJECT_DIR/Assets/Editor && cp $CI_DATA_PATH/CustomBuild.cs "$_"
# Запускаем сборку Unity
if [ "$3" = "5.5" ]; then
/Applications/Unity5.5/Unity.app/Contents/MacOS/Unity -buildTarget ios -projectPath $CI_PROJECT_DIR -batchmode -executeMethod CustomBuild.IOS -quit -logFile /dev/stdout -username "..." -password "..."
elif [ "$3" = "2017.1" ]; then
/Applications/Unity2017.1/Unity.app/Contents/MacOS/Unity -buildTarget ios -projectPath $CI_PROJECT_DIR -batchmode -executeMethod CustomBuild.IOS -quit -logFile /dev/stdout -username "..." -password "..."
else
/Applications/Unity5.6.4/Unity.app/Contents/MacOS/Unity -buildTarget ios -projectPath $CI_PROJECT_DIR -batchmode -executeMethod CustomBuild.IOS -quit -logFile /dev/stdout -username "..." -password "..."
fi
# Проверяем, что Unity создал XCode проект
XCODE_FILES="${CI_PROJECT_DIR}/${XcodeDirectory}"
if [ -d ${XCODE_FILES} ]; then
# Создаем приложение в Apple Developer Console and Itunes Connect
export PRODUCE_APP_IDENTIFIER=${AppBundle}
export PRODUCE_APP_NAME=${AppBundle}
export PRODUCE_USERNAME=${AccountName}
export PRODUCE_SKU=${AppBundle}
fastlane produce --app_version "1.0" --language "English"
# Скачиваем или создаем code signing keys and profiles
cd "${CI_PROJECT_DIR}/${XcodeDirectory}"
rm -f Matchfile
echo "git_url \"${FastlaneRepository}\"" >> Matchfile
echo "app_identifier [\"${AppBundle}\"]" >> Matchfile
echo "username \"${AccountName}\"" >> Matchfile
# Пароль, которым зашифрован репозиторий с ключами
export MATCH_PASSWORD='...'
# Запрашиваем нужные сертификаты
fastlane match appstore
# Собираем в XCode
fastlane gym --scheme "Unity-iPhone" --xcargs "DEVELOPMENT_TEAM=\"${GymExportTeamId}\" PROVISIONING_PROFILE_SPECIFIER=\"match AppStore ${AppBundle}\" CODE_SIGN_IDENTITY=\"iPhone Distribution: ${AccountDesc}\"" -o "${CI_PROJECT_DIR}/" -n "${AppBundle}.${CI_BUILD_ID}.ipa"
# Загружаем в itunes connect
export IPA="${CI_PROJECT_DIR}/${AppBundle}.${CI_BUILD_ID}.ipa"
ls -l "${CI_PROJECT_DIR}/${XcodeDirectory}/*.ipa"
echo "Testing ipa exists: ${IPA}..."
if [ -f ${IPA} ]; then
rm -f Deliverfile
echo "app_identifier \"${AppBundle}\"" >> Deliverfile
echo "username \"${AccountName}\"" >> Deliverfile
echo "ipa \"${IPA}\"" >> Deliverfile
echo "submit_for_review false" >> Deliverfile
echo "force true" >> Deliverfile
fastlane deliver
echo -e "${GREEN}BUILD FOR IOS SUCCESS${NC}"
exit 0
else
echo -e "${RED}BUILD FOR IOS FAILED${NC}"
${CI_DATA_PATH}/notifySlack.sh ios failure
exit 1
fi
else
echo -e "${RED}BUILD FOR IOS FAILED${NC}"
${CI_DATA_PATH}/notifySlack.sh ios failure
exit 1
fiHow others work with this system
- The developer adds the .gitlab-ci.yml template file to the project root, includes the runner in the project settings on gitlab.com, pushes the code into the desired branch.
- The game designer and tester receive a notification in Slack about the successful assembly and a link to download apk and ipa archives.
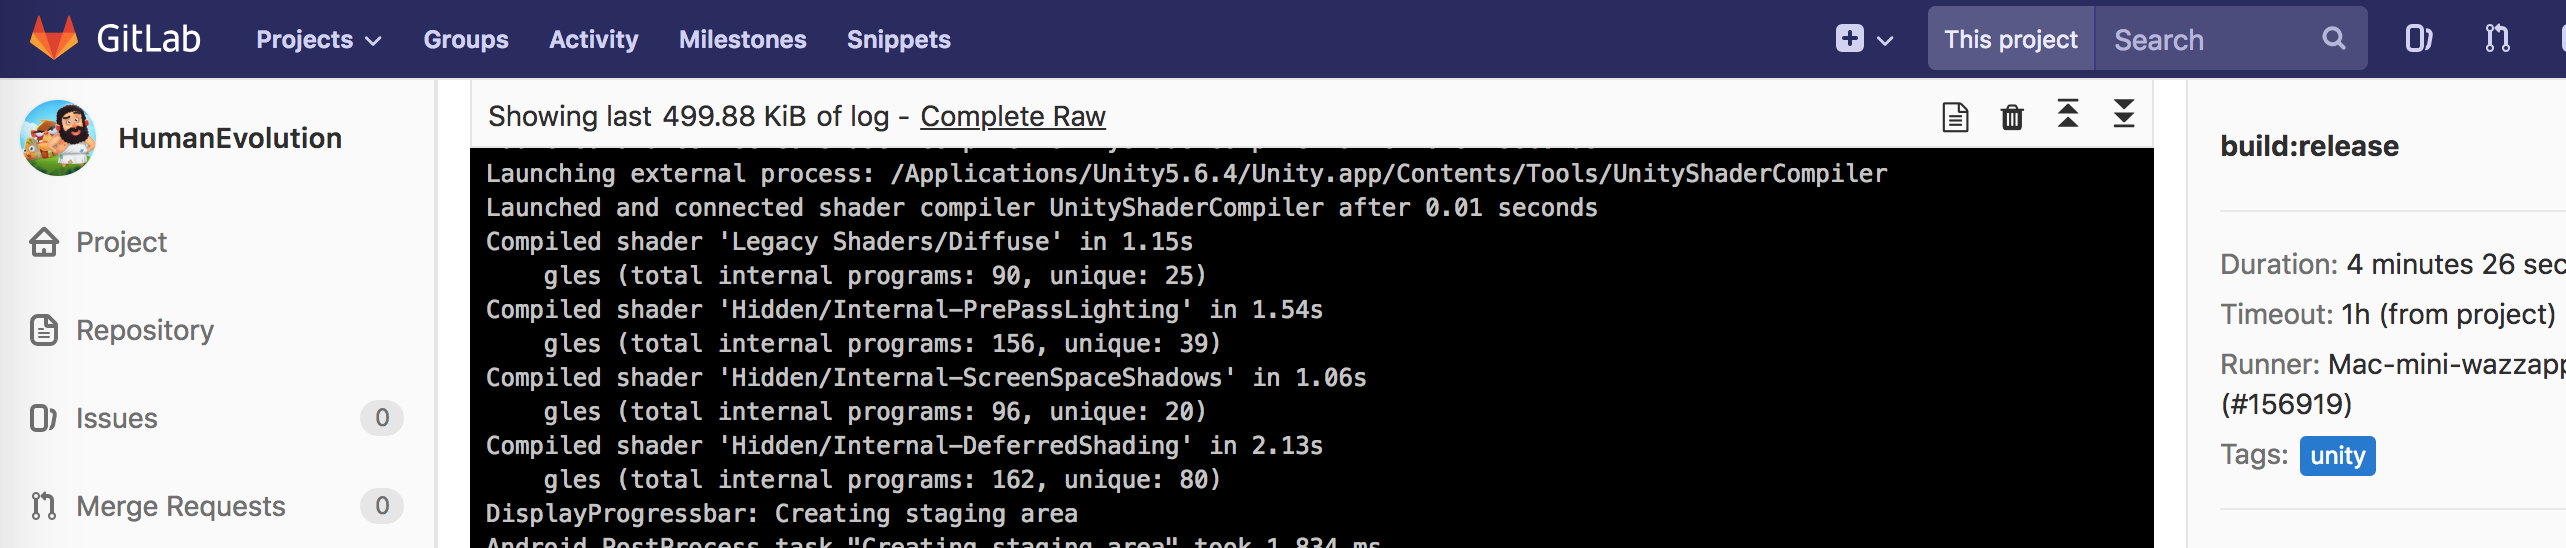
- I track builds, see logs and can help developers deal with bugs. Logs and running builds can be seen directly on gitlab. Of the minuses - now in the interface you cannot see the build queue for a specific runner.
Interface for viewing build logs:
results
Thus, the resulting system is easy to use, allows you to add checks and validations from the server side (code style, tests), while managers see links to assemblies in Slack and there are no problems with the assembly on iOS.
Of the minuses - its support is needed to add new versions of Unity, signing identity and ensure the health of poppies.
At the moment, we have two runners working (about two years), more than 4000 assemblies have passed through the system. The build speed depends on the characteristics of the runner and the number of assets in the project, because they are imported every time again and it varies between 3 - 30 minutes for Android and 10 - 60 for iOS.