April 22, 2018 at 17:06
Simple filter to automatically remove background from images
There are many ways to remove the background from the image of an object, making it transparent (in graphic editors, special services). But sometimes it may be necessary to remove the background in many photographs with minimal human involvement.
I want to share a method based on creating a transparency mask using the Sobel operator and some other transformations. The basic idea is not new at all, but the use of some additional techniques in the correct order allowed us to improve the results, which this note will be about.
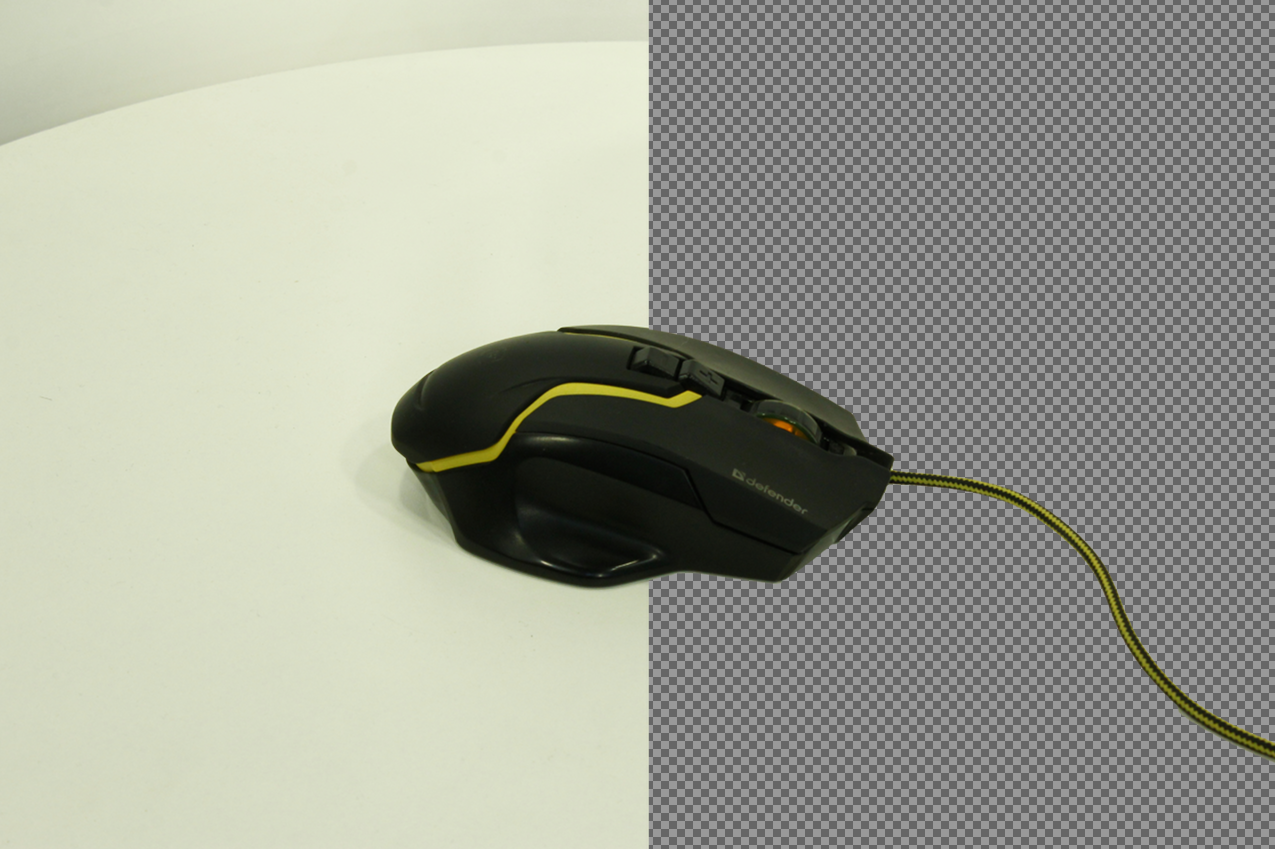
Implementation is made possible by OpenCV and the C # wrapper of OpenCVSharp .
The main task is to form an alpha channel based on the input image, thus leaving only the object of interest to us on it.
Consider each item in detail on the example of my mouse with KDPV. The full filter code can be found in the repository .
Under the spoiler is the base filter class that defines its interface, we will inherit from it. Introduced for convenience, it does not require any special explanations, it is made in the image and likeness of BaseFilter from Accord .NET, another very worthy .NET library for image processing and not only.
I only note that Mat used here is a universal OpenCV entity that represents a matrix with elements of a certain type (MatType) and with a certain number of channels. For example, a matrix with elements of type CV_8UC3 is suitable for storing images in RGB (BGR) format, one byte per color. And CV_32FC1 is for storing a single-channel image with float values.
The fundamental stage of the filter. In the most basic version, it can be implemented like this:
This is a typical example of using the Sobel function:
Here it is worth paying attention to the following:
Unfortunately, this simple code is not always suitable. The problem is that the Sobel operator is resolution-dependent. The left half of the image below is the result for an image of 1280x853 size. Right - the result for the original photo 5184x3456.
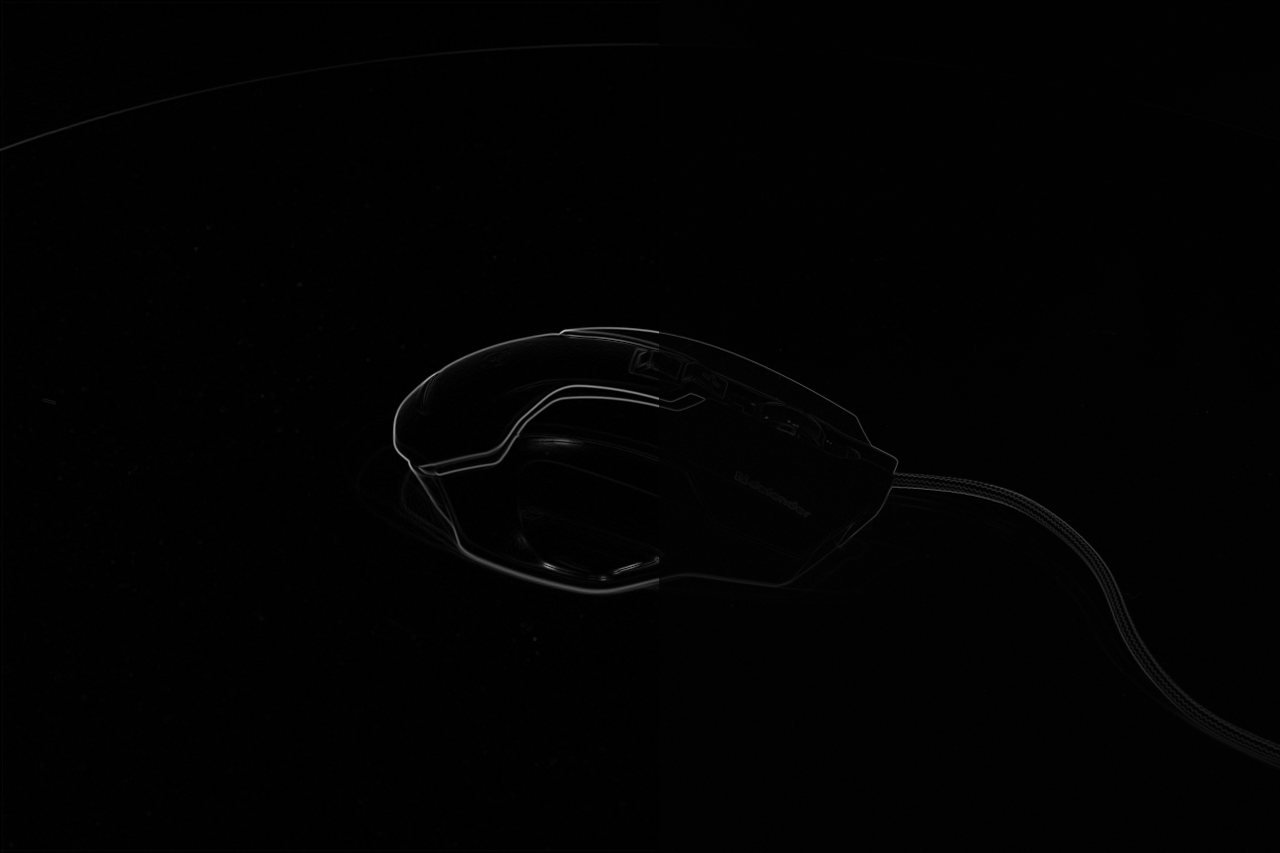
The lines of the edges of the objects became much less pronounced, since, with the same core size, the pixel distances between the same points in the image became several times larger. For less successful photographs (the object is worse separated from the background), important details may disappear altogether.
The Sobel function can accept other kernel sizes. But using it all the same fails for the following reasons:
Fortunately, OpenCV allows you to independently call these functions with automatic normalization, so you do not have to invent your own kernel generation:
The code is a bit more complicated and could not do without small props. Instead of using Sobel, a local Derivative function is declared, using GetDerivKernels to get normalized kernels and SepFilter2D to use them. For larger images, larger kernel sizes are selected (GetDerivKernels supports sizes up to 31). In order for the results between different sizes to have a minimum of differences, already normalized large kernels are additionally multiplied by 2 (the same backup).
Let's look at the result: The
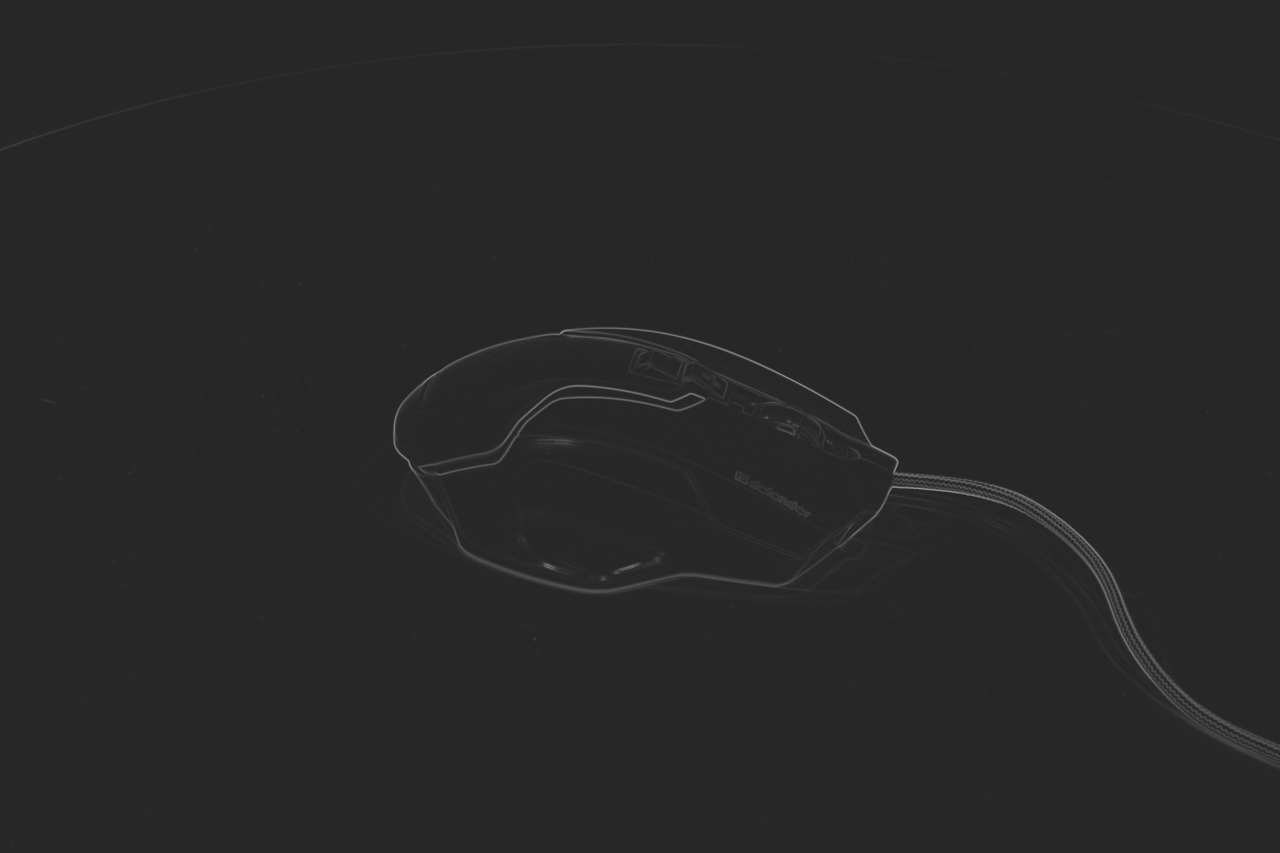
picture “turned gray” somewhat due to the added constant at the end. The reason for such a strange action will become clear in the next step.
Actually, fill it with the simplest way possible - from the corner of the image. FloodFillRelativeSeedPoint is just a constant that defines the relative indent from the corner, and FloodFillTolerance is the "greed" of the fill:
And we get:
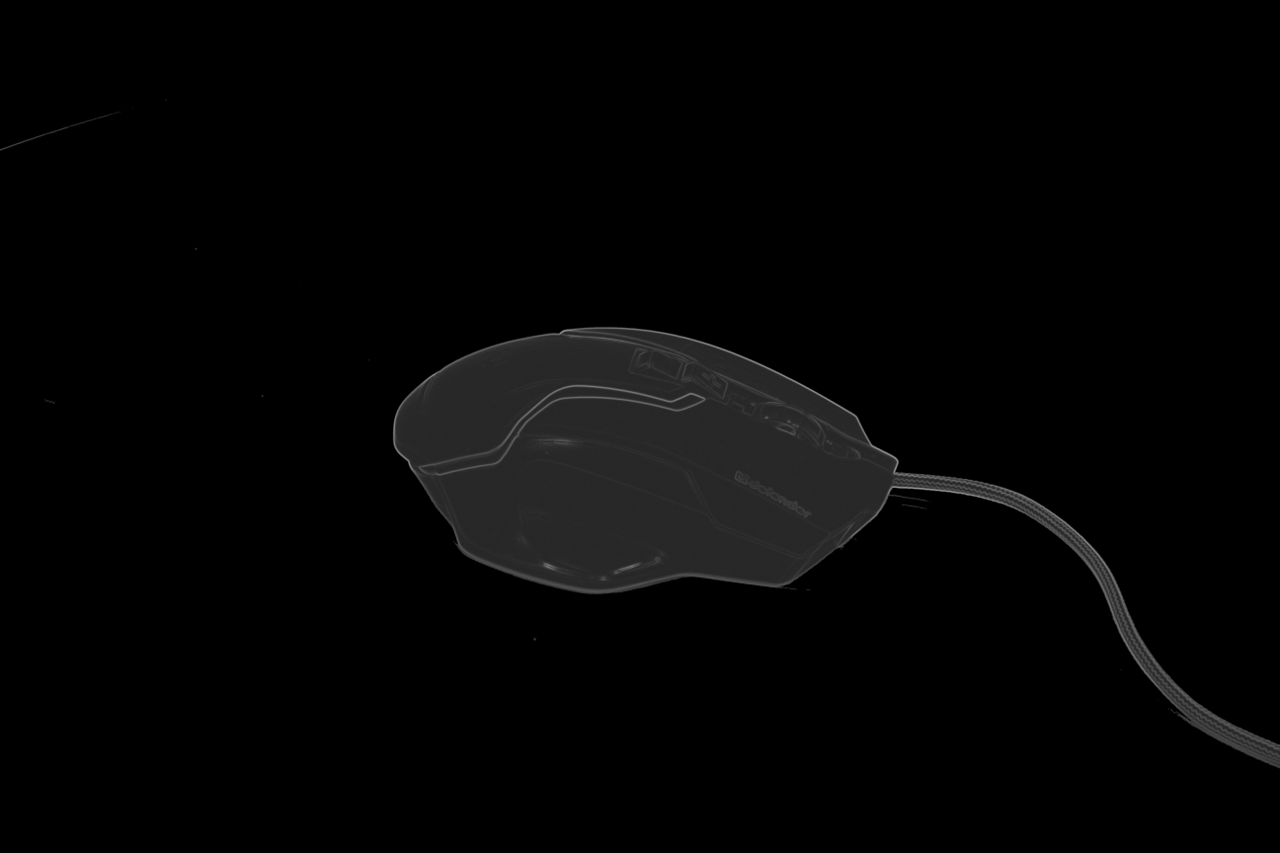
I think now it’s clear why the addition of a constant was required. It can be seen that there were noises, but this is the subject of the next paragraph. But before that, let's look at a less successful outcome of events for some other image - say, a camera photograph:

It can be seen that the black color “flowed” through a small gap to where it wasn’t worth it. Of course, you can try lowering FloodFillTolerance (here 0.04), but in this case more pieces of background and noise that we don’t need appear. And here one more very useful type of operations on images is useful: morphological transformations . The documentation has a great example of their action, so I won’t repeat it. Add one dilatation pass before filling to close possible gaps in the contours:
Better:
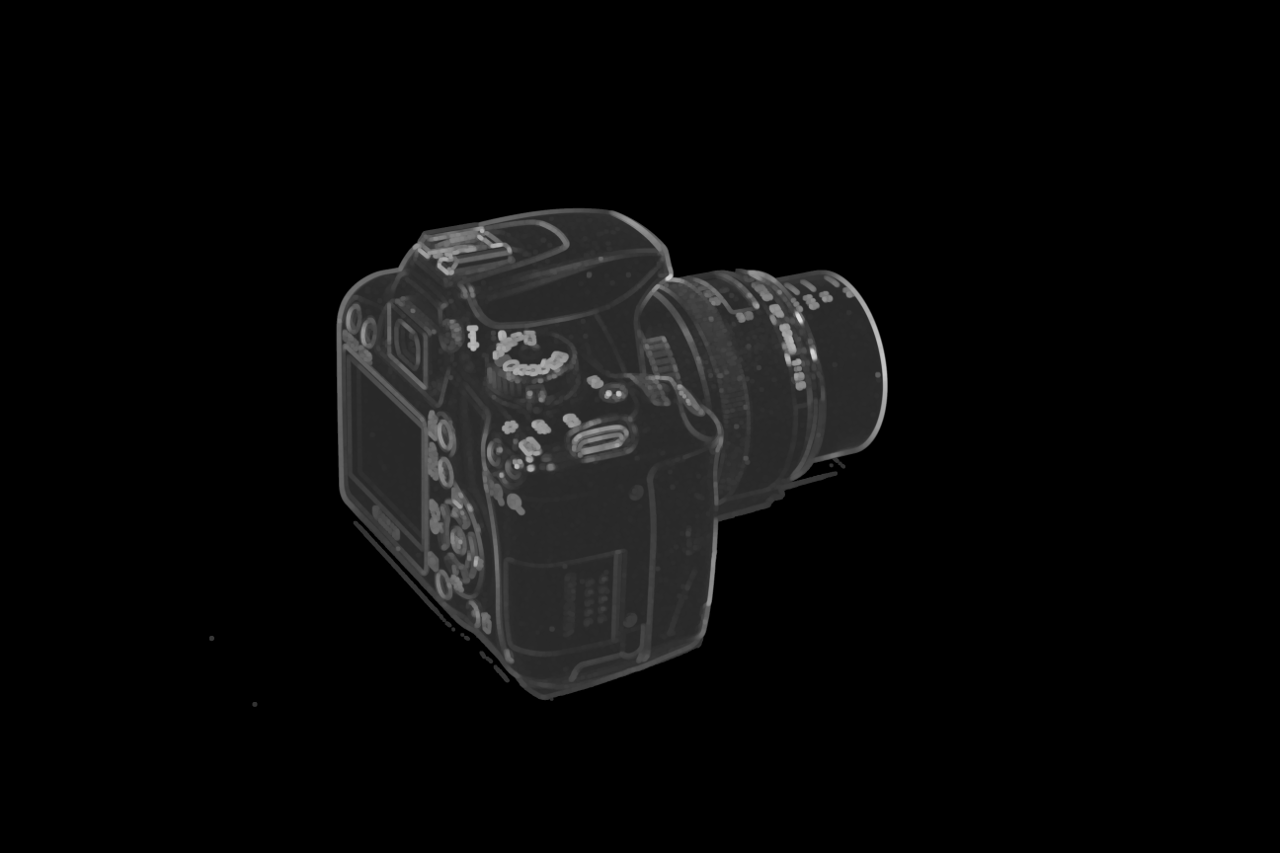
The PerformMorphologyEx local function simply applies the specified morphological operation to the image. At the same time, a structural element of an ellipsoid shape is chosen (you can take a rectangular one, but in this case sharp right angles appear) with a size dependent on resolution (so that the results remain consistent on different image sizes). The size selection formula can still be twisted, it was chosen "by eye".
Here we have the perfect training ground for using morphological opening - in one or two passes all these islands of gray pixels and even the remains of many shadows will be perfectly removed. Add these three lines after filling:
First, we do erosion to compensate for dilatation from the previous step, after which two iterations of erosion and dilatation (morphological narrowing and expansion, respectively). So far we get the following:
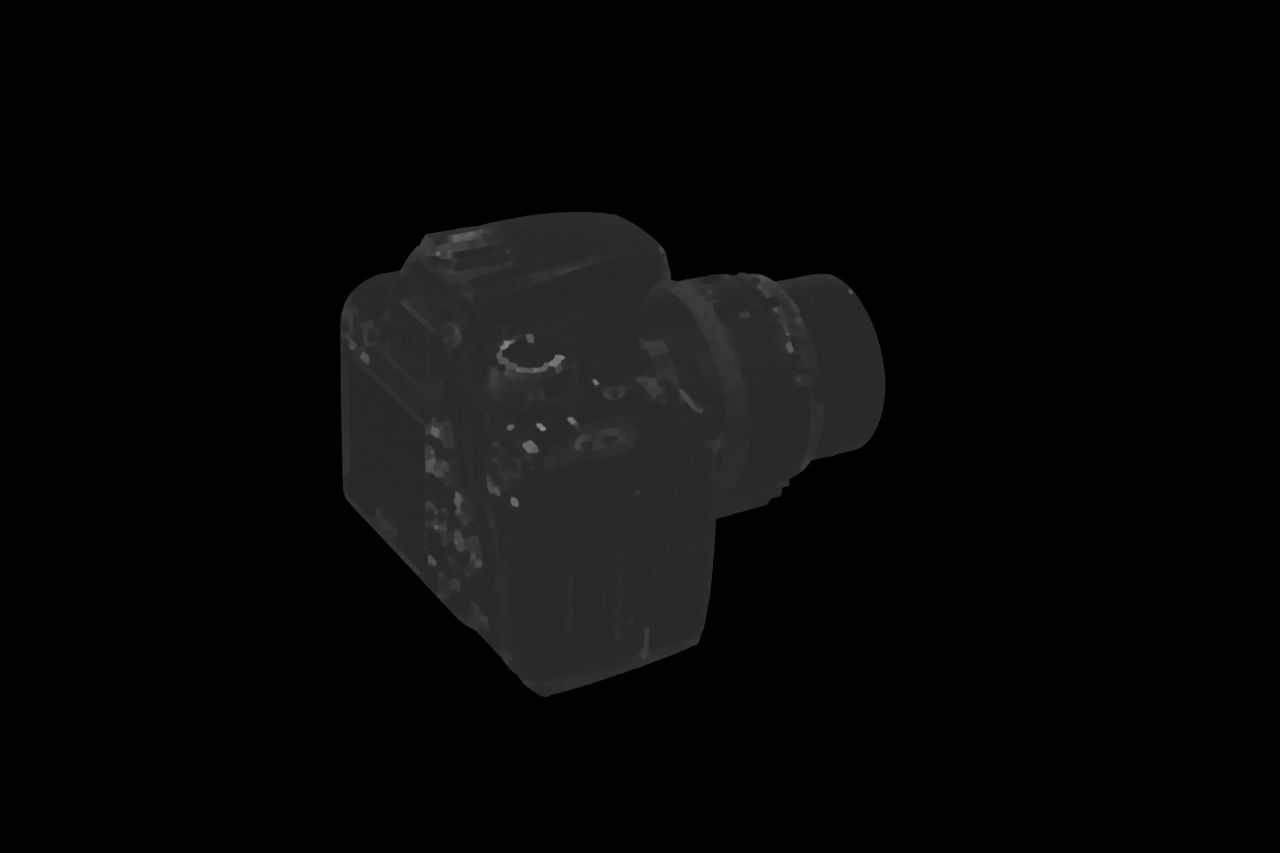
The third line (passage by erosion) is needed in order to avoid the appearance of
By and large, the mask is already ready. Add to the end of the filter:
Here is the final result.
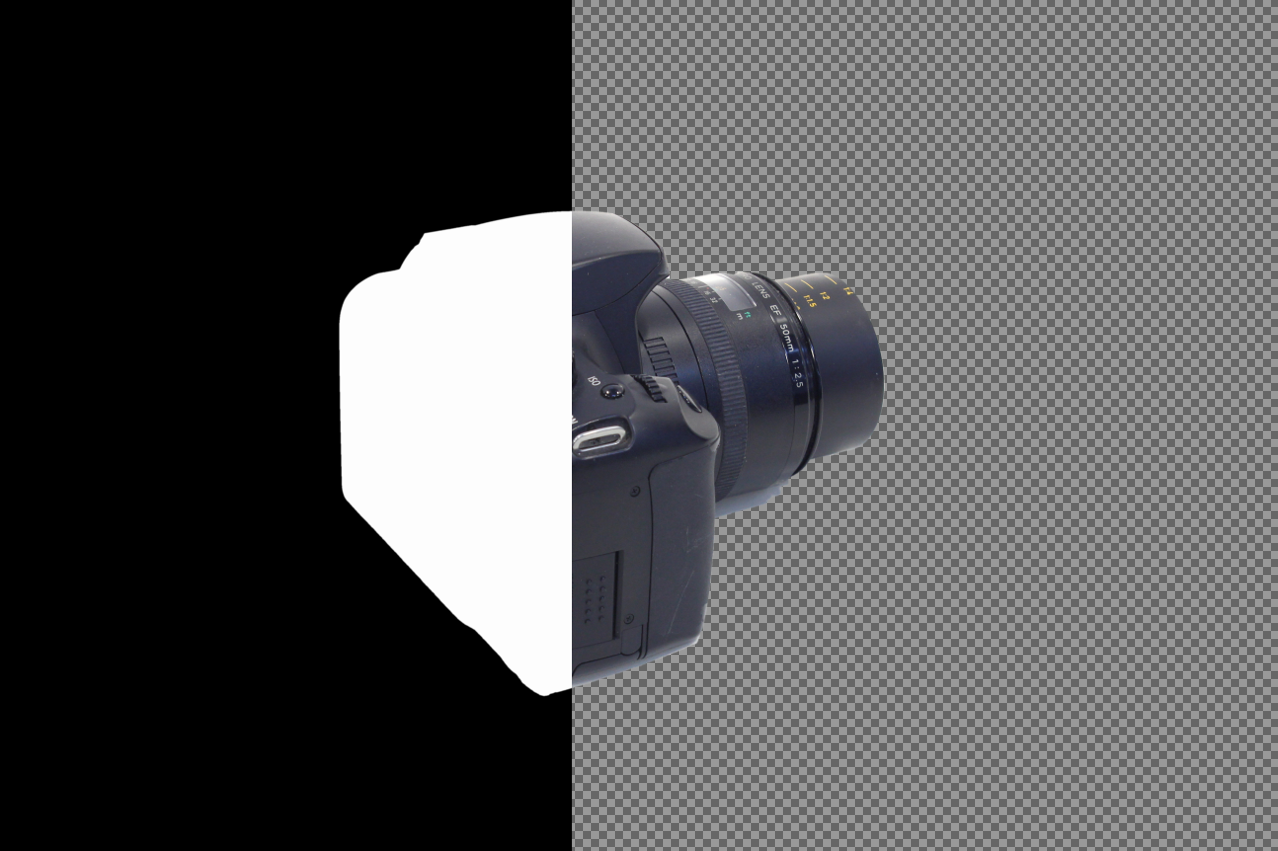
Of course, the method is not ideal. The most significant problems:
Nevertheless, for many images the result is acceptable, maybe this method will be useful to someone ( source ). My goal was to remove the background from photographs of objects taken using such rotary tables .
I want to share a method based on creating a transparency mask using the Sobel operator and some other transformations. The basic idea is not new at all, but the use of some additional techniques in the correct order allowed us to improve the results, which this note will be about.
Implementation is made possible by OpenCV and the C # wrapper of OpenCVSharp .
General scheme
The main task is to form an alpha channel based on the input image, thus leaving only the object of interest to us on it.
- Edge detection : We create the basis for the future mask by acting on the operator to calculate the gradient on the original image.
- Fill : Fill the outer area with black.
- Noise removal: remove non-flooded islets of pixels, smooth the borders.
- Final stage : We perform binarization of the mask, blur a bit and get the output alpha channel.
Consider each item in detail on the example of my mouse with KDPV. The full filter code can be found in the repository .
Preliminary preparation
Under the spoiler is the base filter class that defines its interface, we will inherit from it. Introduced for convenience, it does not require any special explanations, it is made in the image and likeness of BaseFilter from Accord .NET, another very worthy .NET library for image processing and not only.
I only note that Mat used here is a universal OpenCV entity that represents a matrix with elements of a certain type (MatType) and with a certain number of channels. For example, a matrix with elements of type CV_8UC3 is suitable for storing images in RGB (BGR) format, one byte per color. And CV_32FC1 is for storing a single-channel image with float values.
Opencvfilter
///
///     Base class for custom OpenCV filters. More convenient than plain static methods.
///
public abstract class OpenCvFilter
{
    static OpenCvFilter()
    {
        Cv2.SetUseOptimized(true);
    }
    ///
    ///     Supported depth types of input array.
    ///
    public abstract IEnumerable SupportedMatTypes { get; }
    ///
    ///     Applies filter to  and returns result.
    ///
    /// Source array.
    /// Result of processing filter.
    public Mat Apply(Mat src)
    {
        var dst = new Mat();
        ApplyInPlace(src, dst);
        return dst;
    }
    ///
    ///     Applies filter to  and writes to .
    ///
    /// Source array.
    /// Output array.
    /// Provided image does not meet the requirements.
    public void ApplyInPlace(Mat src, Mat dst)
    {
        if (!SupportedMatTypes.Contains(src.Type()))
            throw new ArgumentException("Depth type of provided Mat is not supported");
        ProcessFilter(src, dst);
    }
    ///
    ///     Actual filter.
    ///
    /// Source array.
    /// Output array.
    protected abstract void ProcessFilter(Mat src, Mat dst);
}
Edge detection
The fundamental stage of the filter. In the most basic version, it can be implemented like this:
Like in the tutorials
///
///     Performs edges detection. Result will be used as base for transparency mask.
///
private Mat GetGradient(Mat src)
{
    using (var preparedSrc = new Mat())
    {
        Cv2.CvtColor(src, preparedSrc, ColorConversionCodes.BGR2GRAY);
        preparedSrc.ConvertTo(preparedSrc, MatType.CV_32F, 1.0 / 255); // From 0..255 bytes to 0..1 floats
        using (var gradX = preparedSrc.Sobel(ddepth: MatType.CV_32F, xorder: 0, yorder: 1, ksize: 3, scale: 1 / 4.0))
        using (var gradY = preparedSrc.Sobel(ddepth: MatType.CV_32F, xorder: 1, yorder: 0, ksize: 3, scale: 1 / 4.0))
        {
            var result = new Mat();
            Cv2.Magnitude(gradX, gradY, result);
            return result;
        }
    }
}
This is a typical example of using the Sobel function:
- Let’s color the image (there’s practically no point in calculating the gradient for all three channels - the result will be very little different).
- We calculate the vertical and horizontal components.
- We calculate the final result using the Magnitude function .
Here it is worth paying attention to the following:
- The size of the kernel (ksize) was passed to the Sobel function. 3. A kernel of this size is most often used.
- A normalization factor of 1/4 has also been transmitted. Normalization is required to obtain a clean picture with optimal brightness and minimal noise. More details can be found in this question (the value of the accepted answer to which may exceed the value of the entire given post).
Unfortunately, this simple code is not always suitable. The problem is that the Sobel operator is resolution-dependent. The left half of the image below is the result for an image of 1280x853 size. Right - the result for the original photo 5184x3456.
The lines of the edges of the objects became much less pronounced, since, with the same core size, the pixel distances between the same points in the image became several times larger. For less successful photographs (the object is worse separated from the background), important details may disappear altogether.
The Sobel function can accept other kernel sizes. But using it all the same fails for the following reasons:
- Kernels of arbitrary sizes inside are generated by integers and require normalization, otherwise the range of values obtained will differ from 0..1 and it will be difficult to work with them further, the image will be very noisy and overexposed after applying magnitude.
- What specific cores were chosen by OpenCV developers for sizes larger than 5 are undocumented. Discussions of larger kernels can be found , but not all of them coincide with what is used in OpenCV.
- Internal functions in deriv.cpp have a boolean parameter normalize, but the cv :: sobel function calls them with the false parameter.
Fortunately, OpenCV allows you to independently call these functions with automatic normalization, so you do not have to invent your own kernel generation:
What happened
private Mat GetGradient(Mat src)
{
    using (var preparedSrc = new Mat())
    {
        Cv2.CvtColor(src, preparedSrc, ColorConversionCodes.BGR2GRAY);
        preparedSrc.ConvertTo(preparedSrc, MatType.CV_32F, 1.0 / 255);
        // Calculate Sobel derivative with kernel size depending on image resolution
        Mat Derivative(Int32 dx, Int32 dy)
        {
            Int32 resolution = preparedSrc.Width * preparedSrc.Height;
            // Larger image --> larger kernel
            Int32 kernelSize =
                resolution < 1280 * 1280 ? 3 :
                resolution < 2000 * 2000 ? 5 :
                resolution < 3000 * 3000 ? 9 :
                                           15;
            // Compensate lack of contrast on large images
            Single kernelFactor = kernelSize == 3 ? 1 : 2;
            using (var kernelRows = new Mat())
            using (var kernelColumns = new Mat())
            {
                // Get normalized Sobel kernel of desired size
                Cv2.GetDerivKernels(kernelRows, kernelColumns,
                    dx, dy, kernelSize,
                    normalize: true
                );
                using (var multipliedKernelRows = kernelRows * kernelFactor)
                using (var multipliedKernelColumns = kernelColumns * kernelFactor)
                {
                    return preparedSrc.SepFilter2D(
                        MatType.CV_32FC1,
                        multipliedKernelRows,
                        multipliedKernelColumns
                    );
                }
            }
        }
        using (var gradX = Derivative(1, 0))
        using (var gradY = Derivative(0, 1))
        {
            var result = new Mat();
            Cv2.Magnitude(gradX, gradY, result);
            //Add small constant so the flood fill will perform correctly
            result += 0.15f;
            return result;
        }
    }
}
The code is a bit more complicated and could not do without small props. Instead of using Sobel, a local Derivative function is declared, using GetDerivKernels to get normalized kernels and SepFilter2D to use them. For larger images, larger kernel sizes are selected (GetDerivKernels supports sizes up to 31). In order for the results between different sizes to have a minimum of differences, already normalized large kernels are additionally multiplied by 2 (the same backup).
Let's look at the result: The
picture “turned gray” somewhat due to the added constant at the end. The reason for such a strange action will become clear in the next step.
Note
In addition to the Sobel operator, there are others that give a slightly better result. For example, in OpenCV, Scharr is available out of the box. But only for Sobel there is a built-in generator of kernels of arbitrary size, so I used it.
Pouring
Actually, fill it with the simplest way possible - from the corner of the image. FloodFillRelativeSeedPoint is just a constant that defines the relative indent from the corner, and FloodFillTolerance is the "greed" of the fill:
Floodfill
protected override void ProcessFilter(Mat src, Mat dst)
{
    using (Mat alphaMask = GetGradient(src))
    {
        Cv2.FloodFill( // Flood fill outer space
            image: alphaMask,
            seedPoint: new Point(
                (Int32) (FloodFillRelativeSeedPoint * src.Width),
                (Int32) (FloodFillRelativeSeedPoint * src.Height)),
            newVal: new Scalar(0),
            rect: out Rect _,
            loDiff: new Scalar(FloodFillTolerance),
            upDiff: new Scalar(FloodFillTolerance),
            flags: FloodFillFlags.FixedRange | FloodFillFlags.Link4);
        ...
    }
}
And we get:
I think now it’s clear why the addition of a constant was required. It can be seen that there were noises, but this is the subject of the next paragraph. But before that, let's look at a less successful outcome of events for some other image - say, a camera photograph:
It can be seen that the black color “flowed” through a small gap to where it wasn’t worth it. Of course, you can try lowering FloodFillTolerance (here 0.04), but in this case more pieces of background and noise that we don’t need appear. And here one more very useful type of operations on images is useful: morphological transformations . The documentation has a great example of their action, so I won’t repeat it. Add one dilatation pass before filling to close possible gaps in the contours:
The code
protected override void ProcessFilter(Mat src, Mat dst)
{
    using (Mat alphaMask = GetGradient(src))
    {
        // Performs morphology operation on alpha mask with resolution-dependent element size
        void PerformMorphologyEx(MorphTypes operation, Int32 iterations)
        {
            Double elementSize = Math.Sqrt(alphaMask.Width * alphaMask.Height) / 300;
            if (elementSize < 3)
                elementSize = 3;
            if (elementSize > 20)
                elementSize = 20;
            using (var se = Cv2.GetStructuringElement(
                MorphShapes.Ellipse, new Size(elementSize, elementSize)))
            {
                Cv2.MorphologyEx(alphaMask, alphaMask, operation, se, null, iterations);
            }
        }
        PerformMorphologyEx(MorphTypes.Dilate, 1); // Close small gaps in edges
        Cv2.FloodFill(...);
    }
    ...
}
Better:
The PerformMorphologyEx local function simply applies the specified morphological operation to the image. At the same time, a structural element of an ellipsoid shape is chosen (you can take a rectangular one, but in this case sharp right angles appear) with a size dependent on resolution (so that the results remain consistent on different image sizes). The size selection formula can still be twisted, it was chosen "by eye".
Noise removal
Here we have the perfect training ground for using morphological opening - in one or two passes all these islands of gray pixels and even the remains of many shadows will be perfectly removed. Add these three lines after filling:
PerformMorphologyEx(MorphTypes.Erode, 1); // Compensate initial dilate
PerformMorphologyEx(MorphTypes.Open,  2); // Remove not filled small spots (noise)
PerformMorphologyEx(MorphTypes.Erode, 1); // Final erode to remove white fringes/halo around objects
First, we do erosion to compensate for dilatation from the previous step, after which two iterations of erosion and dilatation (morphological narrowing and expansion, respectively). So far we get the following:
The third line (passage by erosion) is needed in order to avoid the appearance of
such a stroke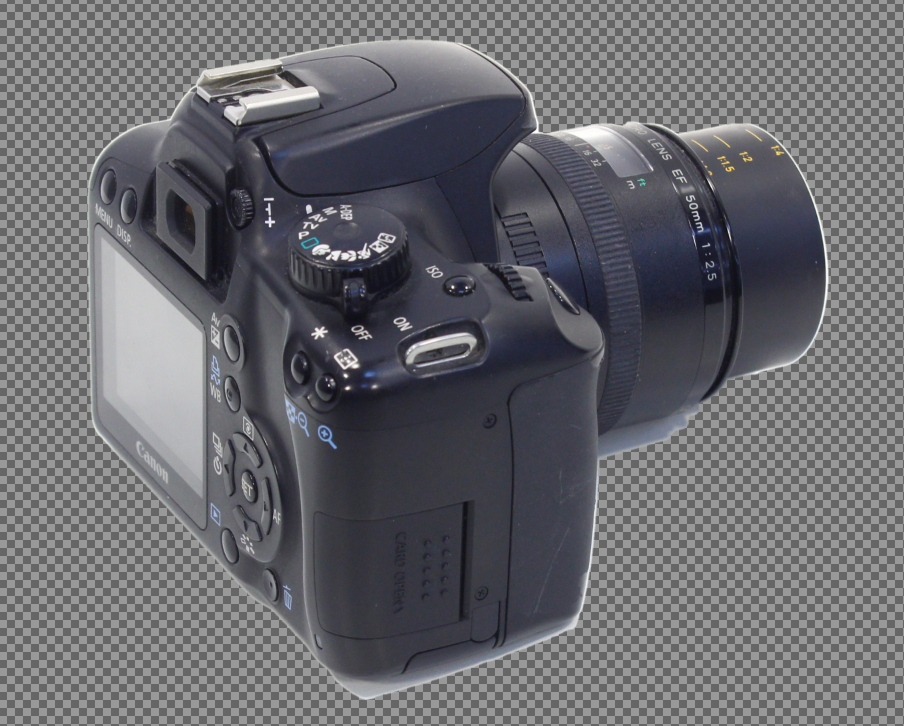
Final stage
By and large, the mask is already ready. Add to the end of the filter:
Following code
AddAlphaChannel simply adds an alpha channel to the input image and writes the result to the output:
Cv2.Threshold(
    src: alphaMask,
    dst: alphaMask,
    thresh: 0,
    maxval: 255,
    type: ThresholdTypes.Binary); // Everything non-filled becomes white
alphaMask.ConvertTo(alphaMask, MatType.CV_8UC1, 255);
if (MaskBlurFactor > 0)
    Cv2.GaussianBlur(alphaMask, alphaMask, new Size(MaskBlurFactor, MaskBlurFactor), MaskBlurFactor);
AddAlphaChannel(src, dst, alphaMask);
AddAlphaChannel simply adds an alpha channel to the input image and writes the result to the output:
///
///     Adds transparency channel to source image and writes to output image.
///
private static void AddAlphaChannel(Mat src, Mat dst, Mat alpha)
{
    var bgr  = Cv2.Split(src);
    var bgra = new[] {bgr[0], bgr[1], bgr[2], alpha};
    Cv2.Merge(bgra, dst);
}
Here is the final result.
Of course, the method is not ideal. The most significant problems:
- If you try to remove the background from a donut or similar object, then the inner area will not be cut out (because the fill will not go inside).
- The shadows. Partially overcome by sensitivity, partially removed along with the noise, but, often, somehow get into the final result. It remains either to live with them, or to additionally implement the search and removal of shadows.
Nevertheless, for many images the result is acceptable, maybe this method will be useful to someone ( source ). My goal was to remove the background from photographs of objects taken using such rotary tables .