Creating a game on Lua and LÖVE - 7
- Transfer
- Tutorial
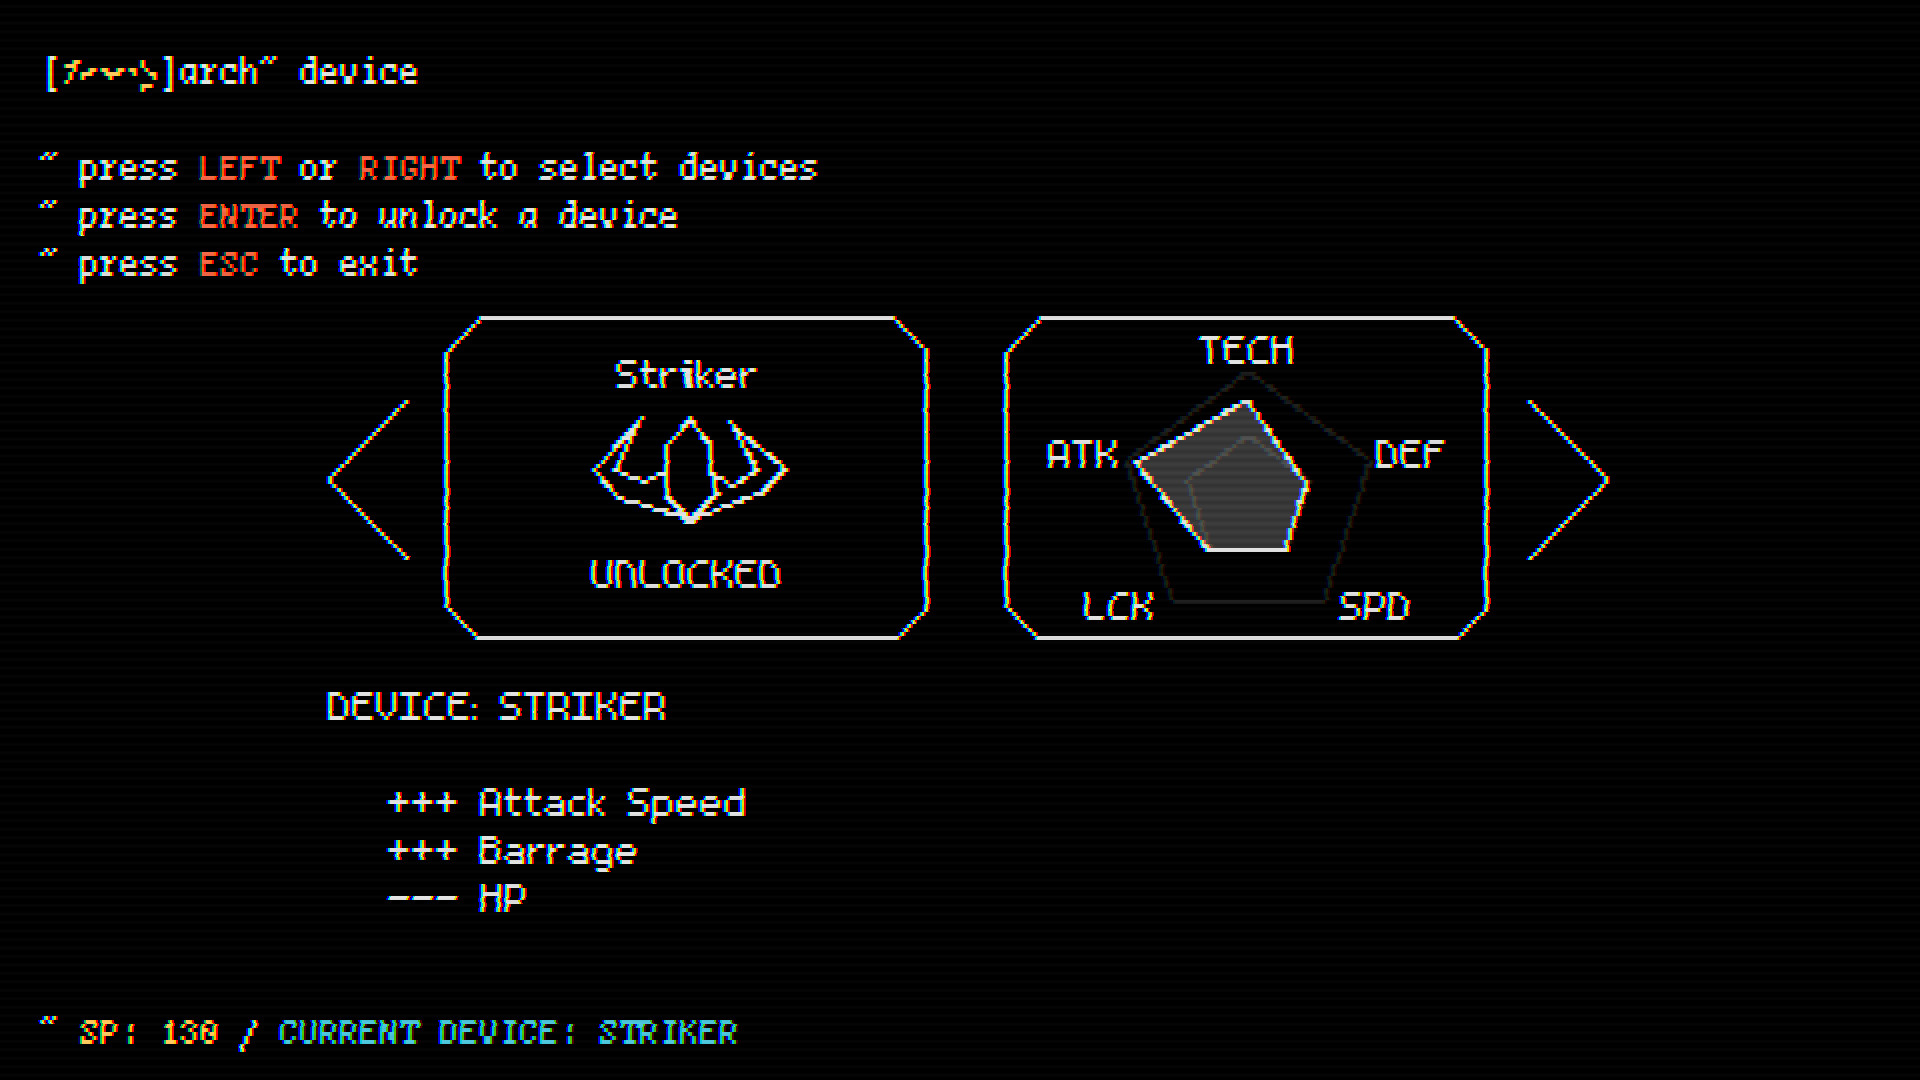
Table of contents
Table of contents
- Article 1
- Part 1. Game cycle
- Part 2. Libraries
- Part 3. Rooms and areas
- Part 4. Exercises
- Section 2
- Part 5. Game Basics
- Part 6. Player class basics
- Section 3
- Part 7. Parameters and attacks of the player
- Part 8. Enemies
- Section 4
- Part 9. Director and game cycle
- Part 10. Code Writing Practices
- Часть 11. Пассивные навыки
- Статья 5
- Часть 12. Другие пассивные навыки
- Статья 6
- Часть 13. Дерево навыков
- Статья 7
- Часть 14. Консоль
- Часть 15. Финал
Part 14: Console
Introduction
In this part we will analyze the Console room. The console is much easier to implement than anything else, because in the end it comes down to displaying text on the screen. Here's what it looks like:
GIF
The Console room will consist of three different types of objects: lines, input lines, and modules. Lines are just plain colored lines of text displayed on the screen. For example, in the example above, ":: running BYTEPATH ..." would be a string. In terms of data structure, it will be just a table storing the position of the row, its text and colors.
Input lines are lines in which the player can enter something. In the example above, these are the lines that contain the word “arch”. When certain commands are entered into the console, these commands will be executed and create new lines or modules. In terms of data structure, input lines will look like simple lines, only with additional logic to read input when the last line added to the room is an input line.
Finally, a module is a special object that allows a player to perform more complex actions than simply entering commands. This is a whole set of elements that appear when a player, for example, needs to select a ship. Such objects can be created by various teams, that is, for example, when a player wants to change the sound volume in a game, he must enter “volume”, after which the Volume module opens, in which you can select the volume level. All of these modules themselves will also be objects, and the Console room will accordingly process their creation and deletion.
Lines
Let's start with the lines. We can define the string this way:
{
    x = x, y = y,
    text = love.graphics.newText(font, {boost_color, 'blue text', default_color, 'white text'}
}
That is, she has a position
x, y, as well as an attribute text. This text attribute is a Text object . We will use Text objects from LÖVE because they can be used to easily define colored text. But before we can add lines to the Console room, we need to create it, so let's get this done. Basically, this task is similar to creating a SkillTree room. We will add a table
linesin which all text lines will be stored, and then in the draw function we will go around the whole table and draw each line. We will also add a function addLinethat will add a new text line to the table lines:functionConsole:new()
...
self.lines = {}
self.line_y = 8
camera:lookAt(gw/2, gh/2)
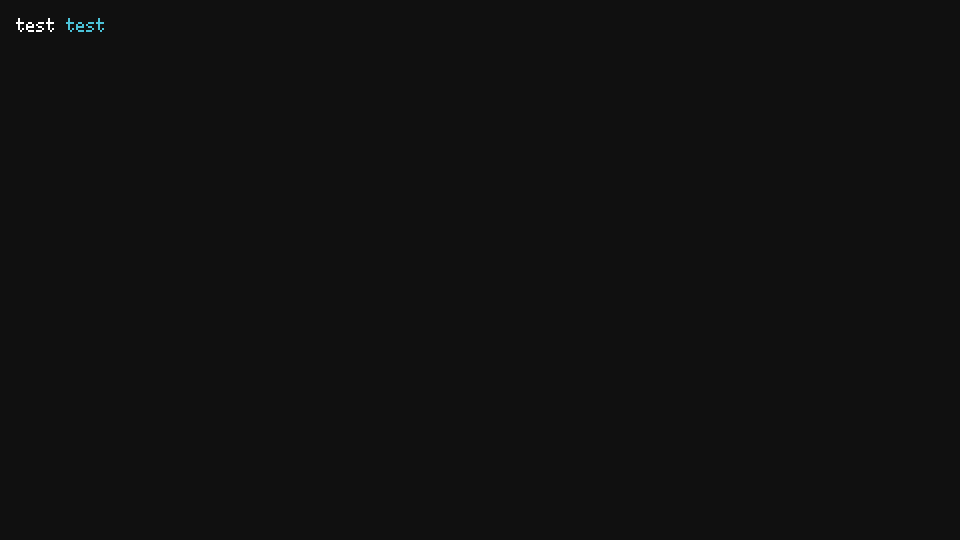
self:addLine(1, {'test', boost_color, ' test'})
endfunctionConsole:draw()
...
for _, line inipairs(self.lines) do love.graphics.draw(line.text, line.x, line.y) end
...
endfunctionConsole:addLine(delay, text)
self.timer:after(delay, function()table.insert(self.lines, {x = 8, y = self.line_y,
text = love.graphics.newText(self.font, text)})
self.line_y = self.line_y + 12end)
endSomething else happens here. Firstly, there is an attribute
line_ythat tracks the position by y, in which we must add the next line. It increases by 12 each time it is called addLine, because we want new lines to be added below the previous one, as happens in regular terminals. In addition, the function
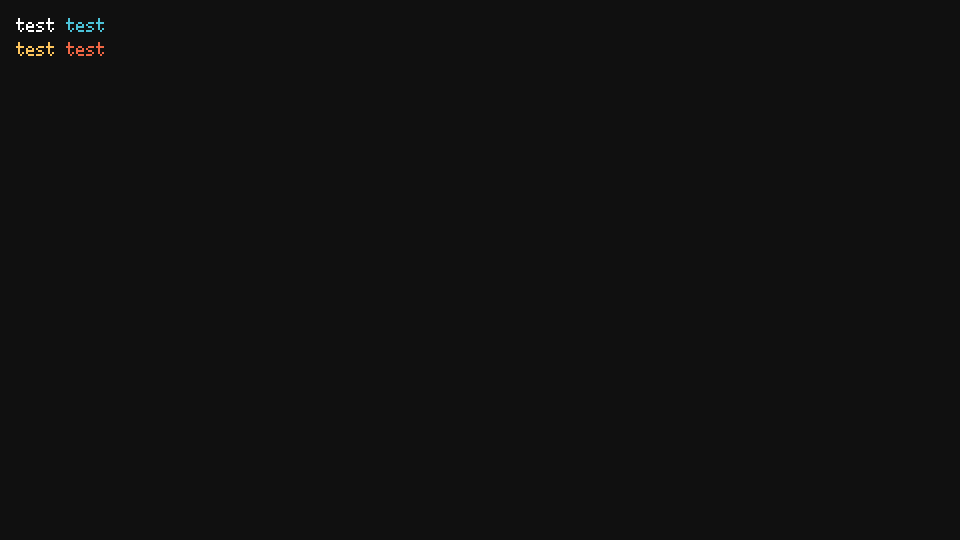
addLinethere is a delay. This delay is useful because when adding multiple lines to the console, we do not want them to be added at the same time. We want there to be a slight delay before each addition, because everything looks better this way. In addition, we can make it so that, along with the delay in adding each line, it is added character by character. That is, instead of one line added at a time, each character is added with a slight delay, which will give us an even more pleasant effect. For the sake of saving time, I won’t do it myself, but it can be a good exercise for you (and we already have some logic for this in the InfoText object). It should all look like this:
And if we add a few lines, then it will look as it should:
Input lines
Input lines are a bit more complicated, but just a little bit. The first thing we want is to add a function
addInputLinethat will behave like addLine, except that it will add text to the input line and enable the player to enter text. By default, we will use the text of the input line [root]arch~, placed before the input, as in a regular terminal.functionConsole:addInputLine(delay)
self.timer:after(delay, function()table.insert(self.lines, {x = 8, y = self.line_y,
text = love.graphics.newText(self.font, self.base_input_text)})
self.line_y = self.line_y + 12
self.inputting = trueend)
endAnd
base_input_textit looks like this:functionConsole:new()
...
self.base_input_text = {'[', skill_point_color, 'root', default_color, ']arch~ '}
...
endAlso, when adding a new input line, we set it to
inputtingtrue. This boolean value will be used to tell us whether we should read keyboard input. If so, then we can simply add to the list as a string all the characters that the player enters, and then add this line to our Text object. It looks like this:functionConsole:textinput(t)if self.inputting thentable.insert(self.input_text, t)
self:updateText()
endendfunctionConsole:updateText()local base_input_text = table.copy(self.base_input_text)
local input_text = ''for _, character inipairs(self.input_text) do input_text = input_text .. character endtable.insert(base_input_text, input_text)
self.lines[#self.lines].text:set(base_input_text)
endAnd it
Console:textinputwill be called up every time it is called love.textinput, what happens every time a player presses a key:-- in main.luafunctionlove.textinput(t)if current_room.textinput then current_room:textinput(t) endendThe last thing we need to do is make the Enter and Backspace keys work. The Enter key will set the
inputtingvalue to false, get the contents of the table input_textand do something with it. That is, if the player entered “help”, and then pressed Enter, we will run the help command. And the Backspace key should just delete the last item from the table input_text:functionConsole:update(dt)
...
if self.inputting thenifinput:pressed('return') then
self.inputting = false-- Run command based on the contents of input_text here
self.input_text = {}
endifinput:pressRepeat('backspace', 0.02, 0.2) thentable.remove(self.input_text, #self.input_text)
self:updateText()
endendendFinally, we can also simulate the pleasing effect of a blinking cursor. The easiest way to do this is simply to draw a blinking cursor at the position after the width
base_input_textconcatenated with the content input_text.functionConsole:new()
...
self.cursor_visible = true
self.timer:every('cursor', 0.5, function()
self.cursor_visible = not self.cursor_visible
end)
endThus, we implement blinking, drawing a rectangle only when
cursor_visibletrue. Next we draw a rectangle:functionConsole:draw()
...
if self.inputting and self.cursor_visible thenlocal r, g, b = unpack(default_color)
love.graphics.setColor(r, g, b, 96)
local input_text = ''for _, character inipairs(self.input_text) do input_text = input_text .. character endlocal x = 8 + self.font:getWidth('[root]arch~ ' .. input_text)
love.graphics.rectangle('fill', x, self.lines[#self.lines].y,
self.font:getWidth('w'), self.font:getHeight())
love.graphics.setColor(r, g, b, 255)
end
...
endHere the
xcursor position is stored in the variable . We add 8 to it, because each line is by default drawn from position 8, so if we do not take this into account, the cursor position will be incorrect. We also assume that the width of the cursor rectangle will be equal to the width of the letter 'w' of the current font. Usually w is the widest letter, so we chose it. But it can be any constant number, for example 10 or 8. And all this will look like this:
GIF
Modules
Modules are objects. which contains logic that allows the player to do something in the console. For example,
ResolutionModulewhich we are implementing will allow the player to change the resolution in the game. We will separate the modules from the rest of the Console room code because their logic can be quite complex and it makes sense to separate them into separate objects. We implement a module that looks like this:GIF
This module is created and added when the player presses Enter after entering the “resolution” command into the input line. After activating the module, it takes control from the console and adds several lines to it using
Console:addLine. In addition to these added lines, he has a selection logic that allows you to select the desired resolution. After selecting a resolution and pressing Enter, the window changes to reflect this new resolution, we add a new input line with Console:addInputLineand turn off the option of selecting ResolutionModule in this object, returning control to the console.All modules will work in approximately the same way. They are created / added, perform their functions, taking control of the Console room, and then, after their behavior is completed, return control to the console. We can implement the basics of modules in a Console object as follows:
functionConsole:new()
    ...
    self.modules = {}
    ...
endfunctionConsole:update(dt)
    self.timer:update(dt)
    for _, module inipairs(self.modules) do module:update(dt) endif self.inputting then
    ...
endfunctionConsole:draw()
    ...
    for _, module inipairs(self.modules) do module:draw() end
    camera:detach()
    ...
end
Since we write code only for ourselves, here we can skip some formalities. Although I just said that we will have some rule / interface between the Console object
and the Module objects through which they will transfer player input control to each other, in fact we will just add modules to the table
self.modules, update and draw them. At the appropriate time, each module will itself be activated / deactivated, that is, from the Console side we do not need to do almost anything. Now let's look at creating a ResolutionModule:
functionConsole:update(dt)
    ...
    if self.inputting thenifinput:pressed('return') then
            self.line_y = self.line_y + 12local input_text = ''for _, character inipairs(self.input_text) do
                input_text = input_text .. character
      	    end
            self.input_text = {}
            if input_text == 'resolution'thentable.insert(self.modules, ResolutionModule(self, self.line_y))
            endend
        ...
    endend
Here we make it so that the variable
input_textwill store what the player entered in the input line, and then, if this text is “resolution”, we create a new ResolutionModule object and add it to the list modules. Most modules will need a link to the console, as well as the current position of y, to which lines are added, so the module will be located under the lines of code that already exist in the console. To do this, when creating a new module object, we pass selfand self.line_y. The implementation of ResolutionModule itself is quite simple. For her, it’s enough for us to add several lines, as well as a small amount of selection logic from several lines. To add lines, we simply do the following:
functionResolutionModule:new(console, y)
    self.console = console
    self.y = y
    self.console:addLine(0.02, 'Available resolutions: ')
    self.console:addLine(0.04, '    480x270')
    self.console:addLine(0.06, '    960x540')
    self.console:addLine(0.08, '    1440x810')
    self.console:addLine(0.10, '    1920x1080')
end
To simplify our work, we will make sure that all available resolutions are values that are multiples of the basic resolution, so we just need to add these four lines.
After that, it remains for us to add the logic of choice. The selection logic is similar to a hack, but it works well: we simply place a rectangle on top of the current selected line and move this rectangle when the player presses the up and down keys. We need a variable to track the line we are in (1 to 4), and we will draw this rectangle at the corresponding y position based on this variable. All this looks as follows:
functionResolutionModule:new(console, y)
    ...
    self.selection_index = sx
    self.selection_widths = {
        self.console.font:getWidth('480x270'), self.console.font:getWidth('960x540'),
        self.console.font:getWidth('1440x810'), self.console.font:getWidth('1920x1080')
    }
end
The variable
selection_indexkeeps track of the current selection, and initially it is equal sx. sxmay be 1, 2, 3 or 4, depending on the size selected main.luawhen calling the function resize. selection_widthsstores the width of the rectangle in each row of the selection. Since the rectangle should cover each resolution, we need to determine its size based on the size of the characters that make up the line of this resolution.functionResolutionModule:update(dt)
...
ifinput:pressed('up') then
self.selection_index = self.selection_index - 1if self.selection_index < 1then self.selection_index = #self.selection_widths endendifinput:pressed('down') then
self.selection_index = self.selection_index + 1if self.selection_index > #self.selection_widths then self.selection_index = 1endend
...
endIn the update function, we process the logic of pressing the player “up” and “down”. We just need to increase or decrease
selection_indexso that the value is not less than 1 and not more than 4.functionResolutionModule:draw()
...
local width = self.selection_widths[self.selection_index]
local r, g, b = unpack(default_color)
love.graphics.setColor(r, g, b, 96)
local x_offset = self.console.font:getWidth(' ')
love.graphics.rectangle('fill', 8 + x_offset - 2, self.y + self.selection_index*12,
width + 4, self.console.font:getHeight())
love.graphics.setColor(r, g, b, 255)
endAnd in the draw function, we simply draw a rectangle in the corresponding position. The code looks awful again and it is full of strange numbers, but we need to place the rectangle in the right place, and there are no “clean” ways for this.
Now we just have to make the object read the input only when it is active, and so that it is active only immediately after its creation and before the player presses Enter to select the resolution. After pressing Enter, it should become inactive and no longer read input. The easiest way to do this is as follows:
functionResolutionModule:new(console, y)
    ...
    self.console.timer:after(0.02 + self.selection_index*0.02, function()
        self.active = trueend)
endfunctionResolutionModule:update(dt)ifnot self.active thenreturnend
	...
  	ifinput:pressed('return') then
    	self.active = false
    	resize(self.selection_index)
    	self.console:addLine(0.02, '')
    	self.console:addInputLine(0.04)
   endendfunctionResolutionModule:draw()ifnot self.active thenreturnend
    ...
end
The variable is set
activeto true a few frames after the module is created. Due to this, the rectangle will not be drawn before adding lines, because lines are added with a slight delay. If the variable is activenot active, then the update and draw functions will not be executed, that is, we will not read the input for this object and draw the selection rectangle. In addition, when you press Enter, we set it to activefalse, call the function resize, and then transfer control back to Console, adding a new input line. All this gives us appropriate behavior and thanks to this, everything will work in the right way.Exercises
227. (CONTENT) Make sure that when the Console room has more lines than can fit on the screen, the camera goes down when adding lines and modules.
228. (CONTENT) Implement the module
AchievementsModule. It shows all the achievements and requirements necessary to unlock them. We will cover the achievements in the next part of the tutorial, so come back to this exercise later! 229. (CONTENT) Implement the module
ClearModule. This module allows you to delete all saved data or clear the skill tree. Saving / loading data will also be discussed in the next article, so you can also return to this exercise later. 230. (CONTENT) Implement the module
ChooseShipModule. This module allows the player to select and unlock ships for the gameplay. 231. (CONTENT) Implement the module
HelpModule. It displays all available teams and allows the player to select a team without entering text. The game will support a gamepad, so forcing players to enter something is not very good. 232. (CONTENT) Implement the module
VolumeModule. It allows the player to select the volume of sound effects and music. 233. (Content) Implement team
mute, skills, start, exitand device. mutemutes all sounds. skillsGoes to the SkillTree room. startcreates a ChooseShipModule, and then starts the game after the player selects the ship. exitlogs out of the game.END
And that’s where we ended up with the console. With just three concepts (lines, input lines and modules), we can do a lot and add salt to the gameplay. The next part will be the last, in it we will consider various aspects that have not come up to any of the previous parts.
Part 15: Final
Introduction
In this last part we will talk about some topics that are not combined with any of the previous parts, but are necessary for the finished game. We will cover the following topics: saving and loading data, achievements, shaders and sound.
Saving and loading
Since this game does not require saving any level data, saving and loading become very simple operations. For them we will use the bitser library and its two functions:
dumpLoveFileand loadLoveFile. These functions will save and load any data to / from a file that we pass to them using love.filesystem. As the link says, the place to save the files depends on the operating system. On Windows, the file will be saved to C:\Users\user\AppData\Roaming\LOVE. To change the save location we can use love.filesystem.setIdentity. If we change the value to BYTEPATH, the save file will be saved to C:\Users\user\AppData\Roaming\BYTEPATH. Be that as it may, we will need only two functions:
saveand load. They will be defined in main.lua. Let's start with the save function:functionsave()local save_data = {}
-- Set all save data here
bitser.dumpLoveFile('save', save_data)
endThe save function is quite simple. We will create a new table
save_dataand put in it all the data that needs to be saved. For example, if we want to save the number of skill points that a player has, then we simply write save_data.skill_points = skill_points, that is, the save_data.skill_pointsvalue contained in the global variable will be stored in skill_points. The same applies to all other data types. However, it is important to limit yourself to saving values and value tables. Saving whole objects, images, and other types of more complex data will most likely not work. After adding everything that we want to save to
save_data, we simply call bitser.dumpLoveFileand save all this data to a file 'save'. When C:\Users\user\AppData\Roaming\BYTEPATHa file is createdsave, and when this file exists, all the information we need to save will be saved there. We can call this function at the close of the game or at the end of the round, it is up to you to decide. The only problem I can see here is that if you save only at the end of the game in the event of a program failure, the player’s progress will most likely not be saved. Now let's move on to the download function:
functionload()if love.filesystem.exists('save') thenlocal save_data = bitser.loadLoveFile('save')
	-- Load all saved data hereelse
        first_run_ever = trueendend
The download function works in a similar way, but in the opposite direction. We call
bitser.loadLoveFilewith the name of the saved file ( save), and then put all the data inside the local table save_data. Having written all the saved data in this table, we can assign them to the corresponding variables. For example, if we want to load player’s skill points, we will write skill_points = save_data.skill_points, that is, we assign the saved skill points to our global skill point variable. In addition, additional logic is required for the load function to work properly. If the player starts the game for the first time, then the save file does not exist yet, that is, when you try to download it, the program will crash. To fix this error, we need to check if the file exists using
love.filesystem.existsand download it only if it is. If it is not, then we simply set the global variable first_run_everto true. This variable is useful because usually when you first start the game we need to perform some additional actions, for example, launching a tutorial or displaying a message. The download function will be called once in love.loadupon loading the game. It is important that this function is called after the file globals.lua, because in it we rewrite global variables. And we are done with saving / loading. What we really need to save and load, we will leave as an exercise, because it depends on the aspects you choose to implement. For example, if you implement the skill tree exactly as in part 13, then you most likely need to save the table
bought_node_indexes, because it stores all the nodes purchased by the player.Progress
Due to the simplicity of the game, achieving achievements is also very simple (at least in comparison with everything else). We will have a regular global table called
achievements. And in this table will be stored the keys representing the name of the achievement, and the values that determine whether the achievement is unlocked. For example, if we have an achievement '50K'unlocked when a player scores 50,000 points in a round, then if this achievement is unlocked, it achievements['50K']will be true, otherwise false. To illustrate how this works, let's create an achievement
10K Fighterthat unlocks when a player scores 10,000 points on a Fighter ship. To realize this, all we have to do is assignachievements['10K Fighter']true when the round ends, the number of points is greater than 10K, and the Fighter ship is selected by the player. It looks like this:functionStage:finish()
timer:after(1, function()
gotoRoom('Stage')
ifnot achievements['10K Fighter'] and score >= 10000and device = 'Fighter'then
achievements['10K Fighter'] = true-- Do whatever else that should be done when an achievement is unlockedendend)
endAs you can see, there is very little code. The only thing we need is to make sure that each achievement only works once, and we will implement this by first checking to see if the achievement has already been unlocked. If not, you can continue.
While I am not familiar with the work of the Steam achievement system, I assume that we can call some function or set of functions to unlock the player’s achievements. If so, then we will call this function here after we set the
achievements['10K Fighter']value to true. We should also not forget that the achievements need to save and load, so it is important to add to the function saveand loadthe corresponding code.Shaders
While in the game I used about three shaders, but I will consider only one. However, since others use the same framework, they can be displayed in the same way, even though the contents of each shader are very different. In addition, I'm not a big specialist in shaders, and most likely I make a lot of stupid mistakes, that is, there are better ways to implement them than those that I will talk about. For me, studying shaders was probably the most difficult part of developing games, and so far I have not mastered them as well as the rest of the code base.
We implement a simple shader of RGB bias and apply it only to some game entities. In fact, pixel shaders work as follows: we write some kind of code, and this code applies to all pixels of the texture passed to the shader. You can read about the basics of shader programming here .
One of the problems that I encountered when trying to apply a shader to different objects is that you cannot apply it directly in the object code. For some reason (more experienced people can tell you exactly what the matter is), pixel shaders are not applied correctly when using simple primitives like lines, rectangles, etc. And even if we used sprites instead of simple shapes, the RGB offset shader would still not be applied in the way we need, because the effect requires us to go beyond the sprite. But since the pixel shader applies only to pixels in the texture, if we apply it, it will read the pixels inside the borders of the sprite, so the effect will not work.
To solve this problem, I chose a way to draw the objects to which I want to apply the X effect on a new canvas, followed by applying a pixel shader to this entire canvas. In a similar game, where the order of rendering is practically not important, this method had no drawbacks. However, in a game in which the rendering order is important (for example, in a 2.5D game with a top view), implementation becomes a little more complicated, so it is not a general solution.
rgb_shift.frag
Before we get into the coding of all this, let's first deal with the pixel shader itself, because it is very simple:
extern vec2 amount;
vec4 effect(vec4 color, Image texture, vec2 tc, vec2 pc) {
    return color*vec4(Texel(texture, tc - amount).r, Texel(texture, tc).g,
    Texel(texture, tc + amount).b, Texel(texture, tc).a);
}
I put it in a file
rgb_shift.fragin a folder resources/shaders, and upload it to the room Stageusing love.graphics.newShader. The entry point for all pixel shaders is a feature effect. This function receives a vector colorthat is similar to love.graphics.setColor, only instead of the interval 0-255, it uses the interval 0-1. That is, if the current color has the value 255, 255, 255, 255, then this vec4 will have the values 1.0, 1.0, 1.0, 1.0. Then it gets textureto which the shader is applied. This texture can be canvas, sprite, or any LÖVE object that can be drawn. The pixel shader automatically goes through all the pixels in this texture and applies a code inside the function to each pixeleffectreplacing the pixel value with the returned value. Pixel values are always vec4 objects, where 4 are the components of red, green, blue and alpha channels. The third argument
tcindicates the coordinate of the texture. The texture coordinates are in the range from 0 to 1 and represent the position of the current pixel inside the texture. The upper left corner is this 0, 0, and the lower right corner is 1, 1. We will use it together with a function texture2D(which is called in LÖVE Texel) to get the contents of the current pixel. The fourth argument pcis the pixel coordinate in screen space. In the shader we will not use it.Finally, the last thing we need to know before we get the effect function is how we can pass values to the shader so that it can manipulate them. In our case, we pass the vec2 vector
amount, which will control the size of the RGB shift effect. Values can be passed using a function send. The only line that creates the whole effect looks like this:
return color*vec4(
    Texel(texture, tc - amount).r,
    Texel(texture, tc).g,
    Texel(texture, tc + amount).b,
    Texel(texture, tc).a);
Here we use the function
Texelto search for pixels. But we want to not only search for a pixel in the current position, but also pixels in neighboring positions, so that it really was an RGB shift. This effect shifts the various color channels (in our case, red and blue) in different directions, which gives the whole “glitchy” appearance. That is, in essence, we look for a pixel at the position tc - amountand tc + amountthen take the red and blue values of this pixel together with the value of the green source pixel, and then display them. We could make a little optimization here, because we get one position twice (for green and alpha components), but for such a simple shader this is not very important.Selective rendering
Since we want to apply this pixel shader only to certain entities, we need to find a way to render only specific entities. The easiest way to do this is to tag each entity with a tag, and then create an
Areaalternative function in the object drawthat will draw objects with this tag only. The tag assignment looks like this:functionTrailParticle:new(area, x, y, opts)
TrailParticle.super.new(self, area, x, y, opts)
self.graphics_types = {'rgb_shift'}
...
endThen the creation of a new draw function, which will draw objects with only certain tags, looks like this:
functionArea:drawOnly(types)table.sort(self.game_objects, function(a, b)if a.depth == b.depth thenreturn a.creation_time < b.creation_time
        elsereturn a.depth < b.depth endend)
    for _, game_object inipairs(self.game_objects) doif game_object.graphics_types thenif #fn.intersection(types, game_object.graphics_types) > 0then
                game_object:draw()
            endendendend
That is, just like a regular function
Area:draw, but with additional logic. We use intersectionto determine if there are common elements in the transmitted tables graphics_typesand types. For example, if we decide that we want to draw only objects of the type rgb_shift, we will call area:drawOnly({'rgb_shift'}), that is, this transmitted table will be checked from graphics_typeseach object. If they have some similar elements, then there #fn.intersectionwill be more than zero, that is, we can draw an object. In a similar way, we want to implement a function
Area:drawExcept, because everything that we draw on one canvas, we do not need to draw on the other, that is, at some stage we need to exclude certain types of objects from rendering. It looks like this:functionArea:drawExcept(types)table.sort(self.game_objects, function(a, b)if a.depth == b.depth thenreturn a.creation_time < b.creation_time
elsereturn a.depth < b.depth endend)
for _, game_object inipairs(self.game_objects) doifnot game_object.graphics_types then game_object:draw()
elseif #fn.intersection(types, game_object.graphics_types) == 0then
game_object:draw()
endendendendHere we draw the object if it is not defined
graphics_types, and also if its intersection with the table typesis 0, that is, its type of graphics is not one of those defined by the calling function.Canvas + Shaders
With all this in mind, we can begin to realize the effect. While we are implementing it only for the object
TrailParticle, that is, an RGB shift will be created for the trail of the player’s ship and shells. The main way we can apply the RGB shift to objects like TrailParticle is as follows:functionStage:draw()
...
love.graphics.setCanvas(self.rgb_shift_canvas)
love.graphics.clear()
camera:attach(0, 0, gw, gh)
self.area:drawOnly({'rgb_shift'})
camera:detach()
love.graphics.setCanvas()
...
endIt looks similar to how we draw entities in the usual way, but instead of rendering on canvas,
main_canvaswe draw on the created one rgb_shift_canvas. And, more importantly, we draw only objects with a tag 'rgb_shift'. Thus, this canvas will contain only the objects we need, to which we can later apply the pixel shader. I used a similar idea for rendering effects Shockwaveand Downwell. After completing the drawing of individual effects on the canvas, we can draw the main game on
main_canvas, with the exception of entities already drawn on other canvases. It will look like this:functionStage:draw()
...
love.graphics.setCanvas(self.main_canvas)
love.graphics.clear()
camera:attach(0, 0, gw, gh)
self.area:drawExcept({'rgb_shift'})
camera:detach()
love.graphics.setCanvas()
...
endFinally, we can apply the effects we need. We will do this by drawing
rgb_shift_canvason another canvas called final_canvas, but this time applying the RGB-shift pixel shader. It looks like this:functionStage:draw()
...
love.graphics.setCanvas(self.final_canvas)
love.graphics.clear()
love.graphics.setColor(255, 255, 255)
love.graphics.setBlendMode("alpha", "premultiplied")
self.rgb_shift:send('amount', {
random(-self.rgb_shift_mag, self.rgb_shift_mag)/gw,
random(-self.rgb_shift_mag, self.rgb_shift_mag)/gh})
love.graphics.setShader(self.rgb_shift)
love.graphics.draw(self.rgb_shift_canvas, 0, 0, 0, 1, 1)
love.graphics.setShader()
love.graphics.draw(self.main_canvas, 0, 0, 0, 1, 1)
love.graphics.setBlendMode("alpha")
love.graphics.setCanvas()
...
endUsing the function,
sendwe can change the value of the variable amountso that it corresponds to the amount of shift that the shader should apply. Since the coordinates of the textures inside the pixel shader are in the range of values from 0 and 1, we want to divide the transmitted values by gwand gh. That is, if, for example, we want to perform a shift of 2 pixels, then it rgb_shift_magwill be 2, but the transmitted value will be 2 / gw b 2 / gh, since inside the pixel shader 2 pixels left / right are represented by this small value, not 2 Also, we need to draw the main canvas onto the final canvas, because the final canvas must contain everything that we want to render. Finally, outside this code, we can draw the final canvas onto the screen:
functionStage:draw()
    ...
    love.graphics.setColor(255, 255, 255)
    love.graphics.setBlendMode("alpha", "premultiplied")
    love.graphics.draw(self.final_canvas, 0, 0, 0, sx, sy)
    love.graphics.setBlendMode("alpha")
    love.graphics.setShader()
end
We could draw everything directly onto the screen, and not previously in
final_canvas, but if we needed to apply another full-screen shader to the screen, for example distortion, then it is easier to do this when everything is properly stored in the canvas. And all this as a result will look like this:
GIF
As expected, the RGB shift only applies to the ship’s trail, giving it the “glitch” look we need.
Sound
I am not a great specialist in sound, so although you can do a lot of interesting and complex things in it, I will stick to what I know, that is, simply playing sounds at the right time. We can do this with ripple .
This library has a fairly simple API and, in essence, it boils down to loading sounds using
ripple.newSoundand playing them back by calling the :playreturned object. For example, if we want to reproduce the sound of shooting when a player shoots, we can do something like this:-- in globals.lua
shoot_sound = ripple.newSound('resources/sounds/shoot.ogg')functionPlayer:shoot()local d = 1.2*self.w
self.area:addGameObject('ShootEffect', ...
shoot_sound:play()
...
endIn this very simple way, we can call
:playwhen we want the sound to play. There are other useful features in the library, for example, changing the tone of a sound, looping sounds, creating tags to change the properties of all sounds with a specific tag, and so on. In my game I added some more effects, but here I will not consider them. If you bought a tutorial, then all this is in the file sound.lua.END
And this concludes my tutorial. In no case can we assume that we have fully disclosed all topics, but the most important parts of the game are considered. If you carefully studied the articles, you should understand the code base well enough, and if you have acquired the tutorial, you can read the entire source code to understand what is going on much better.
I hope this tutorial turned out to be useful and gave you an idea of what development of a real game is and how to move from zero to a finished result. Ideally, you should use everything you have learned to create your own game from scratch, and not change mine, because this is a much better exercise for developing “starting from scratch” skills. Usually, when starting a new project, I almost always copy the code that came in handy for me in several projects. This is usually a large part of the engine code that we covered in parts 1-5.
If you enjoy this series of tutorials, then you can encourage me to write something similar in the future:
By purchasing the tutorial on itch.io, you will have access to the full source code of the game, to the answers to the exercises from parts 1-9, to the code broken into parts of the tutorial (the code will look like it should look at the end of each part) and to the key games on Steam.