How to adapt the game on Unity for iPhone X by April
A month ago, Apple warned all developers that since April all applications that are uploaded to the App Store should be built using the latest iOS 11 SDK. You can read about how to properly position content using the new API in the official documentation and the Human Interface Guidelines . A good and detailed articles on the adaptation of games on Unity neither in Russian nor in English do not please us. And since in War Robots support for the new UI appeared with the February release of version 3.6.0, I decided to write my own guide with scripts and screenshots.
Theory
To begin with, any Unity game is built under iOS first by the build system of the engine itself. At the output, you get a regular Xcode project. Let's say it's September 2017, you are used to working in Xcode 8.3 and successfully submitting your game releases to the App Store. What will happen if at this moment a device with a screen goes on sale that did not exist before? Everything is simple: a project built in Xcode of old versions, namely below version 9.0, will receive large black bars at the top and bottom. And in landscape orientation, as a bonus to the two stripes on the sides, you will also get the same black indentation from below to provide enough free space for the new iOS interface element exclusive to iPhone X - a contrasting horizontal strip replacing the Home button.
Thus, Apple carefully protected users from an unthinkable number of applications that cannot be used because of buttons drawn in the corners or under the visor. But it doesn't look sexy at all, not the Human Interface Guidelines at all.
Immediately, a tempting idea comes to mind: install Xcode 9 and build your project with it. It would seem that this is the same silver bullet, but alas, in many cases the result may be even worse.
The fact is that in this case you already take responsibility yourself, and Apple does not stop you from making an unprofitable application. Important elements of the interface, which used to be comfortably located in the corners and along different sides of the screen, are now cropped and closed by Face ID or the Home button. Of course, no magic happened, the iPhone screen is still rectangular, and the video card does not care about these design innovations.
Practice
But there is a solution. In iOS 11, Apple introduced the new property UIView, which allows you to get UIEdgeInsets. It will contain the values of safe indents from each side of the screen:
@property(nonatomic, readonly) UIEdgeInsets safeAreaInsets;The whole buzz is that for all devices except the iPhone X, zero indentation will be returned, which means you do not have to enclose the code with conditions for any specific cases, everything will work equally well on the entire device park. Knowing this, you need to get the desired values in the Unity project.
Firstly, Apple recommends that you adapt the games so that the information content occupies the entire available space, and only the interactive controls shift. Most likely, you already have them in a separate Canvas and it makes sense to select them in RectTransform, separate from decorative elements that require the entire screen plane. The remaining changes are not very difficult. The Unity workaround solution from their BitBucket repository will help to implement this .
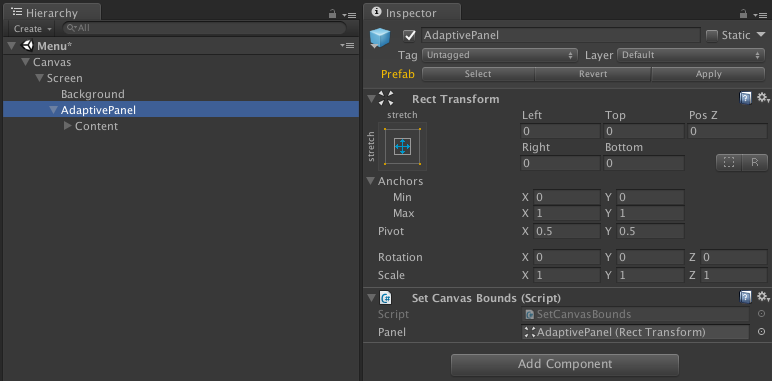
We modified the SetCanvasBounds script a bit, replacing the call to the Update () method with the Awake () call, since the indentation values do not change, and the UI elements in our game are always in the same places. It is enough to set the necessary indents to the RectTransform component only once and everything will look right in any situation.
private void Awake()
{
	var safeArea = GetSafeArea();
	if (safeArea != _lastSafeArea)
	{
		ApplySafeArea(safeArea);
	}
}
In this script, the native C method is called in the GetSafeArea () method.
void GetSafeAreaImpl(float* x, float* y, float* w, float* h) { ... }declared in SafeAreaImpl.mm file. It is here, in the neighboring method, that you can find the very API that was mentioned above.
UIEdgeInsets insets = UIEdgeInsetsMake(0, 0, 0, 0);
if ([view respondsToSelector: @selector(safeAreaInsets)]) {
    insets = [view safeAreaInsets];
}
Use the Screen.safeArea API instead of calling the native method if your version of Unity supports it. The SetCanvasBounds script carefully left the appropriate comment.
Having thus obtained the indentation values, we set them to our RectTransform, which contains and correctly positioned UI elements. It remains only to repeat this on each UI element that requires such changes.
private void ApplySafeArea(Rect area)
{
	var anchorMin = area.position;
	var anchorMax = area.position + area.size;
	anchorMin.x /= Screen.width;
	anchorMin.y /= Screen.height;
	anchorMax.x /= Screen.width;
	anchorMax.y /= Screen.height;
	_panel.anchorMin = anchorMin;
	_panel.anchorMax = anchorMax;
	_lastSafeArea = area;
}
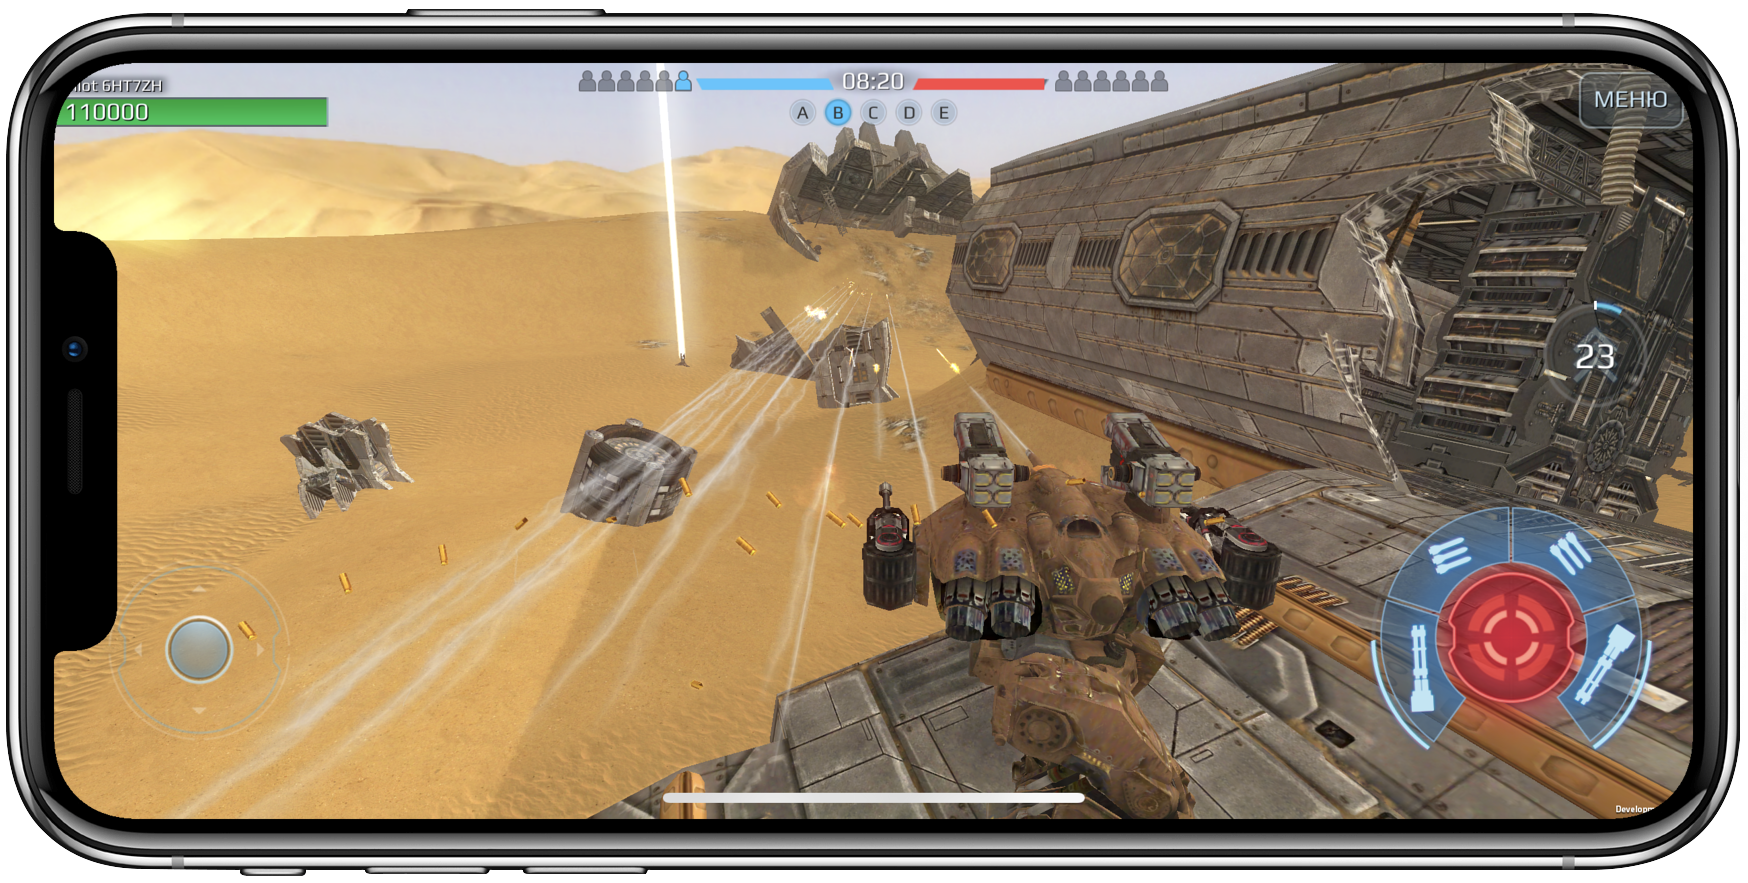
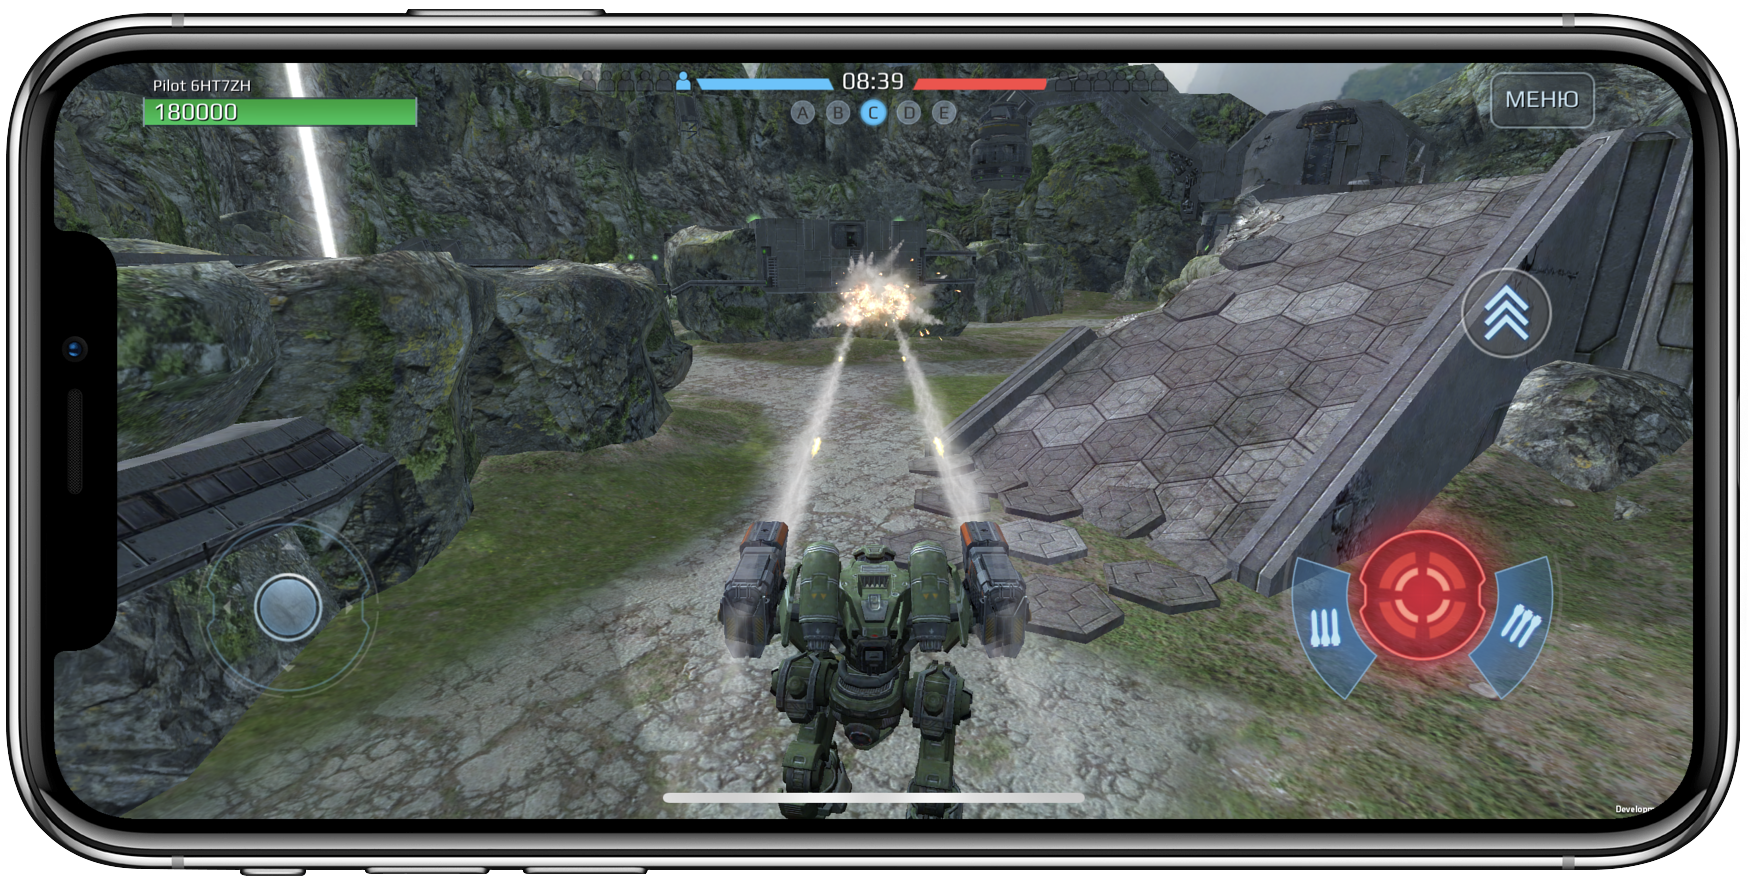
How does it look with us
To demonstrate the result of an example of a real project, we took screenshots of three different assemblies of our game: Xcode 8, Xcode 9 without support for iPhone X and Xcode 9 with support for iPhone X.


Xcode 8

Xcode 9 without support for iPhone X
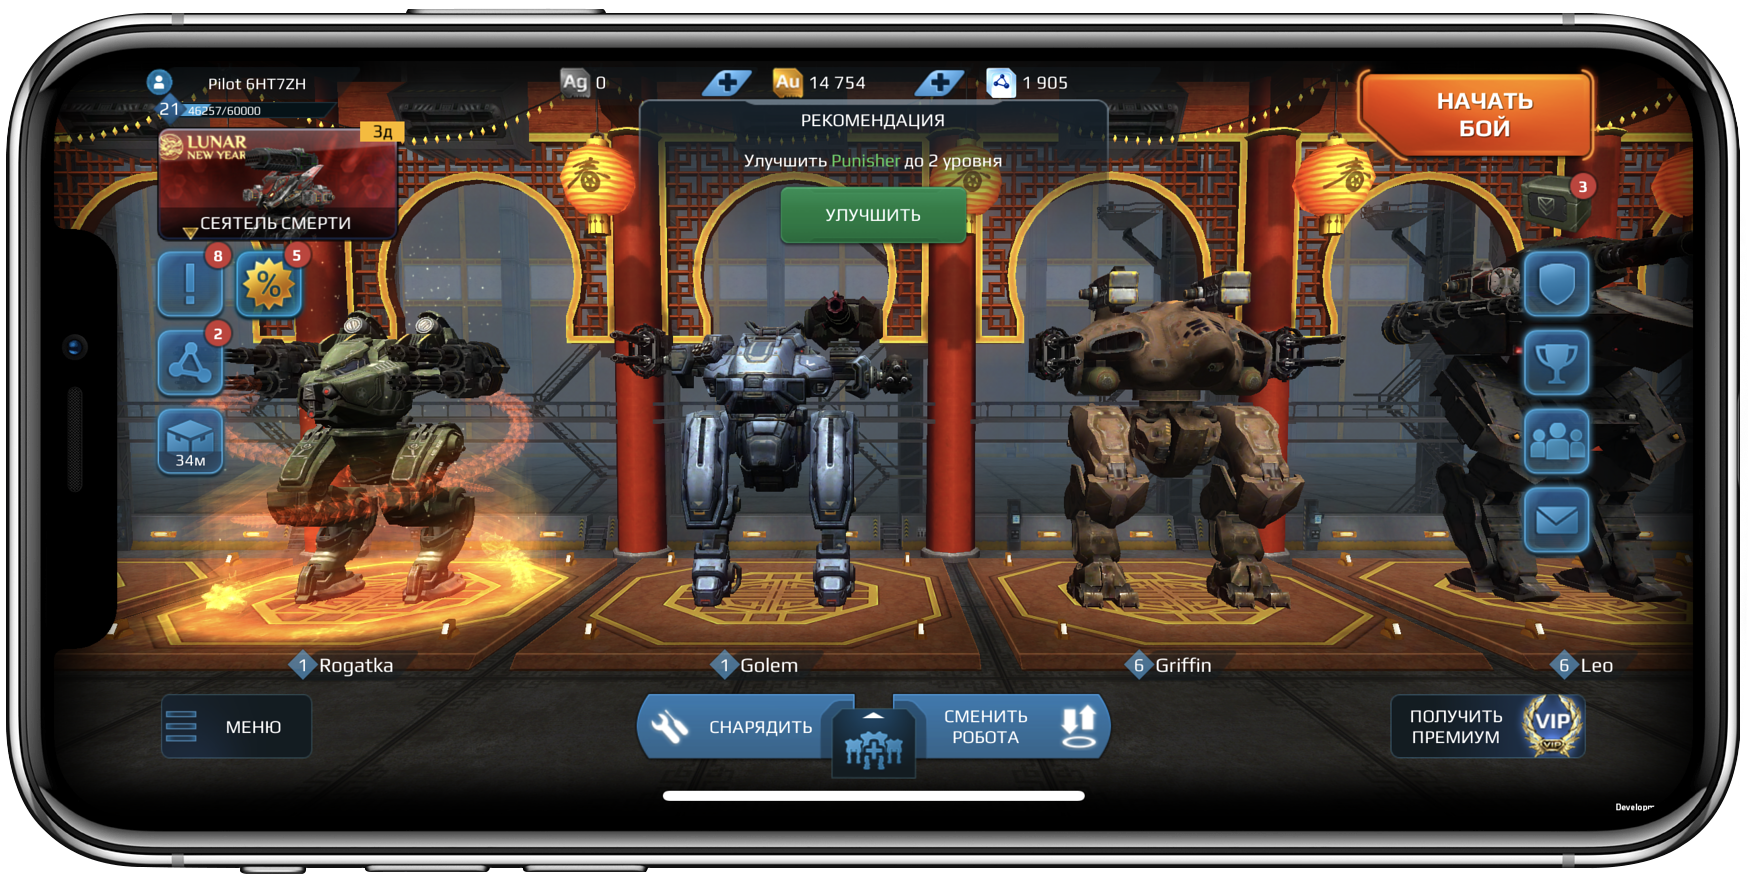
Xcode 9 with support for iPhone X
In the screenshots builds from the old version of Xcode appeared stripes along three sides of the screen. With the naked eye it is clear that the indentation on the left and on the right is unjustifiably large. Playing a dynamic shooter with such a framework was not very convenient. It was necessary to get rid of them.
Then, when we just put together the game in Xcode 9, the stripes disappeared like a nightmare. But now it will become noticeable that part of our buttons drowned under the visor of the new iPhone. Others fell victim to the corners. It was necessary to save the UI from the bizarre forms of the flagship Apple.
We used the techniques described in this article and collected the game for the third time. Again in Xcode 9. This result fully met our expectations. The buttons in the hangar are in their places and do not hide behind corners, and the battle interface has become more convenient without losing its attractiveness. We stopped on this option, since it fully complies with the requirements of the Human Interface Guidelines, after which we sent the next release to the App Store, which I also wish you if you have not had time to do this.