How we set up Continuous Delivery in Kubernetes using TFS
- Tutorial
We continue our journey towards Continuous Delivery (CD) and High Availability (HA) based on redundancy. In the previous series, we moved the API for the mobile application to .NET Core . The next logical step to achieve the CD is to configure the build in the Docker container.
Today we will share our getting-started guide on configuring the assembly of docker images and deployment in Kubernetes in TFS for .NET developers.
(It is assumed that at this point you have already migrated your ASP.NET application to ASP.NET Core, and if not, read our last article ).

Setting up an ASP.NET application to work with Docker
- In Visual Studio 2017, right-click on a web project -> Add -> Docker Support;
- For VS2015, you need to install an extension .
- A Dockerfile file will be added to the project folder - this is the config for creating the image of our application.
- Read more about Docker here.
- A new docker-compose project will be added .
- By itself, the docker-The compose - a utility for managing a multi-container applications. For example, you start the application and the DBMS to it.
- Files in the project:
a. docker-compose.yml - description of your services / dependencies.
Here is an example ASP.NET application in conjunction with SQL Server:
version: '3'
services:
  agentrequests.webapp:
    image: agentrequests.webapp
    build:
      context: .
      dockerfile: AgentRequests.WebApp/Dockerfile
    depends_on:
      - agentrequests-db
  agentrequests-db:
    image: microsoft/mssql-server-linux
    environment:
      SA_PASSWORD: "1"
      ACCEPT_EULA: "Y"
    ports:
      - "1401:1433"
    volumes:
      - agent-requests-db-data:/var/opt/mssql
volumes:
  agent-requests-db-data:
Service names (agentrequests-db in the example database) can be used directly in your application, such as Server Side Service Discovery.
For example, the connection string to the base is "Server = agentrequests-db; Database = AgentRequests; User = sa; Password =
b. docker-compose.override.yml - this file is used during development. Visual Studio merges these files when you press F5.
HINT: Each time docker-compose.yml is changed, the application will be assigned a new local port, which quickly bothers when debugging. Therefore, in docker-compose.override.yml it is useful to fix the port of your application:
version: '3'
services:
  agentrequests.webapp:
    environment:
    - ASPNETCORE_ENVIRONMENT=Development
    ports:
    - "40005:80"
c. docker-compose.ci.build.yml - with this config you can build your application on CI, and the result will be similar to the local build. This file is needed if you just deploy ready-made files, for example, in IIS. We are going to supply ready-made docker-images and will use Dockerfile directly.
Bottom line: we make the docker-compose project start, press F5 and rejoice.
NOTE: The first launch can be a long one, as docker needs to download SQL / ASP.Net Core images.
Also, when debugging, Visual Studio does not create a new docker image each time the application code is changed - in fact, only one container is created from your Dockerfile, to which the folder with your sources on the host machine is mounted. Thus, every change, for example, of a js-file, will instantly be reflected even on a running container.
Build and deploy Docker images in TFS
CI assumes that we have a build machine to perform automated builds regardless of the developer. Developers upload their changes to the version control system, the build machine takes the latest changes and reassembles the project. Thus, the build machine must have all the necessary tools for building the project. In our case, she must have access to Docker in order to collect Docker images.
There are several options:
We can put Docker directly on the build machine or remotely connect to Docker on another machine through the Docker client. Initially, we had standard .Net development on Windows, so all build machines were Windows virtual machines with one or more build agents. So that Docker can build Linux containers on a Windows machine, docker installs a Linux virtual machine. It turns out that we will have several virtual machines embedded in each other. But something does not want to start to fence gardens, and Docker does not officially support this mode.
To connect to Docker on another machine, you need to configure remote access , by default it is turned off. It is also recommended that you secure TLS certificates . There is also a manual from Microsoft , which offers a simplified configuration option using a windows container with LibreSSL preinstalled.
The easiest way: you can run the build agent directly in the Docker container, and it will have access to the Docker on which it is running. Just select the container you need from the microsoft / vsts-agent repository .
Build Agent Setup
- Download the build agent.
- You can read about differences in image versions and parameters here .
- Need a version with docker on board, for example:
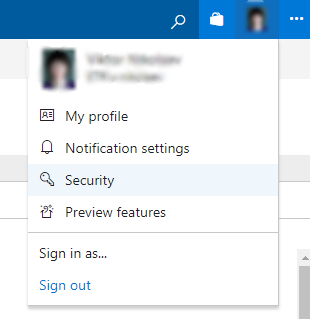
docker pull microsoft / vsts-agent: ubuntu-16.04-tfs-2017-u1-docker-17.12.0-ce - Generate Personal Access Token (PAT) in the Security page in TFS:
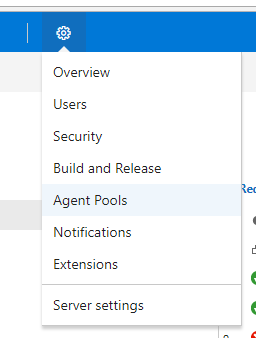
- You can add a new Agent Pool for docker builds. This is done here:
- Launch the container:
docker run \ -e TFS_URL=\ -e VSTS_TOKEN= \ -e VSTS_POOL= \ -e VSTS_AGENT=$(hostname)-agent \ -v /var/run/docker.sock:/var/run/docker.sock \ --restart=always \ -it microsoft/vsts-agent:ubuntu-16.04-tfs-2017-u1-docker-17.12.0-ce
CI setup
- In the project in TFS, add a new Build Definition with a template - Container (PREVIEW)
- Task build image:
a. Container Registry Type - Container Registry;
b. Docker Registry Connection - here we configure the path to your registry of images. You can use the Docker Hub, but we at the company use the Nexus Registry;
c. Docker File - path to the docker file. It is better to specify the path explicitly, without a mask;
d. Use Default Build Context - uncheck;
e. Build Context - the path to the folder in which your .sln file is located;
f. Image-name - it is better to specify explicitly, all characters are lowercase. Example: groups / agent-requests: $ (Build.BuildId);
g. You can put include the latest tag - the latest tag in the registry will be updated. - Task push an image - similar to the second point. The main thing is not to forget to change the image name.
- Add task with Publish Build Artifacts template. Since we plan to deploy to kubernetes, our artifact will be the config for kubectl:
a. Path to Publish - path to your yaml kubernetes config file. You can specify a folder if there are several configs;
b. Artifact Name - to your taste. For example, kubernetes;
c. Artifact Type - Server.
Configure CD and Kubernetes
At first a small digression. Roughly speaking, docker-compose (swarm) is a competitor to kubernetes. But since VS does not have convenient tuning for build and debug in kubernetes, we use both options: compose during development, kubernetes in battle.
The good news is that there is a Kompose utility - it can convert Kubernetes configs to / from docker-compose.yaml files.
However, it is not necessary for developers to use docker / compose altogether - you can configure everything the old fashioned way and manually change urls / configs or store ten web.config for different environments.
apiVersion: v1
kind: Service
metadata:
  name: webapp
spec:
  type: LoadBalancer
  selector:
    app: webapp
  ports:
  - port: 80
Пример deployment.yaml:
apiVersion: extensions/v1beta1
kind: Deployment
metadata:
  name: webapp
spec:
  replicas: 1
  template:
    metadata:
      labels:
        app: webapp
    spec:
      imagePullSecrets:
      - name: <название соединения с Docker Registry>
      containers:
      - image: webapp
        name: webapp
        env:
          - name: DB_USER
          valueFrom:
            secretKeyRef:
              name: database-secret
              key: username
        - name: DB_PASSWORD
          valueFrom:
            secretKeyRef:
              name: database-secret
              key: password
        - name: SQLCONNSTR_<Название сроки подключения>
#например SQLCONNSTR_DefaultConnection
          value: "Server=<адрес SQL сервера>;Initial Catalog=<название БД>;Persist Security Info=False;User ID=$(DB_USER);Password=$(DB_PASSWORD);"
        ports:
        - containerPort: 80
To configure the CD, we used the Kubernetes extension for our TFS server, since the standard Deploy to Kubernetes task that comes out of the box turned out to be inoperative in our version of TFS.
Add Kubernetes Connection Settings to Our Docker Registry
kubectl create secret docker-registry\
 <название соединения с Docker Registry>\
--docker-server=<адрес сервера>\
--docker-username=<логин>\
--docker-password=<пароль>\
--docker-email=<почта>
Add login and password to connect to the database
kubectl create secret generic database-secret\
--from-literal=username=<логин>\
--from-literal=password=<пароль>
Note: steps 1 and 2 can also be automated through TFS.
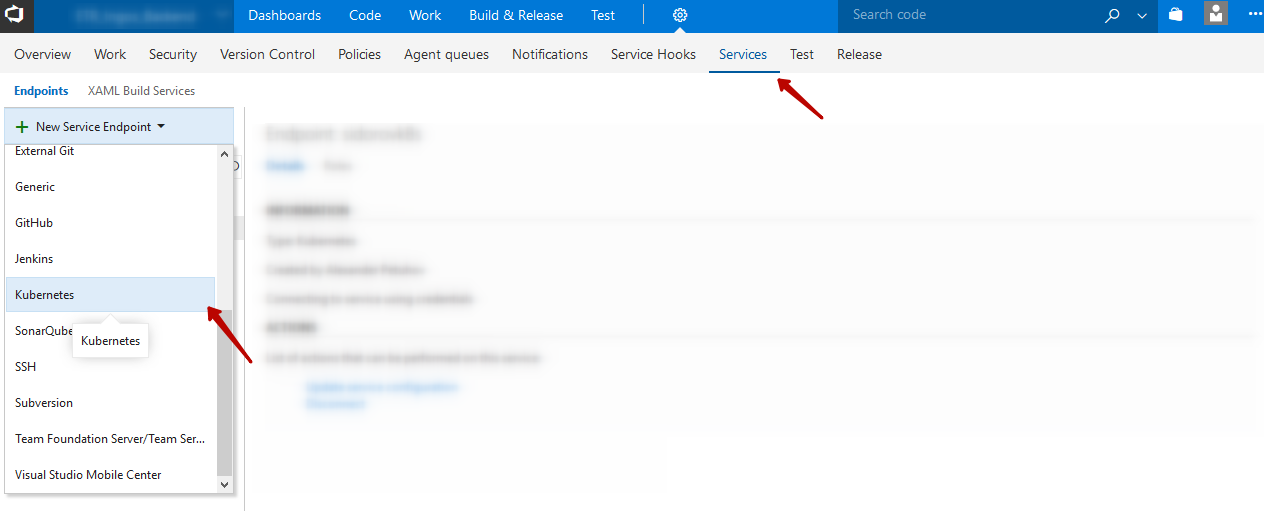
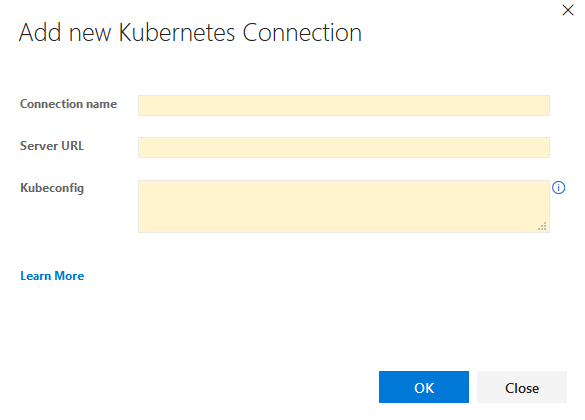
Add Kubernetes endpoint to TFS:
Create a new Release Defenition:
a. Select a project and Build definition
b. Check Continuous deployment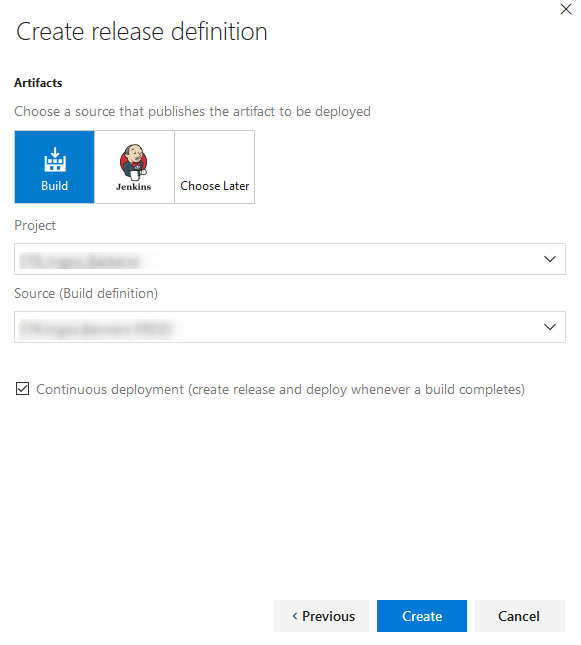
Добавьте таску kubernetes downloader:
a. В поле “kubernetes end point” выберите ваш kubernetes endpoint
b. В поле “kubectl download version” укажите необходимую версию или оставьте поле пустым, в этом случае будет установлена последняя версия клиента.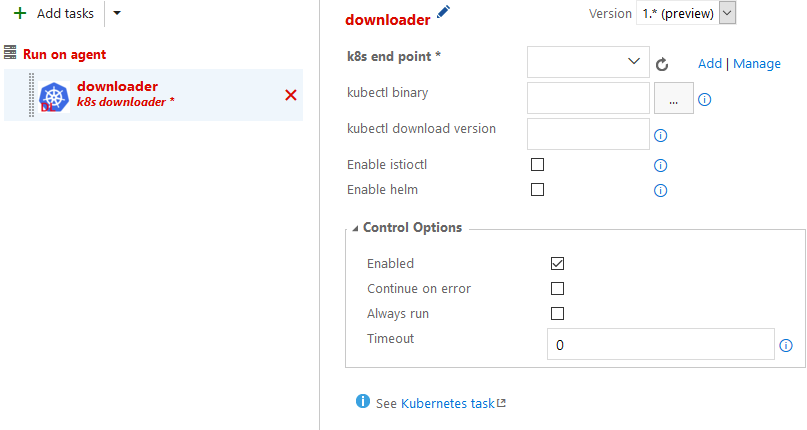
Добавьте таску kubectl exec:
a. В поле “Sub Command” пишем: apply
b. В поле “Arguments” пишем: -f $(System.DefaultWorkingDirectory)/<путь к папке с конфигами>/deployment.yaml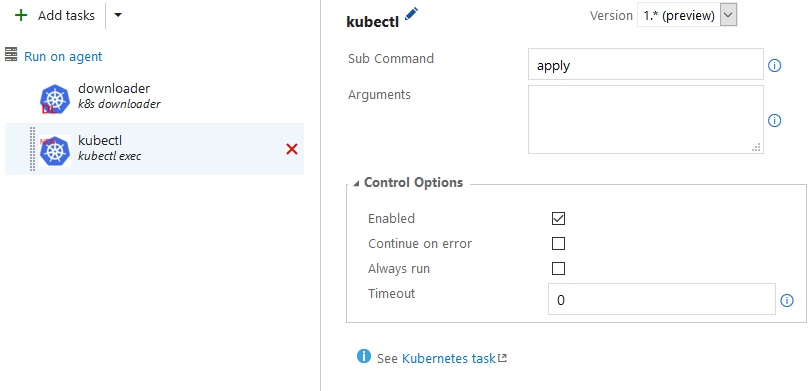
Добавьте таску kubectl exec:
a. В поле “Sub Command” пишем: apply
b. В поле “Arguments” пишем: image -f $(System.DefaultWorkingDirectory)/<путь к папке с конфигами>/service.yamlAdd the kubectl exec task:
a. In the field “Sub Command” write: set
b. In the field “Arguments” write: image -f $ (System.DefaultWorkingDirectory) / <path to the config folder> /deployment.yaml webapp = webapp: $ (Build.BuildID)
Summary
For sim everything. Use docker, automate deployment and enjoy easy release even on Friday night, even before your vacation.