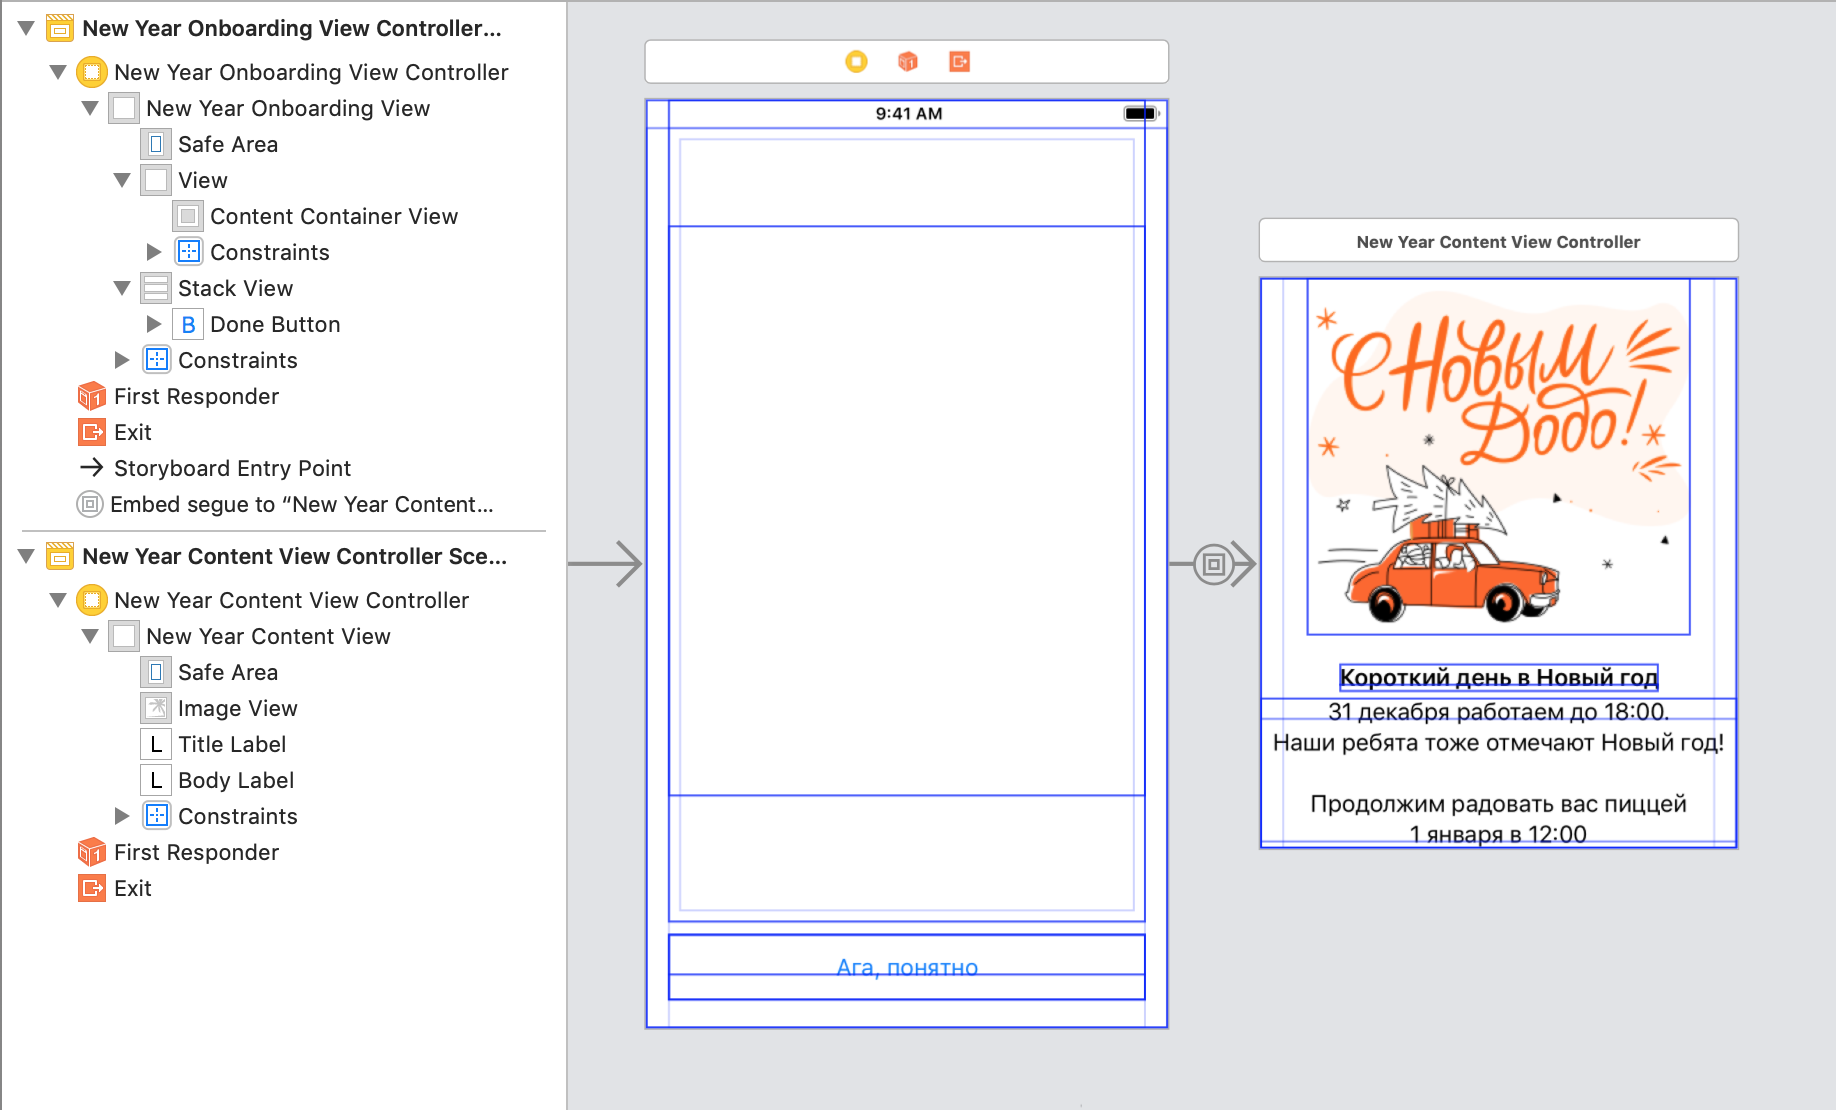
Onion controller. We break screens into parts
Atomic design and system design are popular in design: this is when everything consists of components, from controls to screens. It is easy for a programmer to write separate controls, but what to do with entire screens?
Let's sort on a New Year's example:
- we put everything in a heap;
- divide by controllers: select the navigation, template and content;
- reuse code for other screens.

All in a bunch
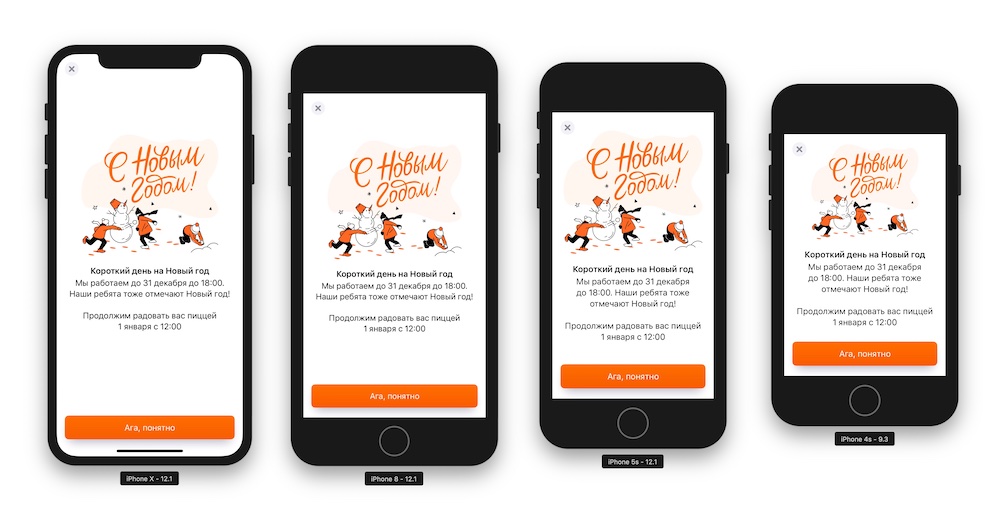
This New Year's screen tells about the special working hours of pizzerias. It is quite simple, so it will not be a crime to make it a single controller:

But. The next time we need a similar screen, we will have to repeat it all over again, and then make the same changes in all screens. Well, it does not happen without edits.
Therefore, it is wiser to divide it into parts and use it for other screens. I identified three:
- navigation,
- a template with an area for content and space for action at the bottom of the screen,
- unique content in the center.
Select each part in its own UIViewController.
Container navigation
The most vivid examples of navigation containers are UINavigationControllerand UITabBarController. Each takes a strip on the screen under his control, and leaves the remaining space for the other UIViewController.
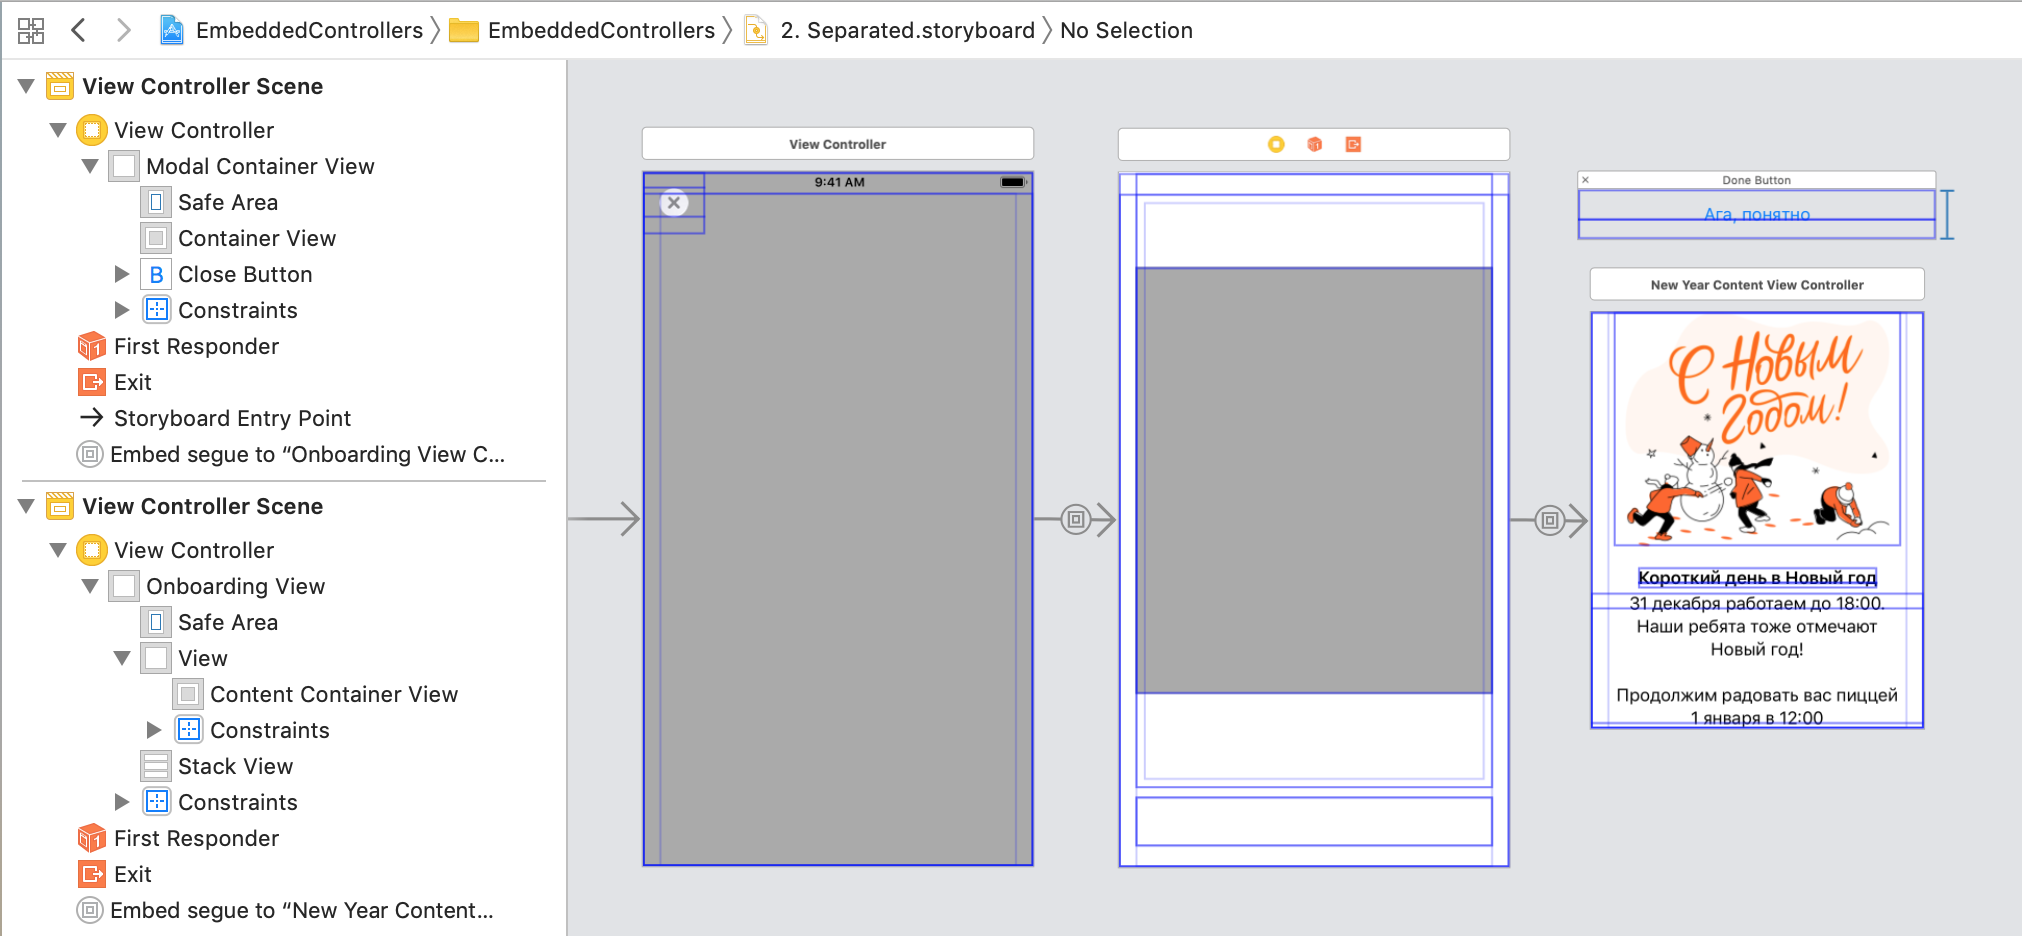
In our case there will be a container for all modal screens with only one close button.
If we want to move the button to the right, then we need to change only in one controller.
Или, если мы решим показывать все модальные окна с особенной анимацией, а закрываться интерактивно свайпом, как в карточках историй AppStore. Тогда UIViewControllerTransitioningDelegate нужно будет установить только для этого контроллера.

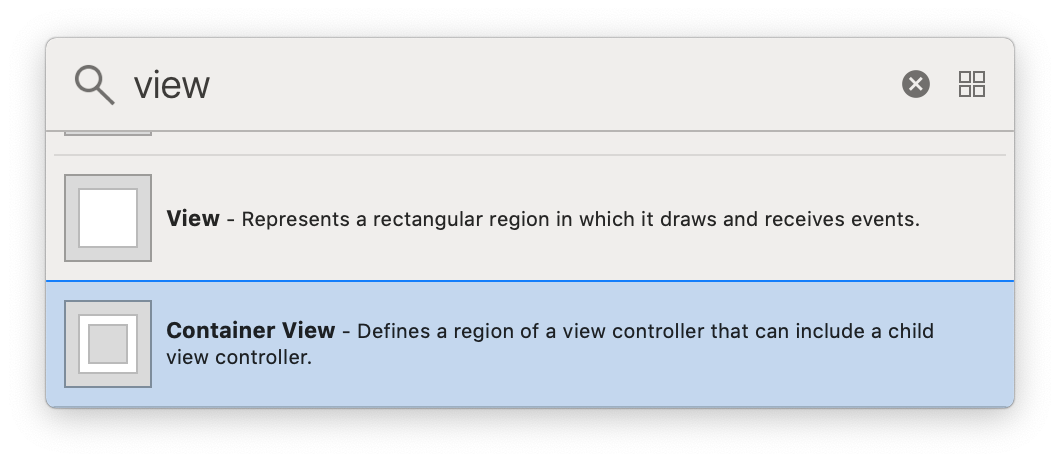
To separate controllers, you can use it container view: it will create UIViewa parent UIViewcontroller and insert a child controller into it .
Stretch container viewto the edge of the screen. Safe areawill automatically apply to the child controller:

Screen template
The content on the screen is obvious: picture, title, text. The button seems to be part of it, but the content is dynamic on different iPhones, and the button is fixed. You can see two systems with different tasks: one displays the content, and the other builds in and aligns it. They should be divided into two controllers.
The first is responsible for the layout of the screen: the content must be centered, and the button is nailed to the bottom of the screen. The second will draw content.

Without a template, all controllers are similar, but the elements are dancing.
The buttons on the last screen are different - depending on the content. Delegation will help solve the problem: the template controller will ask for controls for the content and show them in its own UIStackView.
// OnboardingViewController.swift
protocol OnboardingViewControllerDatasource {
    var supportingViews: [UIView] { get }
}
// NewYearContentViewController.swift
extension NewYearContentViewController: OnboardingViewControllerDatasource {
    var supportingViews: [UIView] {
        return [view().doneButton]
    }
}О том как специализировать UIView у UIViewController можно прочитать в моей прошлой статье Контроллер, полегче! Выносим код в UIView.
Buttons can be attached to the controller through related objects. They were IBOutletand IBActionare stored in the content controller, just the elements have been added to the hierarchy.
You can get items from the content and add them to the template at the preparation stage UIStoryboardSegue:
// OnboardingViewController.swift
override func prepare(for segue: UIStoryboardSegue,  sender: Any?) {
    if let buttonsDatasource  = segue.destination as? OnboardingViewControllerDatasource {
        view().supportingViews = buttonsDatasource.supportingViews
    }
}
In the setter, we add controls to UIStackView:
// OnboardingView.swift
var supportingViews: [UIView] = [] {
didSet {
for view in supportingViews {
stackView.addArrangedSubview(view)
}
}
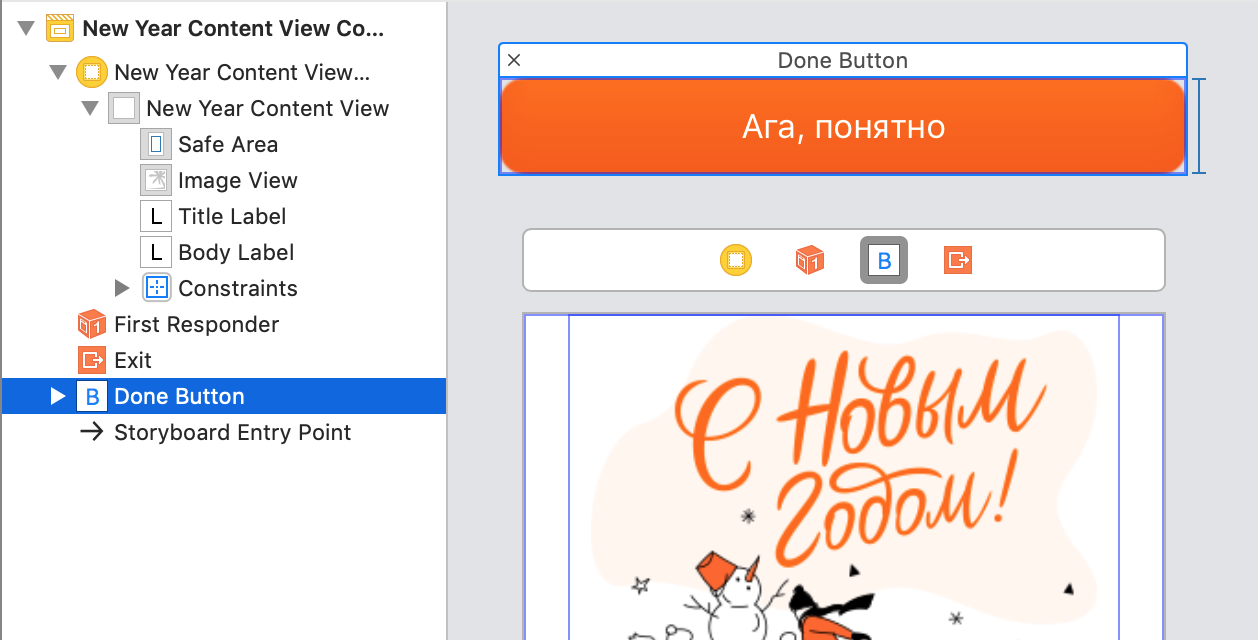
}As a result, our controller was divided into three parts: navigation, template and content. The picture is all container viewgray:
Dynamic size controller
The content controller has its maximum size, it is limited to internal ones constraints.
Container viewadds constraints based on Autoresizing mask, and they conflict with the internal dimensions of the content. The problem is solved in the code: in the content controller, you need to specify that it is not affected by the constraints from Autoresizing mask:
// NewYearContentViewController.swift
override func loadView() {
    super.loadView()
    view.translatesAutoresizingMaskIntoConstraints = false
}
Interface Builder needs two more steps:
Step 1. Specify Intrinsic sizefor UIView. The real values will appear after the launch, but for now we will put any suitable ones.
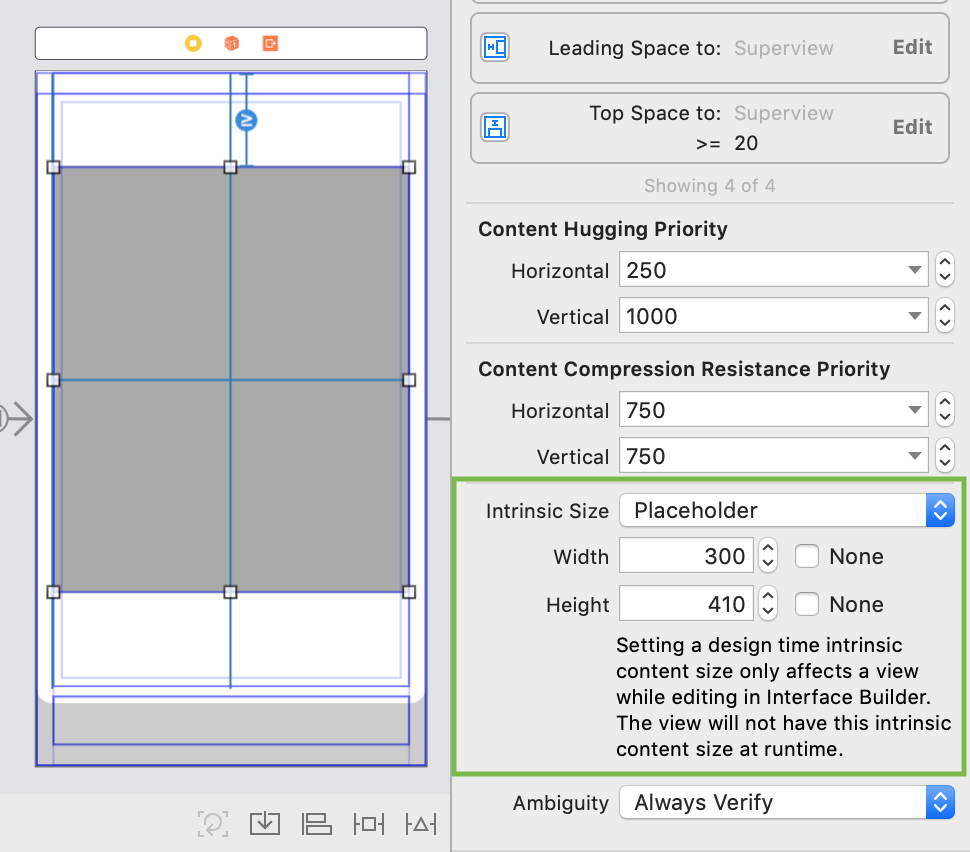
Step 2. For the controller-content specify Simulated Size. It may not coincide with the past size.
Ошибки возникают когда AutoLayout не может понять, как ему разложить элементы в текущем размере.
Чаще всего, проблема уходит после изменения приоритетов констрейнт. Нужно проставить их так, чтобы одна из UIView могла расширяться/сжиматься больше чем другие.
Separate and write in code
We have divided the controller into several parts, but for the time being we cannot reuse them, the interface is UIStoryboarddifficult to extract from the parts. If we need to transfer some data to the content, then we will have to knock on it through the entire hierarchy. It should be the opposite: first take the content, set it up, and then wrap it in the right containers. Like an onion.
Three tasks appear on our way:
- Separate each controller into its own
UIStoryboard. - Unsubscribe
container view, add controllers to containers in code. - Tie it all back.
Separate the UIStoryboard
It is necessary to create two additional UIStoryboardand copy-paste to transfer the navigation controller and the template controller to them. Embed seguewill container viewburst , but with the configured konstraynta will be transferred. Constraints should be saved, but container viewit should be replaced with the usual one UIView.
- открыть
UIStoryboardв виде кода (контекстное меню файла → Open as… → Source code); поменять тип с
containerViewнаview. Поменять надо и открывающий, и закрывающий теги.Этим же способом можно поменять, например,
UIViewнаUIScrollView, если нужно. И наоборот.

Set the property to the controller is initial view controller, and UIStoryboardname it as the controller.
Если имя контроллера совпадает с именем UIStoryboard, то загрузку можно обернуть в метод, который сам найдёт нужный файл:
protocol Storyboardable { }
extension Storyboardable where Self: UIViewController {
    static func instantiateInitialFromStoryboard() -> Self {
        let controller = storyboard().instantiateInitialViewController()
        return controller! as! Self
    }
    static func storyboard(fileName: String? = nil) -> UIStoryboard {
        let storyboard = UIStoryboard(name: fileName ?? storyboardIdentifier, bundle: nil)
        return storyboard
    }
    static var storyboardIdentifier: String {
        return String(describing: self)
    }
    static var storyboardName: String {
        return storyboardIdentifier
    }
}
Если контроллер описан в .xib, то стандартный конструктор загрузит без таких плясок. Увы, .xib может содержать только один контроллер, часто этого мало: в хорошем случае один экран состоит из нескольких. Поэтому мы используем UIStoryborad, в нём легко разбивать экран на части.
Add a controller in the code
For normal operation of the controller, we need all the methods of its life cycle will/did-appear/disappear.
To display correctly, you need to call 5 steps:
    willMove(toParent parent: UIViewController?)
    addChild(_ childController: UIViewController)
    addSubview(_ subivew: UIView)
    layout
    didMove(toParent parent: UIViewController?)
Apple offers to reduce the code to 4 steps, because addChild()he calls willMove(toParent). Eventually:
    addChild(_ childController: UIViewController)
    addSubview(_ subivew: UIView)
    layout
    didMove(toParent parent: UIViewController?)
For simplicity, you can wrap it all in extension. For our case, you will need a version with insertSubview().
extension UIViewController {
    func insertFullframeChildController(_ childController: UIViewController,
                                               toView: UIView? = nil, index: Int) {
        let containerView: UIView = toView ?? view
        addChild(childController)
        containerView.insertSubview(childController.view, at: index)
        containerView.pinToBounds(childController.view)
        childController.didMove(toParent: self)
    }
}
To delete, you need the same steps, but instead of the parent controller you need to install nil. Now removeFromParent()calls didMove(toParent: nil), and the layout is not needed. The abbreviated version is very different:
    willMove(toParent: nil)
    view.removeFromSuperview()
    removeFromParent()
Layout
We put konstraynt
To correctly set the size of the controller will use AutoLayout. We need to nail all sides to all sides:
extension UIView {
    func pinToBounds(_ view: UIView) {
        view.translatesAutoresizingMaskIntoConstraints = falseNSLayoutConstraint.activate([
         view.topAnchor.constraint(equalTo: topAnchor),
         view.bottomAnchor.constraint(equalTo: bottomAnchor),
         view.leadingAnchor.constraint(equalTo: leadingAnchor),
         view.trailingAnchor.constraint(equalTo: trailingAnchor)
     ])
    }
}
Add a child controller in the code
Now everything can be combined:
// ModalContainerViewController.swift
public func embedController(_ controller: UIViewController) {
    insertFullframeChildController(controller, index: 0)
}
Because of the frequency of use, we can wrap it all in extension:
// ModalContainerViewController.swift
extension UIViewController {
    func wrapInModalContainer() -> ModalContainerViewController {
    let modalController = ModalContainerViewController.instantiateInitialFromStoryboard()
    modalController.embedController(self)
    return modalController
    }
}
A similar method is needed for the template controller. Previously supportingViewsconfigured in prepare(for segue:), and now you can bind in the method of embedding the controller:
// OnboardingViewController.swift
public func embedController(_ controller: UIViewController, actionsDatasource: OnboardingViewControllerDatasource) {
    insertFullframeChildController(controller, toView: view().contentContainerView, index: 0)
    view().supportingViews = actionsDatasource.supportingViews
}
Creating a controller looks like this:
// MainViewController.swift
@IBAction func showModalControllerDidPress(_ sender: UIButton) {
   let content = NewYearContentViewController.instantiateInitialFromStoryboard()
   // Здесь можно настроить контроллер
   let onboarding = OnboardingViewController.instantiateInitialFromStoryboard()
   onboarding.embedController(contentController, actionsDatasource: contentController)
   let modalController = onboarding.wrapInModalContainer()
   present(modalController, animated: true)
}
Connecting a new screen to a template is simple:
- remove something that does not apply to the content;
- specify action buttons by implementing the OnboardingViewControllerDatasource protocol;
- write a method that links the template and content.
More about containers
Status bar
It is often necessary that the status barcontroller be controlled by the content controller, and not the container. There is a couple for this property:
// UIView.swift
var childForStatusBarStyle: UIViewController?
var childForStatusBarHidden: UIViewController?
With these, propertyyou can create a chain of controllers, the latter will be responsible for the display status bar.
Safe area
If the buttons of the container will overlap the content, then it is worth increasing the zone safeArea. This can be done in the code: set for child controllers additinalSafeAreaInsets. You can call it from embedController():
private func addSafeArea(to controller: UIViewController) {
    if#available(iOS 11.0, *) {
        let buttonHeight = CGFloat(30)
        let topInset = UIEdgeInsets(top: buttonHeight, left: 0, bottom: 0, right: 0)
        controller.additionalSafeAreaInsets = topInset
    }
}
If you add 30 points from the top, the button will stop overlapping the content and safeAreaoccupy the green area:

Margins. Preserve superview margins
Controllers have standard padding margins. Usually they are equal to 16 points from each side of the screen and on Plus-sizes they are 20 points.
On the basis marginsyou can create constraints, indents to the edge will be different for different iPhones:

When we put one UIViewin another, they marginsare halved: up to 8 points. To avoid this, you need to include Preserve superview margins. Then the marginschild UIViewwill be equal to the marginsparent. It is suitable for fullscreen containers.
the end
Container controllers are a powerful tool. They simplify code, share tasks and can be reused. You can write nested controllers in any way: in UIStoryboard, in .xibor just in code. Most importantly, they are easy to create and enjoyable to use.
→ Example from article on GitHub
Do you have screens from which it would be worth making a pattern? Share in the comments!