Build projects with GitLab CI: one .gitlab-ci.yml for hundreds of applications
- Tutorial

The article solves the problem of managing the assembly description for a large number of similar applications. In order for GitLab CI to work in the project, you need to add a file to the repository
.gitlab-ci.yml. But what if in a hundred repositories this is a file with the same contents? Even if you decompose it into the repositories once, then how to change it later? But what if one is .gitlab-ci.ymlnot enough for assembly - Dockerfileor Dappfile, different scripts and the structure of YAML files for Helm are needed? How to update them? Where to start solving the task of assembling hundreds of similar applications? Of course, see if you can specify GitLab CI to use
.gitlab-ci.ymlfrom another repository or compose .gitlab-ci.ymlfrom files in other repositories ... In search of such an opportunity, the following issues immediately pop up:
- Add 'include' key to .gitlab-ci.yml ;
- Import / include common CI / CD content from one project into another's `.gitlab-ci.yml` (EE only?) ;
- Add includes capability in gitlab-ci YAML format .
It can be seen that the opportunity to have some kind of common
.gitlab-ci.ymlinterest in the community. The decision to add include sections from a file in another repository seems very simple: it is based on many years of programming practice and will be clear to anyone. However, include as a concept works well in the case of the source tree, but in the case of several Git repositories, you can see the following disadvantages in this solution:- In include, you need to specify from which branch to take the file to connect, so the assembly will not play.
- In include, you need to specify which branch to take the file to connect from, so you need to cache efficient
.gitlab-ci.yml, store it and rebuild based on it. - In some projects, paragraph 1 needs to be resolved, and in some, paragraph 2, however, they are mutually exclusive.
- If something has changed in the plug-in file, then essentially
.gitlab-ci.ymlthe project that is being assembled changes, but the change history will not be visible.
For the case of similar applications, two more minuses are added:
- The problem with hundreds of identical ones
.gitlab-ci.ymlremains. - The problem with updating additional files also remains.
Look from a different angle
The solution with include is a pull model, i.e. the assembly project draws part of the CI configuration. If we replace pull with push, we get this:
- the common-ci-config project is created , in which the general
.gitlab-ci.ymland other files necessary for assembly are stored ; - a gitlab-ci-distributor user is created , who is given the right to push (Master) to the desired projects.
This option works as follows: the common-ci-config project stores a file common to hundreds of other projects
.gitlab-ci.yml. When this file is changed, gitlab-ci-distributor sends commits to other projects. For assembly files, you can choose: either add them to the commit, or in
.gitlab-ci.ymlprojects, in the build task, add git clonethe common-ci-config project . The advantages of this approach:
- In each project, it becomes clear when it changed
.gitlab-ci.ymland who changed it. Effective storage problem disappears.gitlab-ci.ymlbecause in each project, the full version is always visible without include. - In projects where the latest version of assembly files is not needed at the time of assembly, assembly files are added by commit.
- In projects where the latest version is always needed at the time of assembly, the assembly files are cloned.
- You can add some files to the commit, and some can be used from the cloned copy.
- You can implement the concept of include for
.gitlab-ci.ymlusing a script call. That is, if you want to.gitlab-ci.ymlalways use the latest version of the test configuration during assembly, then the test is sent to the script in the common-ci-config project .
GitLab API
So, the problem is identified and there is a solution. To continue, you need to talk about the GitLab API ( documentation on the GitLab website ). The following methods will be required:
- File commit. The API offers two options: changing a single file and a commit constructor with multiple files . The second option is a bit more complicated, but it has more features.
- Getting a list of projects . This method will help you find out which projects need to be commited.
- Information about the current commit . The method is needed to copy the message of the commit and its author from the general repository to the rest.
API methods can be called using curl, and the JSON that comes in response can be processed using jq ( filter documentation ).
To call methods, you need to create an access token. This will be discussed further in the article, but for now - an example of how to get a list of projects in a group:
$ curl -s --header "PRIVATE-TOKEN: $TOKEN" https://gitlab.example.com/api/v4/groups/group-of-alike-projects/projects?simple=true | \
  jq -r '.[] | "\(.path_with_namespace)\t\(.id)"'
group-of-alike-projects/project-pasiphae    7
group-of-alike-projects/project-megaclite    6
group-of-alike-projects/project-helike    5
group-of-alike-projects/project-erinome    4
group-of-alike-projects/project-callisto    3
group-of-alike-projects/project-aitne    2
group-of-alike-projects/project-adrastea    1
Configure GitLab
Calling API methods is not possible without authorization. GitLab offers authorization through access tokens. To get such a token, you need to create a separate user who will be given rights to manage the necessary repositories. Let this be the user gitlab-ci-distributor :
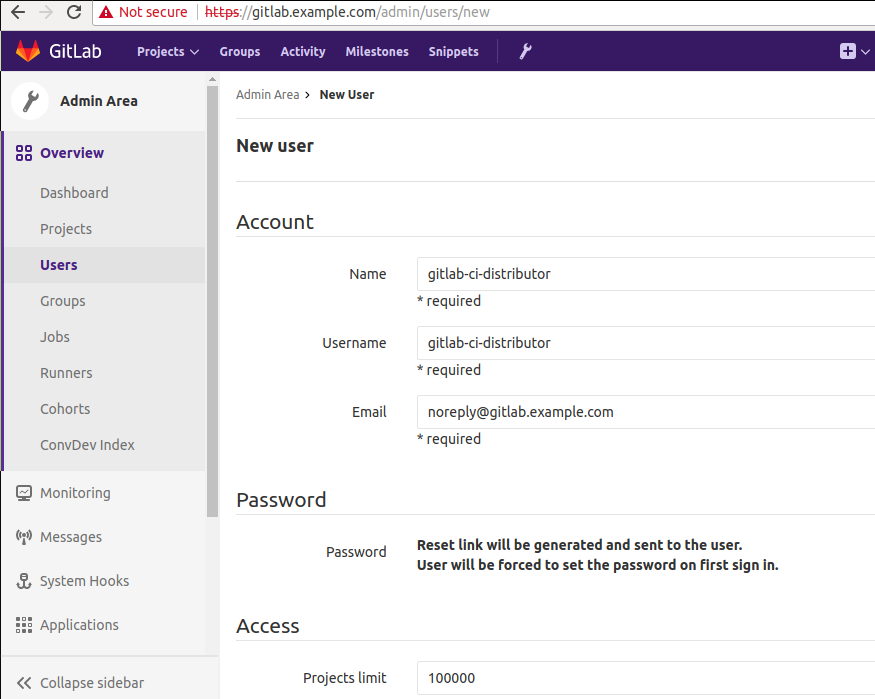

Next, you need to become this user and create access token:
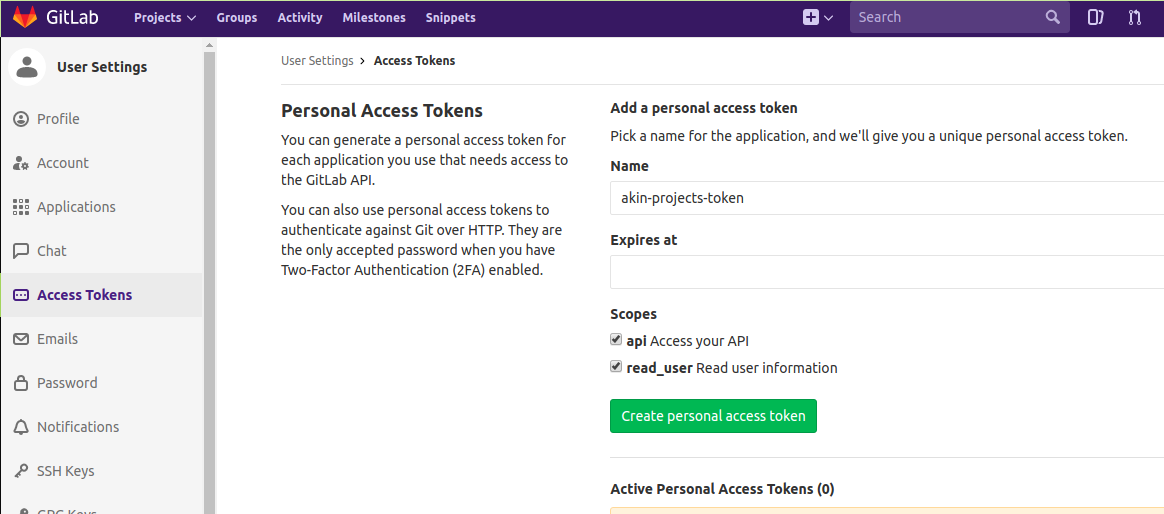
To access projects where you need to manage assembly files, you need to add the user gitlab-ci-distributor to the group:

Files common for projects will be stored in the project common-ci-config . The project needs to be created in a separate group - for example, infra . In the project settings, a secret variable with the value of the received token is added:
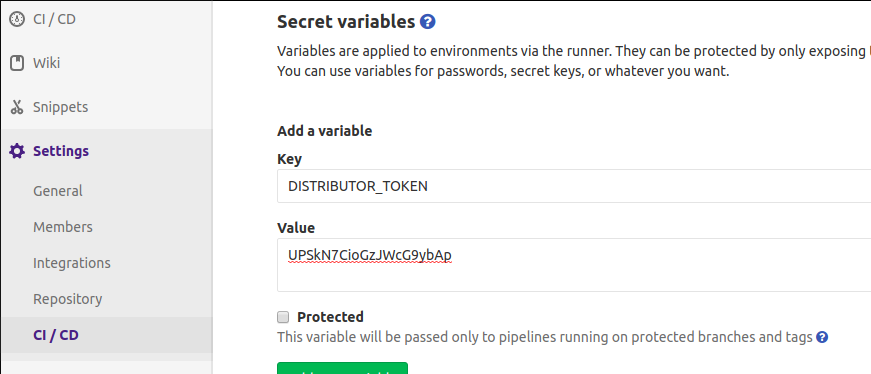
The described actions are performed by the administrator once. Further, all configuration is done through files in the common-ci-config repository .
Common-ci-config repository
Now you can test working with the API through GitLab CI. To do this , a simple one is added to the common-ci-config project
.gitlab-ci.yml:stages:
- distribute
distribute:
stage: distribute
script:
- ./distribute.sh... and a script
distribute.shthat will show information about the commit and projects from the selected group for now:#!/usr/bin/env bash
curl -s --header "PRIVATE-TOKEN: $DISTRIBUTOR_TOKEN" https://gitlab.example.com/api/v4/projects/infra%2Fcommon-ci-config/repository/commits/$CI_COMMIT_SHA | jq '.'
curl -s --header "PRIVATE-TOKEN: $DISTRIBUTOR_TOKEN" https://gitlab.example.com/api/v4/groups/group-of-alike-projects/projects?simple=true | \
jq -r '.[] | "\(.path_with_namespace)\t\(.id)"'Distribute job result :
Running with gitlab-runner 10.1.0 (c1ecf97f)
  on gitlab (d82a6d8f)
Using Shell executor...
Running on gitlab...
Fetching changes...
HEAD is now at 08dcc92 Initial .gitlab-ci.yml and distribute.sh
Checking out 08dcc92a as master...
Skipping Git submodules setup
$ ./distribute.sh
{
  "id": "08dcc92abf0d951194ad1ffcc23deeb875855320",
  "short_id": "08dcc92a",
  "title": "Initial .gitlab-ci.yml and distribute.sh",
  "created_at": "2017-10-25T16:35:15.000+03:00",
  "parent_ids": [
    "d9bdea91d081025c2af658209f23f684c96b5cee"
  ],
  "message": "Initial .gitlab-ci.yml and distribute.sh\n",
  "author_name": "root root",
  "author_email": "root.root@gitlab.example.com",
  "authored_date": "2017-10-25T16:35:15.000+03:00",
  "committer_name": "root root",
  "committer_email": "root.root@gitlab.example.com",
  "committed_date": "2017-10-25T16:35:15.000+03:00",
  "stats": {
    "additions": 0,
    "deletions": 0,
    "total": 0
  },
  "status": "running",
  "last_pipeline": {
    "id": 2,
    "sha": "08dcc92abf0d951194ad1ffcc23deeb875855320",
    "ref": "master",
    "status": "running"
  }
}
group-of-alike-projects/project-pasiphae    7
group-of-alike-projects/project-megaclite    6
group-of-alike-projects/project-helike    5
group-of-alike-projects/project-erinome    4
group-of-alike-projects/project-callisto    3
group-of-alike-projects/project-aitne    2
group-of-alike-projects/project-adrastea    1
Job succeeded
Completion of distribute.sh script
The script will distribute the shared file
.gitalb-ci.yml. In order not to confuse it with .gitlab-ci.ymlthe common-ci-config project , the file is located in the directory common. The file describes a simple automatic task:# common/.gitlab-ci.yml
stages:
- build
build:
stage: build
script:
- echo Building project $CI_PROJECT_PATHThe script
distribute.shalready has information about the commit and a list of projects. To get a beautiful commit into projects, you need to highlight the name and mail of the author and the full message of the commit. You also need to add a loop on the received projects and for each project call the method that creates the commit. Modified
distribute.sh:#!/usr/bin/env bash
COMMIT_INFO=$(curl -s --header "PRIVATE-TOKEN: $DISTRIBUTOR_TOKEN" https://gitlab.example.com/api/v4/projects/infra%2Fcommon-ci-config/repository/commits/$CI_COMMIT_SHA)
# Сообщение коммита может быть многострочным, поэтому jq без -r
MESSAGE=$(echo "$COMMIT_INFO" | jq '.message')
AUTHOR_NAME=$(echo "$COMMIT_INFO" | jq -r '.author_name')
AUTHOR_EMAIL=$(echo "$COMMIT_INFO" | jq -r '.author_email')
CONTENT=$(base64 -w0 common/.gitlab-ci.yml)
PAYLOAD=$(cat <<- JSON
{
"branch": "master",
"commit_message": $MESSAGE,
"author_name": "$AUTHOR_NAME",
"author_email": "$AUTHOR_EMAIL",
"actions": [
{ "action": "update",
"file_path": ".gitlab-ci.yml",
"content": "$CONTENT",
"encoding": "base64"
}
]
}
JSON
)
echo "$PAYLOAD"
curl -s --header "PRIVATE-TOKEN: $DISTRIBUTOR_TOKEN" https://gitlab.example.com/api/v4/groups/group-of-alike-projects/projects?simple=true | \
jq -r '.[] | "\(.path_with_namespace)\t\(.id)"' | \
while read project
do
name=`echo $project | awk '{print $1}'`
id=`echo $project | awk '{print $2}'`
echo Update project $name
curl -s --request POST --header "PRIVATE-TOKEN: $DISTRIBUTOR_TOKEN" \
--header "Content-Type: application/json" \
--data "$PAYLOAD" https://gitlab.example.com/api/v4/projects/$id/repository/commits
done
echo StopThe result of the distribute task :
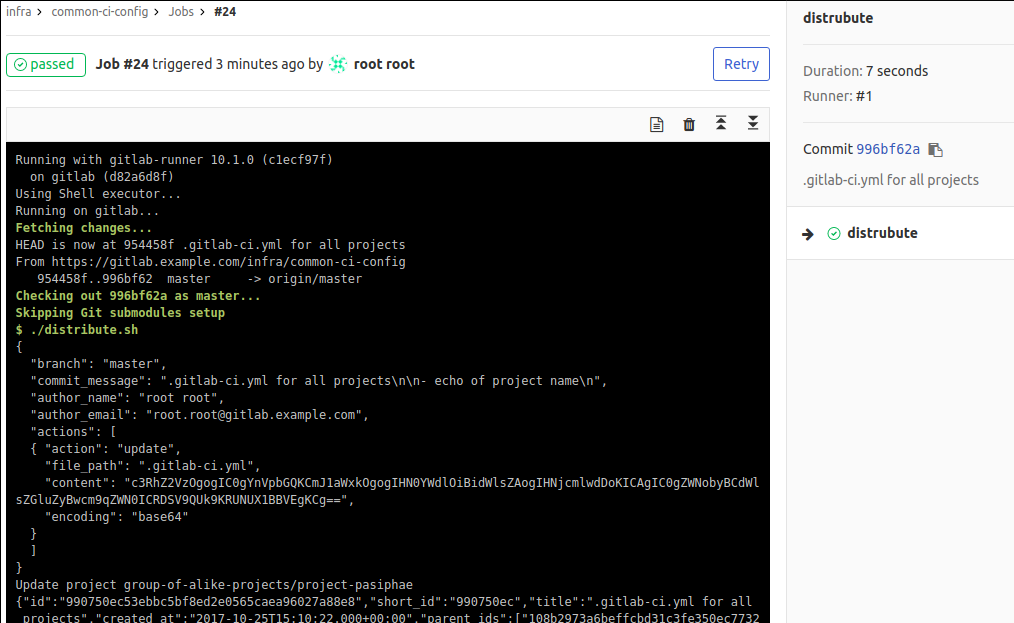
In the group-of-alike-projects / project-pasiphae project, the commit will look like this:
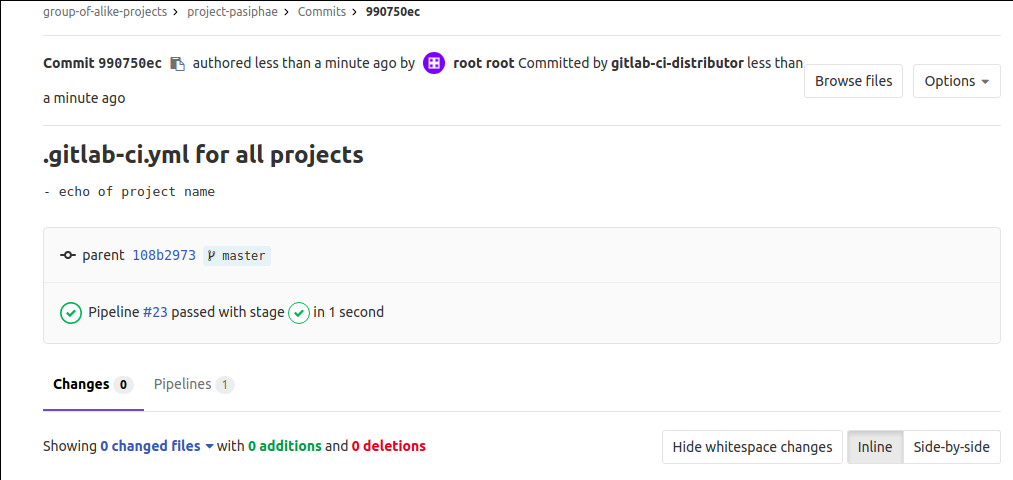
The result of the build task in the group-of-alike-projects / project-pasiphae project :
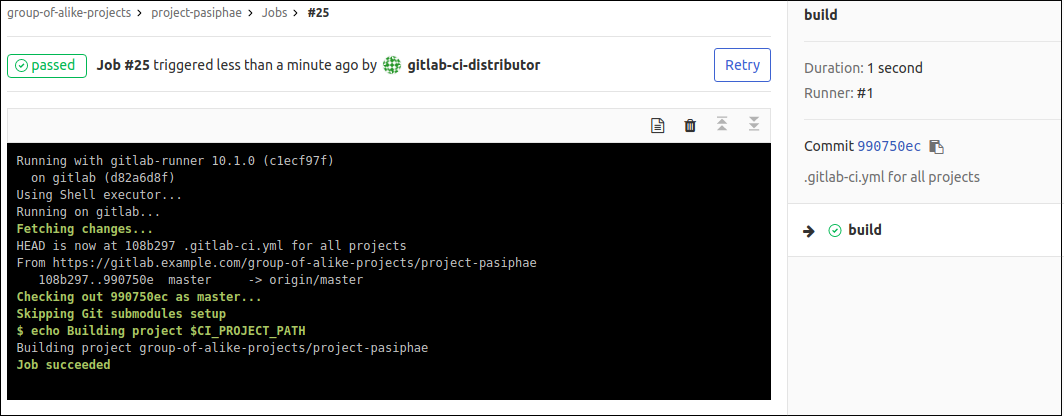
It is visible that the user who runs the task, - gitlab-ci-distributor . But at the same time, the author of the commit is the user who committed in common-ci-config .
Disable simultaneous auto build
The script
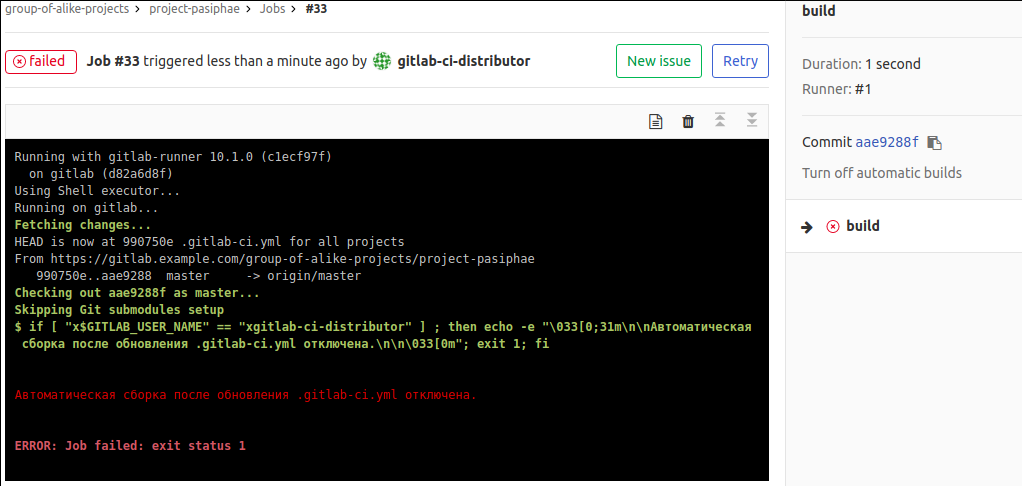
distribute.shadds commits to several projects at once. This leads to the creation of new pipeline and the simultaneous launch of assembly tasks. This effect is not always needed. So that the commit, updating .gitlab-ci.yml, does not start the assembly, you can first set the condition with a warning message:script:
- 'if [ "x$GITLAB_USER_NAME" == "xgitlab-ci-distributor" ] ; then echo -e "\033[0;31m\n\nАвтоматическая сборка после обновления .gitlab-ci.yml отключена.\n\n\033[0m"; exit 1; fi'Attention! The variable
GITLAB_USER_NAMEappeared in GitLab 10.0 ( release from September 22, 2017) . In earlier versions there is only GITLAB_USER_IDand for the condition you have to use the user ID. This ID can be found, for example, by completing a task with script: [export]or with the following API request:curl -s --header "PRIVATE-TOKEN: $DISTRIBUTOR_TOKEN" https://gitlab.example.com/api/v4/users?username=gitlab-ci-distributor | jq '.[] | .id'Result:
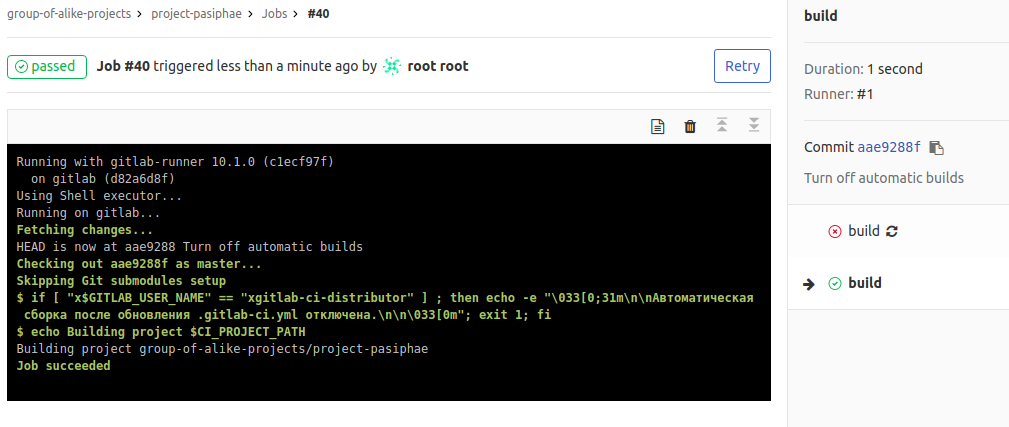
If you run this task again, but from an ordinary user, then everything will succeed:
Conclusion
In general, this information is enough to continue to experiment independently with mass project management.
To simplify the experiments and repeat what is described in the article, you can install GitLab in a virtual machine, for example, using the gitlab-vagrant project . Consider what you have to fix
Vagrantfile: change the base image to ubuntu/xenial64and increase memory vb.memory = "3072". And after starting, add gitlab-runner according to the instructions . When developing the solution, the following resources were used:
PS
Read also in our blog (and subscribe, so as not to miss new publications!) :
