Install 3CX on Debian Linux 9 Stretch, Update Session Border Controller and Call Flow Designer
Install 3CX on Debian Linux 9 Stretch
You may have already heard about the release of the new version of the popular Linux build of Debian 9 Stretch. At the moment, if you try to install Linux version 3CX on this assembly, you will get a module dependency error. The fact is that the current version of 3CX was created for the Debian 8 system, so they use Jessie dependencies (necessary auxiliary files) that are not in the Stretch repository.
But now we’ll show you how to install 3CX for Debian 9 Stretch!
First of all, we want to warn you that the current version of 3CX is not fully tested with Debian 9, so we strongly do not recommend installing this configuration in a working environment. The described method allows you to bypass Linux dependency errors, but does not guarantee one hundred percent system operation after installation. On the other hand, your feedback will greatly help us release the finished version of 3CX for Debian 9 faster!
We also want to ask you not to update the Jessie system on Stretch! Although technically possible and often recommended, we have not yet added the correct dependencies to the 3CX installation package. An update will appear in the coming weeks, and in the meantime, installing 3CX is only possible on a new Debian 9 Stretch installation.
Install 3CX on Debian Linux 9
To start the installation, download the Debian 9 Stretch ISO image and install it as usual.
Next, add the Debian 8 Jessie repository to the list of available Debian 9 Stretch repositories and install the dependencies libicu52, libssl1.0.0 and libcurl3 = 7.38.0-4 + deb8u5 necessary for the 3CX package from. They are the ones that cause the error in a standard 3CX installation. Run the command:
echo 'deb http://ftp.de.debian.org/debian/ jessie main' | tee -a /etc/apt/sources.list
apt-get update
apt-get install libicu52 libssl1.0.0 libcurl3=7.38.0-4+deb8u5
To prevent confusion in the future, you can remove the Jessie repository from the list available in Stretch.
Then install 3CX on Linux using a set of standard commands, as described in the documentation .
wget -O- http://downloads.3cx.com/downloads/3cxpbx/public.key | apt-key add -
echo "deb http://downloads.3cx.com/downloads/3cxpbx/ /" | tee /etc/apt/sources.list.d/3cxpbx.list
apt-get update
apt-get install 3cxpbx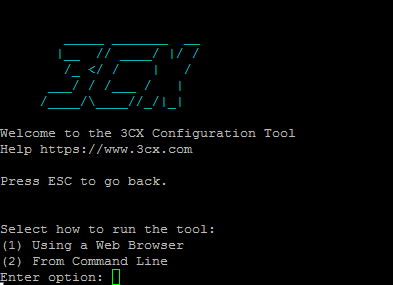
If you see the message, as in the screenshot above, then 3CX is installed successfully. You can go to the PBX setup wizard and test the system.
3CX Session Border Controller Update
Unfortunately, our clients using the free 3CX Session Border Controller utility (which is usually used to connect the client’s office to the 3CX cloud installation) could not connect to 3CX servers from Monday.
The problem arose if traffic encryption was enabled on the SBC. A connection problem has been detected and resolved in less than 24 hours. Therefore, we ask you to update your 3CX SBC installations as soon as possible if you have not already done so (we are talking about 3CX v15 and 15.5 systems)

3CX SBC for Windows
- Download 3CX SBC and install it according to the instructions .
- Traffic encryption can be enabled.
3CX SBC for Debian and Raspberry Pi
Connect to the system via ssh and run the commands:
sudo apt-get update
sudo apt-get install 3cxsbc
After installation, reboot all IP phones on the network, or wait about 10 minutes for the phones to update registration on the server.
We apologize if this problem caused you any inconvenience!
3CX Call Flow Designer Release Candidate Released
As you know, together with 3CX v15.5, we introduced the new 3CX Call Flow Designer voice application development environment . A beta version of the product was released some time ago, and now we are introducing the RC version.
Major improvements in 3CX CFD RC
- The Email Sender component correctly checks the required fields and correctly sets the sender address in the “From” field
- Also, the Email Sender component now automatically receives the mail server configuration from 3CX settings
- Application variables (Call flow) and individual components can be initialized using session variables
- The expression editor determined the wrong number of parameters if a comma was encountered in the text constant
- After the application was compiled in Warnings, the Errors window remained open
- A new Logger component has been added, which allows you to save text in log files. This is very convenient for debugging voice applications.