Configuring VPN CryptoPro IPsec with GOST encryption
- Tutorial
Good afternoon,% username%! Everyone knows that Federal Law of the Russian Federation No. 152 dictates to us that we must use certified means to protect personal data. The task was to ensure channel security through FZ-152 for remote connection of clients. For this, a VPN server with CryptoPro IPsec and GOST certificates were used.
Instruction inside.
Before configuring services and connections on the server and client machines, you need to install CryptoPro CSP and CryptoPro IPSec on them!
We configure the VPN server on Windows Server 2012 R2
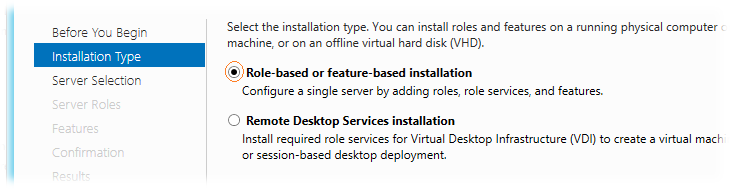
We open the Server Manager snap-in and through the Add Roles Wizard select the type of installation based on roles - Role-based or feature-based installation.
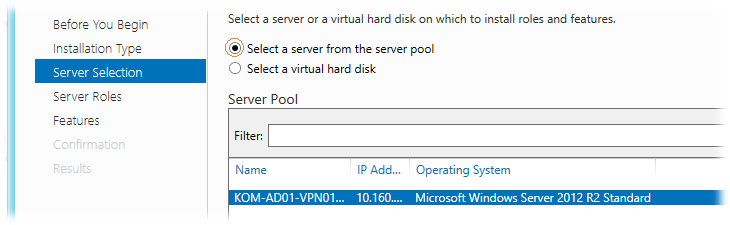
Next, select the server from the server pool.
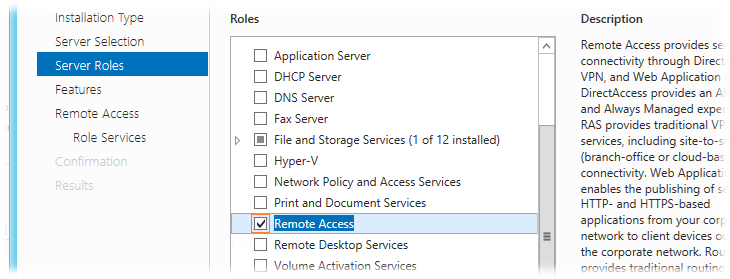
At the role selection step, select the Remote Access role.
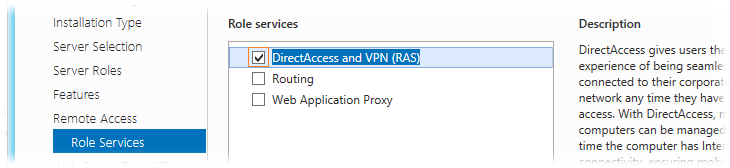
We skip the Features step without making any changes. At the step of choosing the services of the role to be included, choose the DirectAccess and VPN (RAS) service.
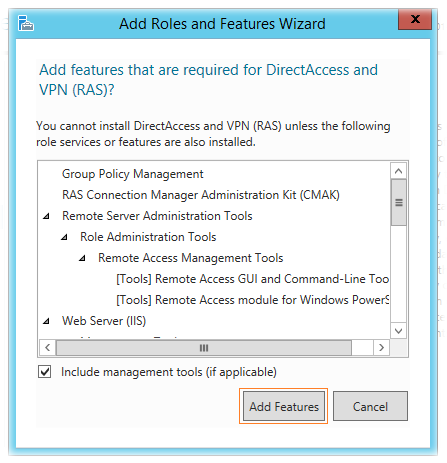
After selecting a service, a window for adding additional components related to the selected service will open. We agree with their installation by clicking Add Features.
The Web Server Role (IIS) role will be added to the Add Roles Wizard. We skip the corresponding appeared step of the Web Server Role Wizard (IIS) and the dependent Role Services options with the default settings and start the installation process, after which a link to the Remote Access Services initial setup wizard - Open the Getting Started Wizard will be available.
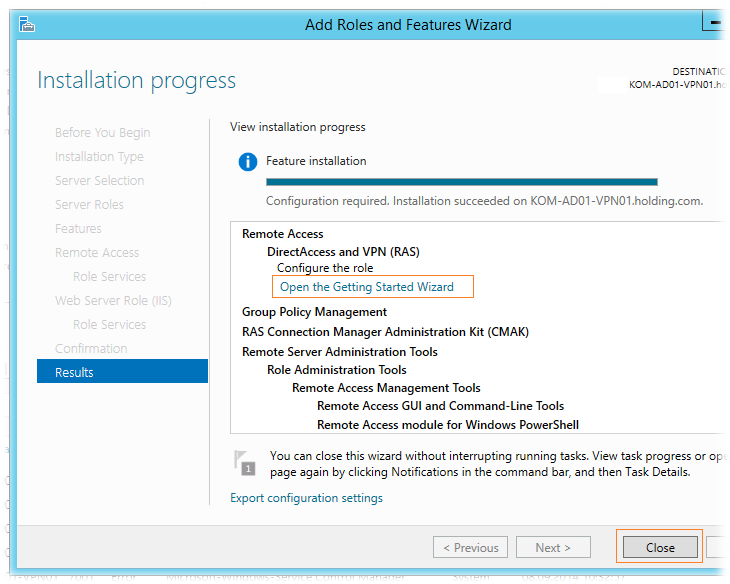
The RAS setup wizard can be called by clicking on the appropriate link here, or later from the Server Manager snap-in:

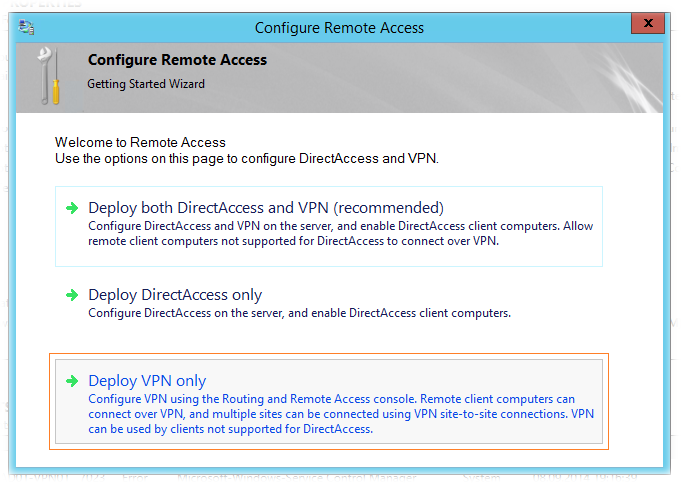
Since the DirectAccess configuration in the context of our task is not needed, in the wizard window we select the VPN only option - Deploy VPN only.
Configuring the Routing and Remote Access service
From the Control Panel, open the Administrative Tools \ Routing and Remote Access snap-in, select the server name and open the context menu. Select Configure and Enable Routing and Remote Access.

Since we only need a VPN, we choose.

Choose a VPN.

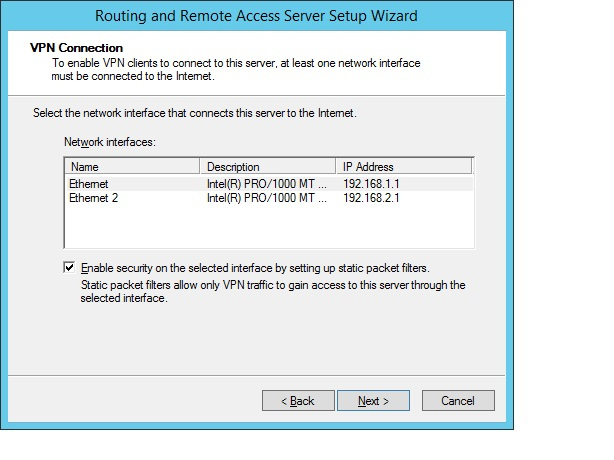
Next, we indicate the external interface that has Internet access, to which remote clients will connect.
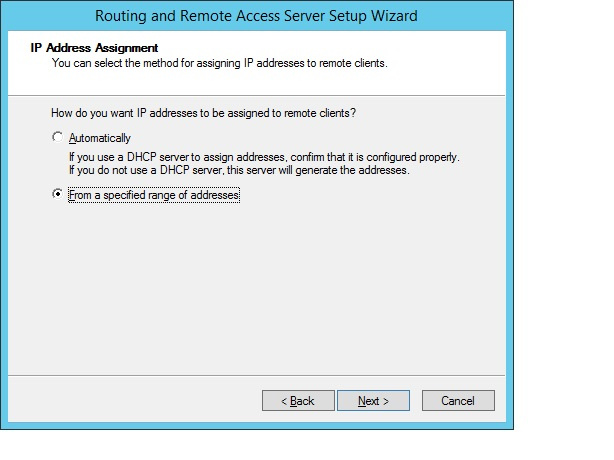
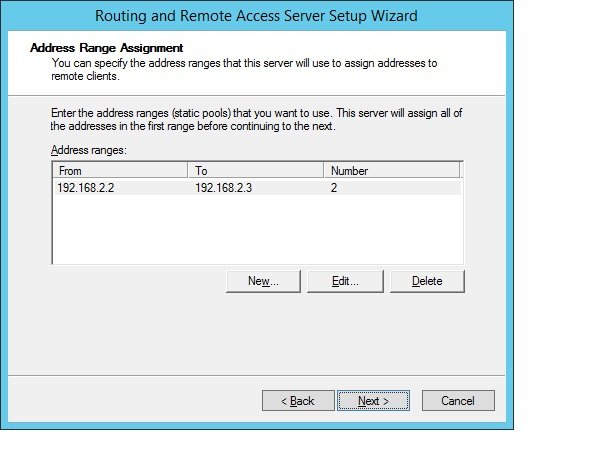
We set up a range of addresses for clients.
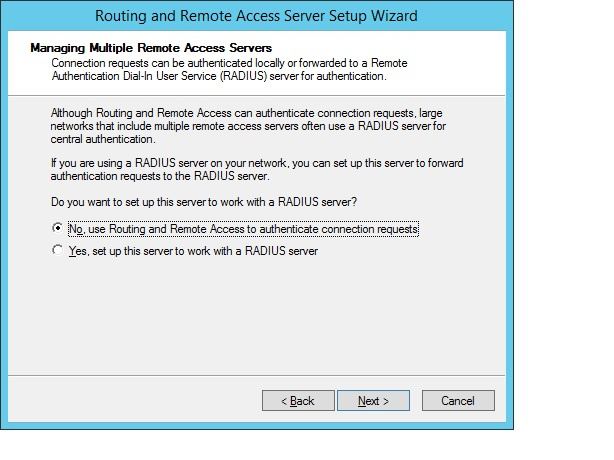
We indicate that we are not using a RADIUS server.
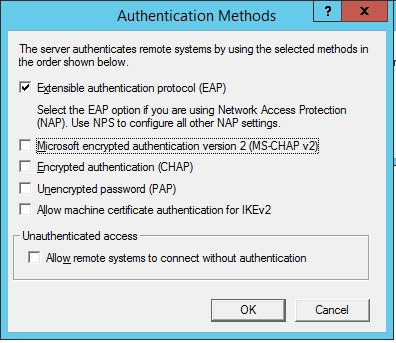
We agree to the launch of the service. After starting, you need to configure user authentication methods.
We issue GOST certificates in CryptoPro УЦ 2.0 for VPN.
In order for IPSec to work for us, we need:
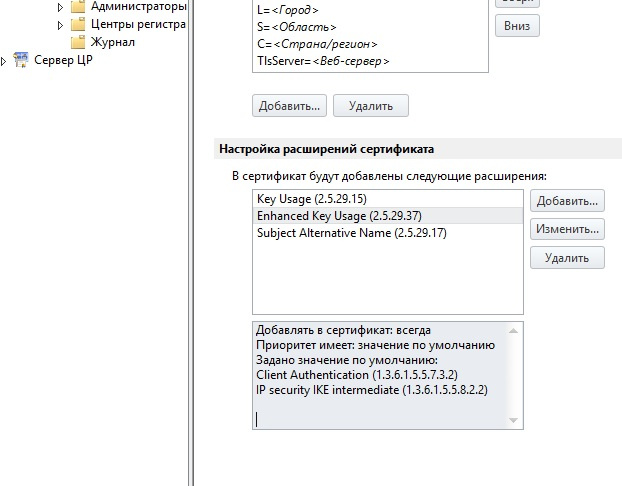
And so, let's create two IPSec client IPSec server templates in the CA Manager.

In the configuration of the IPSec client template, add the Client Authentication parameter (1.3.6.1.5.5.7.3.2). IP security IKE intermediate (1.3.6.1.5.5.8.2.2).
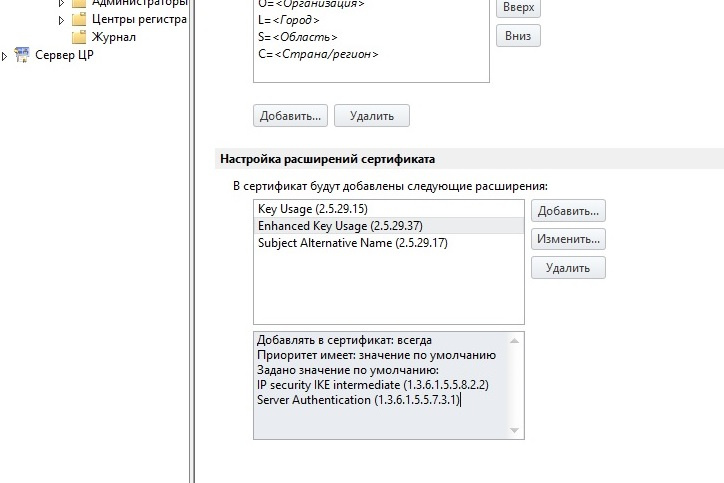
The IPSec server template is the same but with the Server Authentication parameter (1.3.6.1.5.5.7.3.1).
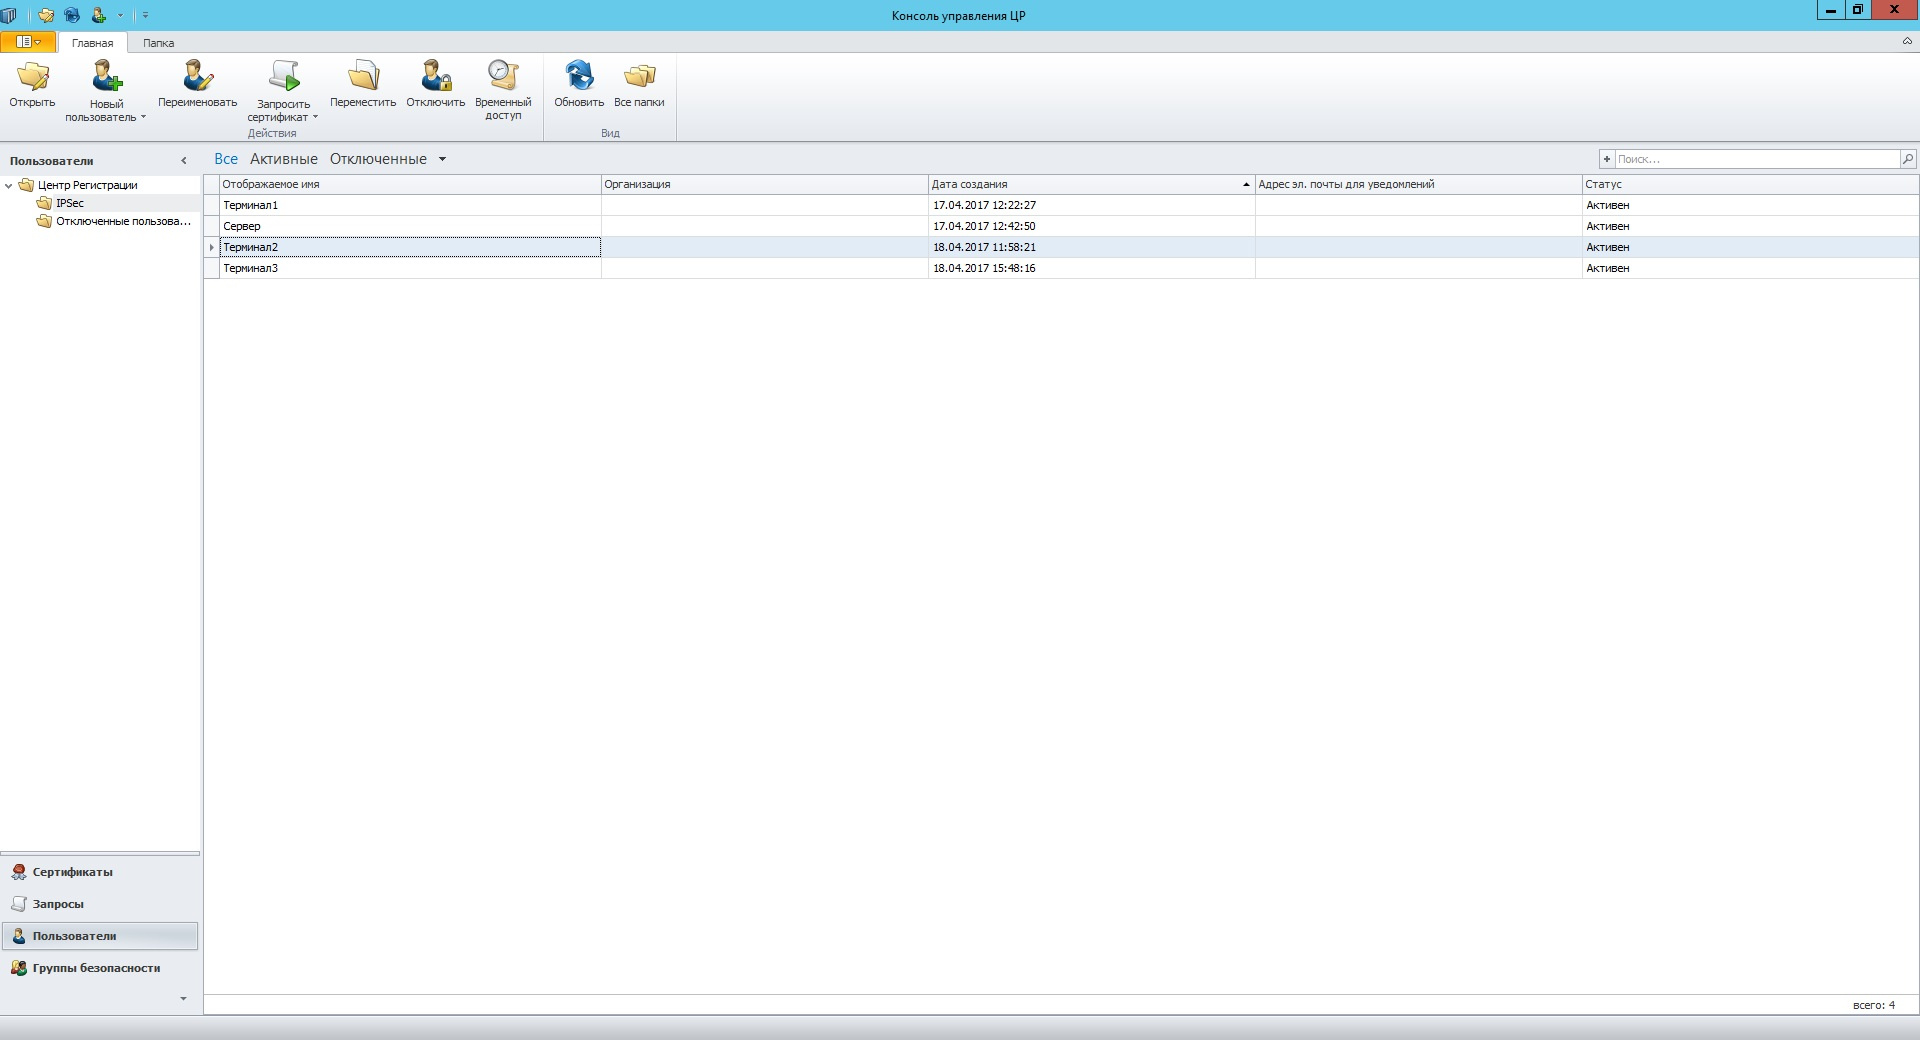
After the work done in the Management Console, we create users to request and generate a certificate.
Next, we request a certificate for created users. When prompted, you must specify the template that we created.

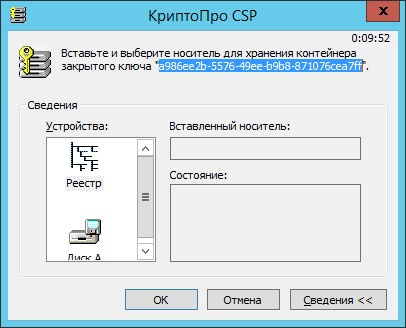
Choose a storage location (container) for the private key.
After a nervous twitching of the mouse (this is necessary for the HRC), set the password for the container.
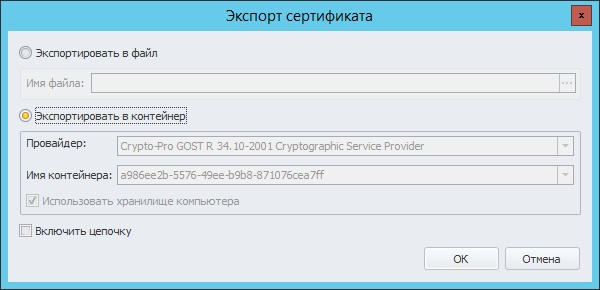
Now we need to export the certificate to a closed container.
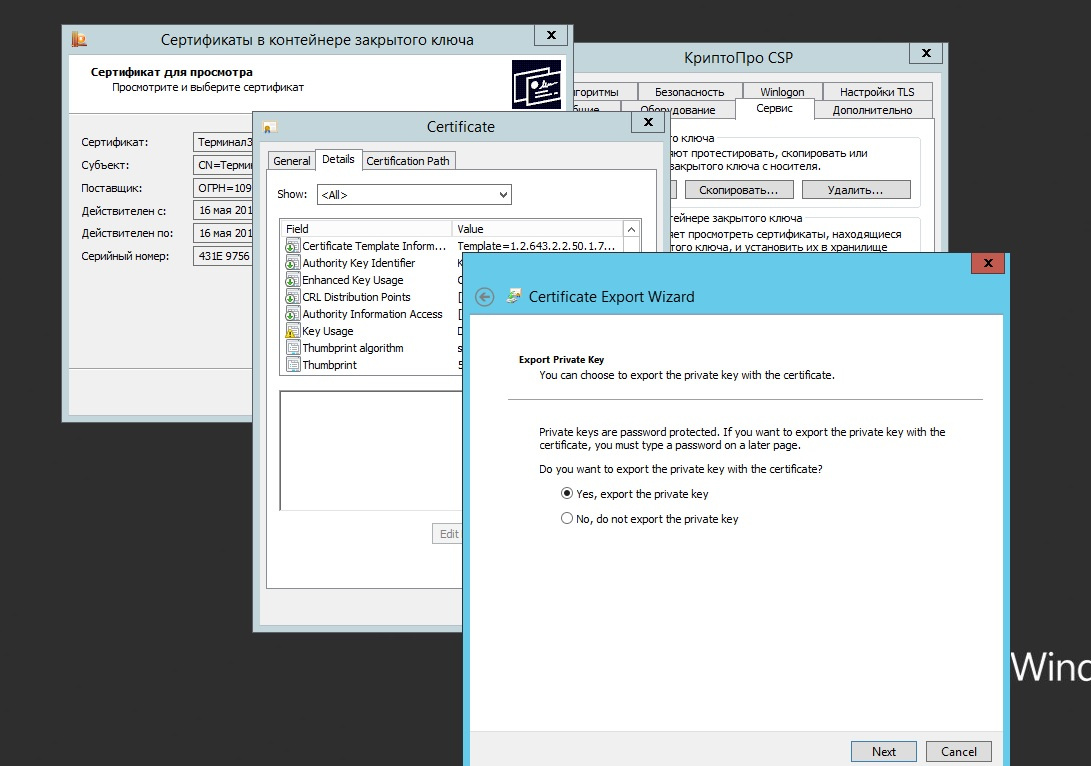
After copying the certificate, you must copy the entire container to a file to transfer the remote client to the AWP. We export using CryptoPro CSP in pfx format.
Using the same algorithm, we create a certificate for the server only according to a different template and install them using the CryptoPro CSP Certificates snap-in. Do not forget about the root certificate that should be in the Trusted Root Certification Authorities.
Configuring an IP Security Policy on the Server
Step Times.

Step two

Step three.
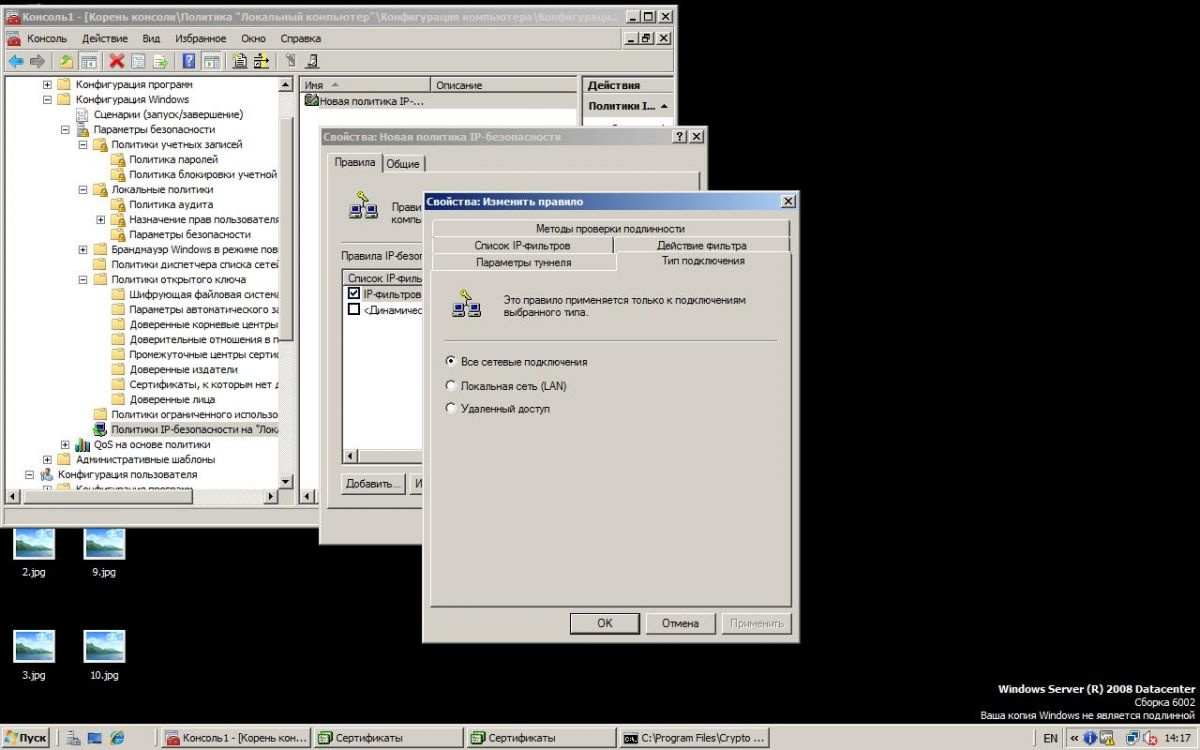
On the "Authentication Methods" tab, add the Root Certificate.

Using the same algorithm, we configure the IP security policy on each remote workstation.
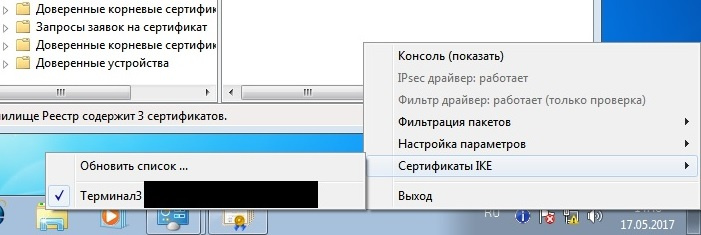
The correctness of the certificate installation and IPSec operability check, as well as error logging, can be checked using the CryptoPro IPSec utility cp_ipsec_info.exe. After clicking the Refresh list menu, you will see a list of installed certificates. On the contrary to the established certificate there should be a checkmark to confirm that everything is fine with it.
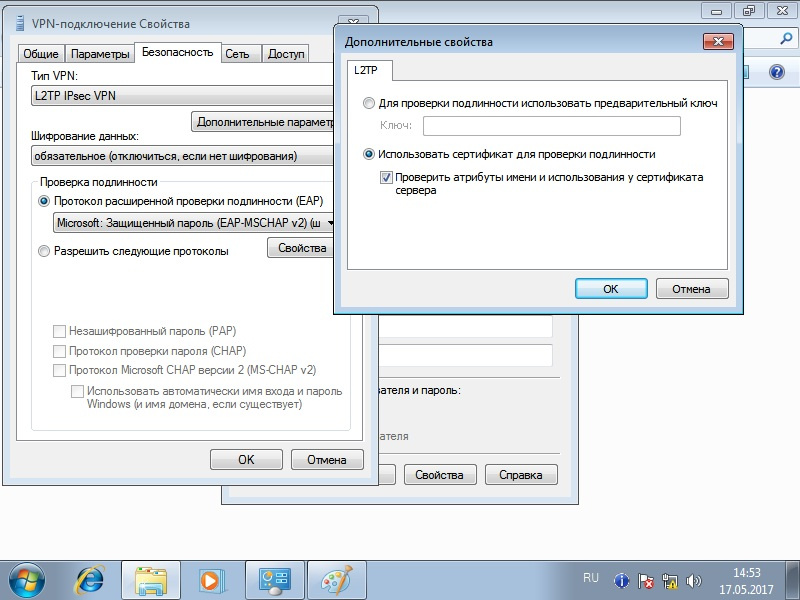
Configuring the VPN connection to the server The
connection is configured as standard but with minor changes.
It seems to have told all the nuances, if there are comments or suggestions I will listen with pleasure!
Instruction inside.
Before configuring services and connections on the server and client machines, you need to install CryptoPro CSP and CryptoPro IPSec on them!
We configure the VPN server on Windows Server 2012 R2
We open the Server Manager snap-in and through the Add Roles Wizard select the type of installation based on roles - Role-based or feature-based installation.
Next, select the server from the server pool.
At the role selection step, select the Remote Access role.
We skip the Features step without making any changes. At the step of choosing the services of the role to be included, choose the DirectAccess and VPN (RAS) service.
After selecting a service, a window for adding additional components related to the selected service will open. We agree with their installation by clicking Add Features.
The Web Server Role (IIS) role will be added to the Add Roles Wizard. We skip the corresponding appeared step of the Web Server Role Wizard (IIS) and the dependent Role Services options with the default settings and start the installation process, after which a link to the Remote Access Services initial setup wizard - Open the Getting Started Wizard will be available.
The RAS setup wizard can be called by clicking on the appropriate link here, or later from the Server Manager snap-in:
Since the DirectAccess configuration in the context of our task is not needed, in the wizard window we select the VPN only option - Deploy VPN only.
Configuring the Routing and Remote Access service
From the Control Panel, open the Administrative Tools \ Routing and Remote Access snap-in, select the server name and open the context menu. Select Configure and Enable Routing and Remote Access.
Since we only need a VPN, we choose.
Choose a VPN.
Next, we indicate the external interface that has Internet access, to which remote clients will connect.
We set up a range of addresses for clients.
We indicate that we are not using a RADIUS server.
We agree to the launch of the service. After starting, you need to configure user authentication methods.
We issue GOST certificates in CryptoPro УЦ 2.0 for VPN.
In order for IPSec to work for us, we need:
- CA root certificate
- Server certificate
- Client certificate
And so, let's create two IPSec client IPSec server templates in the CA Manager.
In the configuration of the IPSec client template, add the Client Authentication parameter (1.3.6.1.5.5.7.3.2). IP security IKE intermediate (1.3.6.1.5.5.8.2.2).
The IPSec server template is the same but with the Server Authentication parameter (1.3.6.1.5.5.7.3.1).
After the work done in the Management Console, we create users to request and generate a certificate.
Next, we request a certificate for created users. When prompted, you must specify the template that we created.
Choose a storage location (container) for the private key.
After a nervous twitching of the mouse (this is necessary for the HRC), set the password for the container.
Now we need to export the certificate to a closed container.
After copying the certificate, you must copy the entire container to a file to transfer the remote client to the AWP. We export using CryptoPro CSP in pfx format.
Using the same algorithm, we create a certificate for the server only according to a different template and install them using the CryptoPro CSP Certificates snap-in. Do not forget about the root certificate that should be in the Trusted Root Certification Authorities.
Configuring an IP Security Policy on the Server
Step Times.
Step two
Step three.
On the "Authentication Methods" tab, add the Root Certificate.
Using the same algorithm, we configure the IP security policy on each remote workstation.
The correctness of the certificate installation and IPSec operability check, as well as error logging, can be checked using the CryptoPro IPSec utility cp_ipsec_info.exe. After clicking the Refresh list menu, you will see a list of installed certificates. On the contrary to the established certificate there should be a checkmark to confirm that everything is fine with it.
Configuring the VPN connection to the server The
connection is configured as standard but with minor changes.
It seems to have told all the nuances, if there are comments or suggestions I will listen with pleasure!