How I built NAS at home
I have long been visited by the idea of organizing a small network storage at home. For what? First of all, for photos, and a few more files that I would not want to lose. Well, since such a dance has gone then the organization of the human media library.
I looked at the models of famous brands, such as the Delhi Synology and QNAP, I even almost took the QNAP TS-469 Pro , but the toad did the trick.
I started surfing the Internet in search of publications with options for building repositories with my own pens, which is interesting and it seemed to me that it was cheaper (in fact, if you use the recommended hardware, it’s not so).
Having read a lot of articles in my head, there was already a plan for how it should be. I decided that it will work under the control of FreeNAS. At the auction I came across a bodyChenbro SR30169 . Somehow I had a chance to touch a servochka in such a case, well, I really liked it. The case is designed for motherboards in Mini ITX format, it has 6 drive bays, 4 formats 3.5 and 2 - 2.5.
What do you need:
The most difficult was the choice of motherboard. I would like to build all this on server hardware with ECC memory, BUT, again, a toad ... The average price of a motherboard of the right size was about 250 American money, so we will build from ordinary human.
Since we have 6 disks, it would be nice to have 6 SATA ports on the board, the availability of RAID is not important (we will have ZFS), I would also like eSATA and USB 3.0, the processor is not important, a gigabit network. As it turned out, such boards can be counted on the fingers. Already thought to take the Gigabyte GA-N3150N-D2H , there are not enough SATA ports, but who is easy now? And then I come across a used ZOTAC H55-ITX with i3-540on board. Cons - the board is old, the chip supports a maximum of 8 gig of memory, SATA 2. Pros - solid components, 6 internal + 1 external SATA, gigabit network, PCI-E x16, price.
What happened:
This is my first experience with FreeNAS, so all comments and additions are welcome.
I looked at the models of famous brands, such as the Delhi Synology and QNAP, I even almost took the QNAP TS-469 Pro , but the toad did the trick.
I started surfing the Internet in search of publications with options for building repositories with my own pens, which is interesting and it seemed to me that it was cheaper (in fact, if you use the recommended hardware, it’s not so).
Having read a lot of articles in my head, there was already a plan for how it should be. I decided that it will work under the control of FreeNAS. At the auction I came across a bodyChenbro SR30169 . Somehow I had a chance to touch a servochka in such a case, well, I really liked it. The case is designed for motherboards in Mini ITX format, it has 6 drive bays, 4 formats 3.5 and 2 - 2.5.
What do you need:
- Mini ITX motherboard;
- RAM, at least 8 Gb (I have just 8);
- disks, at least 2-3 Tb for a start (I have a pair of 2 Tb and one almost not 1 Tb);
- flash drive, to install the system (I had a small SSD, I decided to use it);
- power supply (there is 450 watts);
- case (I already bought);
The most difficult was the choice of motherboard. I would like to build all this on server hardware with ECC memory, BUT, again, a toad ... The average price of a motherboard of the right size was about 250 American money, so we will build from ordinary human.
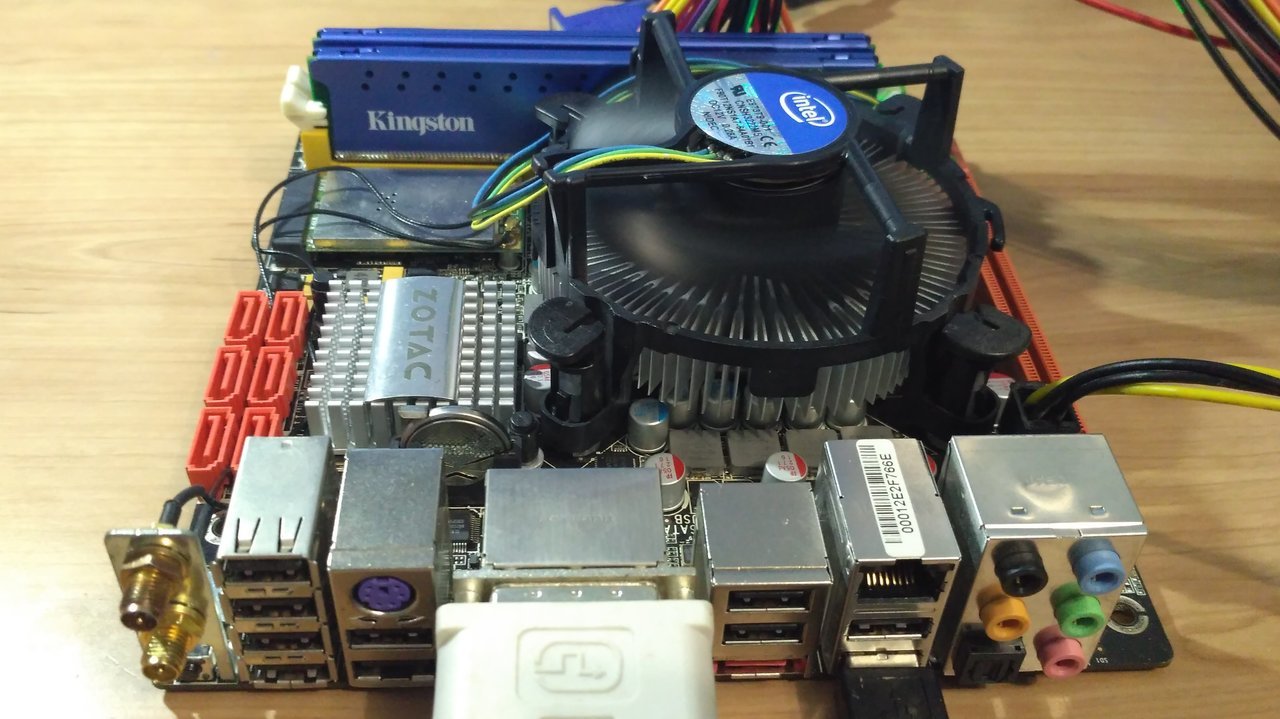
Since we have 6 disks, it would be nice to have 6 SATA ports on the board, the availability of RAID is not important (we will have ZFS), I would also like eSATA and USB 3.0, the processor is not important, a gigabit network. As it turned out, such boards can be counted on the fingers. Already thought to take the Gigabyte GA-N3150N-D2H , there are not enough SATA ports, but who is easy now? And then I come across a used ZOTAC H55-ITX with i3-540on board. Cons - the board is old, the chip supports a maximum of 8 gig of memory, SATA 2. Pros - solid components, 6 internal + 1 external SATA, gigabit network, PCI-E x16, price.
What happened:
- ZOTAC H55-ITX + i3-540 ;
- 2x HyperX Genesis 4 Gb 1600MHz DDR3 Non-ECC
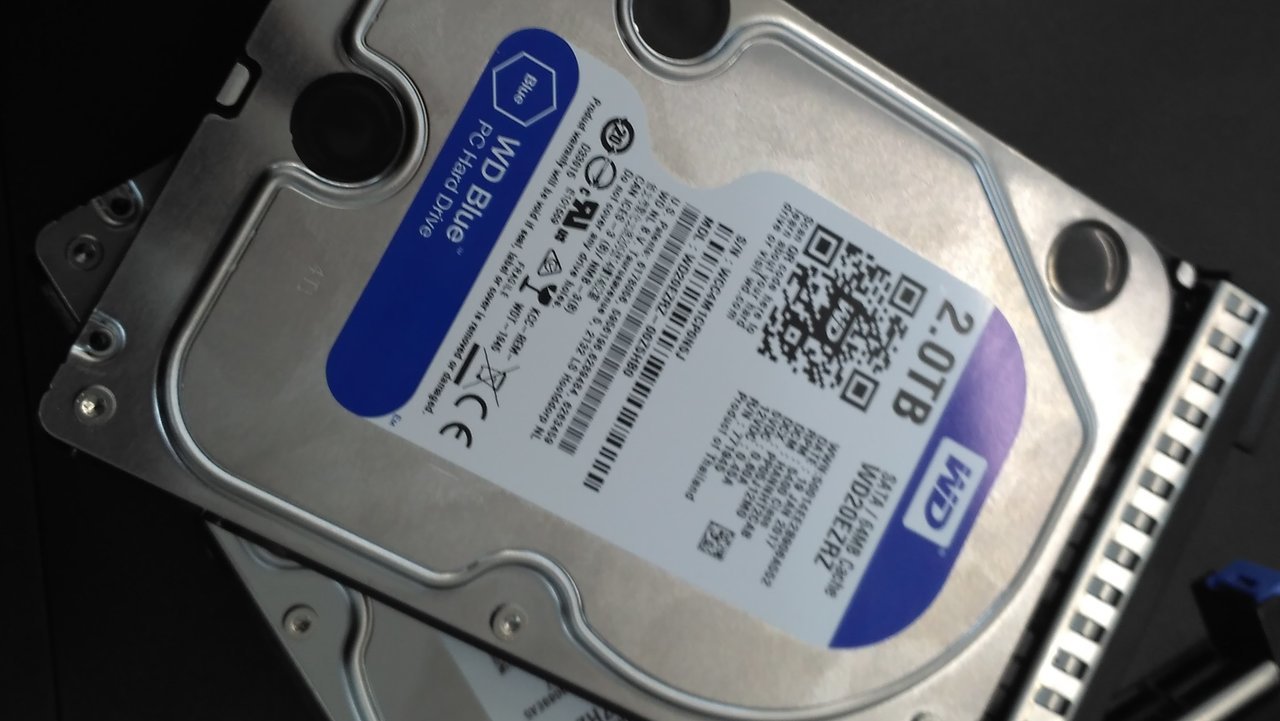
- 2x2Tb 3.5 '+ 2x1Tb 3.5' WD Blue
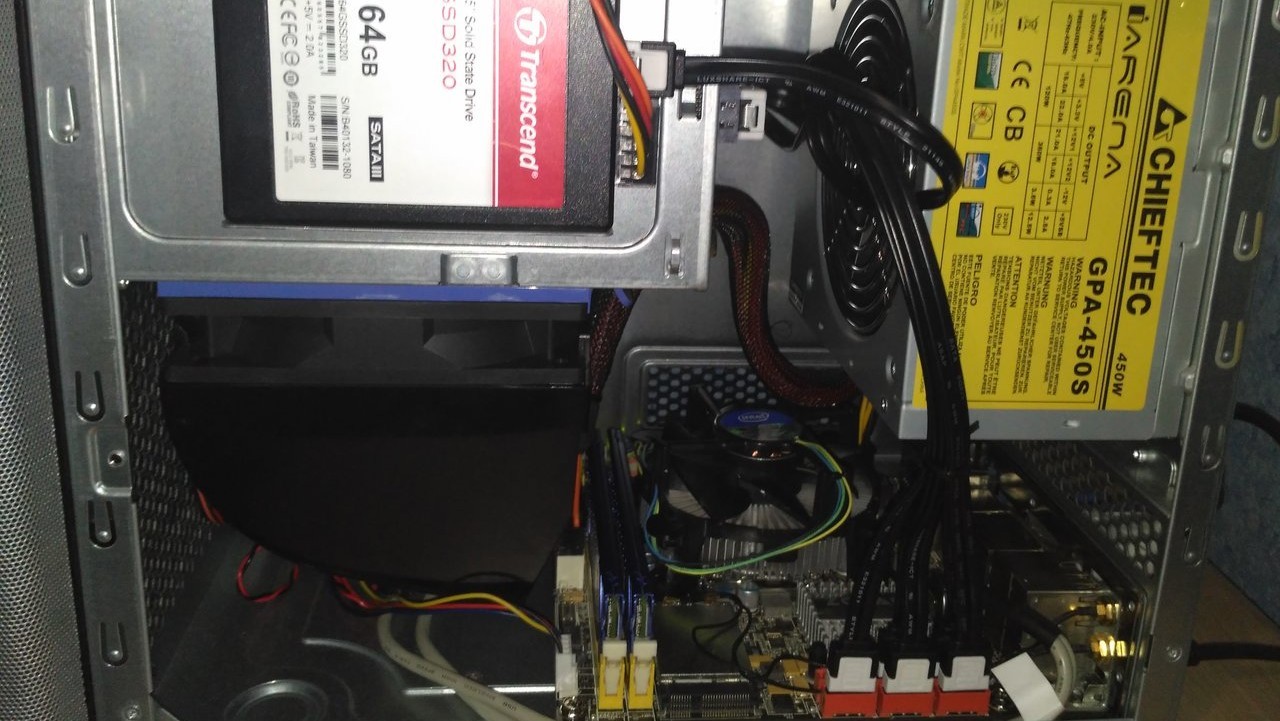
- Transcend SSD320 64 Gb
- Chieftec GPA-450S
- Chenbro SR30169
Iron assembly
First run:
Disks in baskets:
In the case on the left:

Right:
Disks in baskets:
In the case on the left:
Right:
Installation
I chose FreeNAS Corral, but raw, but it seemed to me more convenient than 9.10. With the installation of problems did not arise at all, everything is very simple, I will focus only on the main points.
Let's start:
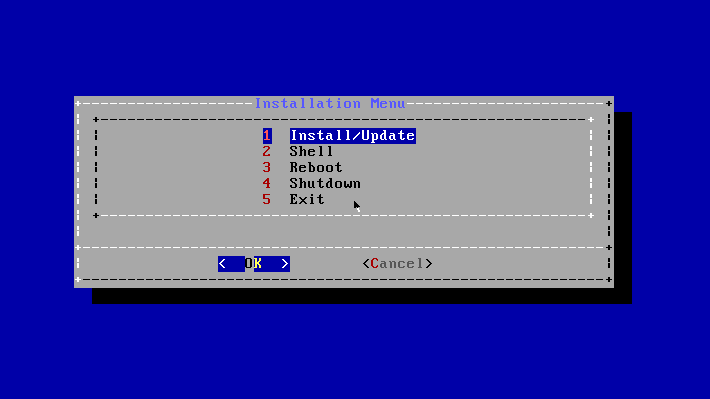
The disk on which the system will be installed will be fully formatted, all data will be lost. After the selection, you need to confirm that we understand what we are doing.

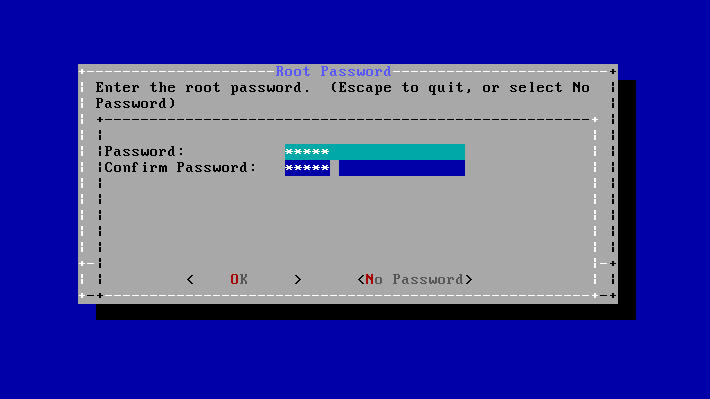
Here you need to specify the root_a password.
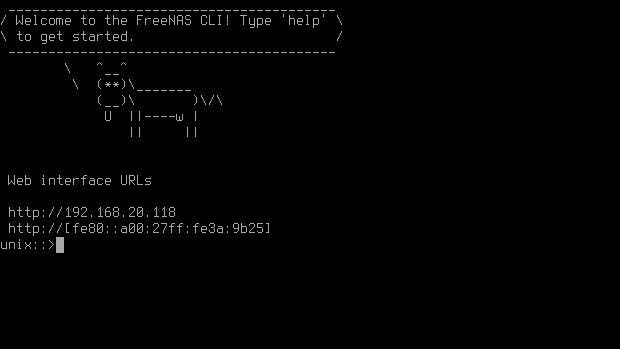
After successful installation, we see the address received via DHSP, you can get to this web interface at this address:
Let's start:
The disk on which the system will be installed will be fully formatted, all data will be lost. After the selection, you need to confirm that we understand what we are doing.
Here you need to specify the root_a password.
After successful installation, we see the address received via DHSP, you can get to this web interface at this address:
Customization
Web interface
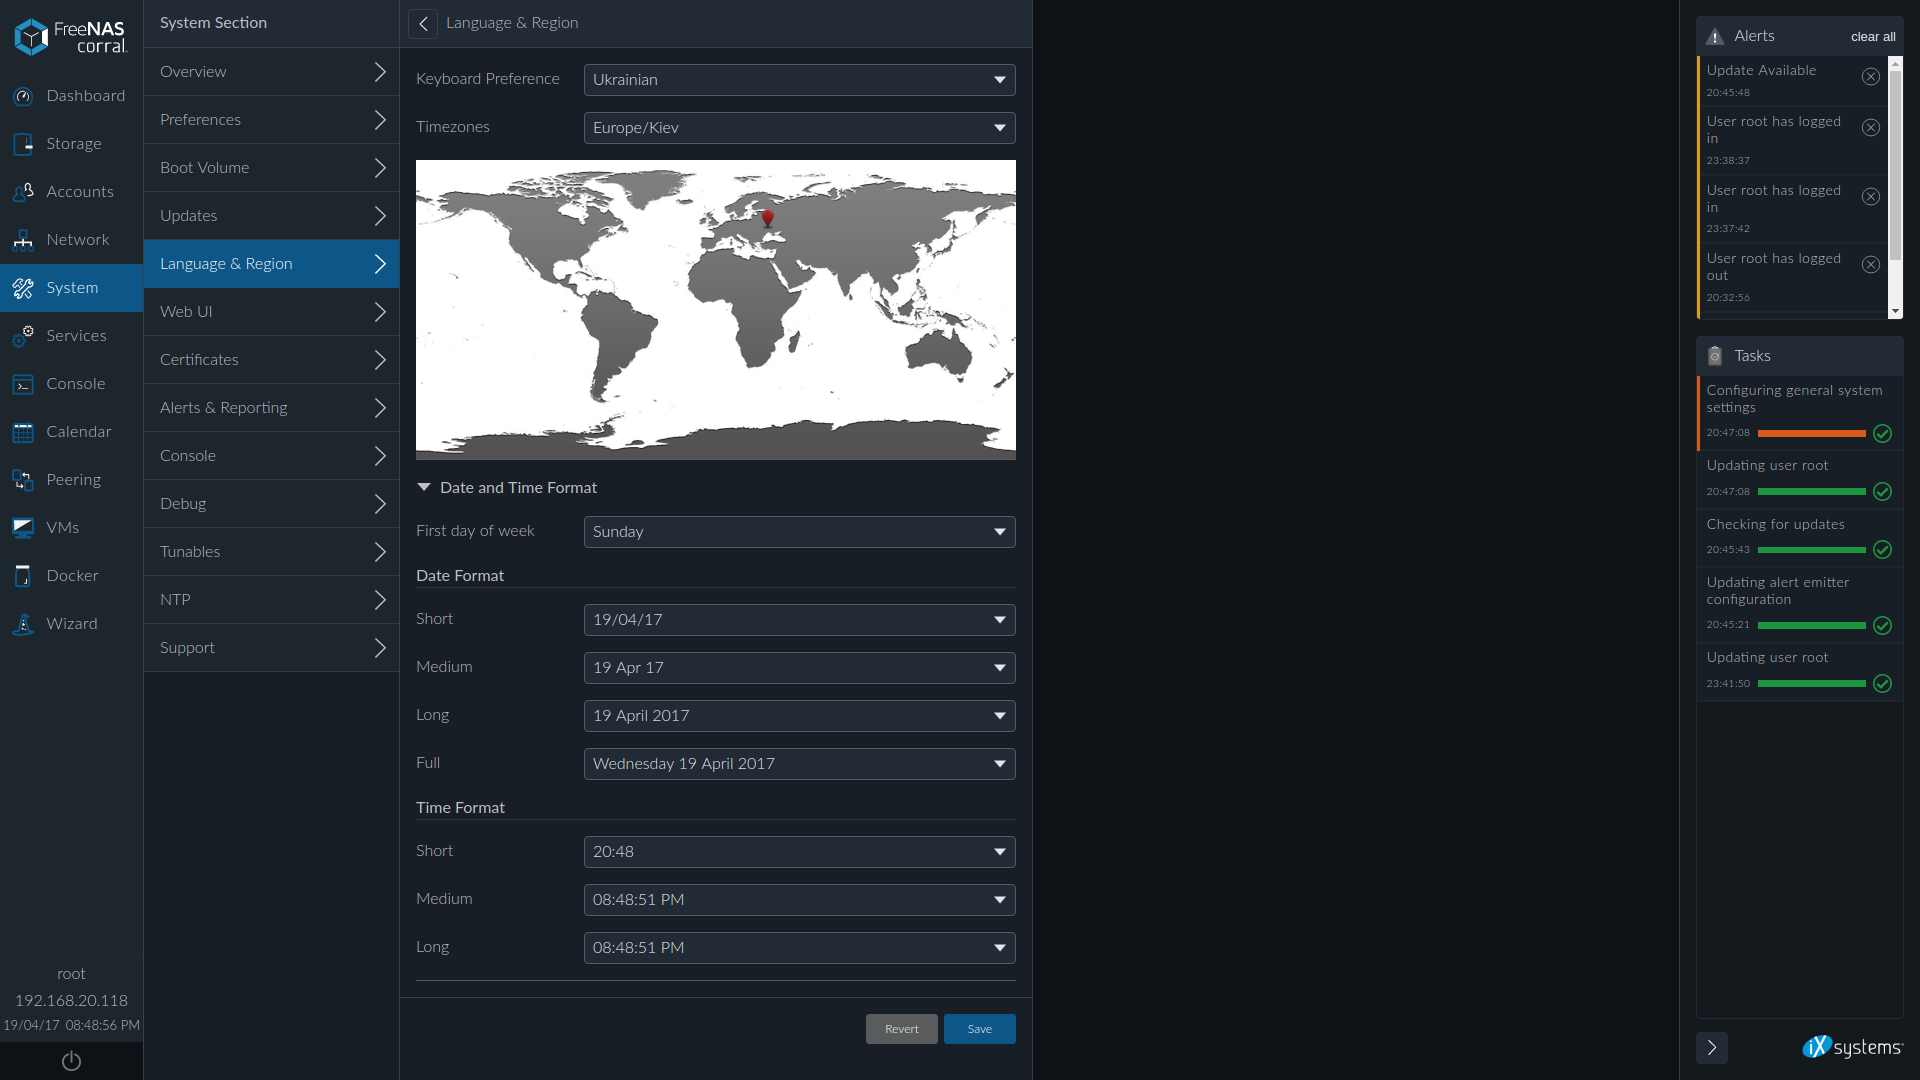
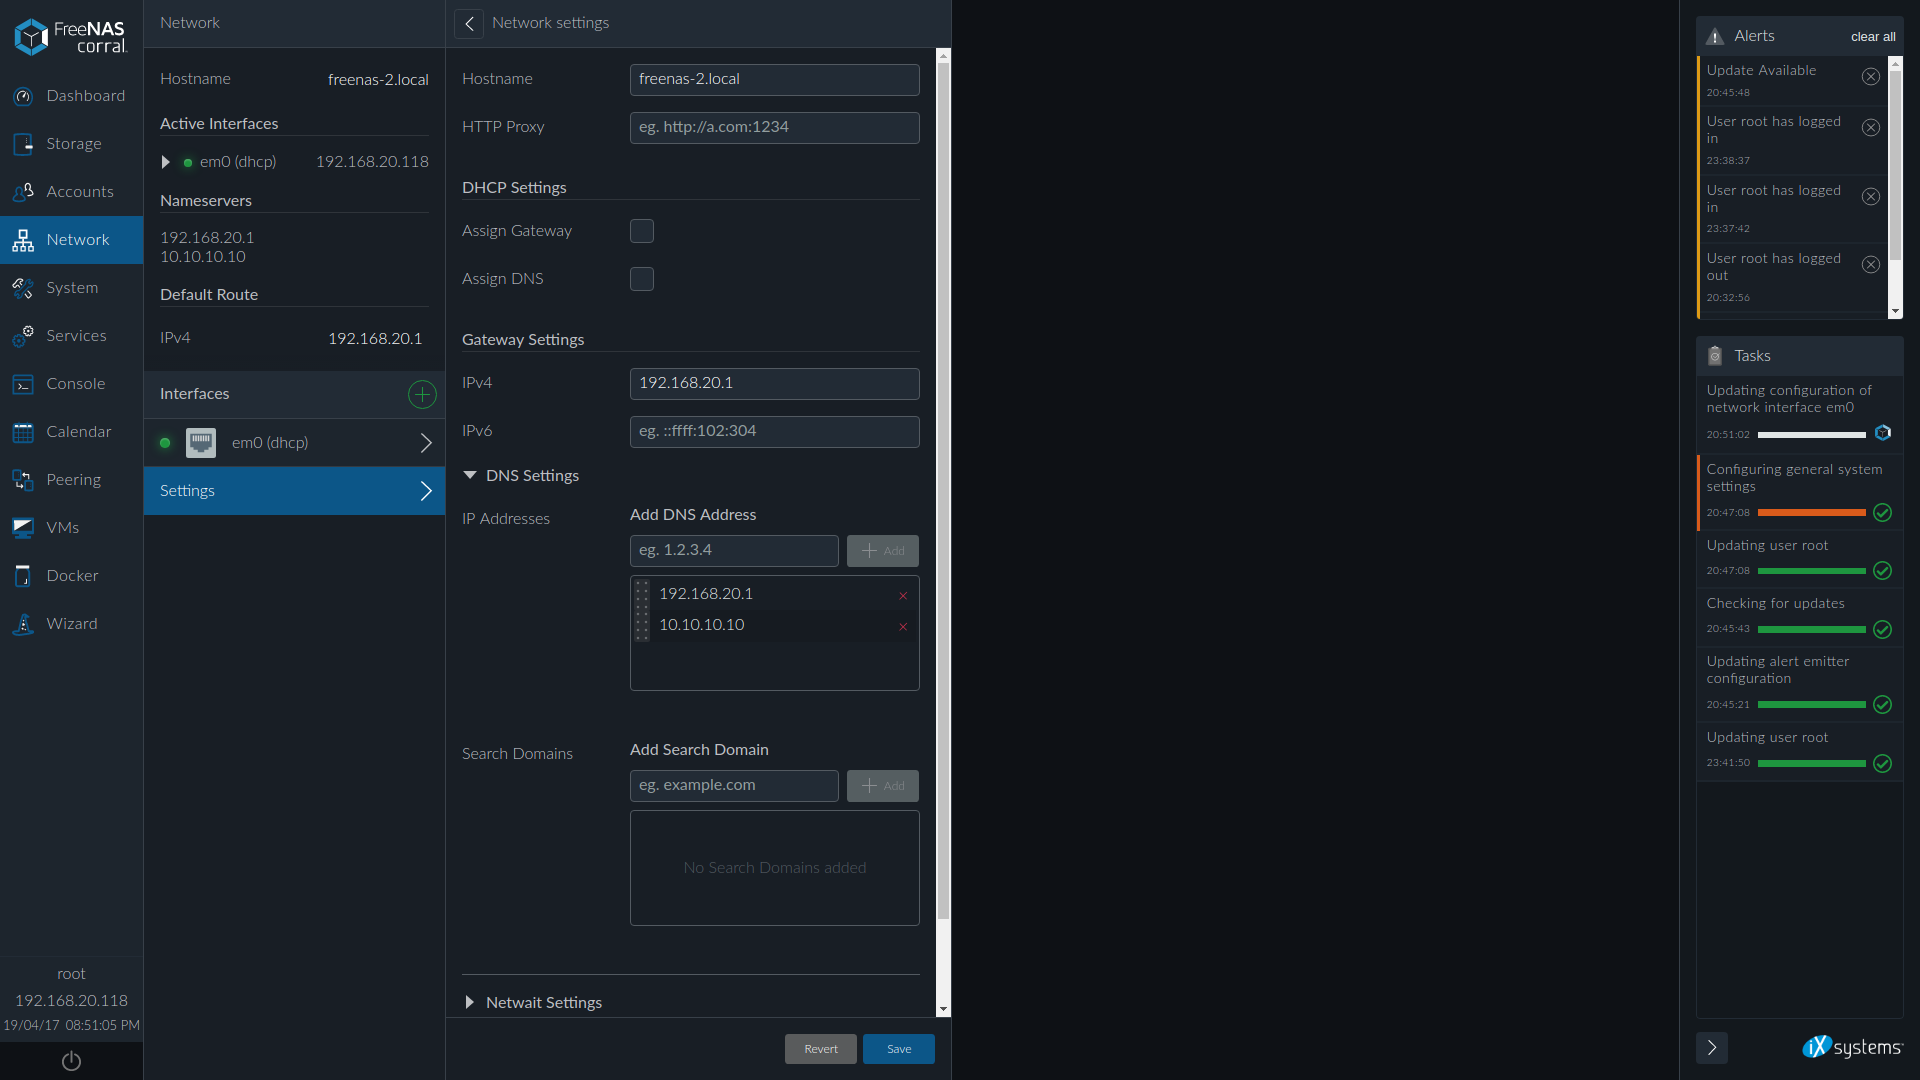
First of all, you need to configure regional settings
and the network interface.
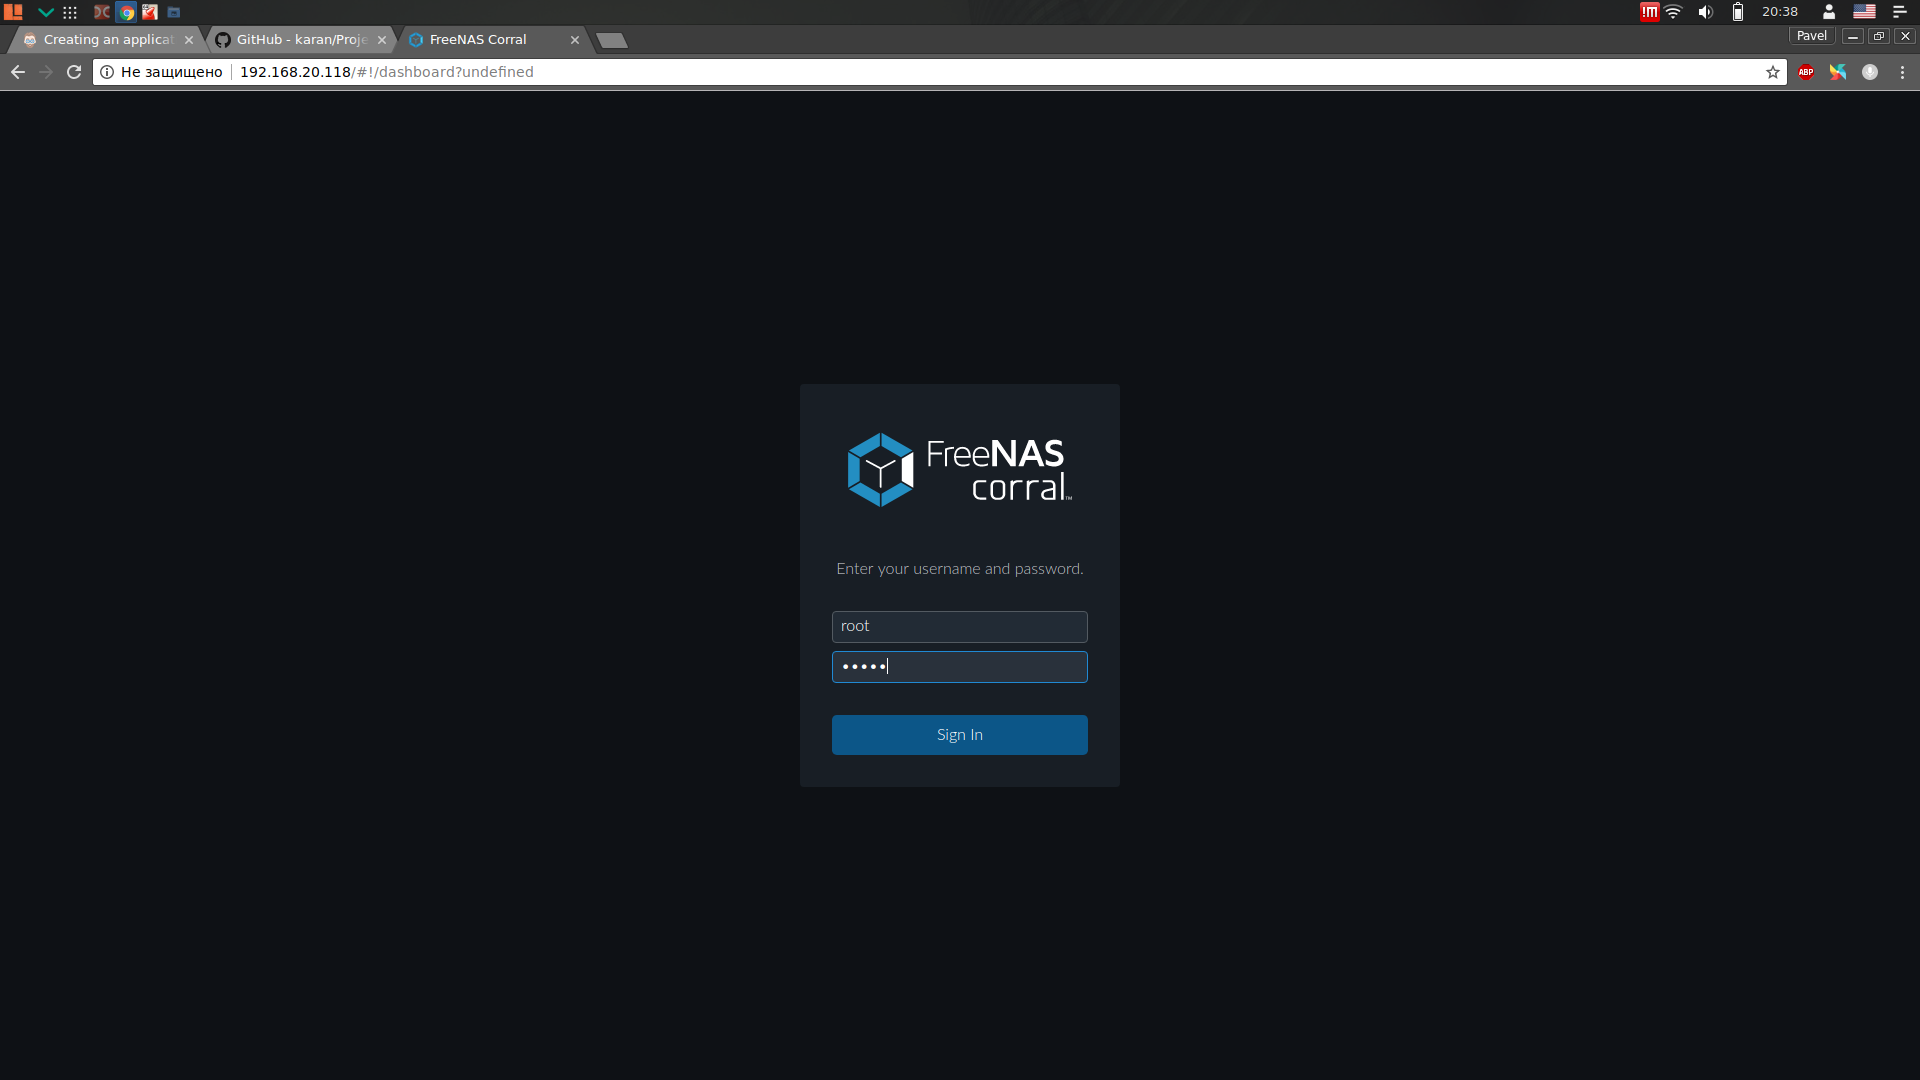
If the address has been changed, then you need to enter the web interface in a new way.
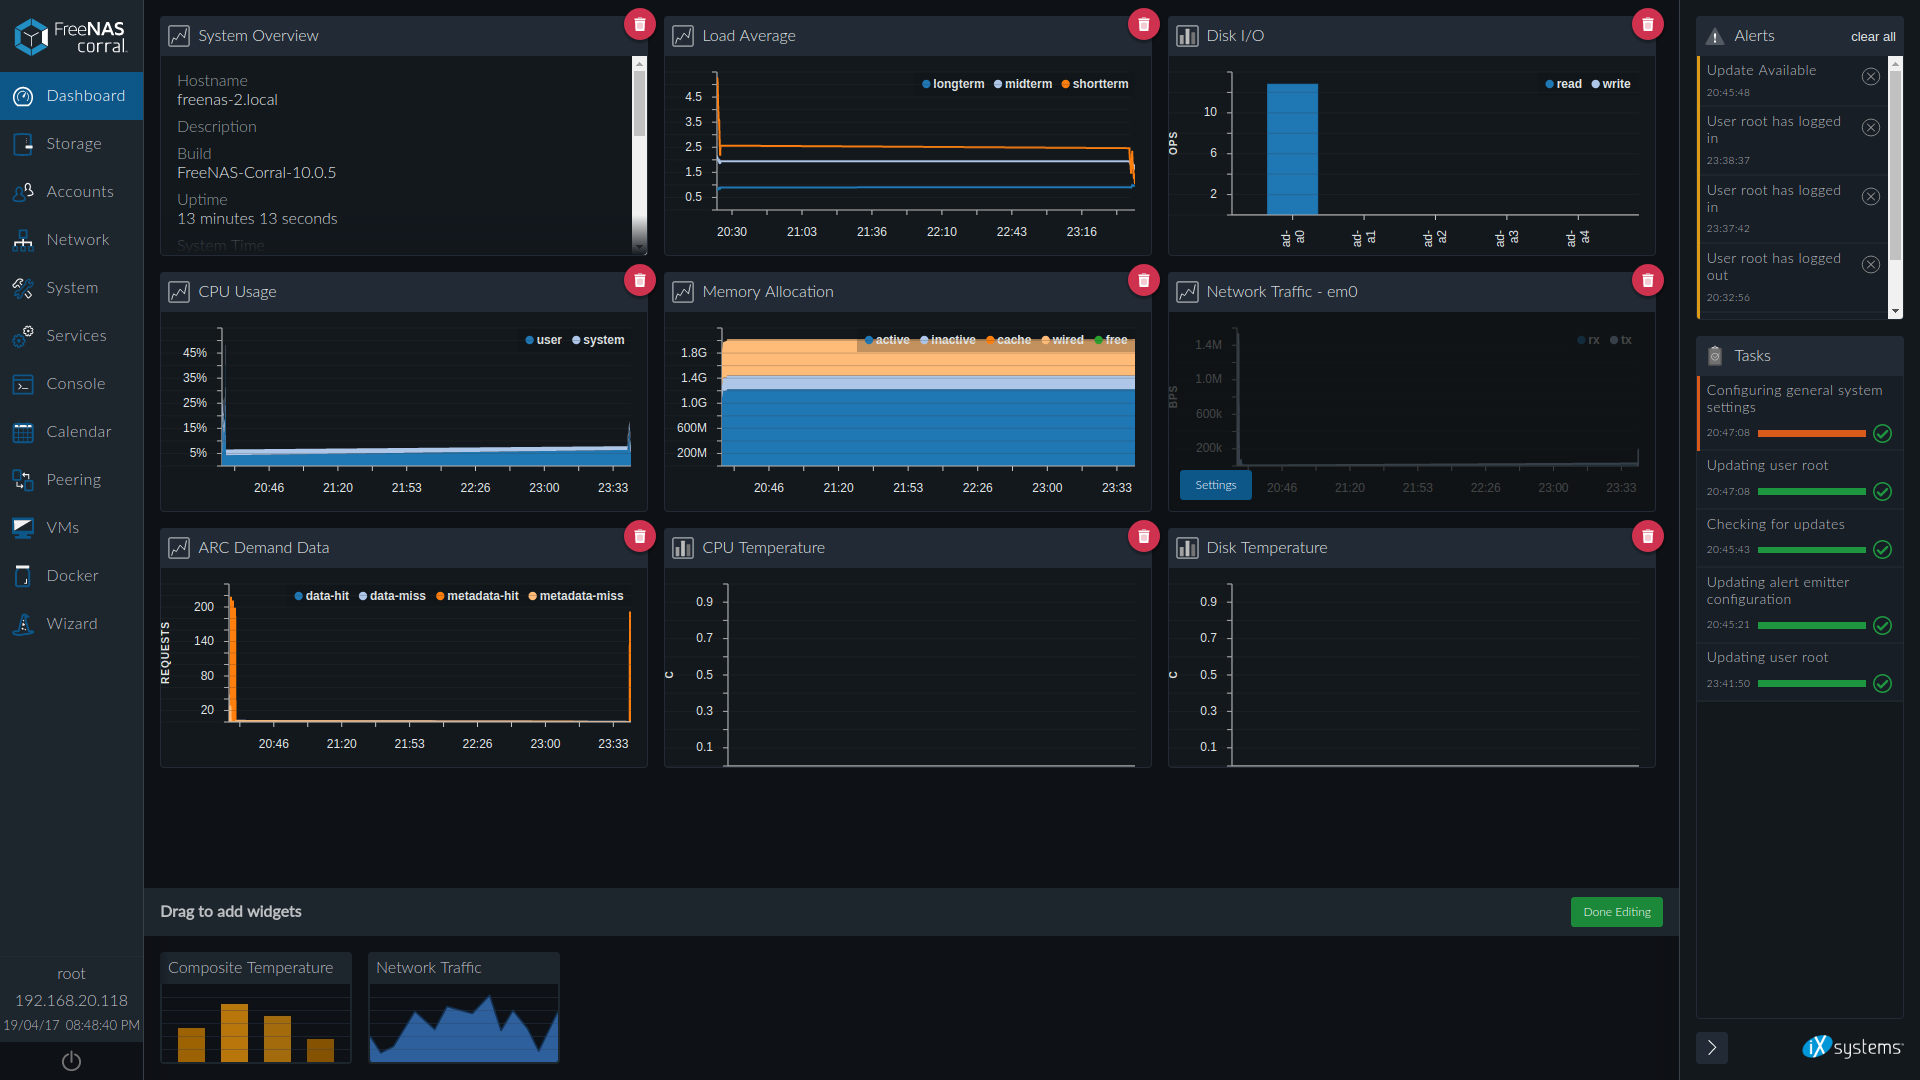
You can add graphics of interest to the panel.
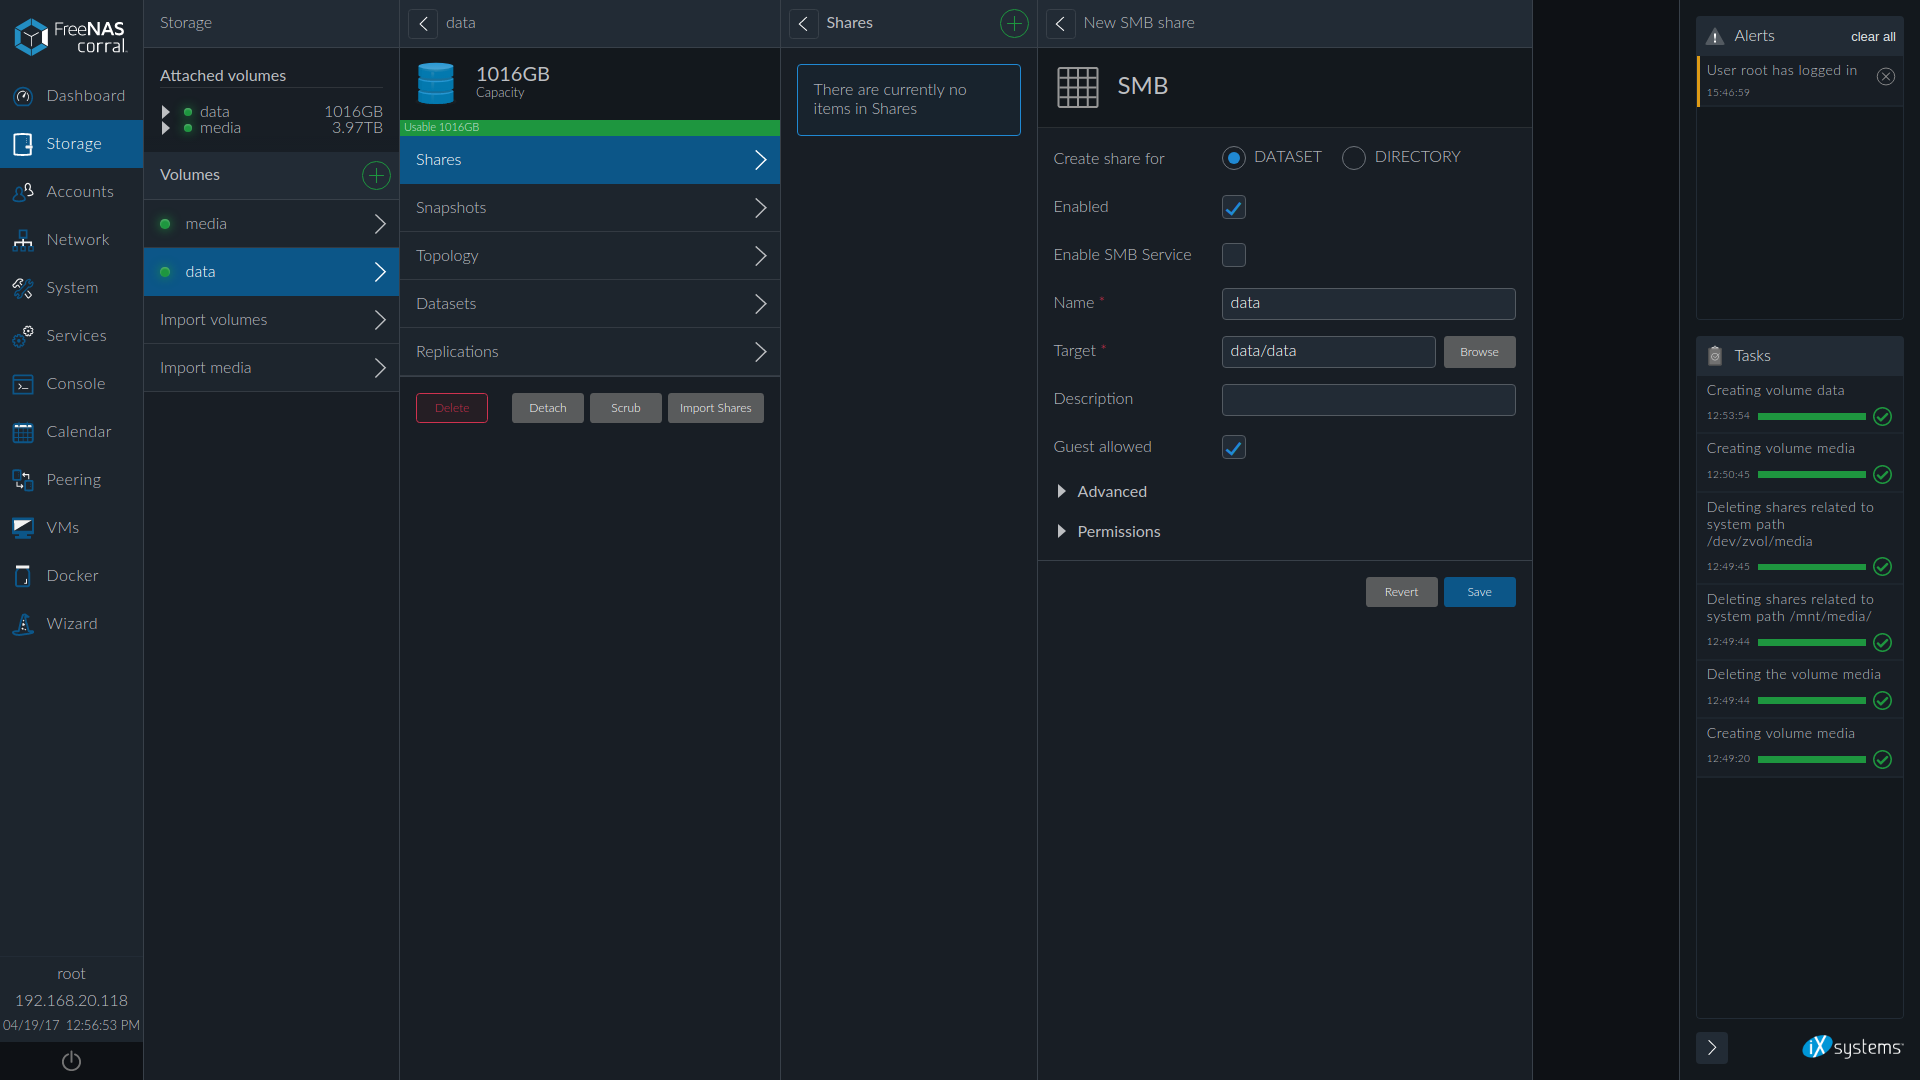
Next I set up the volumes: The
volume for the library created from two screws 2 Tb in RAID 0. I’m not afraid to lose the movie, the main thing is to keep a list of what happened.
For important data, I created a volume of two 1 Tb screws per RAID 1. On it is a photo, some important information, and container configs.
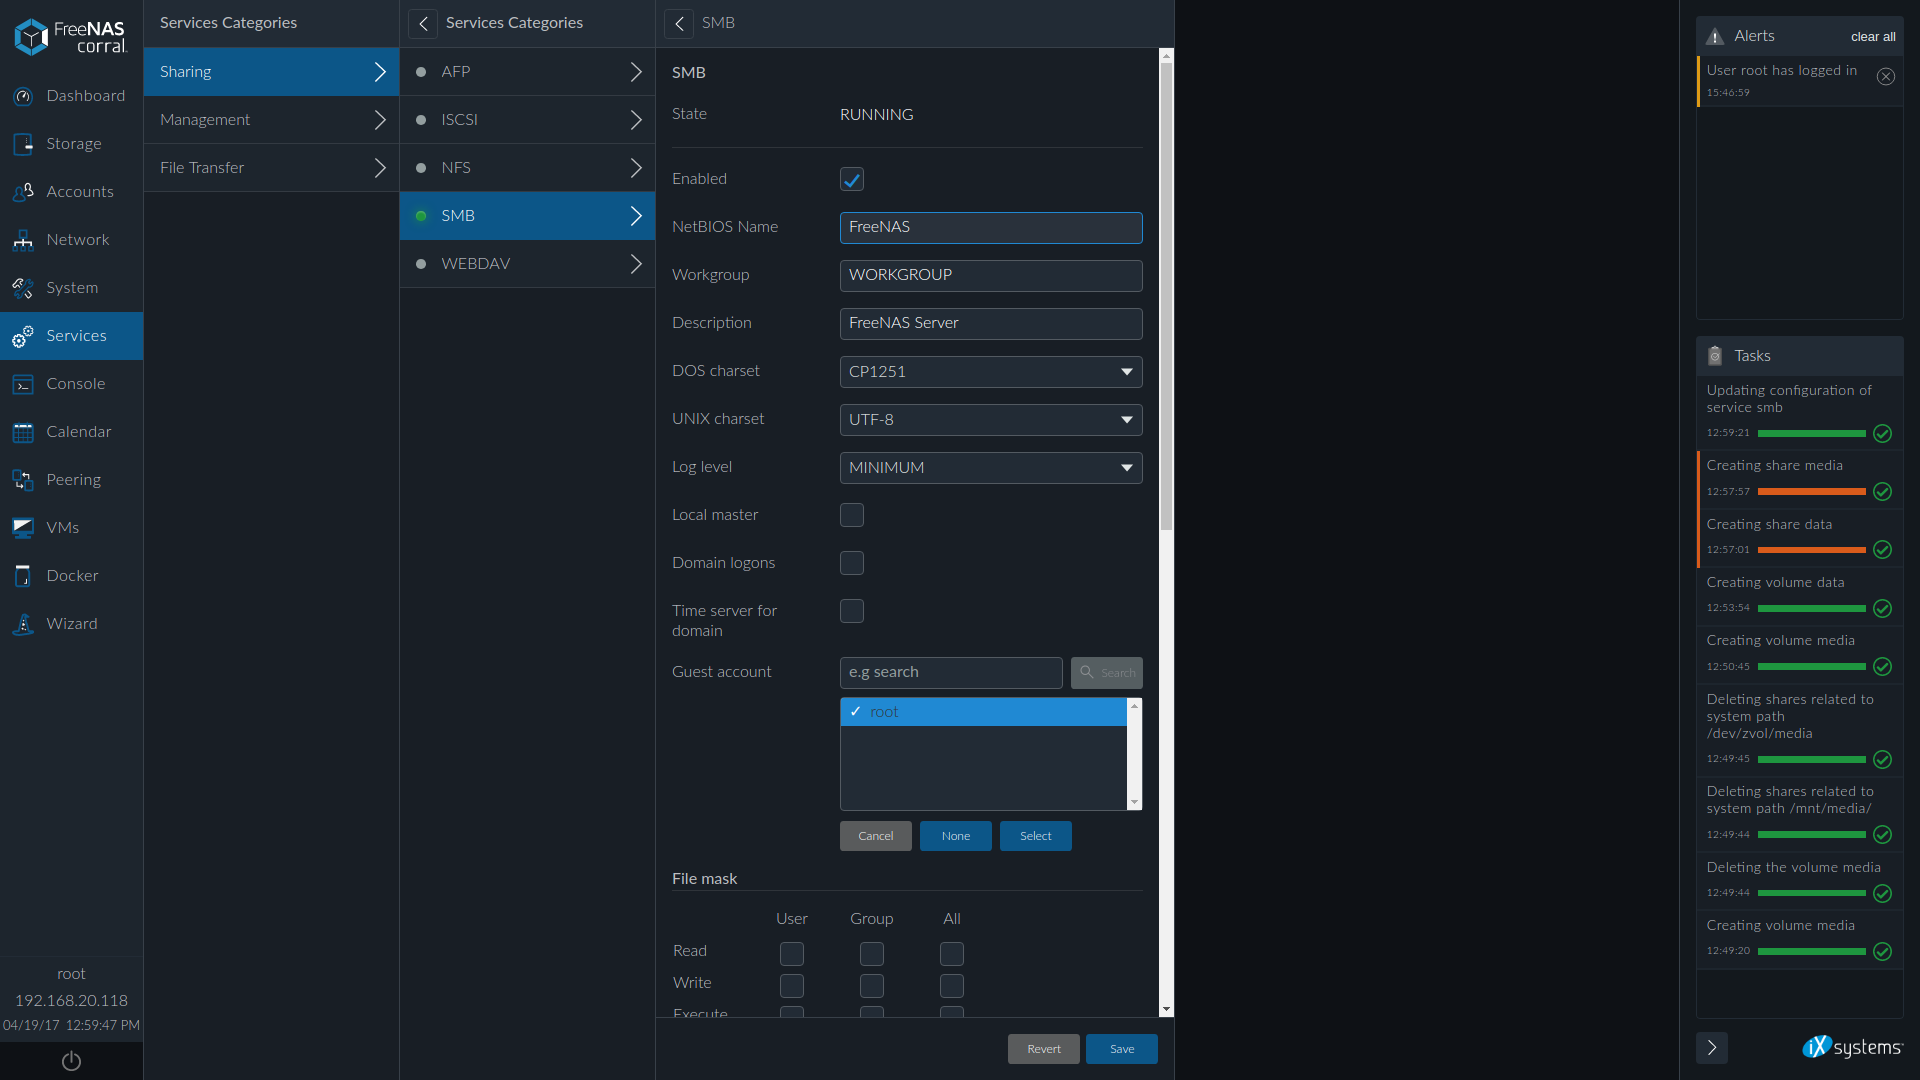
I created SMB balls, noted that I need guest access: I
turned on the SMB service, selected the encoding CP1251 and indicated that the guest account was root (I remind you that this is a home server).


It turned out that FreeNAS with a half kick works even with cheap UPSs, which is good news
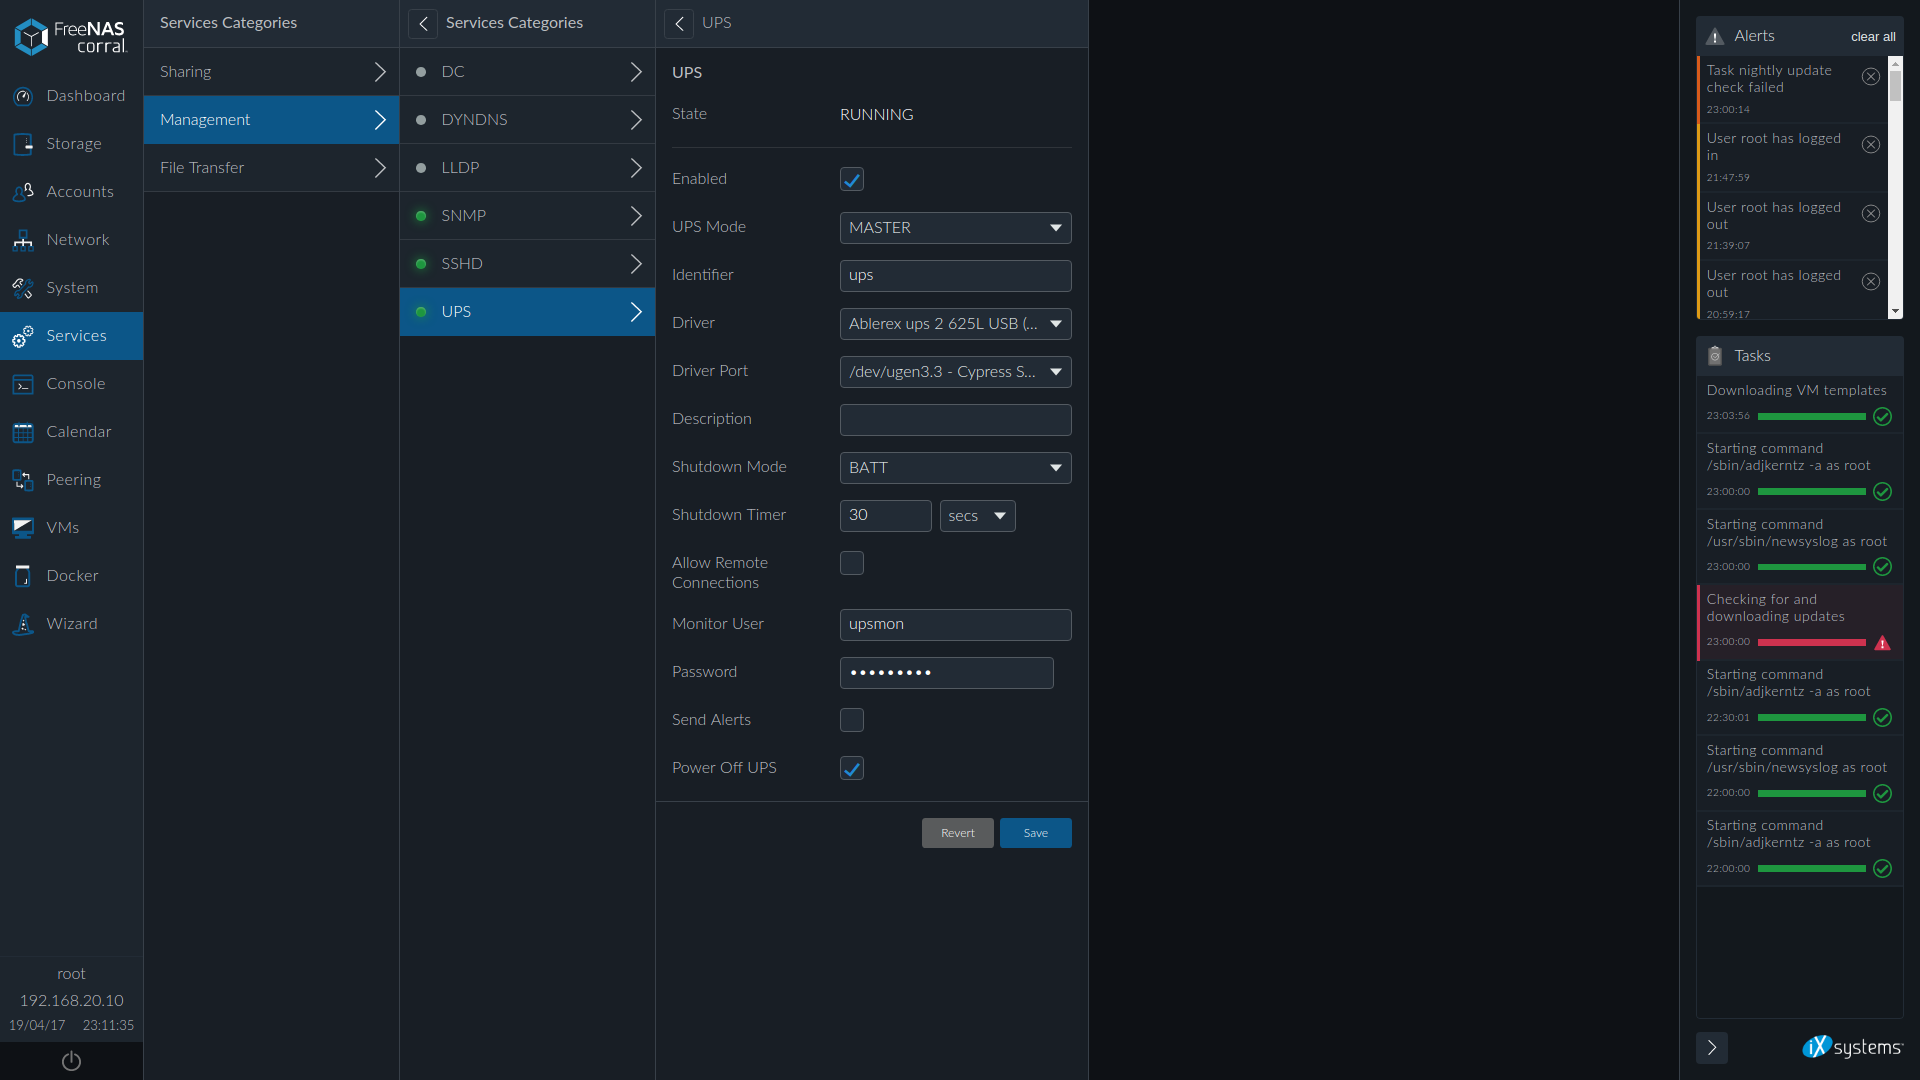
It turned out that FreeNAS with a half kick works even with cheap UPSs, which is good news
Containers
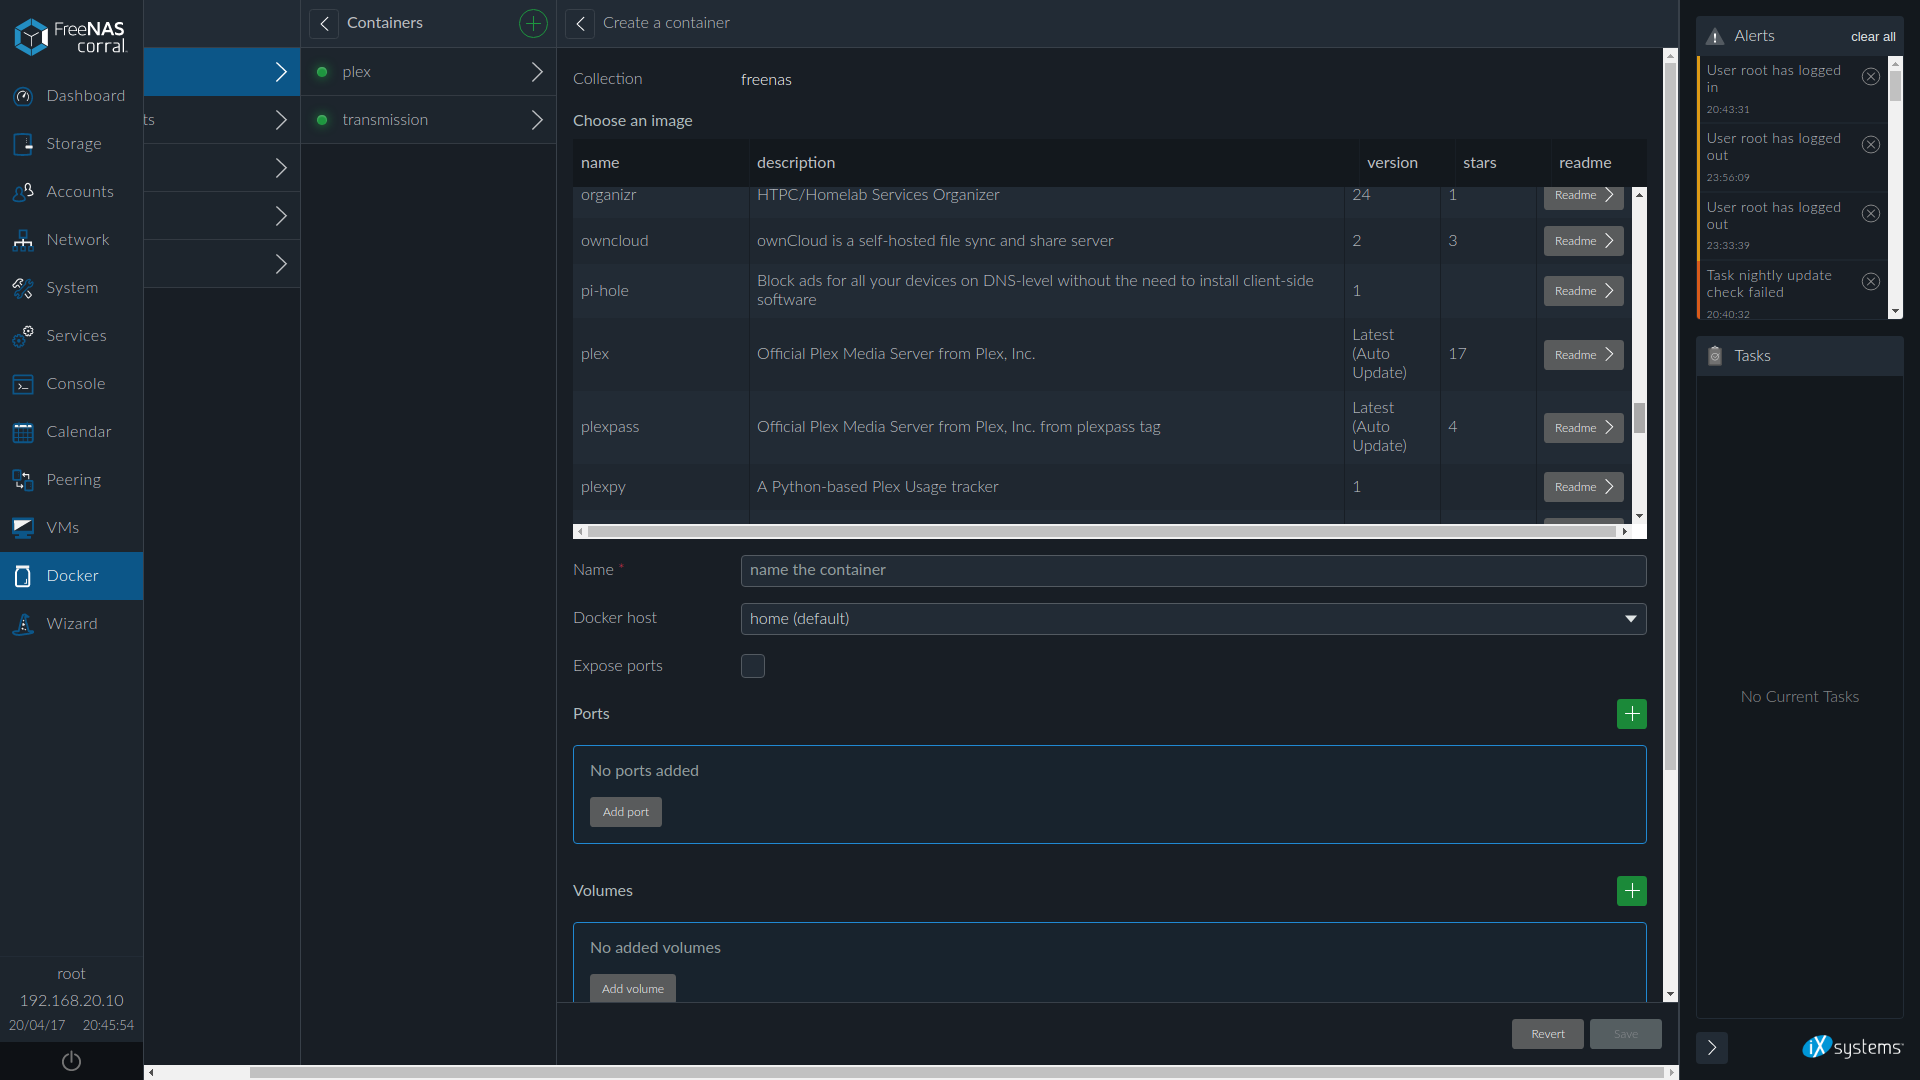
First of all, you need to create a host, I allocated 4 cores to the containers (probably a lot, but since I have one host, let them use it) and 4 Gb of RAM: I
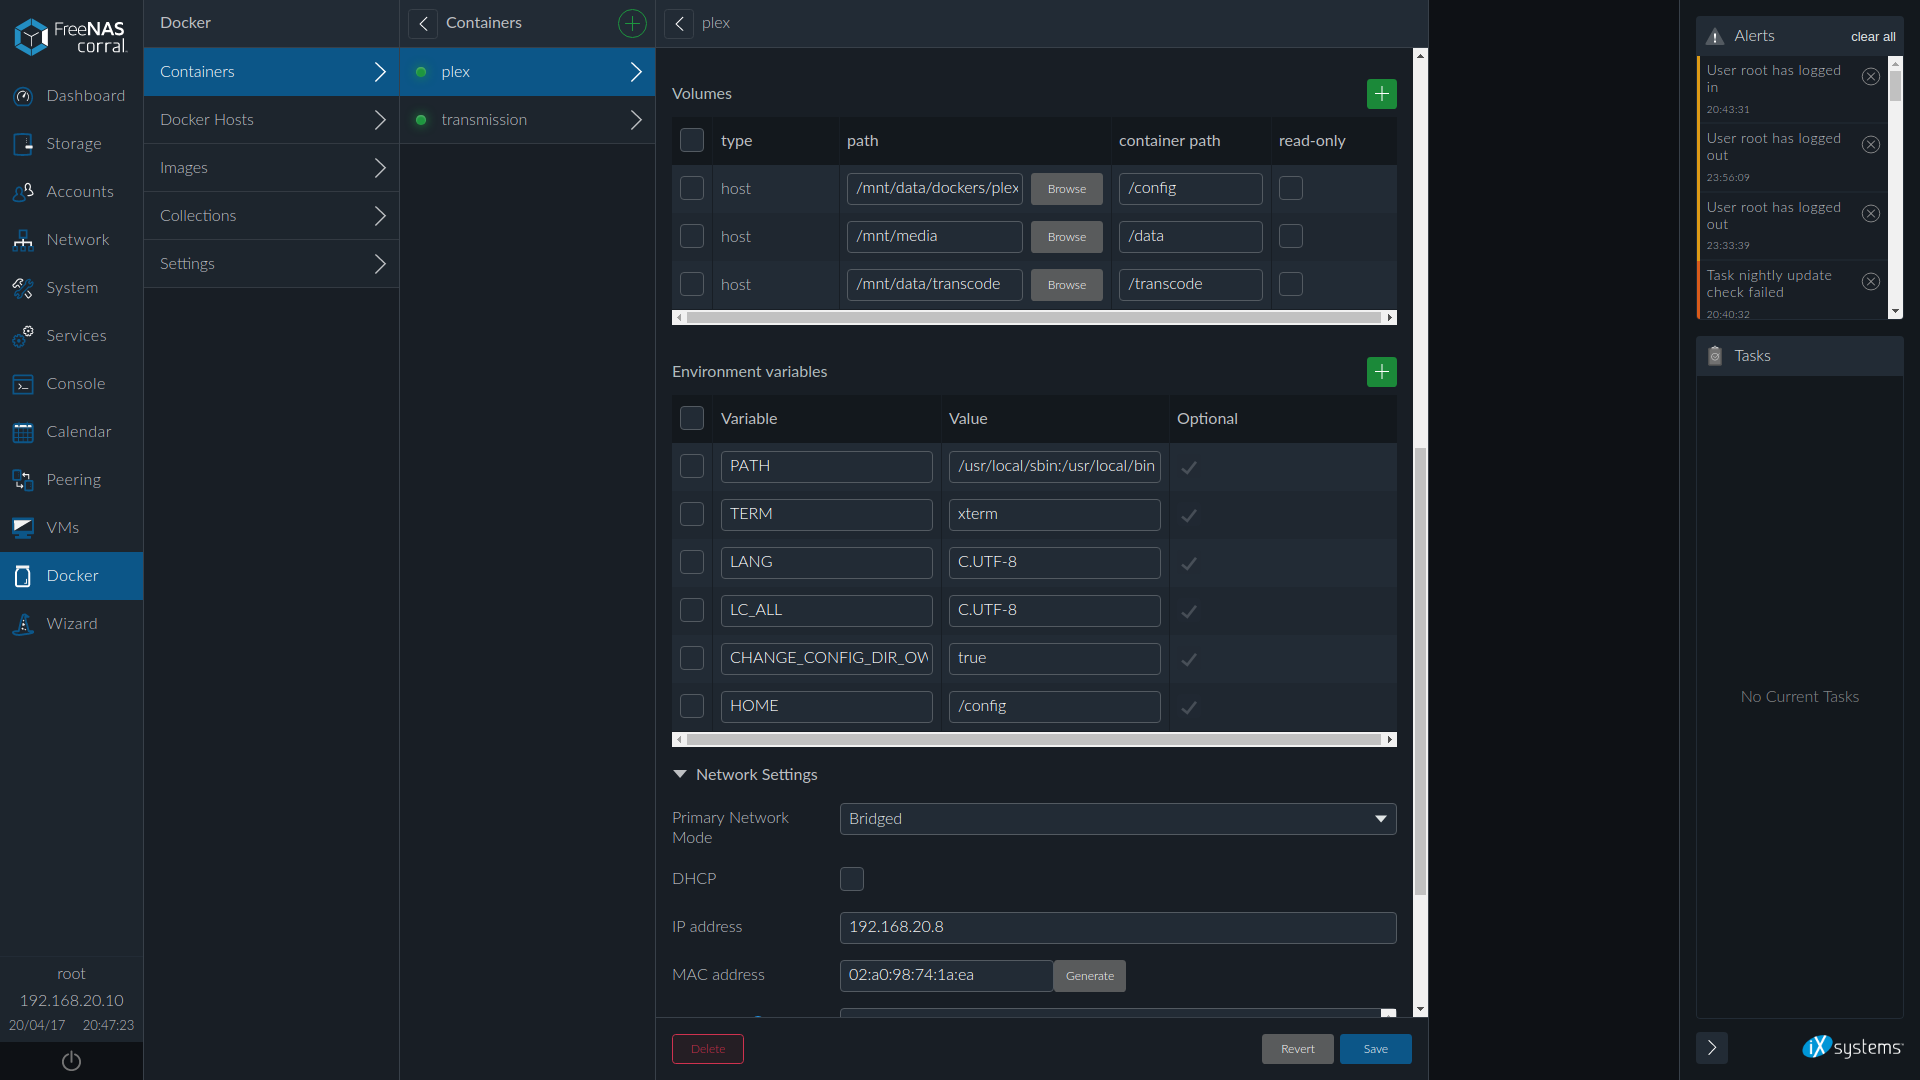
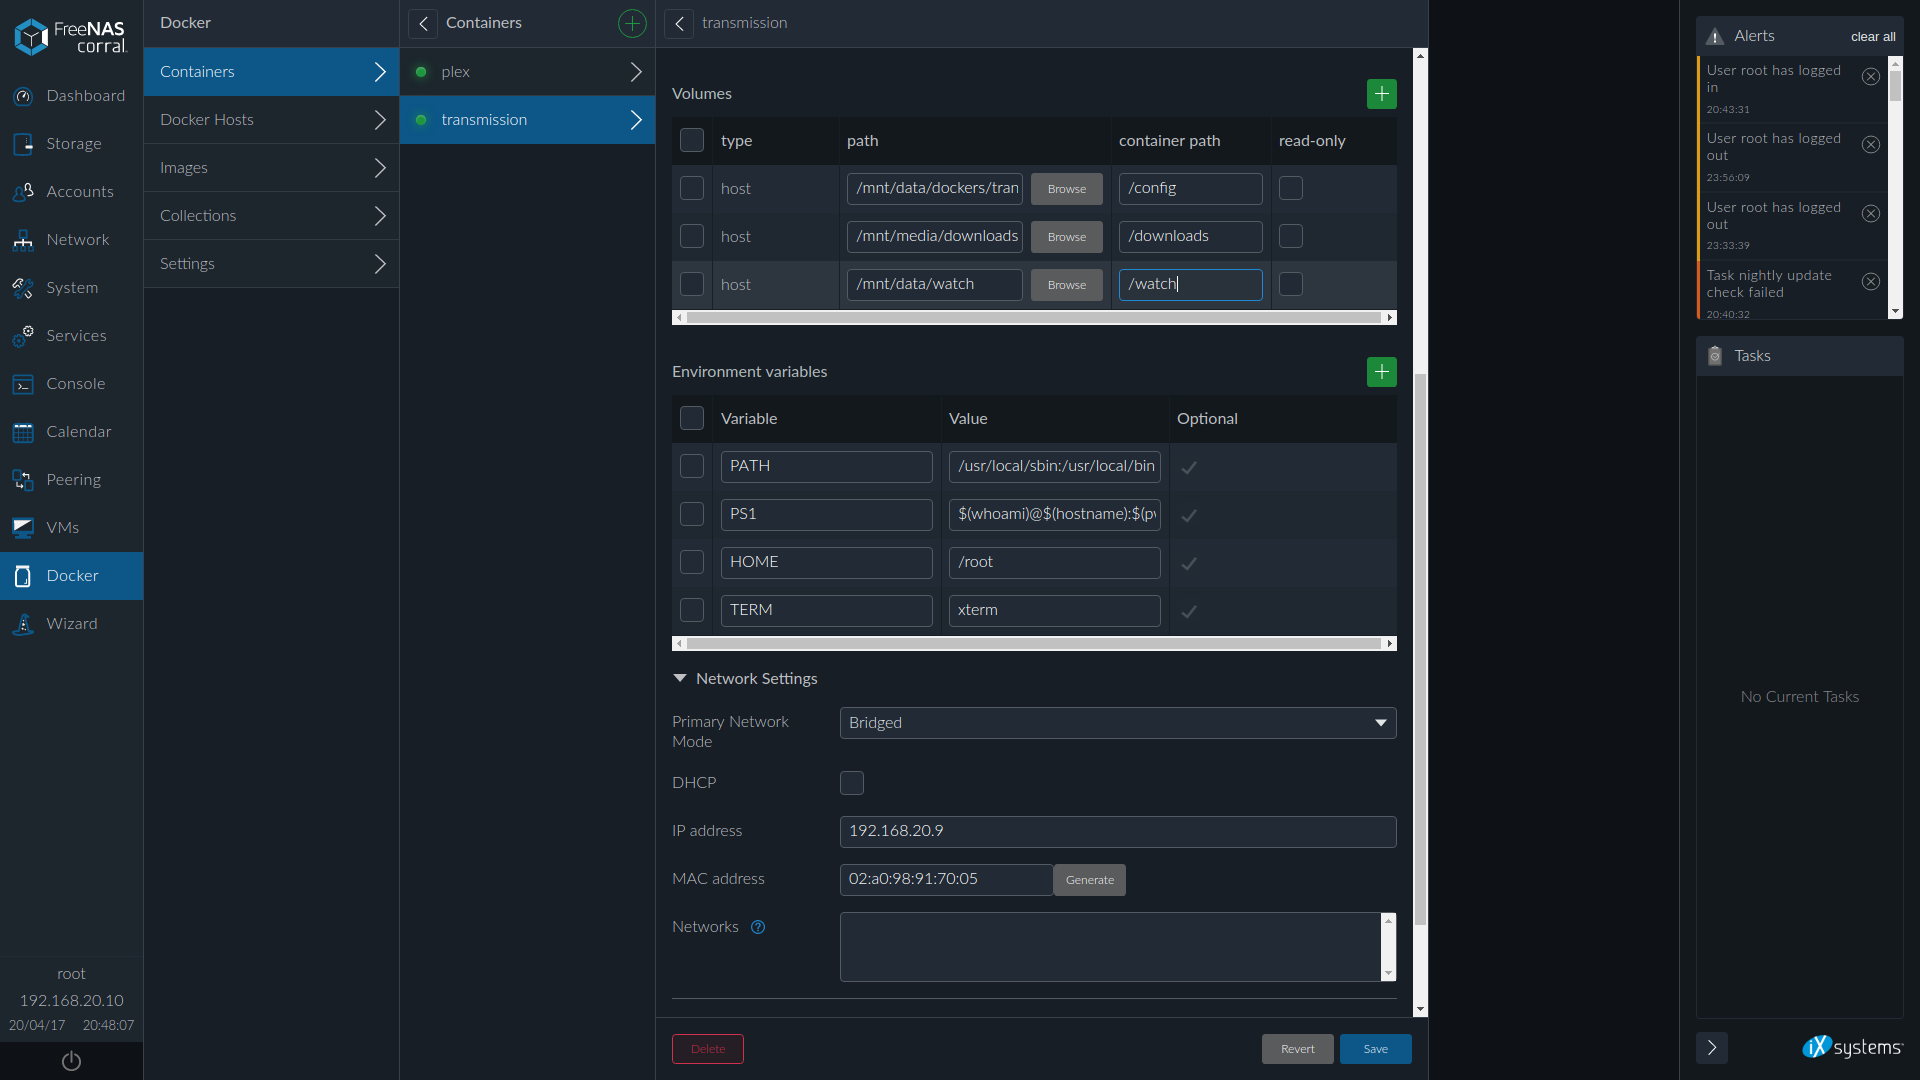
created the Plex_a and Transmission container. I set up volumes and individual addresses for them:
After creating the container, it did not work out right away (there is a special button at the top), although FreeNAS does not give any hints, it still loads something from the network, I saw this from network activity.
After about half an hour it’s already possible to go into the web interfaces of the containers and configure them, I will not paint this anymore.

Result
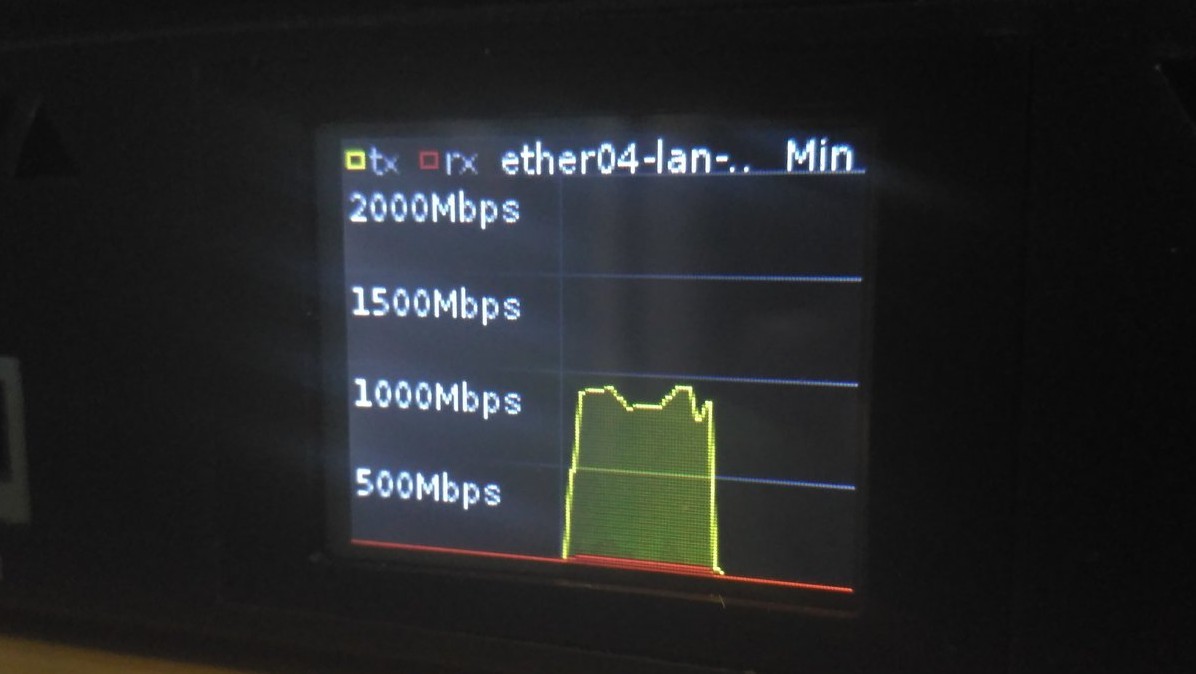
Balls, with a pretty good rate of exchange

Torrent rocking

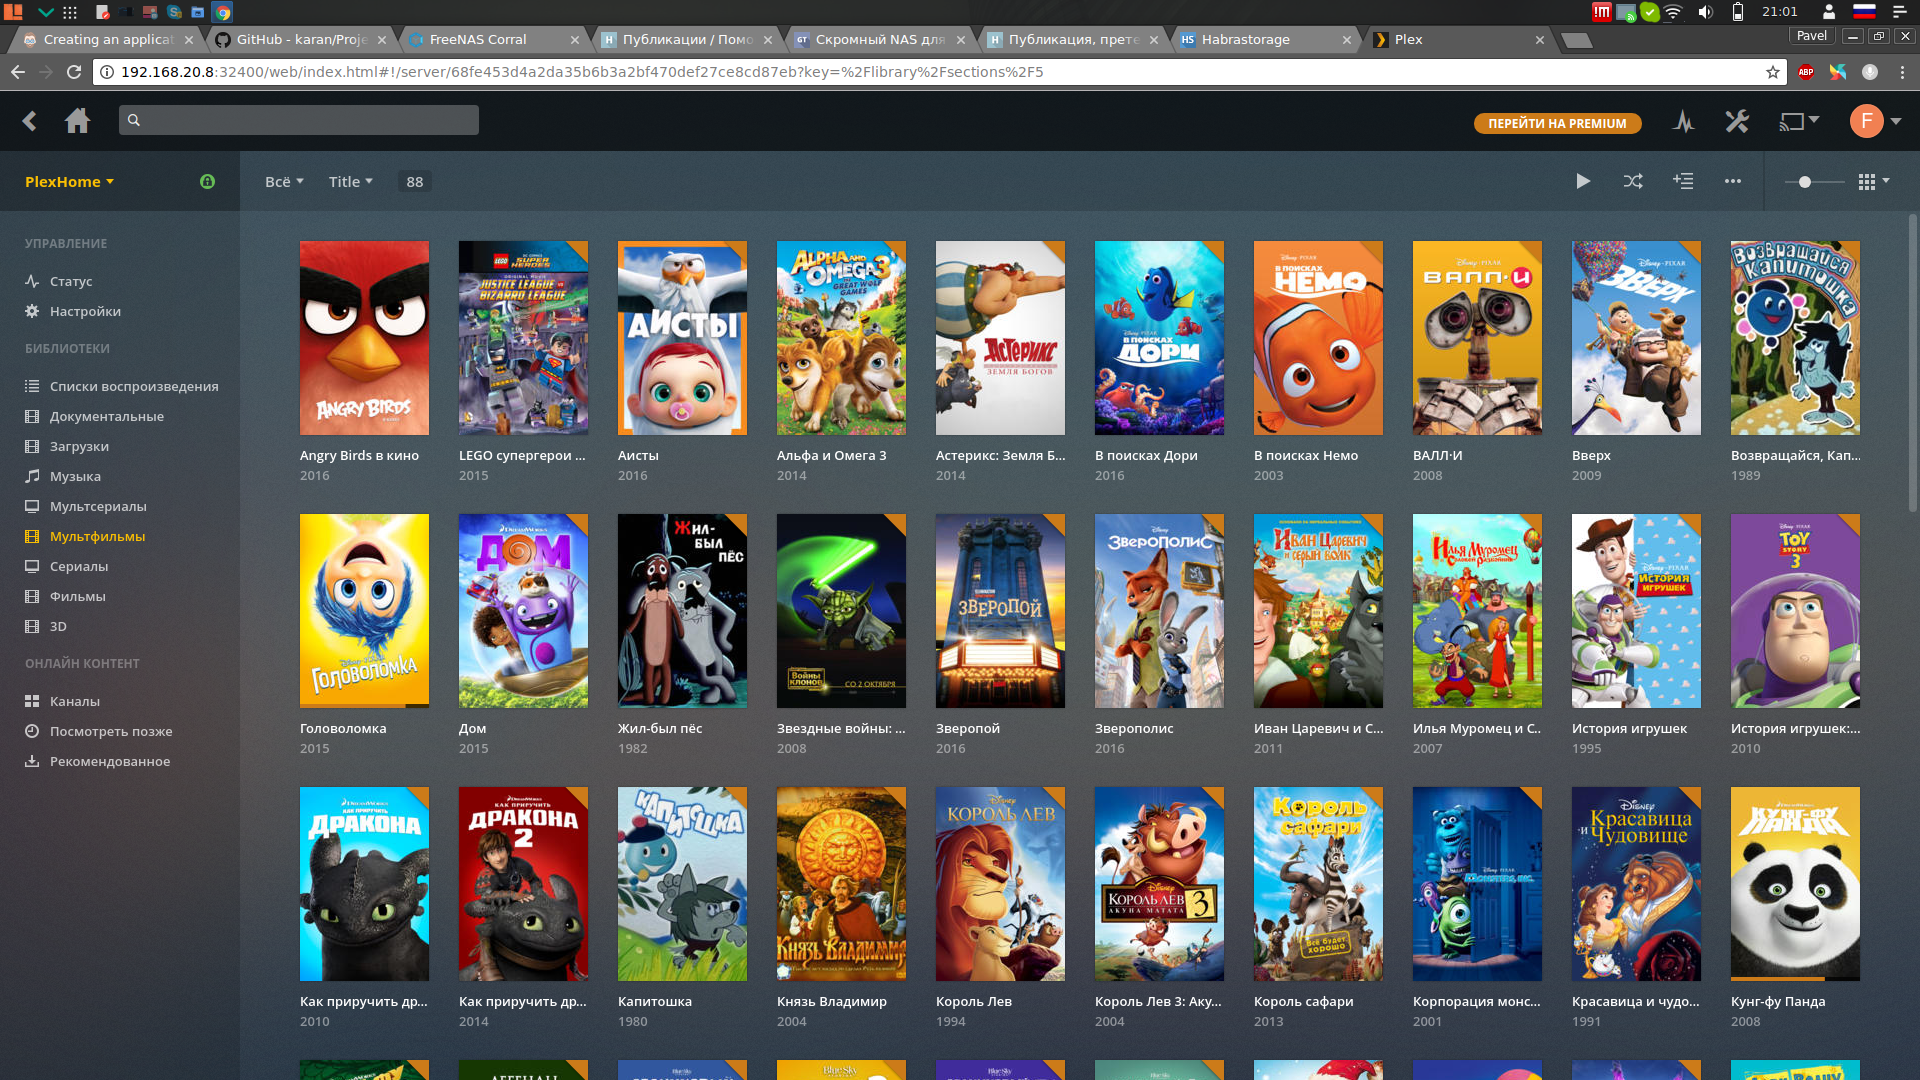
Plex

Torrent rocking
Plex
This is my first experience with FreeNAS, so all comments and additions are welcome.