Indoor Air Quality Monitor
It is wonderful to live on the shore of a mountain lake, in the midst of pristine nature. Only breathe clean, air-filled herbs. But few people succeed. And in the metropolis, at home and in the office you can achieve the highest possible air quality.
To do this, first of all, you need to see and understand what surrounds us? What kind of air do we breathe? We have already become familiar with thermometers, barometers, instruments showing humidity. But these devices do not tell us anything about the quality of the surrounding air. So we will listen to advice that is not always true, guided by rumors, not knowing for sure whether we are doing the right thing.
One of these myths is that the cities have disgusting air, dirty and poisonous. And instead of oxygen, solid exhaust from cars. We take it for granted, and do not try to rectify the situation, even where we are able to do it, in our own home or office. Even those who have small children, or problems with allergies, put their efforts into the blind, without controlling the results.
There are many useful devices that can increase the air quality in our home - humidifiers, ionizers, air washers, fresh air ventilation and filters.
But this is not enough. We need a device that you could directly measure the air quality in your home. What would you understand and obviously how you breathe. Like the temperature on a thermometer.
What can a similar device give?
Many people think that in the metropolis the air is dirty on the street, where cars and factories are. And in the room the air is cleaner. But this is not at all true. Enough to measure. A person exhales 100 times more CO2 than he inhales. And in a hermetically sealed room, especially if several people are present, the air becomes suffocating very quickly. The house has a lot of furniture and decoration materials that emit toxic substances. Dust quickly accumulates in the apartment, which can cause serious harm to your health. Indoor air is 4-8 times dirtier than outdoors, and 8-10 times more toxic. And you can measure it and see if you have the appropriate devices. And to understand how often you should ventilate the room, in any weather.
One of the major air pollutants is dust. The carrier of infections, the favorite medium for tick-saprophytes and a serious allergen - dust pollutes the air most.
In a house where there are allergies, they recommend radical measures: change curtains and drapes for blinds, remove carpets, books, decorative textiles and plush toys. And even upholstered furniture exchange for analogues in leather upholstery. Books, souvenirs, every little thing - to store under glass. And of course, it is important to know that your efforts are not wasted, and the amount of dust in the house is minimal. And this, too, can be measured and seen.
The danger is fraught with home furnishings, furniture, varnishes, paints, particleboard, MDF, some plastics can emit phenols, formaldehydes, etc. It doesn’t matter what price the furniture from particleboard is - anyway, compounds harmful to the body will “fly” into the air.
But this trouble can also be effectively combated, including by airing the premises. You just need to see the enemy in person. Measure and control.
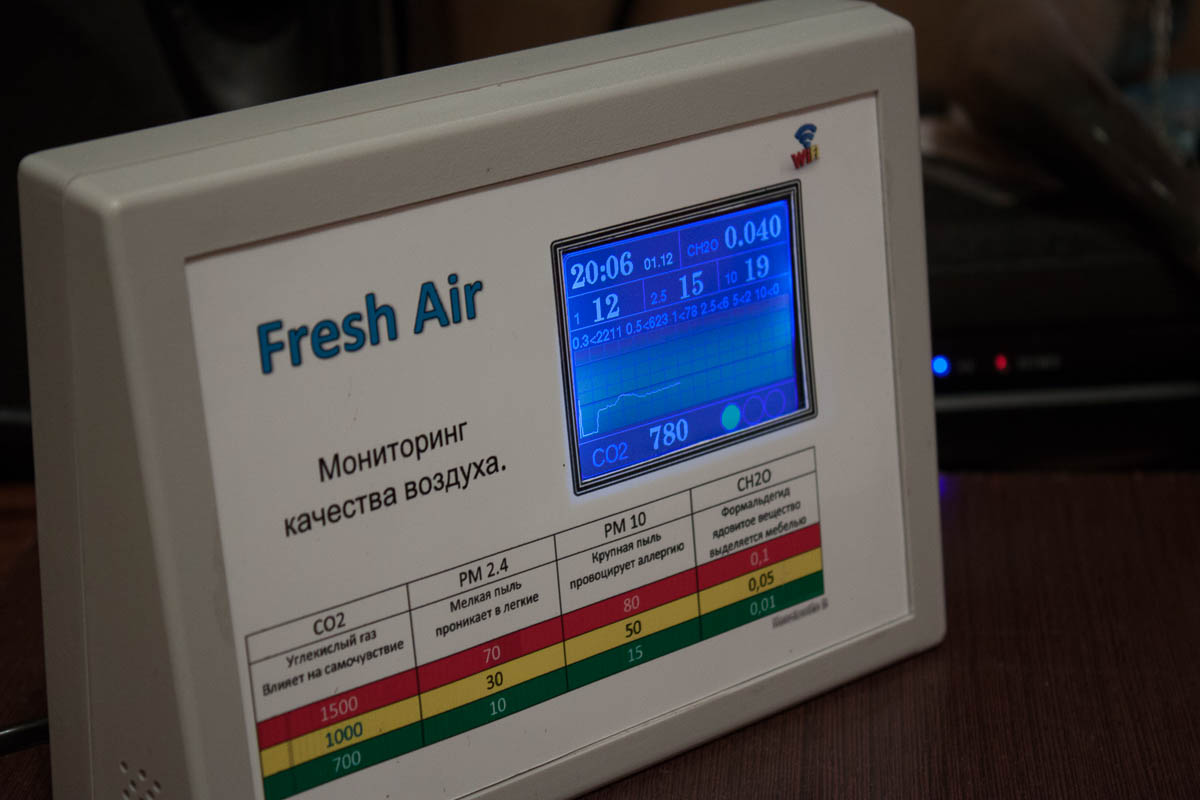
Actually, what I offer is a device for quality control, the main parameters of the surrounding air. which I made for myself. And share with you his design. The device is available for self-assembly, anyone who knows how to hold a soldering iron in their hand.
In the continuation and development of the previous topic of the CO2 sensor , I improved the device and bring to your attention a new version, now integrated monitoring of air quality.
2 more sensors were added to the device. PMS5003 dust sensor and ZE08-CH20 formaldehyde sensor. The device also acquired a DS3231 watch and learned how to make sounds MP3-TF-16P. The temperature and humidity sensor were thrown out. They were of little use. Due to the fact that the filling is heated, the readings of these sensors were very different from reality.
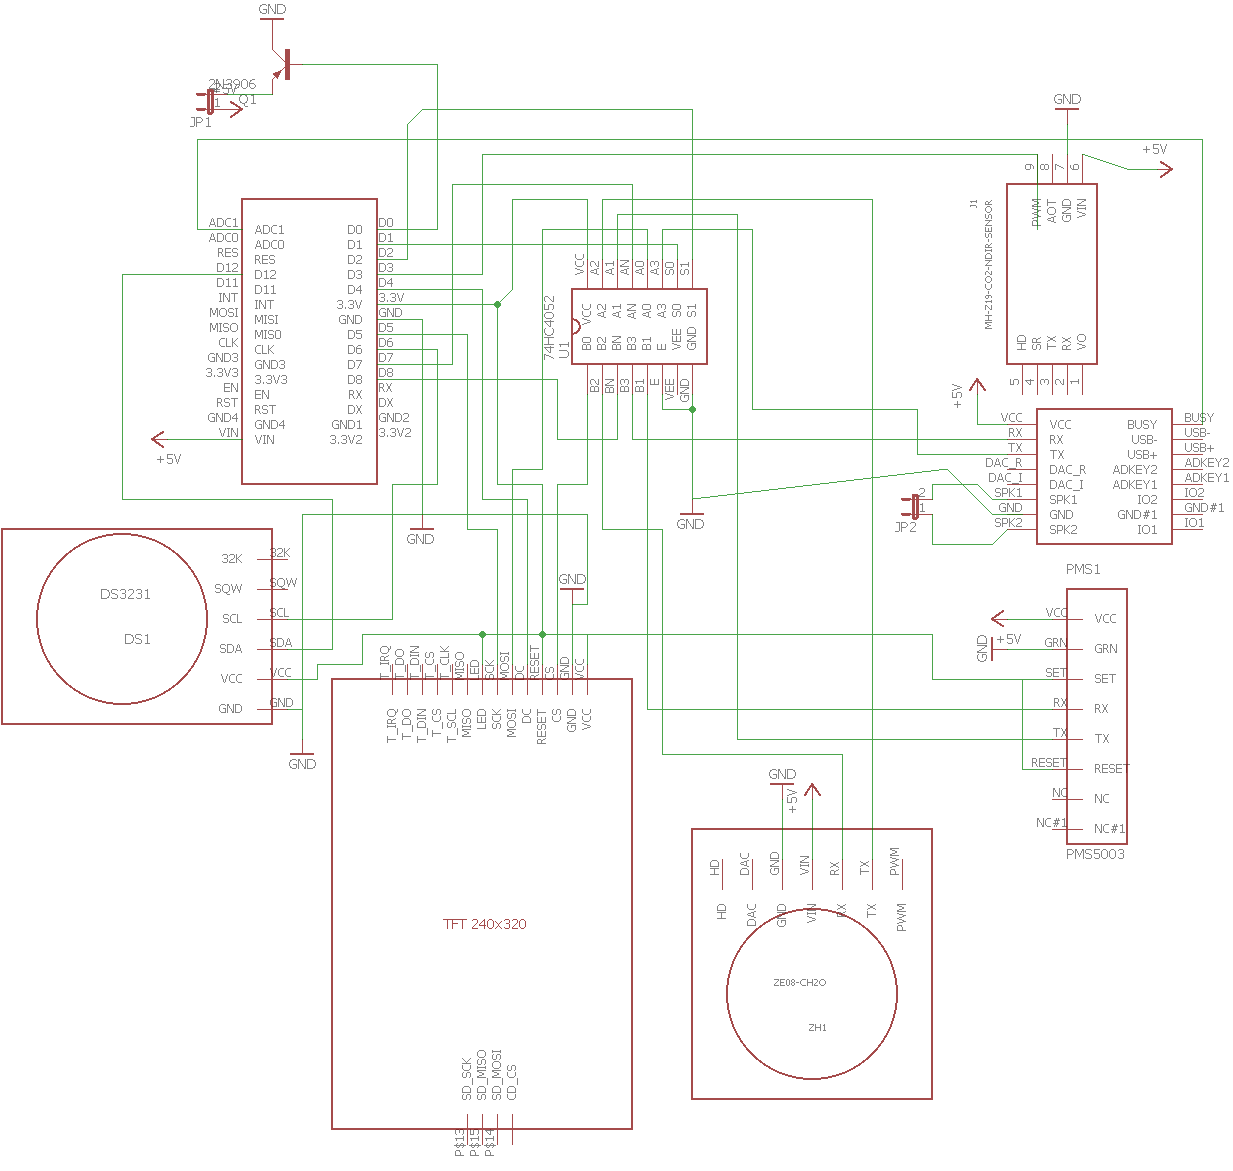
The base of the device is, as before, the ESP8266 dev kit 1 controller and the CO2 sensor MH-Z19. As in the first version of the device, the sensor is connected via PWM. An analog switch 74HC4052 was used to connect the remaining sensors, the screen (all this hangs on the same contacts) and the module emitting sounds. The controller is connected in series to the formaldehyde and dust sensor. After that, it switches to the screen and displays information. If there is a need to make sounds, the controller switches the switch to the sound module.
Dust, formaldehyde and sound module sensors communicate with the controller via UART. At the moment of polling sensors, or playing sounds, the UART controller switches to alternative contacts and at this moment it is impossible to communicate via USB with a computer.
In this model, I used a large 2.8 ”screen with a resolution of 240x320 pixels. With SPI interface based on ILI9341 controller.
There is no control except the power button on the device. Just plug it into a power outlet (a 5v power supply is built in the device) and you can watch the readings.
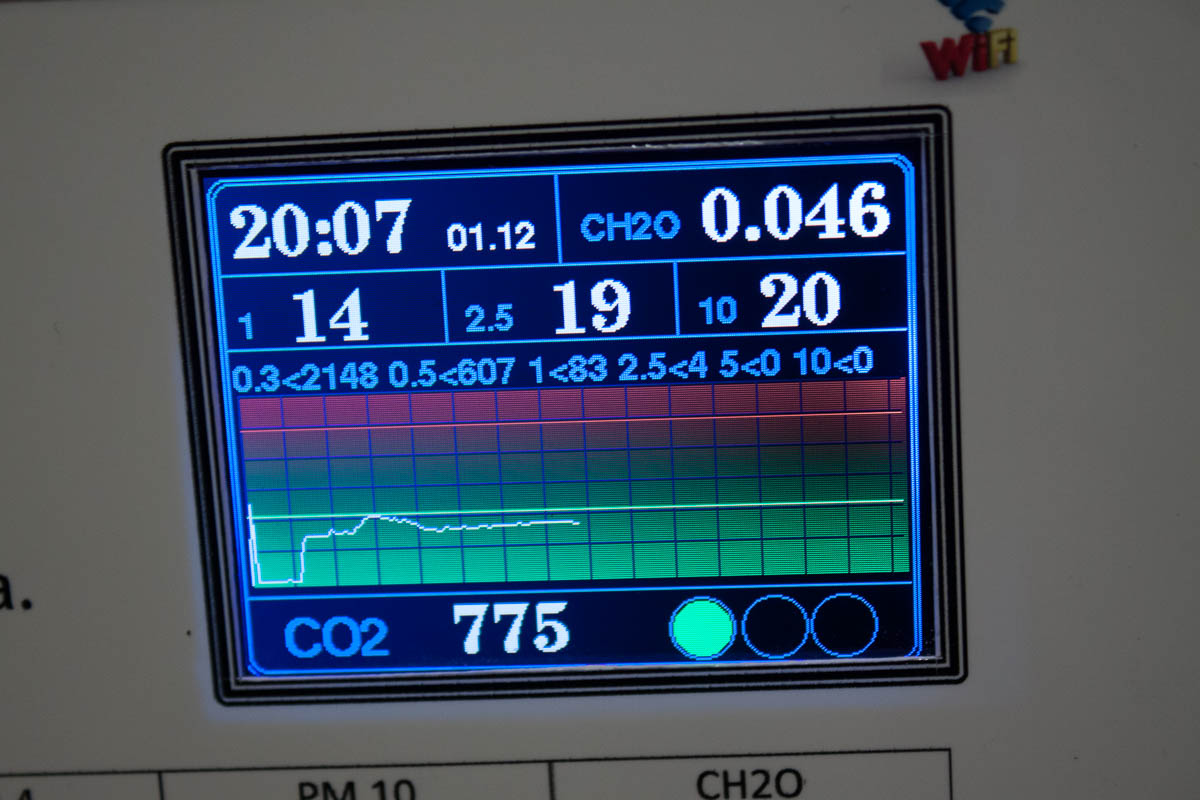
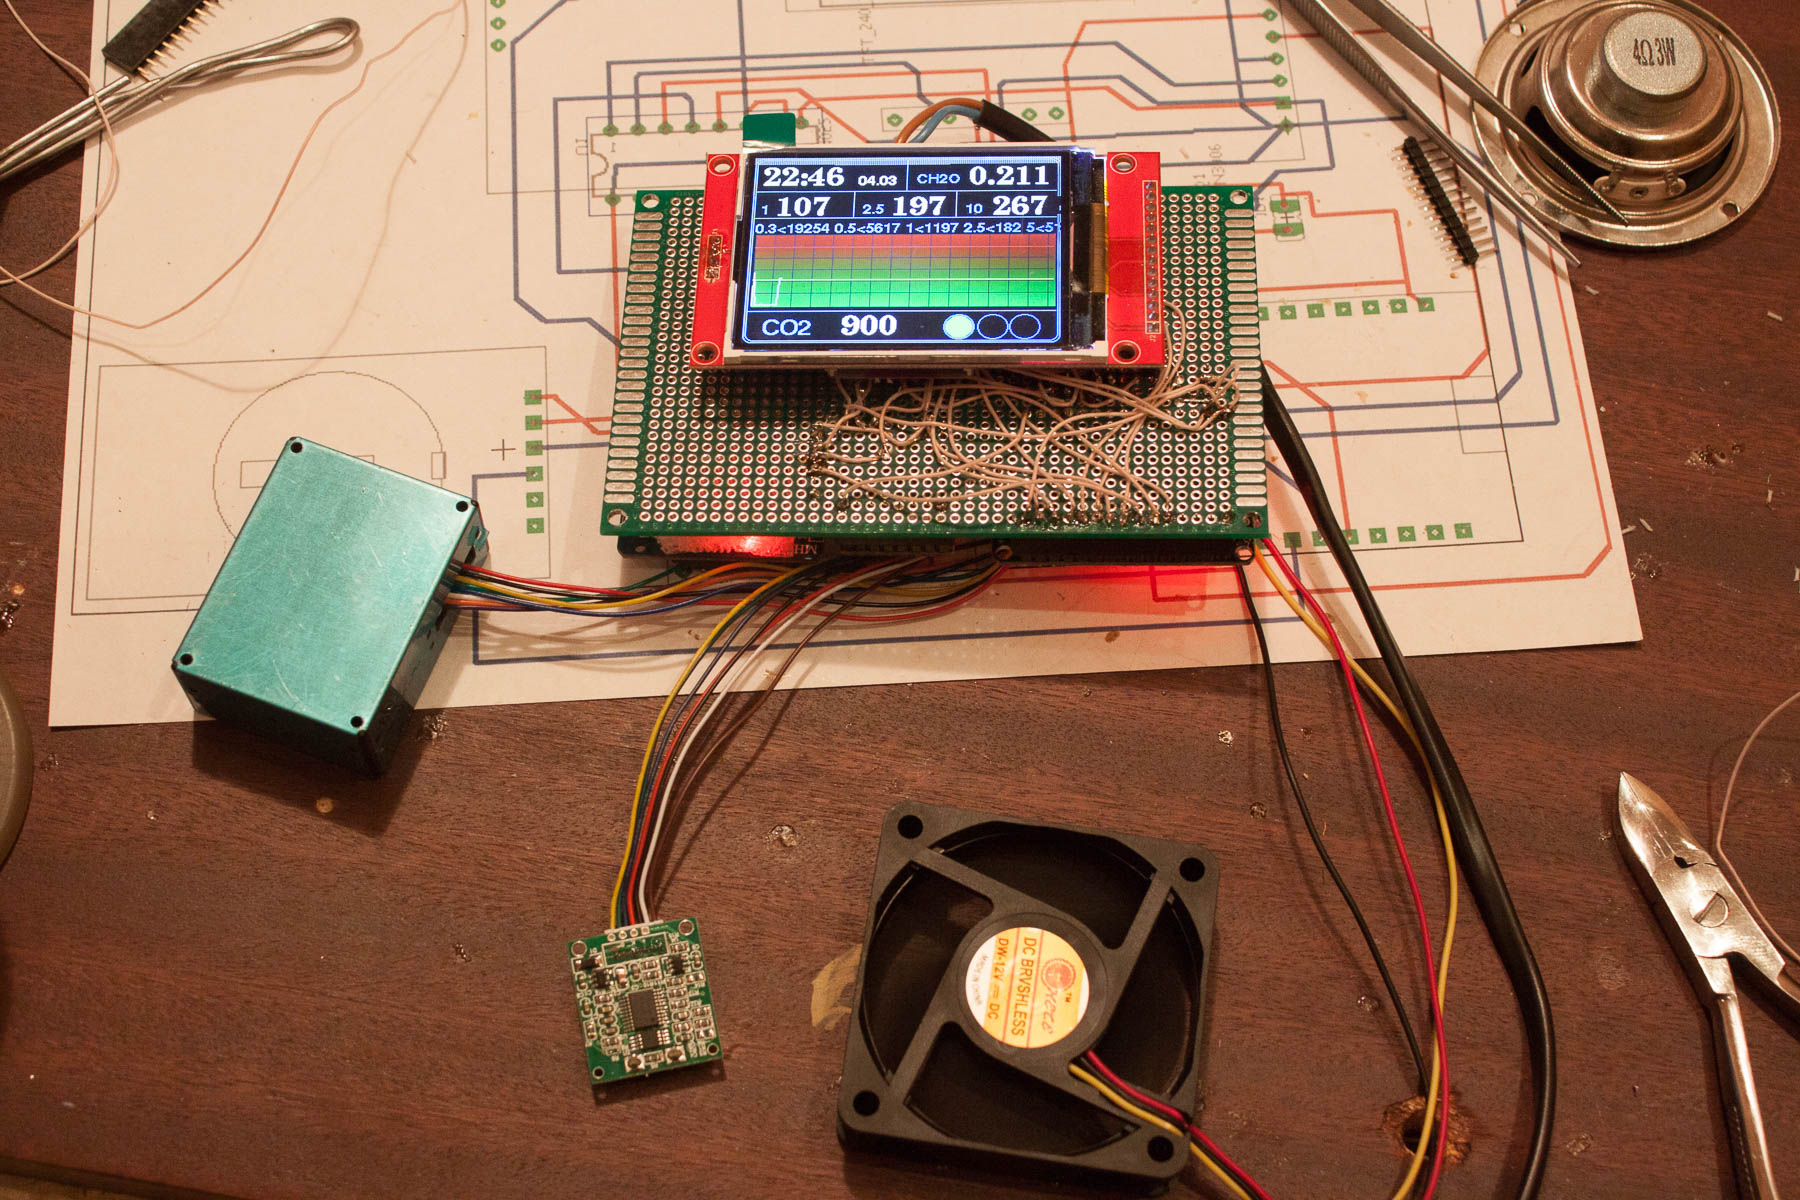
The following information is displayed on the screen: In the upper left corner of the clock with a date and a month. From the right of the clock, the readings of the formaldehyde sensor in µg / mᶟ are displayed. The next row is the dust sensor. There are 3 meanings. The first dust with a diameter of less than 1 μm, further the particles are smaller than 2.5 μm and to the right of the particle up to 10 μm. Values are displayed in µg / mᶟ. A line of small numbers is displayed below the dust sensor. This is for the most curious, the values of the dust particle counter of different fractions are listed here. Data is given - the number of particles per 1 liter of air.
Below is a graph of measurements of carbon dioxide CO2 in the air, in about the last half hour.
At the very bottom is the current CO2 concentration in ppm. On the right is a traffic light signaling the danger or safety of a given concentration of CO2. A green signal indicates that the concentration is less than 900 ppm and good air quality, yellow indicates a stuffy atmosphere and a concentration of 900 to 1500 ppm. A red signal indicates that the concentration of carbon dioxide is above 1500ppm and this is dangerous for health and has a bad effect on well-being.
When the CO2 concentration reaches 900ppm, sneezing is heard from the device. If the level rises above 1500ppm, the device coughs.
On the front side of the device there is a sticker on which what parameters of the device are indicated that indicate and what are the normal, high and dangerous concentrations of gases and dust.
Sensors:
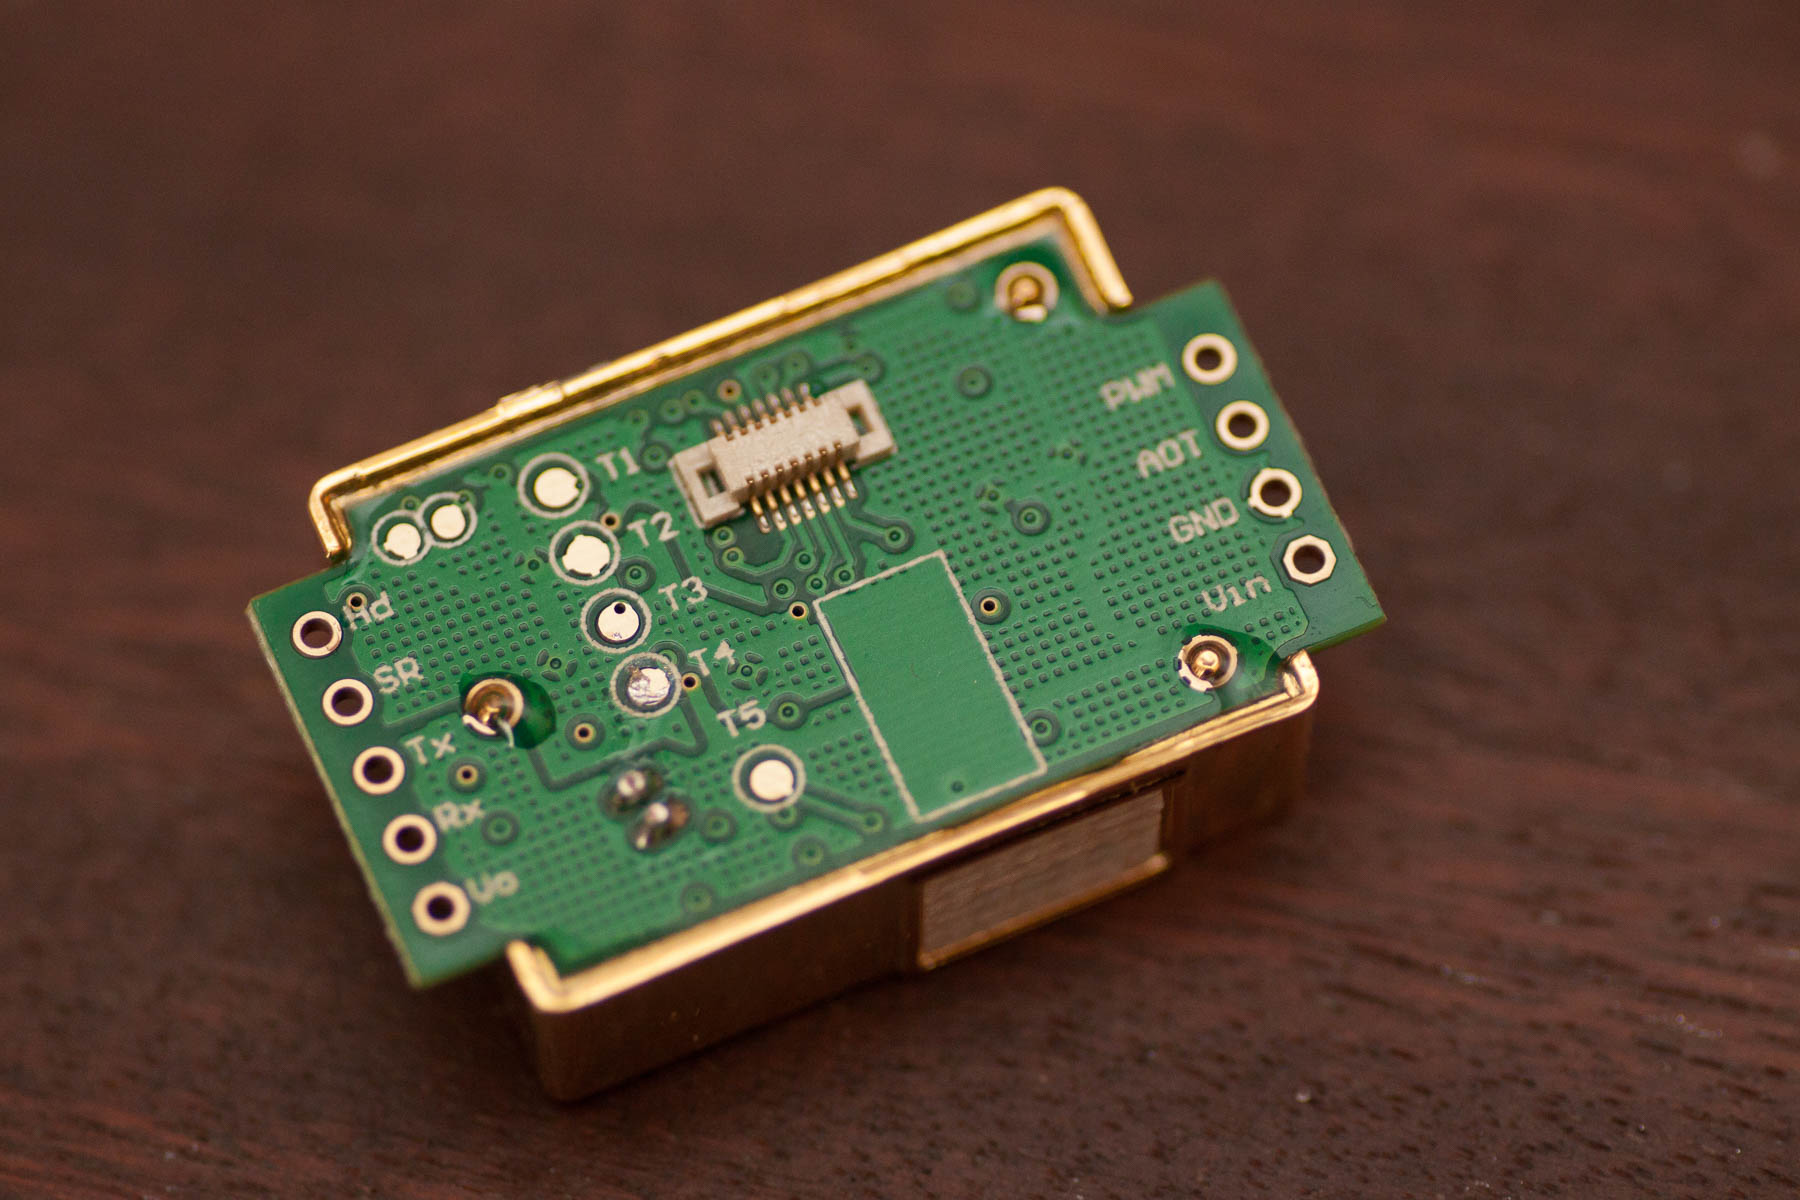
CO2 Sensor MH-Z19 - Non-Dispersive - The infrared sensor (or NDIR sensor) is a simple spectroscopic sensor used as a carbon dioxide detector. The measurement range is up to 5000ppm; the lower limit is about 400ppm (the natural level of CO2 in the atmosphere). Passport accuracy 50ppm. The response time is about 30 seconds. When power is applied, the first minute and a half gives the maximum or minimum readings, then it turns on and gives real data. Information from the sensor is obtained by PWM. At the time of reading, the controller measures the duty cycle of the signal at the output of the sensor and, according to the formula, converts it into a CO2 level.
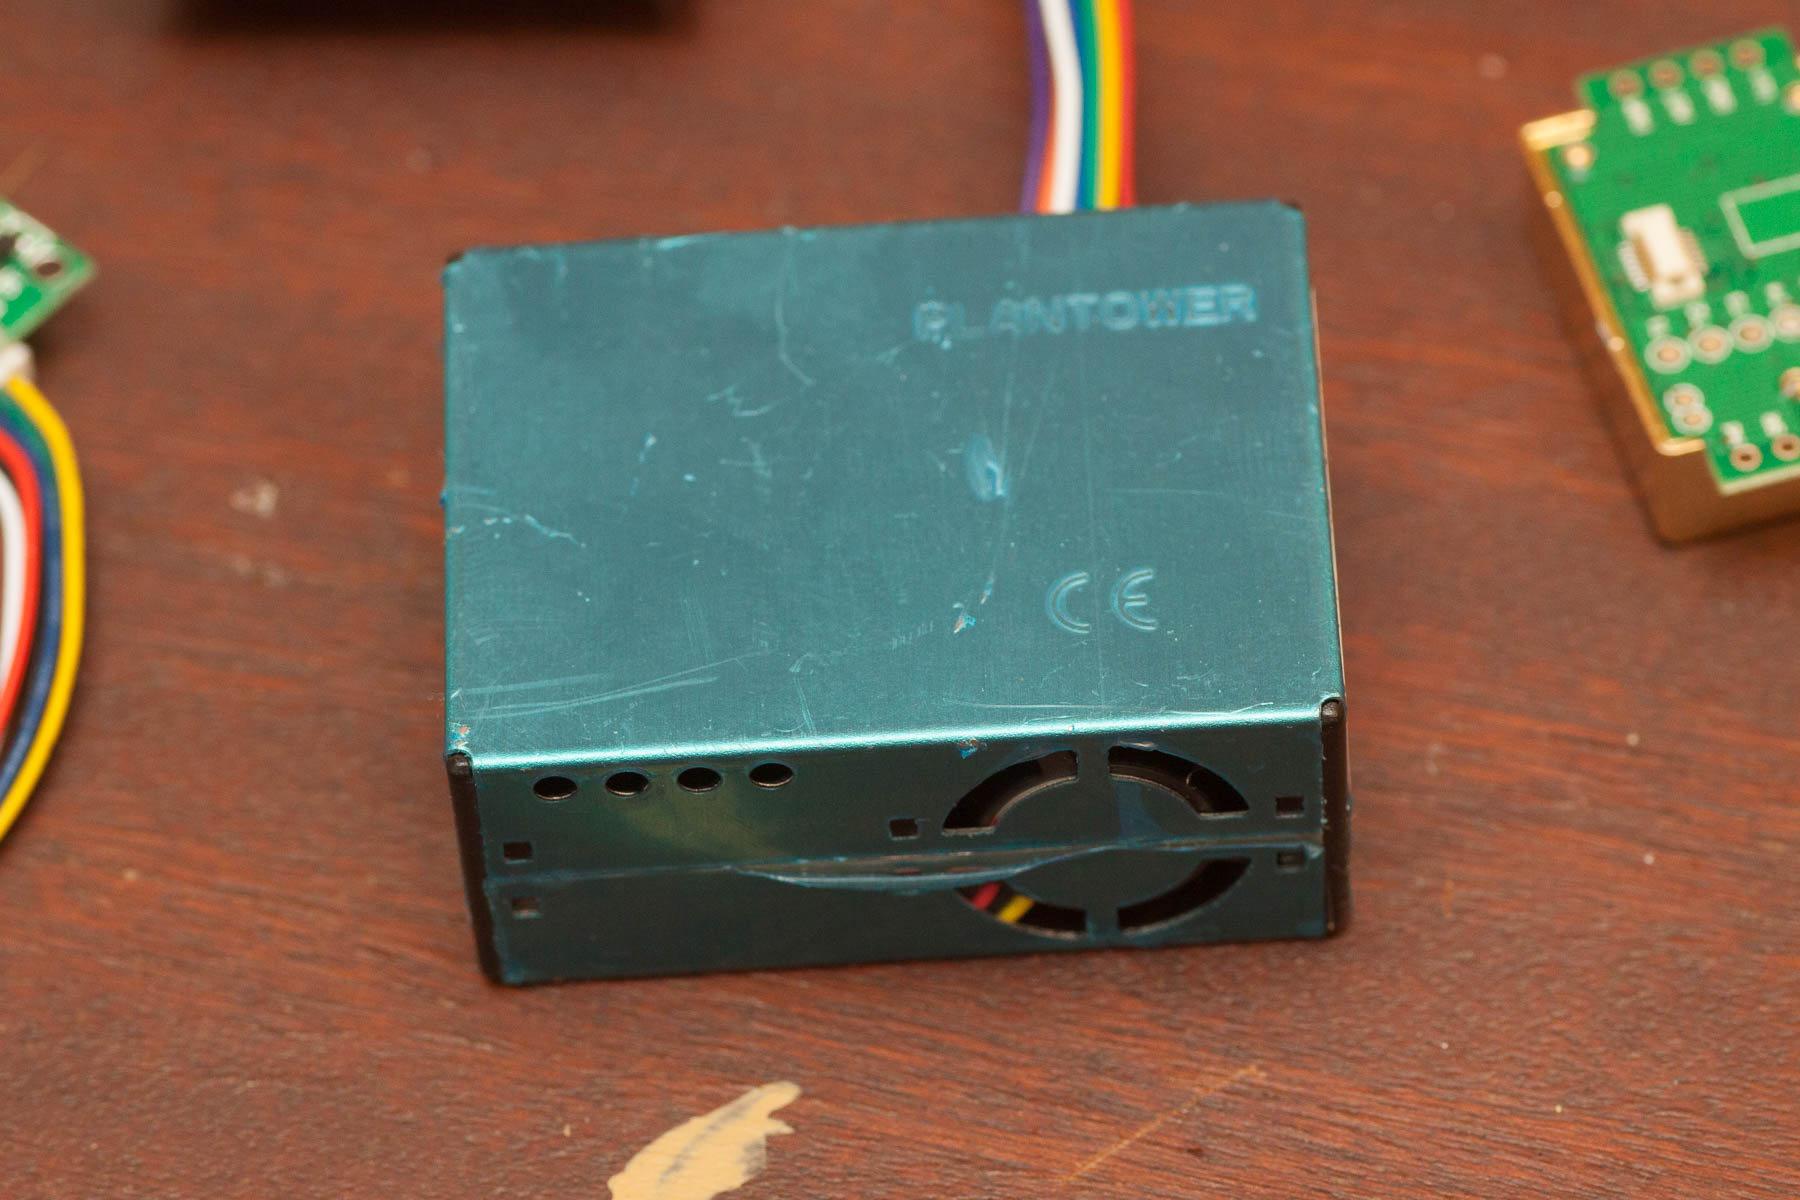
Dust sensor PMS5003. NDIR dust sensor measuring the concentration of dust divided into 3 fractions 1, 2.5 and 10 microns separately. It also has a dust particle counter divided into 6 fractions. Accuracy stated 10%. The sensor is used in active mode. This means that he automatically sends information to the UART at set intervals. When it is necessary to obtain information from the sensor, the controller connects to it by means of the switch and expects the next sending of data.
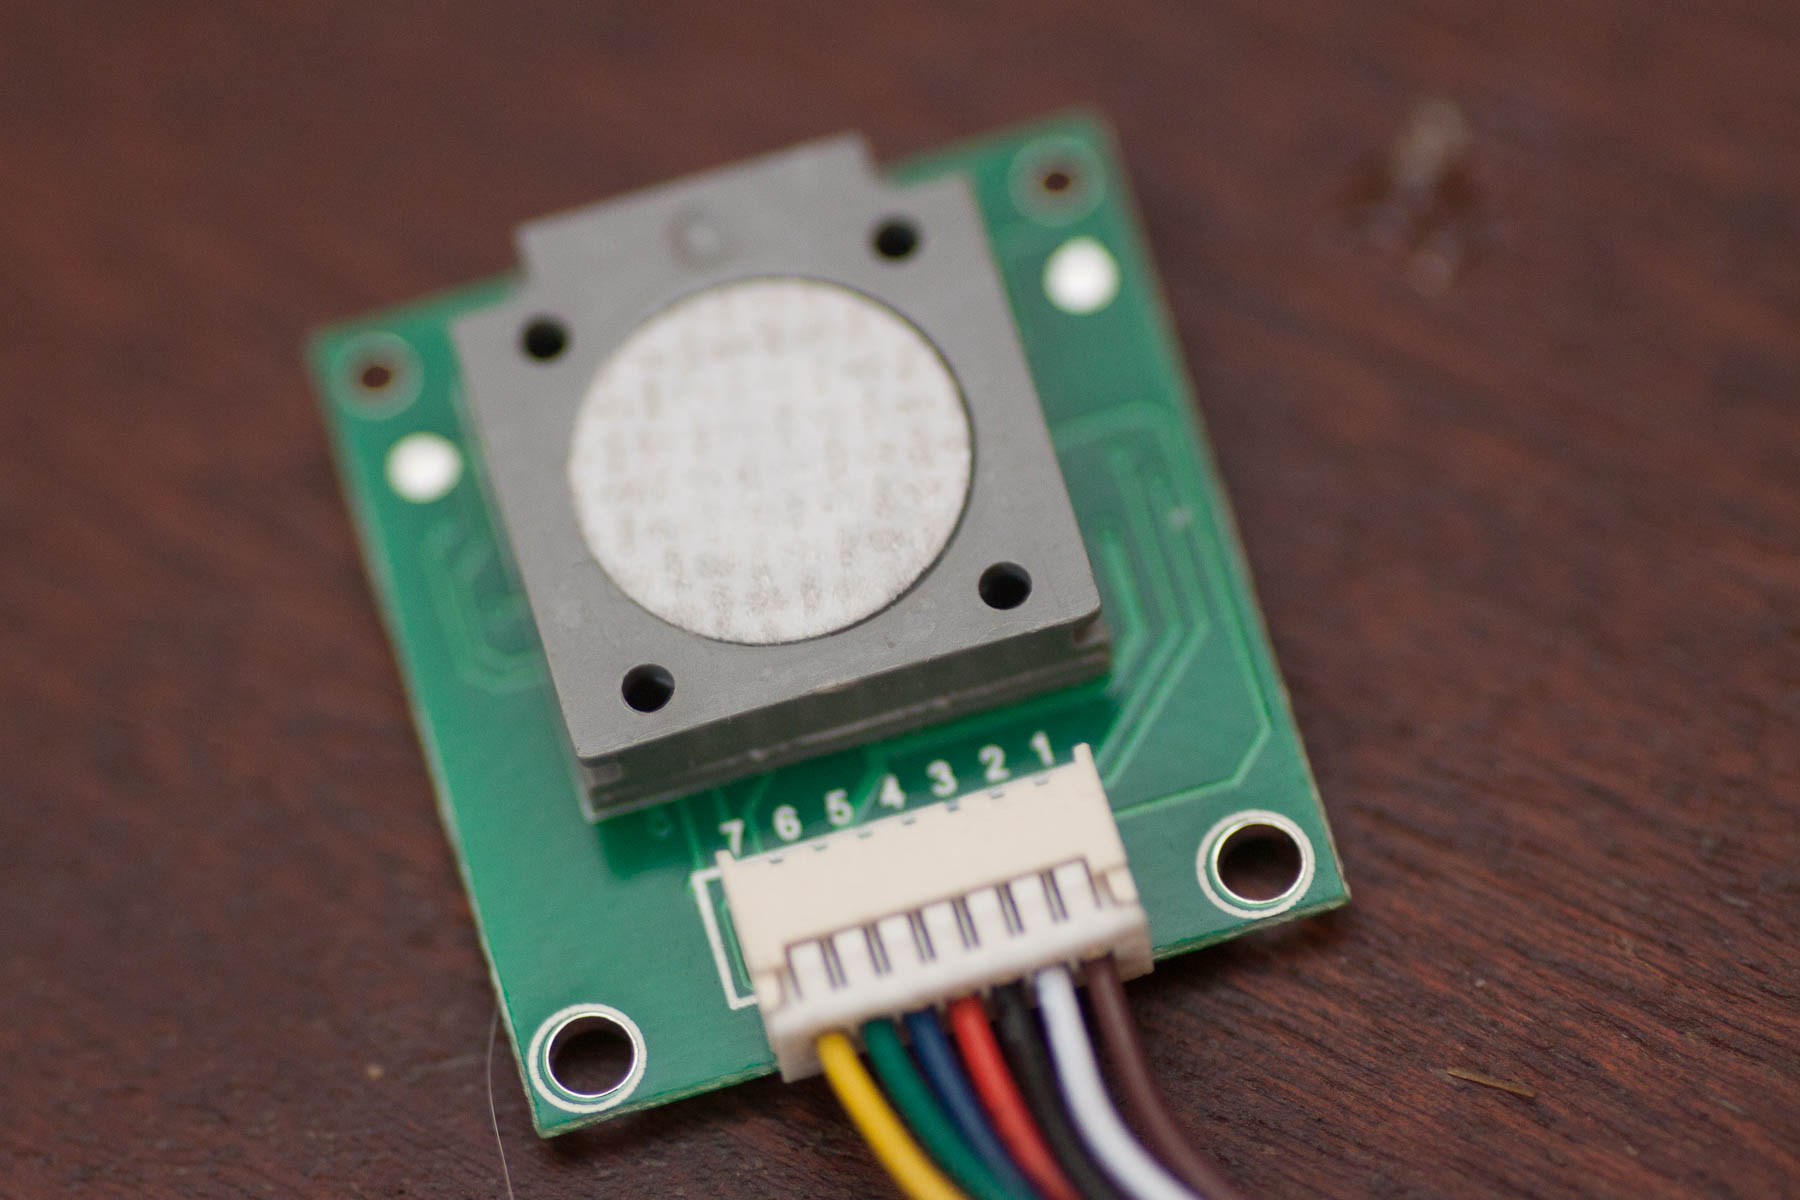
ZE08-CH2O formaldehyde sensor Thermostatic electrochemical sensor. This sensor is also used in active mode. It independently sends data to the UART every second, and when the controller switches the switch to it, data is read.
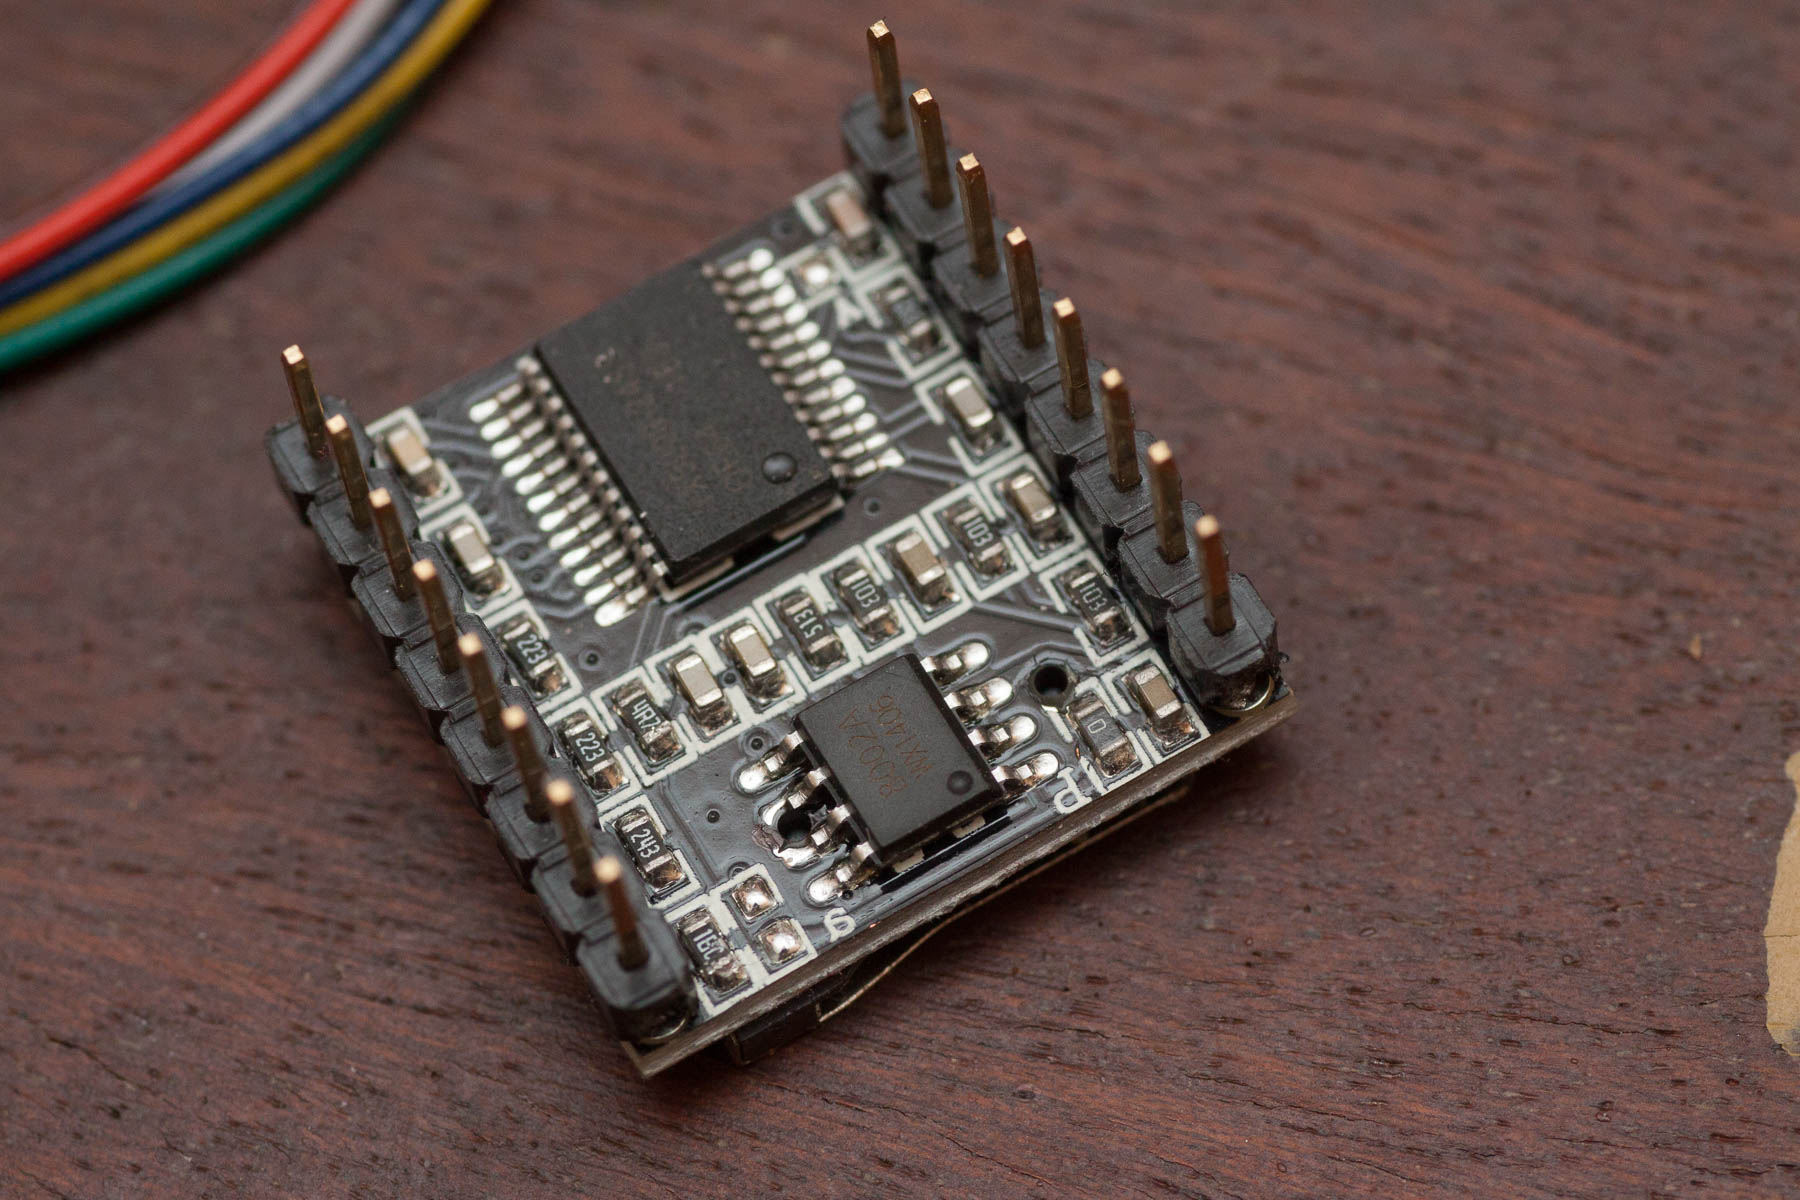
To extract various sounds and sound alarms about the air condition, a miniature mp3 player controlled by UART is used - MP3-TF-16P. This board has a micro SD card reader on board, onto which audio files are recorded in mp3 format. There is also a power amplifier and an 8th speaker can be connected. The selection and playback of files recorded on the sd card is controlled by UART from the device controller. The program has built-in protection against alerts at night. After 22:00 and until 8:00 a sound signal does not sound.
To display the time and date on the screen, the DS3231 clock module is used, which works according to the I2C protocol. Claimed accuracy 2 minutes per year.
An analog switch 74HC4052 is used to switch the ESP8266 main controller between the sensors, the screen and the sound module. This is a dual 4-line switch. ESP8266 uses the D9, D10 pins for UART, but we cannot use these pins, since they are connected to the USB adapter built into the controller board. Fortunately, it is possible to switch the UART outputs to alternative contacts D7, D8. But these same contacts are used by the ISP bus through which the controller is connected to the display. In order to deal with this zoo, a switch is used. It has 2 entrances and 4 exits. At one point, each input can be connected to one of 4 outputs. A sensor, or display, or sound module is connected to each output. By control pins, the controller selects which device to connect to at the moment.
The device also uses a fan that blows air through the closed case, so that the sensors adequately respond to atmospheric changes around the device. The speed of the fan is controlled by the controller, because if you do not reduce it, the fan is buzzing too much.
The total cycle of polling sensors and displaying information on the screen is 5 seconds.
Device diagram:
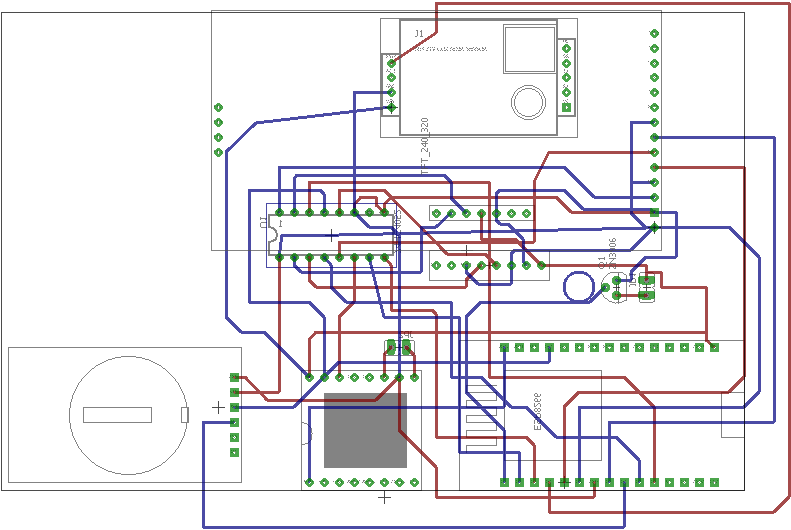
Circuit board:
→ Firmware file
→ Script file:
→ Here is a step-by-step instruction on how to assemble the device
→ Here is the firmware manual
