Create a game for WebGL using Unity 5 and JavaScript
- Transfer
- Tutorial

Unity is a cross-platform game engine that allows you to create games for PCs, consoles, mobile devices and websites. The latest version of the engine (Unity 5) has the ability to export to WebGL , so developers can easily publish their games on the web. As the name implies, this exporter uses WebGL - the JavaScript API for rendering interactive computer 3D graphics, as well as asm.js - a subset of JavaScript developed by Mozilla and portrayed as "assembly language for the web." More information about Asm.js and WebGL for Unity and Unreal Engine is available here .
In this lesson I want to show how to configure work with Unity. I’ll also demonstrate how to create a simple Unity game using JavaScript and export it to the web.
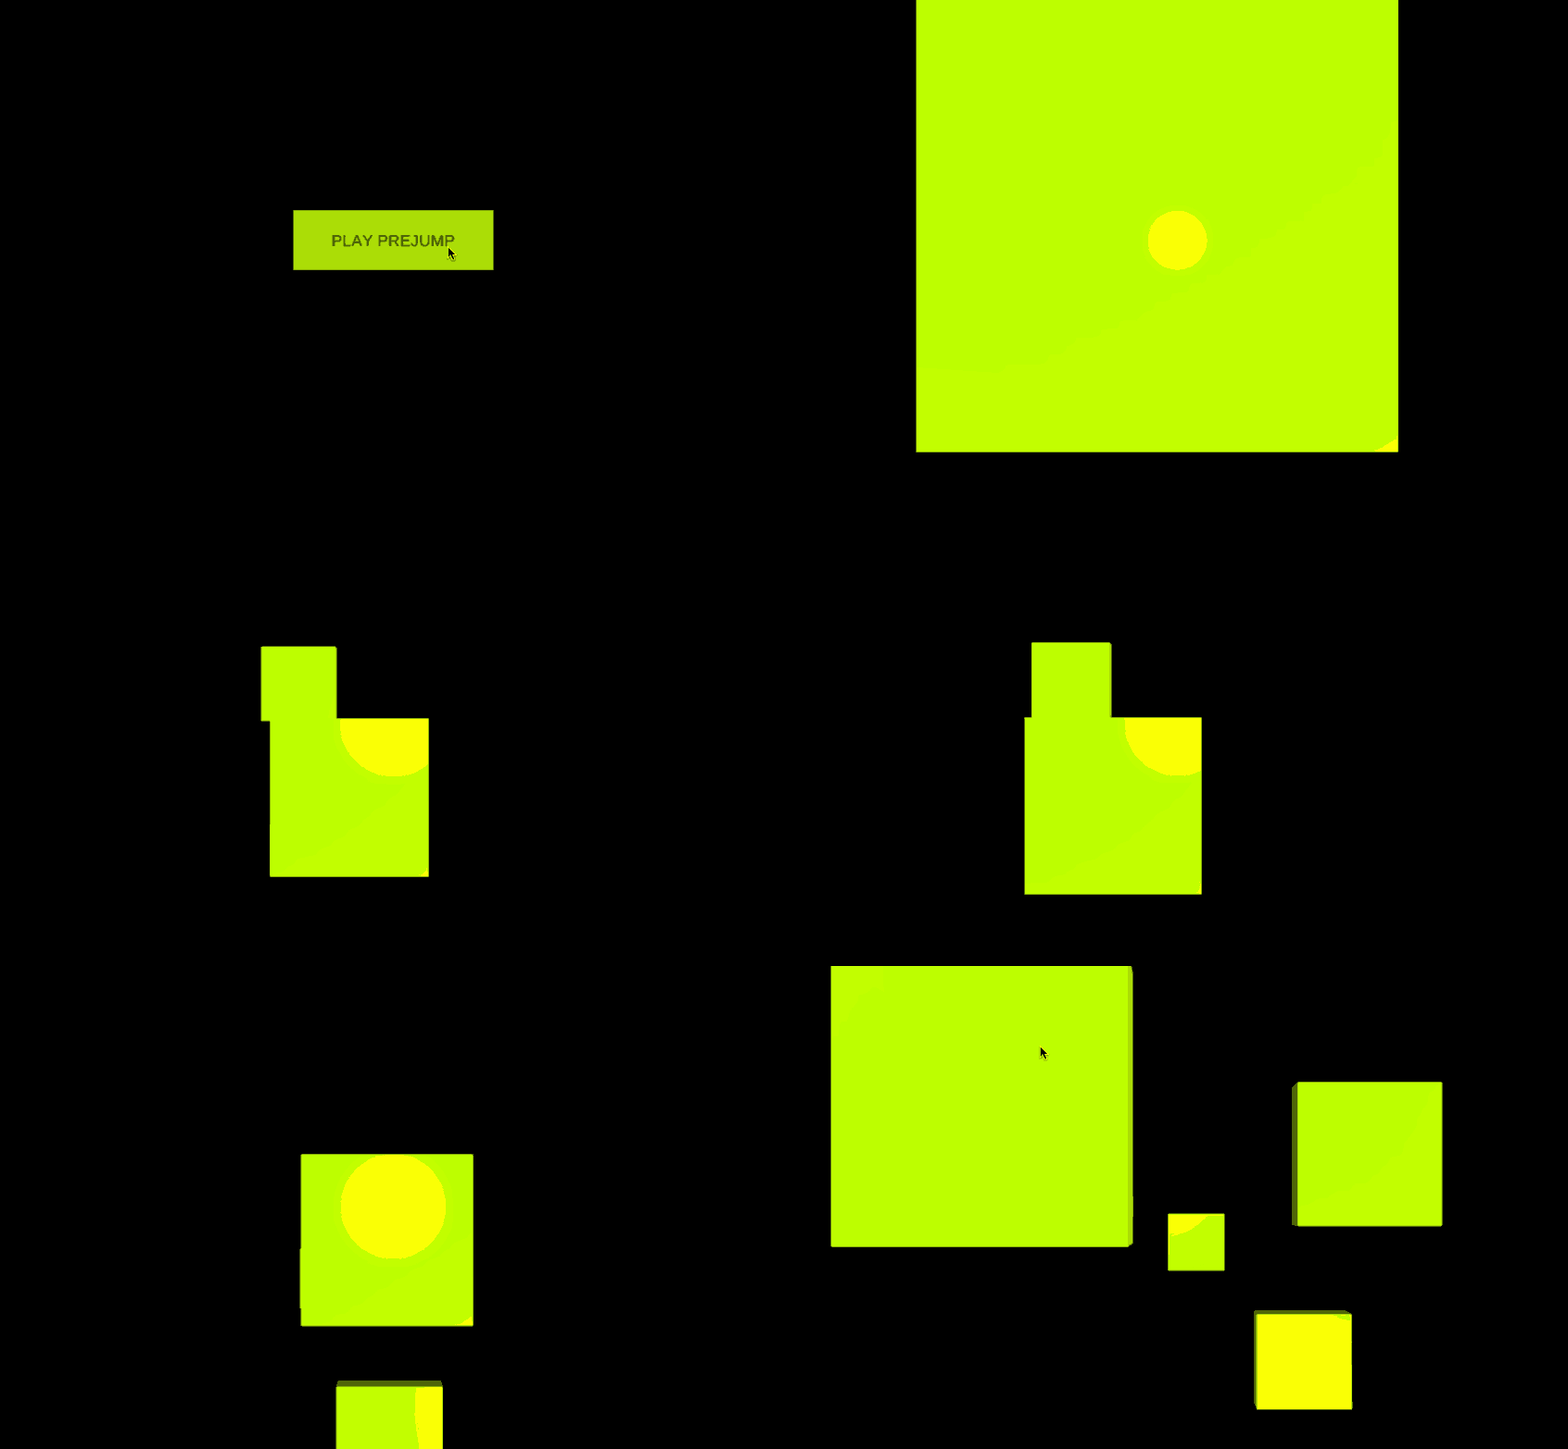
At the end of the lesson you will get this kind of game ( you will need a browser with WebGL support to view it ). The project is also available for download from the repository on GitHub .
So, let's begin.
A few words about JavaScript in Unity
Speaking of JavaScript in Unity, we mean something like a JS dialect called UnityScript. Although Unity experts call this language JavaScript , more skeptical internet users believe that Unity's JavaScript support is a marketing ploy . Anyway, you need to immediately make a reservation that UnityScript does not comply with the ECMAScript specification, and no one even makes an attempt to eliminate these inconsistencies .
Install Unity
First, we need a working version of Unity, you can download it here . Installation files are available for Windows and Mac OS X. Linux users can run Unity using Wine or use another convenient method.

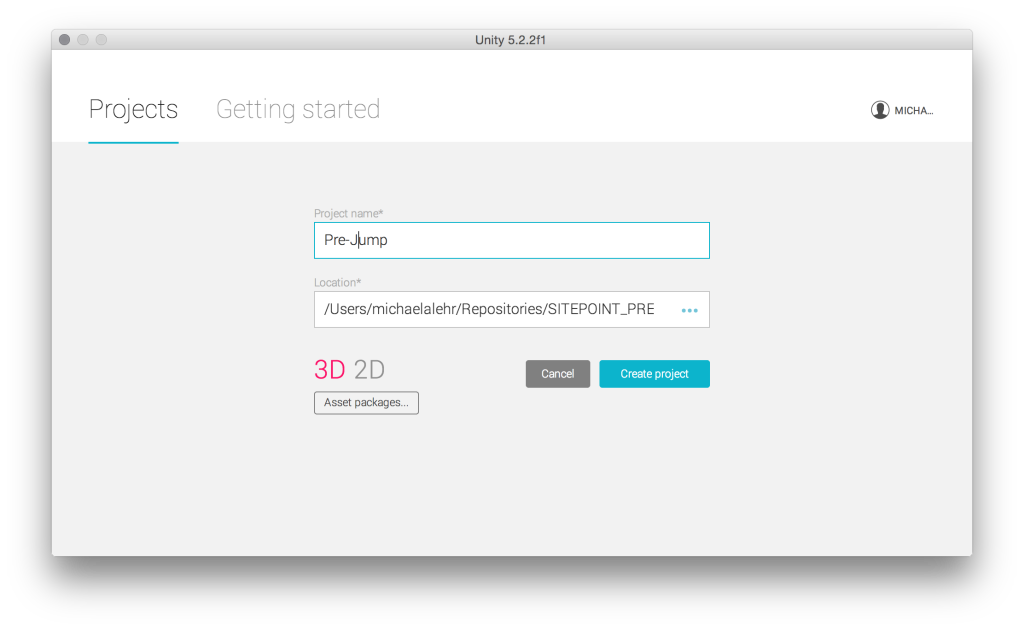
After installation, we can proceed. Open Unity and create a new 3D project.

Customize the project
Now that the program has opened, let's briefly go through the main interface:

- On the left is the Hierarchy panel . She shows all the elements of the current scene. A scene is a visual representation of a game (level or menu). Currently there are two elements in the panel: Main Camera and Directional Light .
- The Scene panel in the middle displays the camera and light in 3D space.
- There is a Game tab next to Scene . It shows how the player will see the game. This is necessary for testing the game in the editor.
- On the right is the Inspector panel , where you can change the settings of the elements. Let's see how it works. First, select Directional Light in the Hierarchy panel . We will see a lot of information about this type of light and can turn off the shadows in it by selecting Shadow Type: No Shadows .
- At the bottom of the screen is the Project window , showing the files that we need to create for the game.
It remains to do one more thing before starting work: save the current scene. Option File> Save Scene opens a dialog box the Save the Scene , leading to the Assets folder. The most common way to organize files in Unity is to use subfolders. Therefore, add a new Scenes subfolder to the Assets folder and save the current scene there, calling it Level.unity.
Create a hero
The hero in our game will jump up from one platform to another. If he doesn’t manage to drop into one of them in time, he will fall into the abyss and lose. We will start by creating a hero. Since the game will be in the first person, the appearance of the hero does not matter, and we can use the standard sphere instead. The plus is that the sphere is quickly created, and its physical characteristics are great for jumping on platforms. Add it by selecting Create in the Hierarchy panel and editing the following parameters in the Inspector tab:
Position {X: 0, Y: 2.5, Z: 0}
Scale {X: 0.3, Y: 0.3, Z: 0.3}

Press the Play button to check the result. A 3D space should appear on the screen with a sphere against the horizon.
For a sphere to fall, it must have weight. It turns out that we need to add a new component to it by clicking the Add Component button in the Inspector panel and selecting Rigidbody . Since we do not want the sphere to rotate, we need to fix its position using the Rigidbody component . To do this, open Constraints and select all the axes in the Rotation line . Play the scene again and you will see that the sphere is now falling.

To prevent the sphere from falling endlessly, create something like a platform. To do this, add a flat cube with a Scale.Y value of 0.1. Play the scene again and make sure that the sphere successfully lands on the platform. But it is worth noting that all this does not look very natural. How to make the sphere bounce? For this, physical materials are useful to us.
We give the sphere physical properties
First of all, we will create physical material for our sphere, which will allow it to jump away from the contact surface. To do this, create a new subfolder Materials in the Assets folder. Inside this subfolder, create a new physical material and call it Bouncy_Sphere. Here are the values we need to specify in the Inspector panel :
Dynamic Friction: 10
Static Friction: 10
Bounciness: 1
Friction Combine: Maximum
Bounce Combine: Maximum
If we add this material to Sphere Collider , the sphere will bounce, but always at the same height. To make it bounce higher each time, you need to add physical material for the platform. Create another material called Bouncy_Platform and apply the following values to it:
Dynamic Friction: 0.9
Static Friction: 0.9
Bounciness: 1
Friction Combine: Average
Bounce Combine: Multiply
In order not to get confused, rename our flat cube platform to Platform by double-clicking on it in the Hierarchy panel . Now, starting the game, you will see that the sphere bounces higher each time.
We will also create a new standard material called Platform, so that it becomes possible to give the platform some color. Once you’ve created it, paste the color # C8FF00 opposite the Albedo value , and then drag this material onto the platform element. Now the platform should turn yellow.
Add a first-person view
To do this, drag the camera onto the sphere in the Hierarchy panel. As a result, the camera will become a child of the sphere and will move with the sphere. The camera also needs to set some additional settings:
Position {X: 0, Y: 1, Z: 0}
Rotation {X: 90, Y: 0, Z: 0}
Scale {X: 2.5, Y: 2.5, Z: 2.5}
Clear Flags: Solid Color
Background: # 000
Field of View: 80.3
In addition, add a flashlight as the second child of the sphere. It will help the player to have an idea of the height of the sphere at any moment of the game. The parameters of the flashlight are as follows:
Rotation {X: 90, Y: 0, Z: 0}
Customize game controls
Our goal is to use a mouse or trackpad to allow the player to move the sphere in a certain direction. To this end, we will write the first script. As with Rigidbody, the script is added to the game element as a component. In our example, we will add a JS script called InputController to the camera. Just as we did with the scene and materials, we will create a new folder in the Project panel called Scripts, in which our script will be located. Double-clicking on the new script will open the MonoDevelop editor, standard for Unity . It can be replaced with any other editor ( Unity> Preferences> External Tools ), but now it does not matter.
As you can see, the script already has some kind of code. First of all, we will create several variables under the first line with the text #pragma strict (includes forced type definition in Unity):
#pragma strict
public var Hero : GameObject;
private var halfScreenWidth : float;
private var  halfScreenHeight : float;
function Start () {}
function Update () {}
The first is a public variable belonging to the GameObject type . It denotes a sphere. Back to Unity, still leaving the camera selected. We will see that this public variable is located next to an empty input field. Drag the sphere to the given section, thus assigning the value to this variable.
The other two variables are private, they will be assigned values in the Start function . This function is called only once, after the scene starts. Both private variables will be assigned half the width and height of the screen, respectively. To do this, we use the built-in Screen class :
function Start () {
  halfScreenWidth = Screen.width / 2;
  halfScreenHeight = Screen.height / 2;
}
The only thing left to implement in the InputController script is to obtain data on the position and movement of the mouse. To do this, we will use the Update function , which is called for each frame:
function Update () {
  var x : float = 0.0;
  var z : float = 0.0;
  x = ( Input.mousePosition.x - halfScreenWidth ) / halfScreenWidth;
  z = ( Input.mousePosition.y - halfScreenHeight ) / halfScreenHeight;
  Hero.GetComponent( HeroController ).SetPosition( x, z );
}
Each of the two new variables x and z denotes the corresponding axis. When we look along the y axis, we see the horizontal x axis and the vertical z axis. We will change the position of the sphere on these axes depending on the data received from the mouse. We need a static variable Input.mousePosition that returns a two-dimensional vector . A vector whose zero value falls on the lower left corner should move in our coordinate system to the middle of the screen. The following code fragment demonstrates such a transformation of coordinates. Finally, we call the setHeroPosition function with both calculated values as arguments. We will write this function to the new HeroController script bound to the sphere:
#pragma strict
public function SetPosition ( x : float, z : float ) {
  transform.position.x = x;
  transform.position.z = z;
}
Let's check how our code works: move the mouse or trackpad so that the sphere falls from the platform.
We implement procedural platform creation
To automatically create platforms, we need something like a platform template. In Unity, such patterns are called prefabs. To create a prefab, you must drag the platform from the Hierarchy panel to the new Prefabs subfolder of the assets folder. Prefabs are easy to recognize in the Hierarchy panel in blue. All platforms, except the first one, will be created using the new GameManager script attached to the camera. First, in the script, we turn to the necessary variables:
#pragma strict
public var Platform : GameObject;
public var Hero : GameObject;
private var boundary : float;
private var rotation: Quaternion;
private var lastPlatformPosition : Vector3;
function Start () {
  boundary = 1.0;
  rotation = Quaternion.identity;
  lastPlatformPosition = new Vector3( 0, 0, 0 );
}
function Update () {}
You need to turn to the prefab panel and the sphere, so you need to drag them to the corresponding sections of the editor. We also create three private variables that will be used to instantiate the prefab panel.
- The boundary variable defines the boundary of the y axis. Each time a hero jumps above this mark, a new panel should be created.
- The second variable is responsible for the rotation needed to create a new instance of the prefab. The Quaternion.identity value cancels the rotation , as we need.
- The lastPlatformPosition variable saves the position of the last platform as a three-dimensional vector .
Now we make sure that in each frame it is checked whether the sphere is above a given border. If so, the border will rise and a new instance of the panel will be created:
function Update () {
  if ( Hero.transform.position.y > boundary ) {
    var position : Vector3;
    boundary += 1.0;
    position = getNextPlatformPosition();
    Instantiate( Platform, position, rotation );
  }
}
Then add the code to get the position of the next panel. We put this code in an additional function to maintain general readability:
private function getNextPlatformPosition () {
  var position : Vector3;
  do {
    position = new Vector3( Random.Range( -1, 2 ), boundary, Random.Range( -1, 2 ) );
  } while ( position.x == lastPlatformPosition && position.z == lastPlatformPosition );
  lastPlatformPosition = position;
  return position;
}
To avoid duplication of the x and z coordinates in the new panel relative to the previous one, we use the do while loop. The Unity Random.Range function will help us get arbitrary values of the x and z axes. In any case, we need their range to be between -1 and 2. Finally, save the new position of the panel as the last one and return it.
Add the game menu
At this stage, the player can jump on platforms higher and higher, moving the mouse in the desired direction. But if he misses, he will endlessly fall down. It needs to be fixed. From now on, if the sphere falls below the first platform, a new scene will appear on the screen.
First of all, you need to check whether the sphere has fallen below a certain mark. To do this, edit the if statement of the update function in the GameManager script. The else if statement will check if the position of the sphere is below -2.0 units. If so, it will call the private gameOver function:
function Update () {
  if ( Hero.transform.position.y > boundary ) {
    var position : Vector3;
    boundary += 1.0;
    position = getNextPlatformPosition();
    Instantiate( Platform, position, rotation );
  } else if (Hero.transform.position.y < -2.0) {
    gameOver();
  }
}
To track the status of the game, we will use a new function:
private function gameOver () {
  Application.LoadLevel( 'Menu' );
}
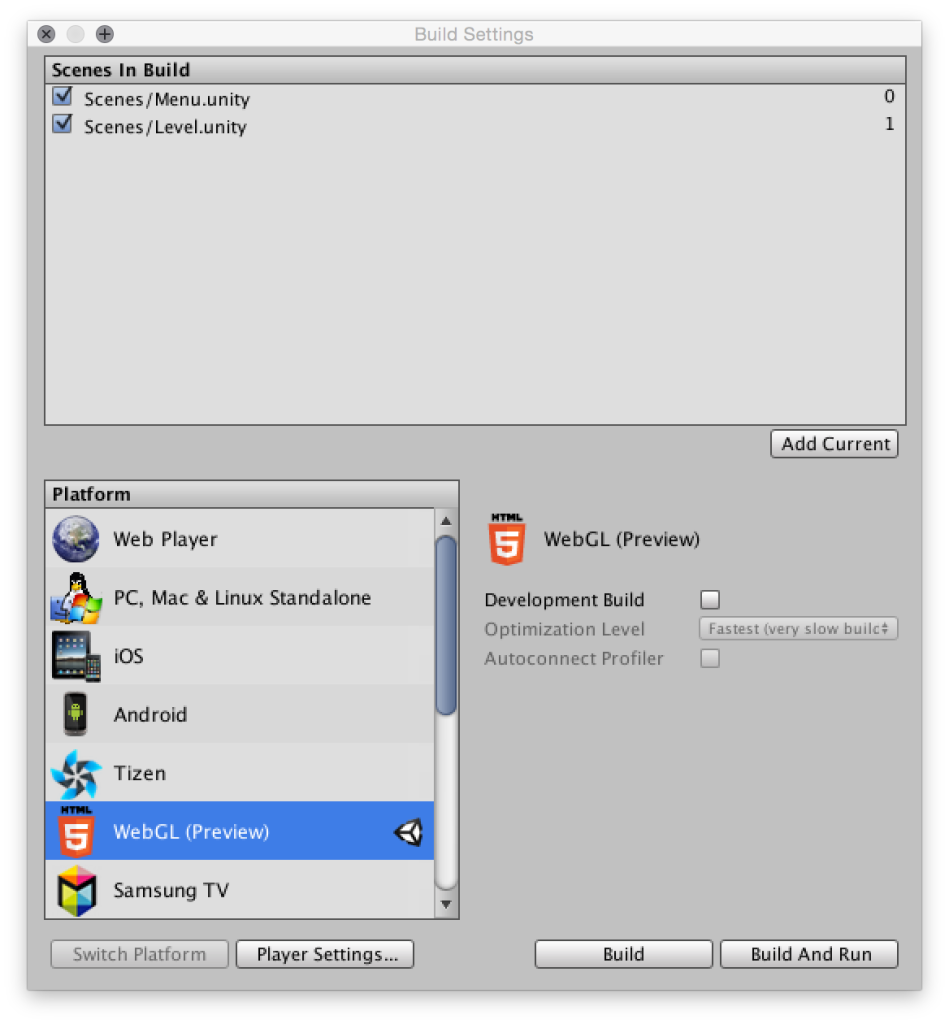
In this case, we use the Application class , which allows us to load a new Menu scene using the LoadLevel method. To do this, first create a scene by choosing File> New Scene , and save it under the name Menu. Then we need to add both scenes to the build process. Build settings are available in the File> Build Settings tab . Without closing the scene from the menu, click the Add Current button and add the scene to the build settings. Repeat the same action with an open level scene. Now, at the end of the game, the newly created scene with the game menu will appear on your screen.
Add a button to start the game.
To play the game, you need to add a button to the menu to launch it. Therefore, we return to the settings of the game menu scene and first of all change the camera settings in the Inspector panel :
Clear Flags: Solid Color
Background: # 000
Width: 200
Height: 60
To add a button, we will use Unity user interface elements that can be added as 3D elements through the Hierarchy panel . After adding the interface button to the Hierarchy , the following elements should appear: EventSystem and Canvas together with the child Button and its child Text .
Canvas is a container for all interface elements; it can be made adaptive in a sense. To do this, in the Inspector panel, switch the Canvas Scaler: UI Scale Mode setting from Constant Pixel Size to Scale With Screen Size. Now you can change the position of the button:
Rect Transform {Pos X: 0, Pos Y: 0, Pos Z: 0}
Rect Transform {Width: 200, Height: 60}
By removing the original image of the button and setting its color to # C8FF00, we will give the menu a slightly more decent look. Now change the text in the Text element to PLAY PREJUMP and set the font to the 16th size. To make the button work, we will use a new function, which we will add to the new UIController script for the Button element. The script consists of only one function, loading the level scene:
public function StartGame () {
  Application.LoadLevel( 'Level' );
}
This function can be applied in the button options in the Inspector panel . In the settings of the Button (Script) component, you can make the function run when the user clicks this component. To this end, we will add a new function to the On Click () event by clicking the + icon. Now you can drag the button itself onto the input field. Then select the function you just wrote from the UIController script (UIController.StartGame).

We publish the project as a browser game for WebGL
With Unity, you can export your project as an application for WebGL. Open the build settings and select WebGL as the platform. Then confirm by pressing the Switch Platform button . After that, it remains only to press the Build button and select a name for the game. When the build is complete, open the html file using any browser that supports WebGL.

Further steps
Of course, our little game can be improved. For example, add scoring, different types of platforms, additional input methods, sounds and so on. The main thing that we saw in this lesson is that the Unity cross-platform game engine provides a good combination of a WYSIWYG editor and scripting capabilities created in a language similar to JavaScript. Depending on the specific requirements of the project, Unity can be a worthy alternative to WebGL frameworks.
Do you use Unity in your projects? Do you have examples of interesting games written using this engine? Waiting for answers in the comments below the post.
